 ALLPCB


Hand soldering tiny PCB components, like 0402 resistors or capacitors, can seem daunting at first. However, with the right tools, techniques, and practice, anyone can master this skill. Whether you're working on soldering small SMD components or aiming to improve your precision with intricate designs, this guide will walk you through every step. From choosing the best tools for hand soldering SMD to mastering best practices for hand soldering PCBs, we’ve got you covered. Let’s dive into the detailed process to help you achieve clean, reliable solder joints every time.
Why Hand Soldering Tiny PCB Components Matters
In the world of electronics, surface-mount devices (SMDs) have become the standard due to their compact size and efficiency in modern PCB designs. Components like 0402 (measuring just 0.4mm x 0.2mm) are incredibly small, requiring precision and patience to solder by hand. Hand soldering these tiny parts is often necessary for prototyping, repairs, or small-scale production when automated assembly isn’t an option. Mastering hand soldering 0402 components and other small SMDs opens up a world of possibilities for hobbyists and professionals alike, ensuring you can work on cutting-edge, high-density designs with confidence.
Essential Tools for Hand Soldering SMD Components
Before you start soldering small SMD components, having the right tools is critical. Using improper equipment can lead to damaged parts, poor connections, or frustration. Here’s a list of must-have tools for hand soldering SMD:
- Soldering Iron with Fine Tip: Choose a soldering iron with a fine tip (0.2mm to 0.5mm) and adjustable temperature control. A temperature range of 260°C to 300°C is ideal for most SMD work to avoid overheating delicate components.
- Solder Wire: Use thin solder wire with a diameter of 0.3mm to 0.5mm. A rosin-core solder with a 63/37 tin-lead ratio or lead-free alternatives works well for precise application.
- Flux Pen or Paste: Flux helps the solder flow smoothly and prevents oxidation. A no-clean flux pen is convenient for hand soldering 0402 components.
- Tweezers: Precision tweezers with fine, anti-static tips are essential for placing and adjusting tiny components without damaging them.
- Magnifying Glass or Microscope: A magnifying tool with at least 5x to 10x magnification helps you see small pads and joints clearly.
- Desoldering Braid and Pump: Mistakes happen. A desoldering braid (wick) or suction pump can help remove excess solder or correct errors.
- Anti-Static Mat and Wrist Strap: Protect sensitive components from electrostatic discharge (ESD) by grounding yourself and your workspace.
- Cleaning Supplies: Isopropyl alcohol (90% or higher) and a small brush are great for cleaning flux residue after soldering.
Investing in quality tools for hand soldering SMD makes a huge difference in the outcome of your work. While budget options exist, reliable equipment ensures consistency and reduces the risk of damaging components.
Best Practices for Hand Soldering PCBs
Soldering tiny components requires more than just the right tools; it demands proper technique and attention to detail. Following best practices for hand soldering PCBs will help you achieve strong, reliable connections while minimizing errors. Here are some key tips to keep in mind:
- Maintain a Clean Workspace: Dust and debris can interfere with solder joints. Keep your area tidy and free from contaminants.
- Control Temperature: Set your soldering iron to the correct temperature for the component and solder type. For 0402 components, start at 260°C and adjust if needed. Too much heat can damage parts or lift pads.
- Use Minimal Solder: Apply just enough solder to create a small, shiny fillet. Excess solder can cause bridges between pads, leading to shorts.
- Work Quickly: Prolonged heat exposure can damage components. Aim to complete each joint in 2-3 seconds.
- Inspect Your Work: After soldering, use a magnifying tool to check for cold joints (dull, cracked solder) or bridges. Fix any issues immediately.
- Practice ESD Safety: Always wear an anti-static wrist strap and work on an ESD-safe mat to prevent static damage to sensitive components.
These practices form the foundation of successful hand soldering. By adhering to them, you’ll reduce errors and build confidence in handling even the smallest parts.
Step-by-Step Guide to Hand Soldering 0402 Components
Now that you’re equipped with the right tools and knowledge of best practices, let’s walk through the detailed process of hand soldering 0402 components. This step-by-step guide will help you tackle tiny SMDs with precision.
Step 1: Prepare Your Workspace and Components
Set up your anti-static mat, wear your wrist strap, and organize your tools within reach. Gather all the components you’ll need and place them in a small tray or organizer to avoid losing them. Double-check the PCB layout or schematic to confirm component placement and orientation, especially for polarized parts like capacitors or diodes.
Step 2: Clean the PCB
Ensure the PCB is free from dust, grease, or oxidation. Use isopropyl alcohol and a brush to clean the board, then dry it completely. Clean pads ensure better solder adhesion and reduce the risk of poor connections.
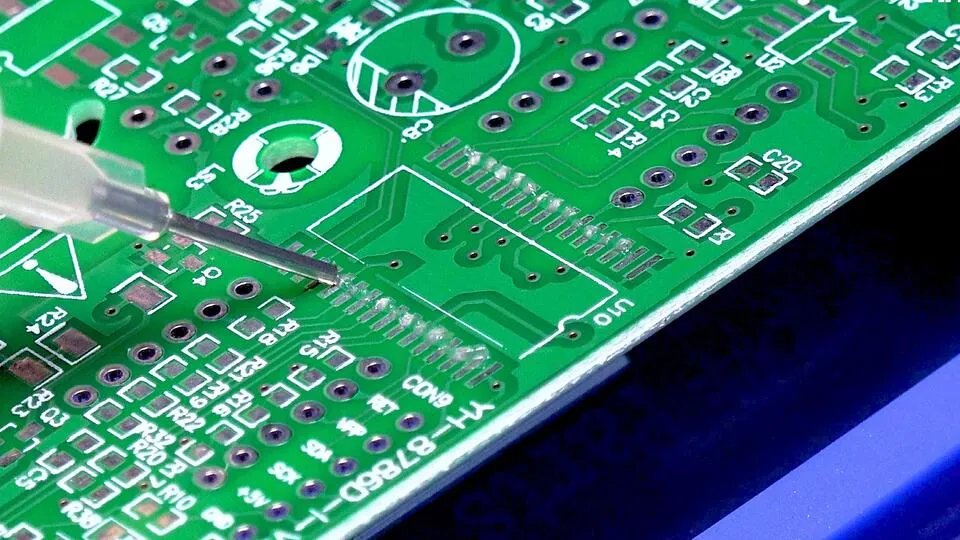
Step 3: Apply Flux to the Pads
Using a flux pen or paste, apply a thin layer of flux to the pads where the 0402 component will be placed. Flux helps the solder flow evenly and prevents oxidation during heating.
Related Reading: Hand Soldering with Solder Paste: A Step by Step Guide for Beginners
Step 4: Tin One Pad
Heat your soldering iron to the appropriate temperature (around 260°C for small SMDs). Place the tip on one of the pads for 1-2 seconds, then apply a small amount of solder to create a tiny dome. This “tinned” pad will act as an anchor for the component. Be careful not to use too much solder, as it can make placement difficult.
Step 5: Place the Component
Using precision tweezers, carefully pick up the 0402 component and position it on the pads. Align it so one end rests on the tinned pad while the other end sits on the bare pad. The small size of these components can make this tricky, so use a magnifying tool if needed to ensure accuracy.
Step 6: Solder the First Pad
Touch the soldering iron tip to the tinned pad where the component is placed, allowing the solder to melt and bond with the component’s terminal. This should take no more than 2-3 seconds. Remove the iron and let the joint cool naturally. Avoid moving the component during cooling to prevent a weak connection.
Step 7: Solder the Second Pad
Now, apply flux to the second pad if needed, then add a small amount of solder to the tip of your iron. Touch the tip to the pad and the component’s terminal simultaneously, letting the solder flow to form a smooth, shiny joint. Again, work quickly to avoid overheating.
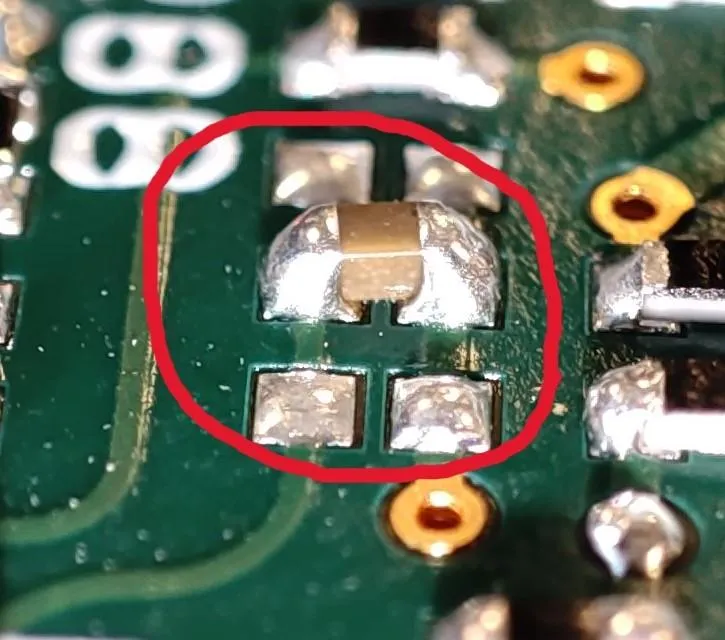
Step 8: Inspect the Joints
Examine both solder joints under magnification. Look for a concave fillet shape, which indicates a strong bond. If the joint appears dull, cracked, or uneven, it may be a cold joint—reheat it briefly and add a tiny bit of fresh solder to fix it. Check for solder bridges between pads and use a desoldering braid to remove excess if necessary.
Step 9: Clean the Area
Once you’re satisfied with the joints, clean the area with isopropyl alcohol and a brush to remove flux residue. This step improves the board’s appearance and prevents potential corrosion over time.
Related Reading: The Art of Hand Soldering: Techniques for Perfect Manual Assembly
Common Challenges When Soldering Small SMD Components
Even with careful preparation, hand soldering tiny components can present challenges. Here are some common issues and how to address them:
- Component Misalignment: If a component shifts during soldering, use tweezers to reposition it while reheating the joint. Applying flux can help with movement.
- Solder Bridges: Excess solder can connect adjacent pads, causing shorts. Use a desoldering braid to wick away extra solder, then re-inspect the joint.
- Overheating: Prolonged heat can damage components or lift pads from the PCB. Work in short bursts and let the area cool if needed.
- Poor Visibility: Tiny components are hard to see with the naked eye. Invest in a good magnifying tool or microscope for better accuracy.
Encountering these issues is part of the learning process. With practice, you’ll develop the steady hand and quick judgment needed to avoid them.
Tips for Improving Hand Soldering Skills
Like any craft, hand soldering improves with time and repetition. If you’re looking to enhance your ability to work with small SMD components, consider these strategies for improving hand soldering skills:
- Start with Larger Components: If 0402 parts feel too small, practice with larger SMD sizes like 0805 or 0603 to build confidence before moving to tinier ones.
- Use Practice Boards: Many kits come with practice PCBs designed for soldering exercises. These are great for honing your technique without risking a real project.
- Watch Tutorials: Visual guides online can show you proper hand positioning and soldering techniques from experienced professionals.
- Maintain Steady Hands: Rest your hands or elbows on a stable surface while soldering to reduce shaking. Avoid caffeine if it affects your steadiness.
- Experiment with Tools: Try different tip sizes or soldering iron brands to find what feels most comfortable for your style.
Consistency is key. Set aside time each week to practice, and soon, soldering even the smallest components will feel second nature.
Conclusion: Master the Art of Hand Soldering Tiny PCB Components
Hand soldering tiny PCB components like 0402 parts may seem challenging at first, but with the right tools, techniques, and persistence, it’s a skill anyone can learn. By following this step-by-step guide, adhering to best practices for hand soldering PCBs, and using quality tools for hand soldering SMD, you’ll achieve clean, reliable results. Whether you’re soldering small SMD components for a personal project or a professional prototype, precision and patience are your best allies.
Keep practicing, stay mindful of safety, and don’t be afraid to make mistakes—they’re part of the journey to mastery. With each joint you solder, you’ll gain confidence and expertise in this essential electronics skill. Start small, build your skills, and soon you’ll be tackling even the most intricate PCB designs with ease.


