 ALLPCB


If you're new to PCB assembly and wondering how to achieve precise solder paste application for your projects, stencil printing is the key. This process ensures accurate placement of solder paste on your printed circuit board (PCB) before components are mounted, making it a critical step in surface mount technology (SMT) assembly. In this comprehensive guide, we'll walk you through stencil printing for beginners, covering everything from the basics to detailed steps for successful PCB assembly. Whether you're looking for a stencil printing tutorial or an SMT assembly guide, this post will provide actionable insights to help you master solder paste printing and electronics assembly steps.
What is Stencil Printing in PCB Assembly?
Stencil printing is a technique used in PCB assembly to apply solder paste onto specific areas of a board where components will be placed. A stencil, typically made of stainless steel, has tiny openings that match the layout of the PCB's pads. Solder paste is spread over the stencil, and a squeegee pushes the paste through these openings, depositing it precisely on the board. This method is widely used in SMT assembly because it ensures uniformity and repeatability, which are crucial for reliable electronic connections.
For beginners, understanding stencil printing is essential because over 60% of defects in SMT assembly can be traced back to improper solder paste application, according to industry studies. By mastering this step, you can significantly reduce errors in your electronics assembly process.
Why Stencil Printing Matters for Beginners
If you're just starting with PCB assembly, stencil printing might seem like an extra step, but it’s a game-changer. Manually applying solder paste with a syringe or brush is time-consuming and often leads to inconsistent results. Stencil printing, on the other hand, offers precision and speed, making it ideal for both small-scale hobby projects and larger production runs. It ensures that the right amount of solder paste—typically a thickness of 0.1 to 0.15 mm—is applied to each pad, preventing issues like insufficient solder or bridging during reflow soldering.
By using a stencil, you also minimize the risk of misalignment, which can cause components to shift or fail to connect properly. For beginners, this consistency builds confidence as you work through the electronics assembly steps.
Tools and Materials Needed for Stencil Printing
Before diving into the stencil printing tutorial, let’s go over the essential tools and materials you’ll need for successful solder paste printing:
- PCB Stencil: A custom-made stencil matching your PCB design, usually made from stainless steel with laser-cut or chemically etched openings.
- Solder Paste: A mixture of tiny solder particles and flux, available in leaded or lead-free variants. Choose a paste with a viscosity suitable for stencil printing (typically Type 3 or Type 4).
- Squeegee: A flat, flexible metal or rubber blade used to spread solder paste across the stencil. Metal squeegees are preferred for precision.
- PCB: The bare board where components will be mounted.
- Stencil Frame or Holder: A frame to secure the stencil and PCB in place during printing (optional for manual setups).
- Cleaning Supplies: Isopropyl alcohol, lint-free wipes, and a stencil cleaner to remove excess paste after printing.
- Gloves and Safety Gear: To protect your hands and maintain cleanliness during the process.
Step-by-Step Guide to Stencil Printing for PCB Assembly
Now that you have your tools ready, let’s walk through the detailed electronics assembly steps for stencil printing. This SMT assembly guide is tailored for beginners, ensuring you can follow along easily.
Step 1: Prepare Your Workspace
Start by setting up a clean, well-lit workspace. Dust and debris can contaminate the solder paste or PCB, leading to defects. Lay down a protective mat or paper on your workbench, and wear gloves to avoid transferring oils from your hands onto the board or stencil. Ensure all tools are within reach to streamline the process.
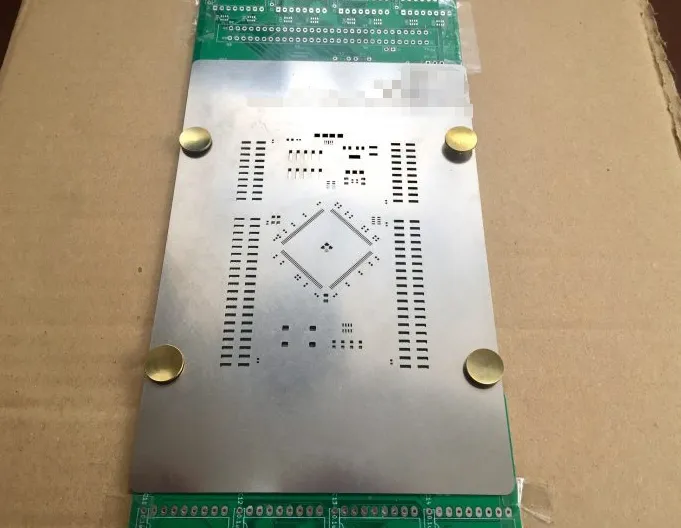
Step 2: Inspect the Stencil and PCB
Before beginning, carefully inspect both the stencil and the PCB. Check the stencil for any damage or clogged openings, as even a small blockage can result in uneven solder paste application. Verify that the stencil aligns perfectly with the PCB’s pads by placing it over the board and looking for mismatches. Most stencils are designed with fiducial marks or alignment holes to help with this step.
Step 3: Secure the Stencil and PCB
Place the PCB on a flat surface or in a holder if you have one. Lay the stencil over the PCB, ensuring the openings align with the pads. If you’re working manually, you can use tape or clamps to hold the stencil in place. For more advanced setups, a framed stencil or a dedicated jig can provide better stability. Proper alignment is critical, as even a 0.1 mm offset can lead to soldering defects.
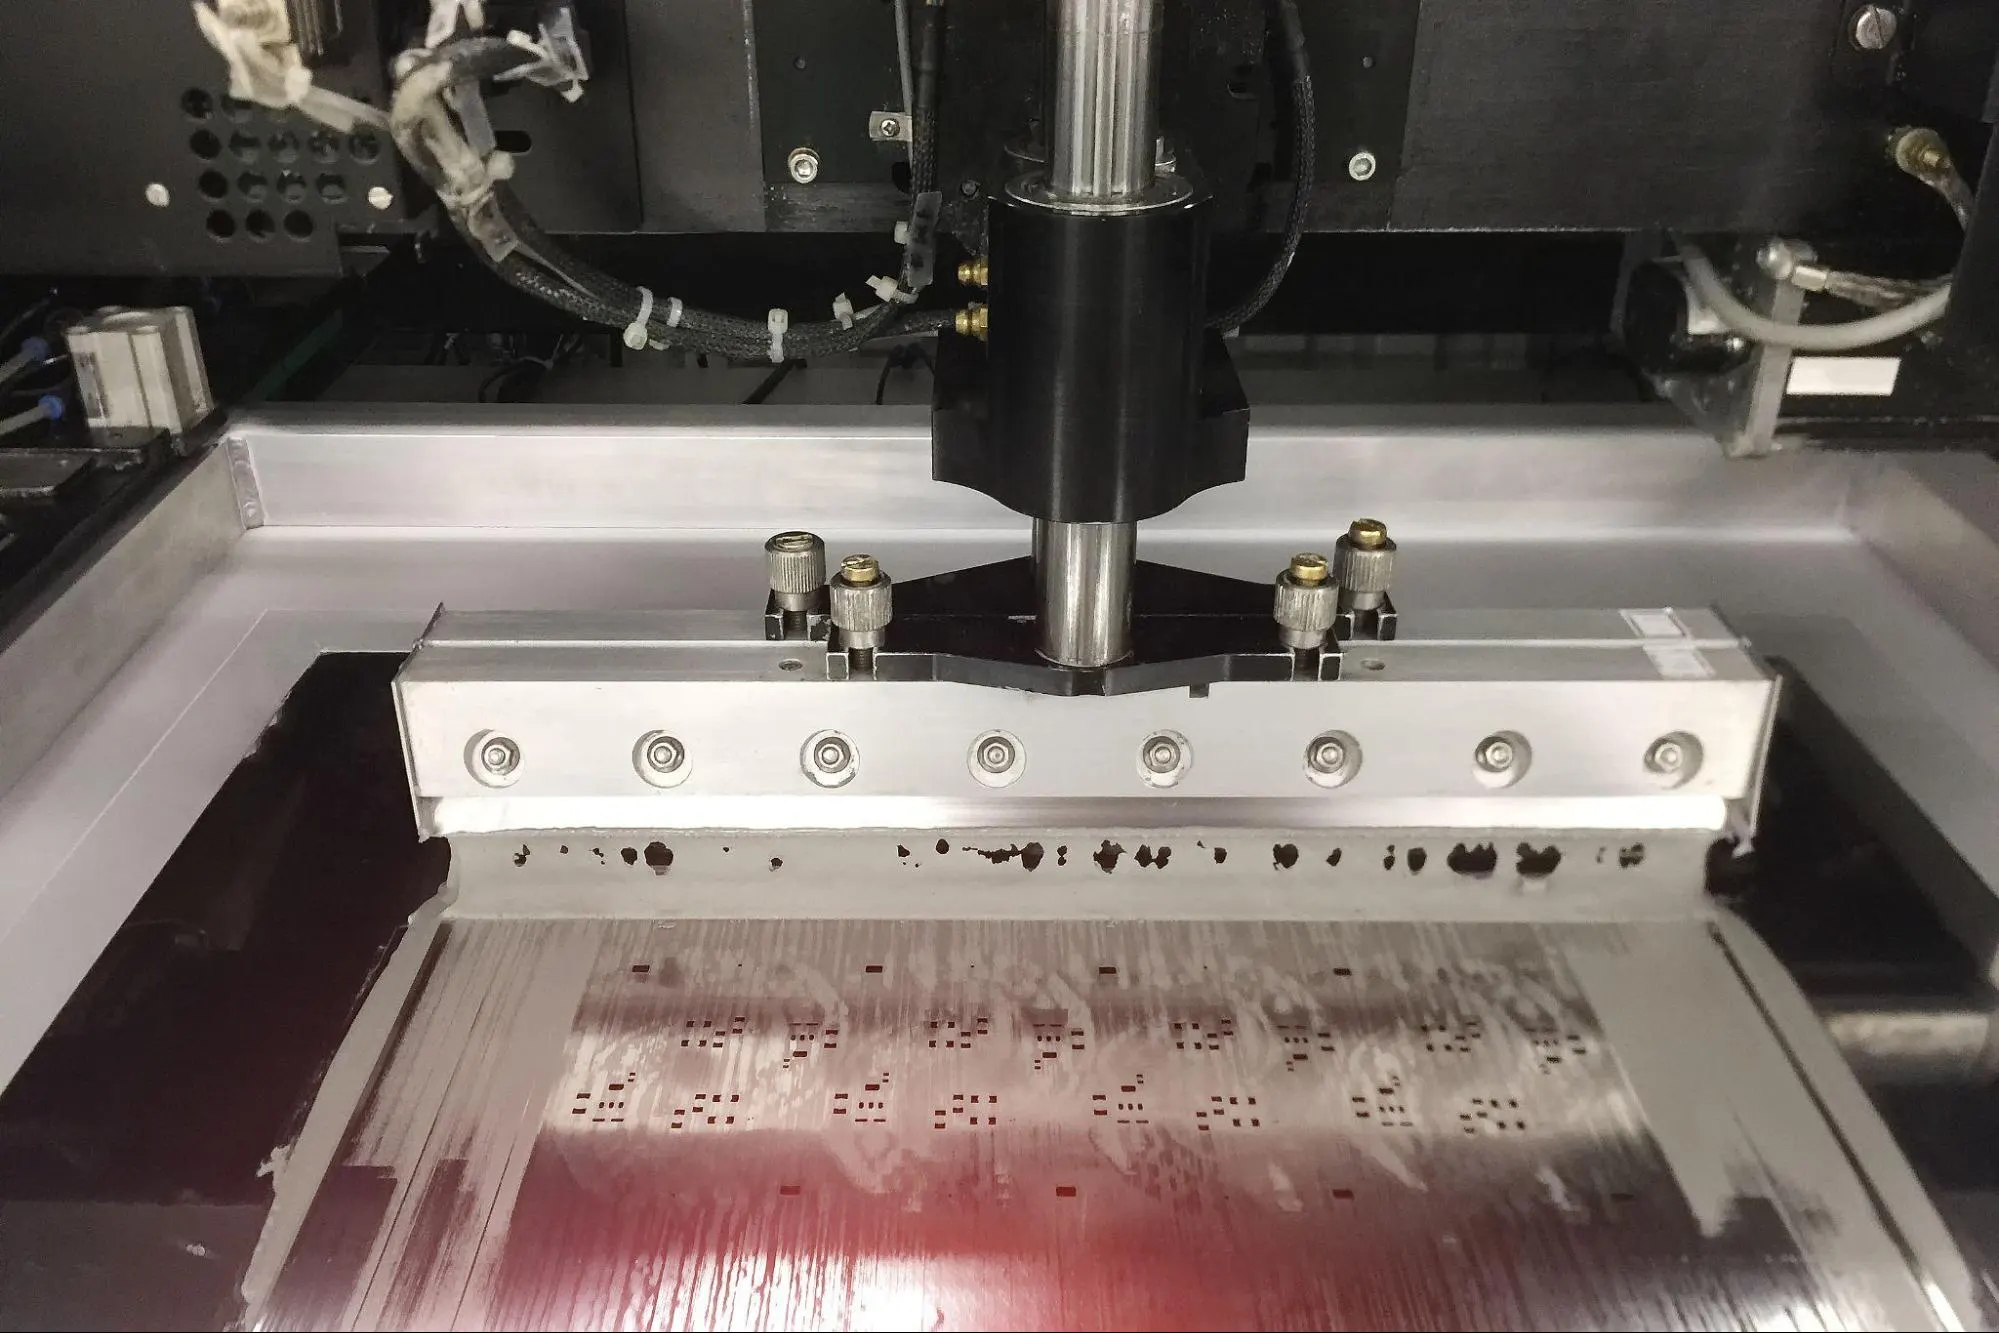
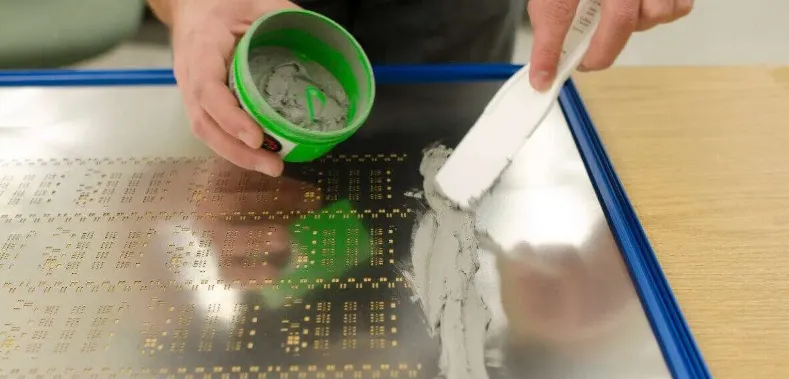
Step 4: Apply Solder Paste
Take a small amount of solder paste—about a 1-inch line for small boards—and place it along one edge of the stencil. Hold the squeegee at a 45-degree angle to the stencil surface, and with steady pressure, drag the paste across the stencil in one smooth motion. The goal is to fill all the openings with paste without leaving excess on top of the stencil. Avoid multiple passes, as this can cause the paste to smear or overfill.
The pressure you apply should be consistent, typically around 1-2 kg for manual printing, depending on the stencil thickness (common thicknesses are 0.1 mm to 0.2 mm). Too much pressure can damage the stencil, while too little may result in incomplete paste transfer.
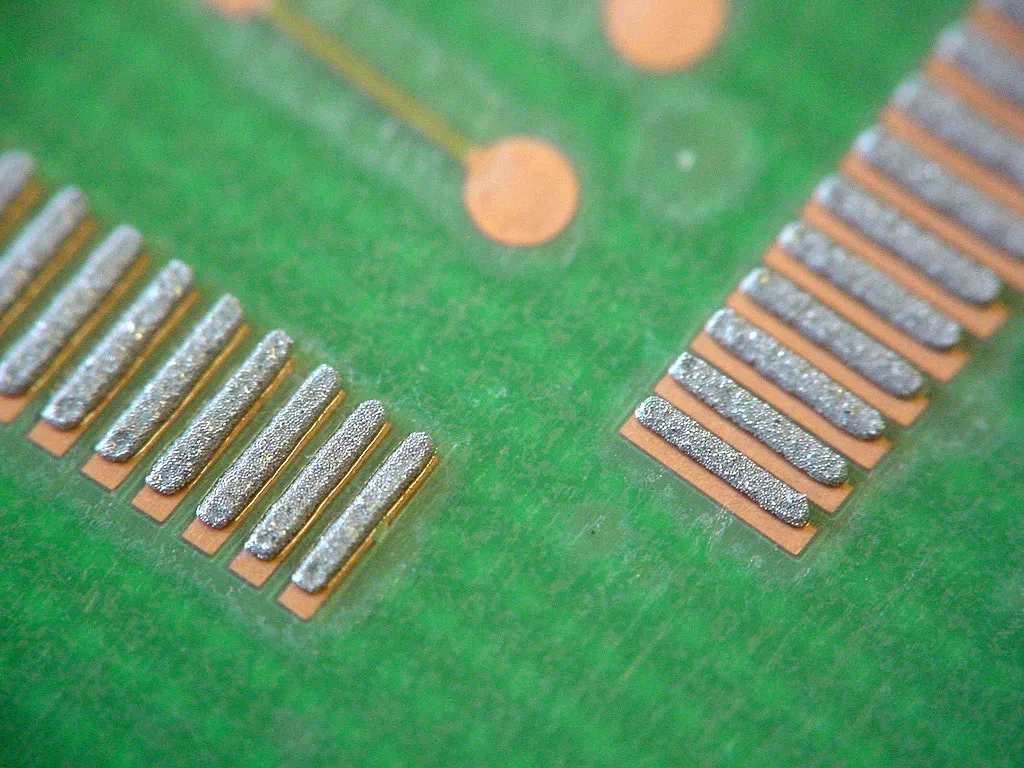
Step 5: Lift the Stencil Carefully
Once the solder paste is applied, gently lift the stencil straight up from one corner to avoid smudging the paste on the PCB. Inspect the board to ensure the paste is evenly deposited on all pads. You should see neat, uniform dots or rectangles of paste matching the pad shapes. If you notice gaps or unevenness, clean the board and stencil, then repeat the process.
Step 6: Clean the Stencil
After printing, clean the stencil immediately to prevent the solder paste from drying in the openings. Use isopropyl alcohol and a lint-free wipe to remove residue from both sides of the stencil. For stubborn paste, a dedicated stencil cleaner or ultrasonic bath can be effective. Proper cleaning ensures the stencil remains usable for future projects and prevents contamination.
Step 7: Proceed to Component Placement
With the solder paste applied, your PCB is ready for component placement. Use tweezers or a pick-and-place machine to position surface mount components on the paste-covered pads. Ensure each component is aligned correctly, as the paste will hold them in place temporarily until reflow soldering. From here, you can move to the next stage of PCB assembly, which involves heating the board to melt the solder and form permanent connections.
Common Mistakes in Stencil Printing and How to Avoid Them
As a beginner in PCB assembly, it’s normal to encounter challenges during stencil printing. Here are some common issues and tips to avoid them:
- Uneven Paste Application: This often happens due to inconsistent squeegee pressure or speed. Practice maintaining a steady hand, and ensure the stencil is flat against the PCB.
- Stencil Misalignment: Double-check alignment before applying paste. Use fiducial marks or alignment holes to guide you.
- Excess Paste or Bridging: Applying too much paste can cause solder bridges between pads during reflow. Use only a small amount of paste and avoid over-pressing with the squeegee.
- Clogged Stencil Openings: Clean the stencil after every few prints, especially for fine-pitch designs with small openings (e.g., 0.5 mm pitch or less).
By being mindful of these pitfalls, you can improve the quality of your solder paste printing and achieve better results in your SMT assembly.
Tips for Successful Solder Paste Printing
To elevate your stencil printing skills, consider these additional tips tailored for beginners:
- Choose the Right Stencil Thickness: For standard SMT components, a stencil thickness of 0.1 mm to 0.15 mm works well. Thicker stencils (0.2 mm) are better for larger components or high-power applications requiring more solder.
- Store Solder Paste Properly: Solder paste should be refrigerated at 2-10°C when not in use to maintain its viscosity. Let it reach room temperature (about 25°C) for 1-2 hours before printing to avoid condensation issues.
- Work Quickly: Solder paste can dry out if exposed to air for too long. Complete the printing and component placement within 1-2 hours to ensure the paste remains tacky.
- Practice on Scrap Boards: If you’re new to stencil printing, test your technique on a scrap PCB to get a feel for the squeegee pressure and paste consistency.
Benefits of Mastering Stencil Printing for PCB Assembly
Investing time in learning stencil printing offers several advantages for anyone involved in electronics assembly. First, it saves time compared to manual solder paste application, especially for boards with dozens or hundreds of pads. Second, it improves the reliability of your assemblies by ensuring consistent solder joints—critical for preventing failures in devices operating at high frequencies (e.g., above 1 GHz) or in harsh environments. Finally, stencil printing prepares you for scaling up to larger projects or even small-scale production, as the process is compatible with automated equipment used in professional manufacturing.
Conclusion: Start Your Stencil Printing Journey Today
Stencil printing is a foundational skill in PCB assembly for beginners, and with this step-by-step guide, you’re well on your way to mastering it. By following the electronics assembly steps outlined in this SMT assembly guide, from preparing your workspace to applying solder paste with precision, you can achieve professional-quality results in your projects. Remember to practice, pay attention to detail, and refine your technique over time. As you gain confidence in solder paste printing, you’ll find that stencil printing becomes second nature, opening doors to more complex and rewarding PCB designs.
At ALLPCB, we’re committed to supporting your journey in electronics manufacturing with resources and tools to simplify every stage of the process. Dive into stencil printing today, and watch your PCB assembly skills soar to new heights!


