If you're looking to create an audio amplifier PCB prototype quickly and efficiently, you're in the right place. Audio amplifier PCB prototyping involves designing and fabricating printed circuit boards for amplifying sound signals, often requiring precision and speed to meet project deadlines. In this guide, we'll explore fast and effective methods for prototyping, including quick turn PCB services, online PCB fabrication options, and tips for streamlined prototype assembly. Whether you're an engineer, hobbyist, or product developer, you'll find practical steps to bring your audio amplifier designs to life.
Why Audio Amplifier PCB Prototyping Matters
Audio amplifiers are the heart of sound systems, boosting low-power audio signals to drive speakers with clarity and strength. Prototyping these circuits on a PCB (printed circuit board) is a critical step in testing and refining designs before full-scale production. A well-executed prototype helps identify issues like noise interference, signal distortion, or thermal inefficiencies early on, saving time and costs down the line.
For engineers working on audio projects, speed and accuracy in prototyping are essential. With tight schedules and the need for multiple iterations, leveraging quick turn PCB services and efficient design methods can make all the difference. Let's dive into the best practices for audio amplifier PCB prototyping and how online PCB services can accelerate the process.

Key Challenges in Audio Amplifier PCB Prototyping
Before exploring solutions, it's important to understand the unique challenges of prototyping audio amplifier PCBs. These challenges often influence the methods and tools you choose for fabrication and assembly.
- Signal Integrity: Audio amplifiers require clean signal paths to avoid noise and distortion. Poor PCB layout can introduce interference, especially in high-frequency ranges (e.g., above 20 kHz, beyond human hearing but still impactful on sound quality).
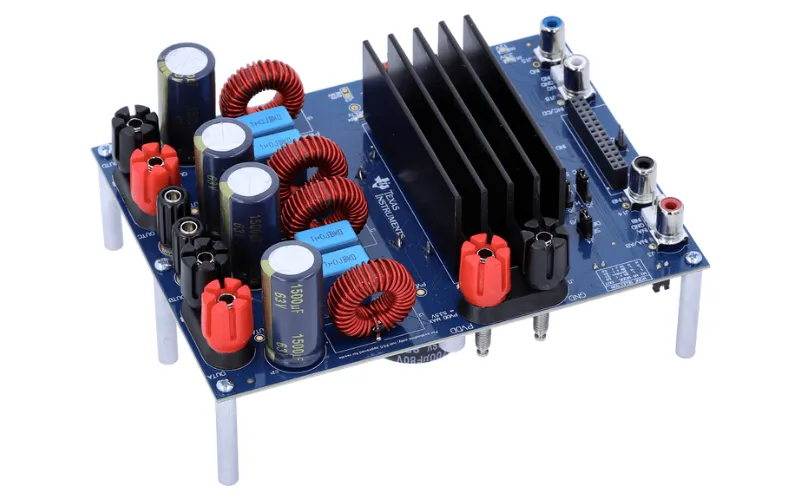
- Thermal Management: Amplifiers generate heat, especially in high-power designs. Without proper heat dissipation, components like power transistors can fail, leading to a prototype that doesn't reflect real-world performance.
- Component Placement: The placement of components affects both signal flow and noise. For instance, placing input capacitors too far from the amplifier IC can increase impedance, degrading audio quality.
- Time Constraints: Many projects demand rapid iterations to test different designs, making quick turn PCB fabrication a necessity.
Addressing these challenges requires a combination of smart design practices and reliable fabrication services. Let’s break down the most effective methods for fast and efficient audio amplifier PCB prototyping.
Method 1: Optimize Your Design for Prototyping
The foundation of a successful prototype starts with a well-thought-out design. By optimizing your PCB layout specifically for audio amplifiers, you can minimize errors and speed up the testing phase.
Focus on Layout for Signal Quality
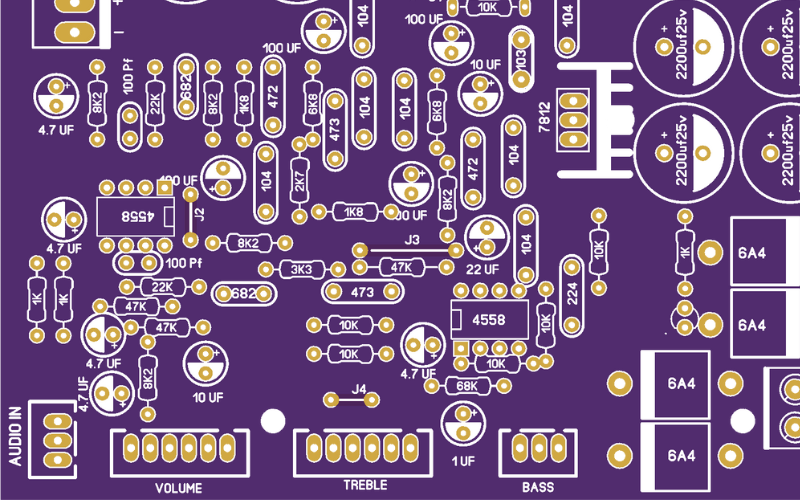
In audio amplifier designs, the PCB layout plays a huge role in performance. Keep signal paths short to reduce resistance and inductance. For example, ensure that the ground plane is solid and continuous to avoid ground loops, which can introduce a humming noise at 50-60 Hz (common power line frequencies). Separate analog and digital sections if your design includes both, as digital switching noise can interfere with analog audio signals.
Plan for Thermal Efficiency
High-power audio amplifiers often deal with currents of 1-5 amps or more, generating significant heat. Use wider traces (e.g., 20-30 mils for power lines) to handle current without overheating. Place heat sinks or thermal vias near power components to dissipate heat effectively. Simulation tools can help predict hot spots before fabrication, ensuring your prototype won’t fail due to thermal issues.
Use Standard Components
For faster prototyping, stick to widely available components with standard footprints. This reduces delays in sourcing parts during prototype assembly. For instance, using common resistor values like 1kΩ or 10kΩ and standard capacitor packages (e.g., 0805 or 1206) ensures you can quickly populate your board.

Method 2: Leverage Quick Turn PCB Fabrication
Once your design is ready, the next step is getting the PCB fabricated as quickly as possible. Quick turn PCB services are designed to meet tight deadlines, often delivering boards in as little as 24-48 hours after file submission.
What is Quick Turn PCB Fabrication?
Quick turn PCB fabrication refers to expedited manufacturing processes that prioritize speed without sacrificing quality. These services are ideal for engineers who need to test multiple iterations of an audio amplifier design in a short time. By choosing a reliable provider, you can receive bare boards ready for assembly in record time, allowing you to focus on testing and refinement.
Benefits for Audio Amplifier Projects
For audio amplifier prototyping, quick turn services offer several advantages. First, they reduce downtime between design iterations, letting you test and tweak your circuit faster. Second, many providers offer strict quality checks, such as automated optical inspection (AOI), to ensure your board meets design specs—crucial for maintaining signal integrity in audio applications. Finally, expedited shipping options mean you can have your boards delivered globally within days.
At ALLPCB, we specialize in providing fast fabrication solutions tailored to your needs, ensuring that your audio amplifier prototypes are ready when you need them. Our streamlined processes and rigorous testing guarantee high-quality boards, even on the tightest schedules.
Method 3: Utilize Online PCB Services for Convenience
Online PCB services have revolutionized the way engineers approach prototyping. These platforms allow you to upload your design files, customize specifications, and order boards from anywhere in the world—all with just a few clicks.
Why Choose Online PCB Services?
Online PCB services combine convenience with efficiency. You can instantly get quotes based on your design parameters, such as board thickness (common options include 1.6mm for standard audio PCBs) or layer count (often 2-4 layers for amplifiers). Many platforms also provide design rule checks (DRC) to catch errors like insufficient trace spacing (e.g., below 6 mils) before fabrication begins.
Streamlining Audio Amplifier Prototyping
For audio amplifier projects, online services are particularly useful because they often support small batch orders—perfect for testing a few prototypes without committing to large production runs. Additionally, some platforms integrate assembly services, meaning you can have components soldered onto your board, saving time on manual assembly.
With ALLPCB’s online platform, you can upload your Gerber files, select quick turn options, and track your order in real-time. Our user-friendly interface ensures that even complex audio amplifier designs are handled with precision and delivered on time.
Method 4: Speed Up Prototype Assembly
After receiving your fabricated PCB, the assembly process is the final step in creating a functional audio amplifier prototype. Efficient assembly methods can significantly reduce lead time and improve testing accuracy.
Prepare for Assembly in Advance
Before your boards arrive, gather all necessary components and tools. Create a bill of materials (BOM) listing every part, from resistors to ICs like operational amplifiers (op-amps). Verify that component values match your design—for example, ensure coupling capacitors are rated for the correct voltage (e.g., 16V or higher for typical audio circuits) to prevent failure under load.
Consider Automated Assembly for Precision
For complex audio amplifier designs with many surface-mount components, manual soldering can introduce errors like cold joints or misalignment. Automated prototype assembly services use pick-and-place machines to position components with high accuracy, down to 0.4mm pitch for fine-pitch ICs. This is especially important for maintaining signal integrity in audio circuits, where even small deviations can cause noise.
Test Immediately After Assembly
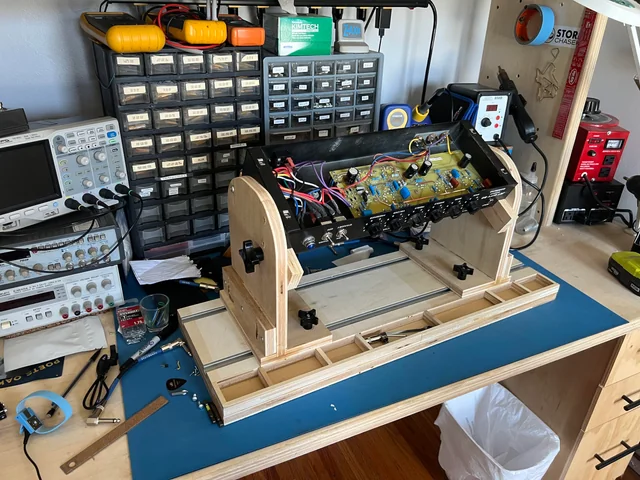
Once assembled, test your prototype under realistic conditions. Use an oscilloscope to check for signal distortion at various frequencies (e.g., 20 Hz to 20 kHz, the audible range). Measure output power to ensure it matches your design goals— for instance, a Class AB amplifier might target 10W into an 8-ohm speaker load. Early testing helps catch issues like incorrect component placement or soldering defects before moving to the next iteration.
ALLPCB offers integrated assembly solutions to complement our fabrication services, ensuring your audio amplifier prototypes are built with precision and ready for immediate testing.
Tips for Faster and More Efficient Prototyping
Beyond the core methods, here are additional tips to streamline your audio amplifier PCB prototyping process:
- Start with Simulation: Use software to simulate your circuit before fabrication. Tools can model signal behavior and thermal performance, reducing the likelihood of design flaws.
- Order Extra Boards: When using quick turn PCB services, order a few extra boards (e.g., 5-10) in case of assembly errors or the need for parallel testing.
- Document Everything: Keep detailed notes on each prototype iteration, including test results and design changes. This helps track progress and avoid repeating mistakes.
- Collaborate with Experts: If you're new to audio amplifier design, consult with experienced engineers or use online forums for advice on layout and component selection.

Conclusion: Accelerate Your Audio Amplifier Projects with ALLPCB
Audio amplifier PCB prototyping doesn’t have to be a slow or frustrating process. By optimizing your design for signal quality and thermal management, leveraging quick turn PCB fabrication, utilizing online PCB services, and streamlining prototype assembly, you can bring your ideas to life faster than ever. Each step, from layout to testing, plays a crucial role in ensuring your amplifier performs as intended—whether it’s for a home audio system, professional equipment, or a portable device.
At ALLPCB, we’re committed to supporting engineers and innovators with fast, reliable, and high-quality PCB solutions. Our quick turn services, user-friendly online platform, and assembly options are designed to meet the unique needs of audio amplifier prototyping. Ready to start your next project? Upload your design today and experience the speed and efficiency that sets us apart.
With these methods and tips, you’re well-equipped to tackle audio amplifier PCB prototyping with confidence. Keep iterating, keep testing, and watch your audio designs come to life with precision and speed.
 ALLPCB


