 ALLPCB


If you're a hobbyist or DIY enthusiast looking to work with SMD components, you might wonder how to adapt these tiny parts to your custom PCB designs. Surface Mount Device (SMD) components are smaller, more efficient, and widely used in modern electronics, but they can seem intimidating for hand soldering or integrating into DIY projects. The good news? With the right techniques, tools, and adapter boards, using SMD components DIY is easier than you think. In this guide, we’ll walk you through the process of hand soldering SMD, designing easy SMD PCB layouts, and using SMD adapter boards to simplify your projects as a hobbyist.
This blog post will dive deep into everything you need to know about surface mount for hobbyists. From understanding SMD basics to practical tips for soldering and PCB design, we’ve got you covered with actionable advice and clear steps to make your DIY electronics journey smoother.
What Are SMD Components and Why Use Them in DIY Projects?
SMD components are tiny electronic parts designed to be mounted directly onto the surface of a printed circuit board (PCB). Unlike traditional through-hole components, which have long leads that go through holes in the board, SMD parts have small metal pads or leads that sit flat on the PCB surface. Common SMD components include resistors, capacitors, LEDs, and integrated circuits (ICs), often in packages like 0402, 0603, or SOIC.
So, why should hobbyists consider using SMD components in their DIY projects? Here are a few reasons:
- Smaller Size: SMD parts take up less space, allowing for compact designs. For example, an 0402 resistor measures just 0.4mm by 0.2mm—tiny compared to a through-hole resistor.
- Better Performance: Due to their small size, SMD components often have lower parasitic inductance and capacitance, improving signal integrity at high frequencies (e.g., above 100 MHz).
- Availability: Many modern components, especially advanced ICs, are only available in SMD packages, making them essential for cutting-edge projects.
While SMD components offer these advantages, they can be challenging for hobbyists due to their size and soldering requirements. That’s where this guide comes in, helping you adapt SMD to your DIY PCB form factors with ease.

Getting Started with SMD Components DIY: Tools You’ll Need
Before diving into SMD components DIY projects, gather the right tools to make the process smooth and frustration-free. Here’s a list of essentials for hobbyists:
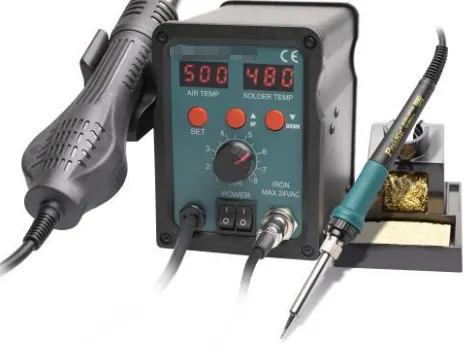
- Soldering Iron with Fine Tip: Use a soldering iron with a tip size of 0.5mm to 1mm for precision. A temperature-controlled iron set to around 300°C (572°F) works best for most SMD soldering.
- Tweezers: Fine-tip tweezers are crucial for handling tiny SMD parts, especially sizes like 0402 or 0201.
- Solder Paste or Thin Solder Wire: For hand soldering SMD, a thin solder wire (0.3mm to 0.5mm diameter) is ideal. Solder paste can be useful for reflow soldering if you have a hot air station or hotplate.
- Flux: Flux helps solder flow smoothly and prevents oxidation, making soldering cleaner and easier.
- Magnifying Glass or Microscope: A magnifying tool helps you see tiny pads and ensure proper placement.
- Desoldering Tools: Solder wick or a desoldering pump can help fix mistakes when working with SMD components.
With these tools in hand, you’re ready to tackle SMD projects. Investing in quality tools will save you time and improve your results, especially for intricate designs.
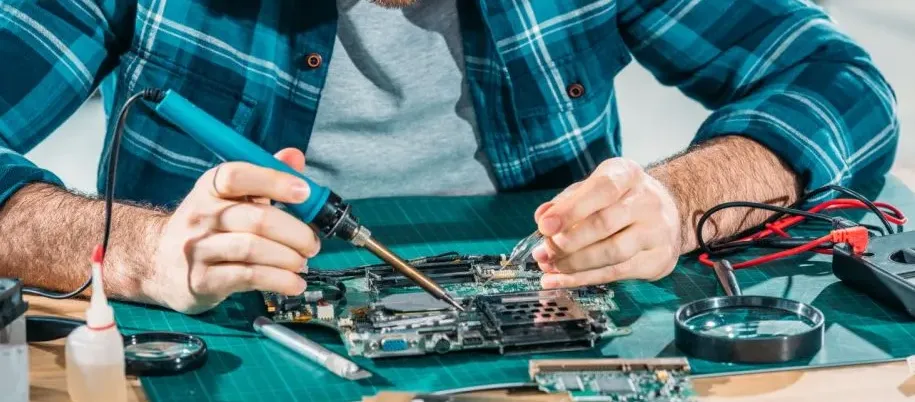
Hand Soldering SMD: Step-by-Step Guide for Hobbyists
Hand soldering SMD might seem tricky at first, but with practice, it becomes second nature. Follow these steps to solder SMD components onto your PCB:
- Prepare Your Workspace: Ensure your work area is clean and well-lit. Use an anti-static mat or wrist strap to protect sensitive components from static discharge.
- Apply Flux: Dab a small amount of flux onto the PCB pads where the SMD component will sit. This helps the solder adhere better.
- Tin One Pad: Using your soldering iron, apply a small bead of solder to one of the pads. This creates an anchor point for the component.
- Place the Component: Use tweezers to position the SMD part on the pads, aligning it with the tinned pad.
- Solder the First Pad: Heat the tinned pad and place the component’s lead into the molten solder. Hold it steady until the solder cools.
- Solder the Remaining Pads: Apply solder to the other pads, ensuring a clean, shiny joint without bridges (solder connecting two pads accidentally).
- Inspect and Clean: Check for cold joints or bridges using a magnifying glass. Clean excess flux with isopropyl alcohol and a brush.
For larger components like ICs with multiple pins (e.g., SOIC-8 packages), consider the drag soldering technique. Apply solder to all pins, then use a clean iron tip with flux to drag across the pins, removing excess solder and creating neat joints.
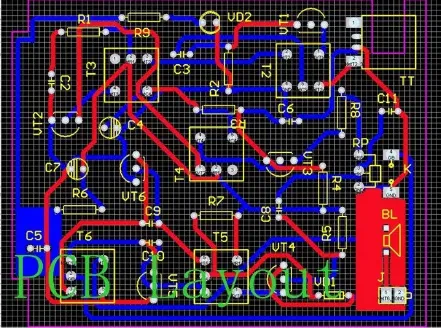
Easy SMD PCB Design: Tips for Hobbyists
Designing an easy SMD PCB layout is crucial for successful DIY projects. A well-thought-out design reduces soldering errors and ensures your circuit works as intended. Here are some tips for easy SMD PCB design tailored for hobbyists:
- Choose Larger SMD Packages: Start with larger SMD sizes like 0805 or 1206 for resistors and capacitors. These are easier to handle than tiny 0402 or 0201 packages.
- Space Pads Generously: Leave enough space between pads (at least 0.5mm) to avoid solder bridges, especially if you’re new to SMD soldering.
- Use Reference Markings: Add silkscreen markings on your PCB design to indicate component orientation, especially for polarized components like diodes or ICs.
- Keep Traces Short: Minimize trace lengths to reduce signal loss and interference. For high-speed signals (e.g., 50 MHz or higher), aim for trace impedance matching if possible, targeting values like 50 ohms for RF designs.
- Add Test Points: Include test pads in your design for easy troubleshooting with a multimeter.
Many free or affordable PCB design tools allow hobbyists to create SMD-friendly layouts. Look for software with libraries of SMD footprints to simplify the process. Always double-check your design against the component datasheets to ensure pad sizes and spacing match the specifications.
Surface Mount for Hobbyists: Overcoming Common Challenges
Working with surface mount for hobbyists comes with a learning curve. Here are some common challenges and how to overcome them:
- Difficulty Handling Tiny Parts: Use tweezers and a magnifying glass to place components accurately. Practice on scrap boards with larger SMD parts before moving to smaller ones.
- Solder Bridges: If solder connects two pads unintentionally, use solder wick and flux to remove the excess. Prevent bridges by using less solder and maintaining a steady hand.
- Component Misalignment: Double-check placement before soldering. If a part is misaligned, reheat the solder and reposition it with tweezers.
- Heat Damage: Avoid overheating components by limiting soldering time to 2-3 seconds per pad. Use a temperature-controlled iron to stay within safe limits (around 300°C).
Patience and practice are key. Start with simple projects, like building an LED circuit with SMD components, before tackling complex designs.
Using SMD Adapter Boards to Simplify DIY Projects
One of the easiest ways to adapt SMD components to DIY PCB form factors is by using SMD adapter boards. These small breakout boards convert SMD packages into through-hole or breadboard-friendly formats, making them ideal for prototyping and testing. Here’s why hobbyists love adapter boards:
- Ease of Use: Adapter boards let you work with SMD components without needing advanced soldering skills. For example, an SOIC-to-DIP adapter allows you to use a surface-mount IC in a through-hole setup.
- Versatility: Available for various SMD packages like QFN, DFN, and TSSOP, adapter boards fit a wide range of components.
- Prototyping Friendly: Many adapter boards have standard 2.54mm (0.1 inch) pin spacing, perfect for breadboards or perfboards.
To use an adapter board, simply solder the SMD component onto the board’s pads, then connect the board to your larger circuit. This method is especially helpful for ICs with fine pitch leads (e.g., 0.5mm spacing) that are hard to solder directly onto a custom PCB.
Advanced Tips for SMD in DIY PCB Projects
Once you’re comfortable with the basics, consider these advanced strategies to elevate your SMD components DIY projects:
- Reflow Soldering: For multiple SMD components, try reflow soldering with a hot air station or a skillet. Apply solder paste to pads, place components, and heat the board to around 220-250°C to melt the solder uniformly.
- Stencil Use: For precise solder paste application, use a stencil aligned with your PCB design. This is useful for densely populated boards.
- Mixed Designs: Combine SMD and through-hole components in your design for flexibility. For instance, use SMD for compact areas and through-hole for connectors that need mechanical strength.
These techniques require more investment in tools and practice but can significantly improve the quality and efficiency of your projects.
Conclusion: Mastering SMD for Your DIY Electronics
Adapting SMD components to DIY PCB form factors doesn’t have to be daunting. By understanding the basics of SMD components DIY, mastering hand soldering SMD techniques, focusing on easy SMD PCB design, and leveraging SMD adapter boards, you can confidently incorporate surface mount for hobbyists into your projects. Start small, practice often, and equip yourself with the right tools to turn challenges into achievements.
Whether you’re building a compact sensor module or prototyping a new idea, SMD components open up a world of possibilities for hobbyists. With the tips and steps outlined in this guide, you’re well on your way to creating efficient, professional-grade DIY electronics. Keep experimenting, and watch your skills grow!


