ALLPCB


If you’re an electrical engineer working on a PCB assembly project, choosing the right solder paste application method is critical to ensuring quality, efficiency, and reliability. The main methods—stencil printing, syringe dispensing, jet dispensing, and manual application—each have unique strengths and limitations. So, which one is right for your project? In short, it depends on your production volume, component size, precision needs, and budget. Stencil printing is ideal for high-volume production, syringe dispensing suits small batches or rework, jet dispensing excels in high-precision and complex designs, while manual application works for quick prototypes or low-budget tasks. In this comprehensive guide, we’ll dive deep into each method, compare their pros and cons, and help you decide the best fit for your specific needs using practical examples and data.
Why Solder Paste Application Matters in PCB Assembly
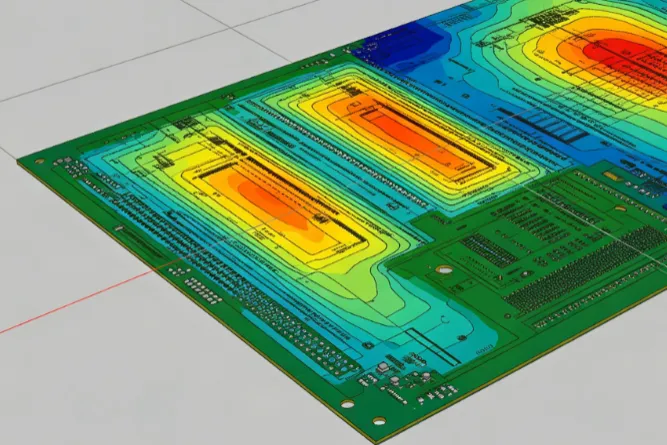
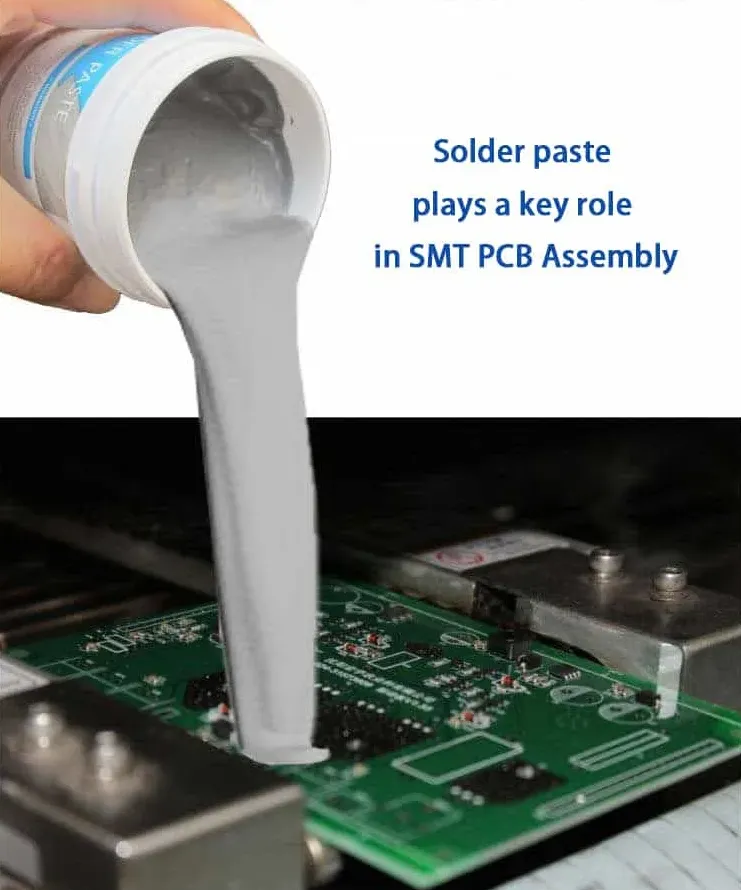
Solder paste application is a foundational step in surface mount technology (SMT) for PCB assembly. It involves depositing a precise amount of solder paste—a mixture of tiny solder particles and flux—onto the pads of a printed circuit board (PCB) before placing components. This paste acts as the adhesive and conductive medium that forms strong electrical and mechanical bonds during reflow soldering. A poorly applied solder paste can lead to defects like bridging, insufficient solder, or tombstoning, which can compromise the functionality of the final product. As an electrical engineer, understanding the nuances of each application method ensures you minimize defects and optimize production.
Overview of Solder Paste Application Methods
Let’s explore the four primary solder paste application methods—stencil printing, syringe dispensing, jet dispensing, and manual application—along with the tools like solder paste printers and dispensers that facilitate these processes. Each method caters to different project scales, precision levels, and budgets, making it essential to match the technique to your requirements.
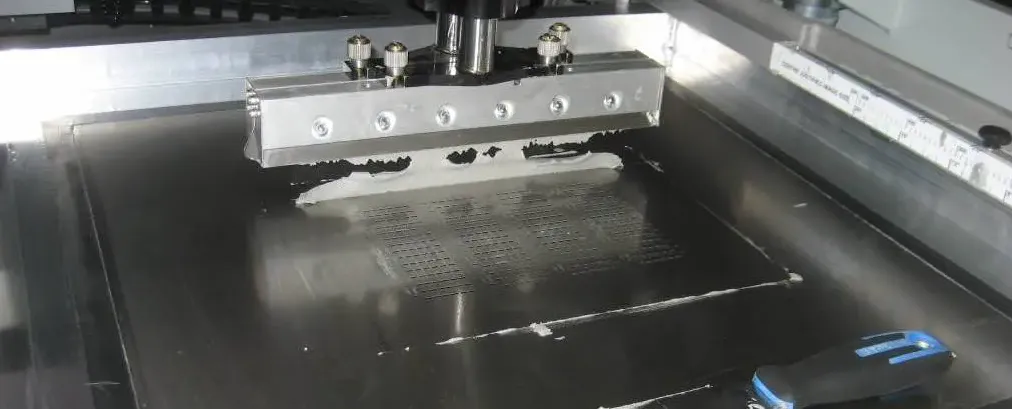
1. Stencil Printing: The Industry Standard for High-Volume Production
Stencil printing is the most widely used method in professional PCB assembly, especially for medium to high-volume production. It involves using a stainless steel or laser-cut stencil with apertures aligned to the PCB pads. A squeegee pushes solder paste through these openings, depositing a consistent layer onto the board.
How It Works: A solder paste printer holds the stencil in place over the PCB. The machine applies pressure via a squeegee to force paste through the stencil apertures. After printing, the stencil is lifted, leaving precise deposits of paste on the pads. Modern automatic solder paste printers can handle thousands of boards per hour with repeatability within ±0.01 mm, according to industry data from manufacturers like DEK and MPM.
Advantages:
- High speed and efficiency for large-scale production.
- Uniform paste deposition, reducing defects in high-density designs.
- Cost-effective for batches of 100+ boards, as stencil costs (typically $50–$200) are spread over many units.
Limitations:
- High upfront cost for stencil design and solder paste printer (machines start at $10,000).
- Not practical for small batches or prototypes due to setup time.
- Struggles with non-planar surfaces or flexible PCBs.
Best For: Projects with consistent designs and production runs exceeding 100 units, such as consumer electronics or automotive control modules.
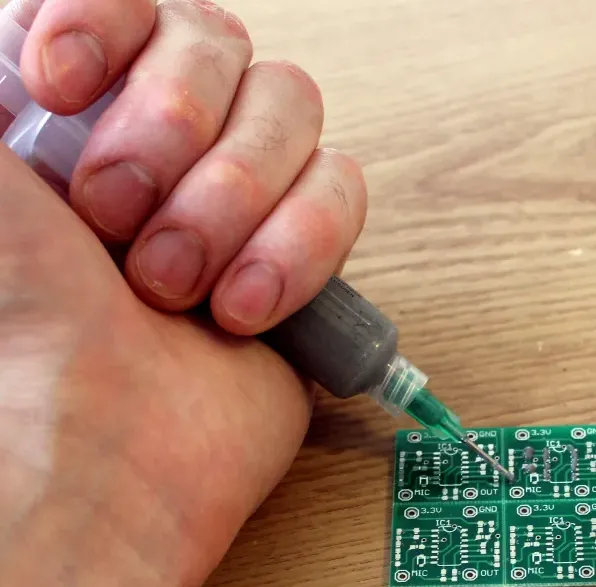
2. Syringe Dispensing: Flexible and Affordable for Small Batches
Syringe dispensing uses a handheld or semi-automated syringe filled with solder paste to manually or mechanically deposit paste onto PCB pads. This method is common in prototyping, rework, or small-batch production where flexibility trumps speed.
How It Works: A solder paste dispenser, often a pneumatic or manual syringe, controls the flow of paste through a fine needle (typically 0.010–0.020 inches in diameter). The operator targets individual pads, adjusting pressure and time to control the deposit volume. Some advanced dispensers offer repeatability within ±10% of the target volume, per specs from manufacturers like Nordson EFD.
Advantages:
- Low cost—basic syringes start at $20, while pneumatic dispensers range from $500–$2,000.
- Ideal for small runs (1–50 boards) or quick repairs on existing assemblies.
- Works on irregular surfaces or 3D assemblies where stencils fail.
Limitations:
- Time-consuming and operator-dependent, leading to inconsistent results.
- Not suitable for fine-pitch components (below 0.5 mm) due to precision limits.
- Fatigue during long sessions can degrade quality.
Best For: Prototyping labs or repair stations where engineers need to test designs or fix individual boards, such as in R&D for IoT devices.
3. Jet Dispensing: High Precision for Complex Designs
Jet dispensing is a cutting-edge, non-contact method that uses a specialized machine to “jet” tiny droplets of solder paste onto PCB pads with extreme accuracy. It’s gaining traction in industries requiring high precision, like medical devices and aerospace.
How It Works: A jet dispensing system, such as those from Mycronic or Vermes, uses a piezoelectric actuator to eject paste droplets at high speeds (up to 500 Hz). The system can deposit volumes as small as 0.5 nanoliters with placement accuracy of ±0.025 mm, based on manufacturer data. No stencil is required, and the machine can adjust paste volume on the fly for different pad sizes.
Advantages:
- Exceptional precision for fine-pitch components (down to 0.3 mm) and mixed assemblies.
- No stencil cost or setup time, saving money on small runs with frequent design changes.
- Handles 3D surfaces and cavities where stencils can’t reach.
Limitations:
- Expensive equipment—jet dispensers often cost $50,000 or more.
- Slower than stencil printing for high-volume production.
- Requires skilled programming and maintenance.
Best For: High-mix, low-volume projects with complex layouts, such as wearable tech or advanced sensor boards.
4. Manual Application: Quick and Dirty for Prototypes
Manual application is the simplest and least expensive method, often involving a toothpick, small spatula, or brush to apply solder paste by hand. It’s rarely used in professional settings but can be handy for one-off projects or emergencies.
How It Works: The engineer scoops a small amount of paste from a jar or syringe and carefully dabs it onto each pad. There’s no specialized equipment beyond basic tools, and the process relies entirely on the user’s skill.
Advantages:
- Zero equipment cost—uses readily available tools.
- Useful for quick tests or single-board prototypes.
- No setup time or learning curve.
Limitations:
- Highly inconsistent results, leading to defects like uneven paste or bridging.
- Impractical for anything beyond a few pads due to time and effort.
- Not suitable for fine-pitch or high-density designs.
Best For: Hobbyists or engineers in a pinch who need to assemble a single test board without access to proper tools.
Comparing Solder Paste Application Methods: Key Factors for Electrical Engineers
Choosing the right method involves evaluating several factors specific to your project. Below is a detailed comparison based on production volume, precision, cost, and setup time to help you make an informed decision.
Production Volume:
- High Volume (100+ boards): Stencil printing with a solder paste printer is the clear winner due to speed (up to 10,000 pads per hour) and cost per unit.
- Low Volume (1–50 boards): Syringe dispensing or jet dispensing offers flexibility without high setup costs.
- Single Units: Manual application or syringe dispensing works for one-offs or quick tests.
Precision Requirements:
- Fine-Pitch Components (<0.5 mm): Jet dispensing provides the best accuracy, followed by stencil printing with high-quality stencils.
- Standard Components (>0.5 mm): Syringe dispensing and stencil printing are sufficient.
- Basic Designs: Manual application can suffice if precision isn’t critical.
Cost Considerations:
- Low Budget: Manual application or a basic syringe dispenser keeps costs under $50.
- Moderate Budget: Syringe dispensing with a pneumatic tool ($500–$2,000) balances cost and quality.
- High Budget: Invest in jet dispensing or a solder paste printer for long-term efficiency.
Setup Time:
- Fast Setup: Manual and syringe methods require no preparation beyond loading paste.
- Moderate Setup: Jet dispensing needs programming but no stencil design.
- Long Setup: Stencil printing involves designing and aligning stencils, taking hours for the first run.
Practical Tips for Choosing and Implementing Your Method
As an electrical engineer, you likely juggle multiple projects with varying needs. Here are actionable tips to guide your decision and execution:
- Assess Your Project Scale First: Start by estimating your production run. For a batch of 500 IoT sensor boards, invest in stencil printing. For a one-off test of a new microcontroller circuit, use syringe dispensing.
- Consider Component Density: If your design includes fine-pitch QFN packages or 0402 resistors, prioritize jet dispensing or a high-precision stencil. I’ve seen bridging issues firsthand when using syringes on 0.4 mm pitch components—don’t risk it.
- Budget for Tools: If you’re in a startup lab, a $500 pneumatic syringe dispenser can bridge the gap until you scale up to a $10,000+ solder paste printer.
- Test and Iterate: Always run a small test batch to inspect paste deposits under a microscope (aim for 50–70% pad coverage for most components, per IPC standards). Adjust stencil thickness (common range: 0.004–0.006 inches) or dispenser settings accordingly.
- Maintain Equipment: Clean stencils after every 5–10 prints to avoid clogging, and store solder paste at 0–10°C to maintain viscosity (check manufacturer specs, as shelf life is often 6 months refrigerated).
Real-World Examples: Matching Methods to Projects
Let’s look at two hypothetical scenarios to illustrate how these methods apply to real engineering challenges:
Scenario 1: Mass-Produced Smart Home Device
You’re tasked with assembling 2,000 PCBs for a smart thermostat. The design uses 0603 capacitors and a 0.8 mm pitch microcontroller. Stencil printing with a solder paste printer is the obvious choice. A $150 stencil and a rented or in-house printer (processing 200 boards/hour) ensure uniformity and keep defect rates below 1%, saving time and rework costs.
Scenario 2: Prototype for a Medical Sensor
You’re developing a wearable sensor with a complex 3D layout and fine-pitch components (0.4 mm). Only 10 boards are needed for testing. Jet dispensing fits perfectly—its precision handles the tight tolerances, and the lack of stencil setup saves days of preparation. Even at a high equipment cost, renting a jet dispenser for a day ($500–$1,000) is justified for such a specialized task.
Conclusion: Making the Right Choice for Your Project
Selecting the best solder paste application method—whether stencil printing, syringe dispensing, jet dispensing, or manual application—hinges on balancing your project’s volume, precision needs, and budget. For high-volume runs, a solder paste printer with stencil printing offers unmatched efficiency. Small batches or repairs benefit from the affordability of a syringe-based solder paste dispenser. Complex, high-precision designs call for jet dispensing, while manual application remains a last resort for quick, low-stakes tasks. By understanding the strengths and trade-offs of each method, as outlined with specific data and examples, you can optimize your PCB assembly process for quality and cost.