 ALLPCB


If you're just starting out in electronics and looking for easy PCB design software or free PCB software to create your first circuit board, you're in the right place. For beginners, the best options are user-friendly tools that simplify the design process without overwhelming you with complex features. Some great choices include open-source platforms like KiCad, web-based design tools, and lightweight software tailored for beginner electronics design. In this guide, we'll dive deep into these options, explore their features, and help you pick the right one for your DIY PCB layout or simple circuit board design projects.
Why PCB Design Software Matters for Beginners
Designing a printed circuit board (PCB) is a crucial step in turning your electronics ideas into reality. Whether you're building a small gadget or experimenting with circuits as a hobbyist, PCB design software helps you create accurate schematics and layouts. For beginners, the challenge lies in finding tools that are intuitive and don't require a steep learning curve. Using the right easy PCB design software can save you time, reduce errors, and make the process enjoyable.
What to Look for in Beginner-Friendly PCB Software
Before we explore specific tools, let's break down the key features that make PCB design software suitable for those new to beginner electronics design. Keep these factors in mind as you choose the best tool for your needs:
- Ease of Use: Look for software with a clean, intuitive interface that doesn't overwhelm you with too many options at once.
- Cost: As a beginner, free PCB software or low-cost options are ideal to avoid upfront expenses while learning.
- Community Support: Tools with active forums or tutorials can help you troubleshoot issues and learn faster.
- Basic Features: Ensure the software supports schematic capture, PCB layout, and the ability to export files for manufacturing.
- Compatibility: Check if the software runs on your operating system (Windows, macOS, or Linux) or if it’s web-based.
Top Free and Easy PCB Design Software for Beginners
Now, let's explore some of the most accessible tools for simple circuit board design. These options are widely used by hobbyists and beginners for their user-friendly features and robust capabilities.
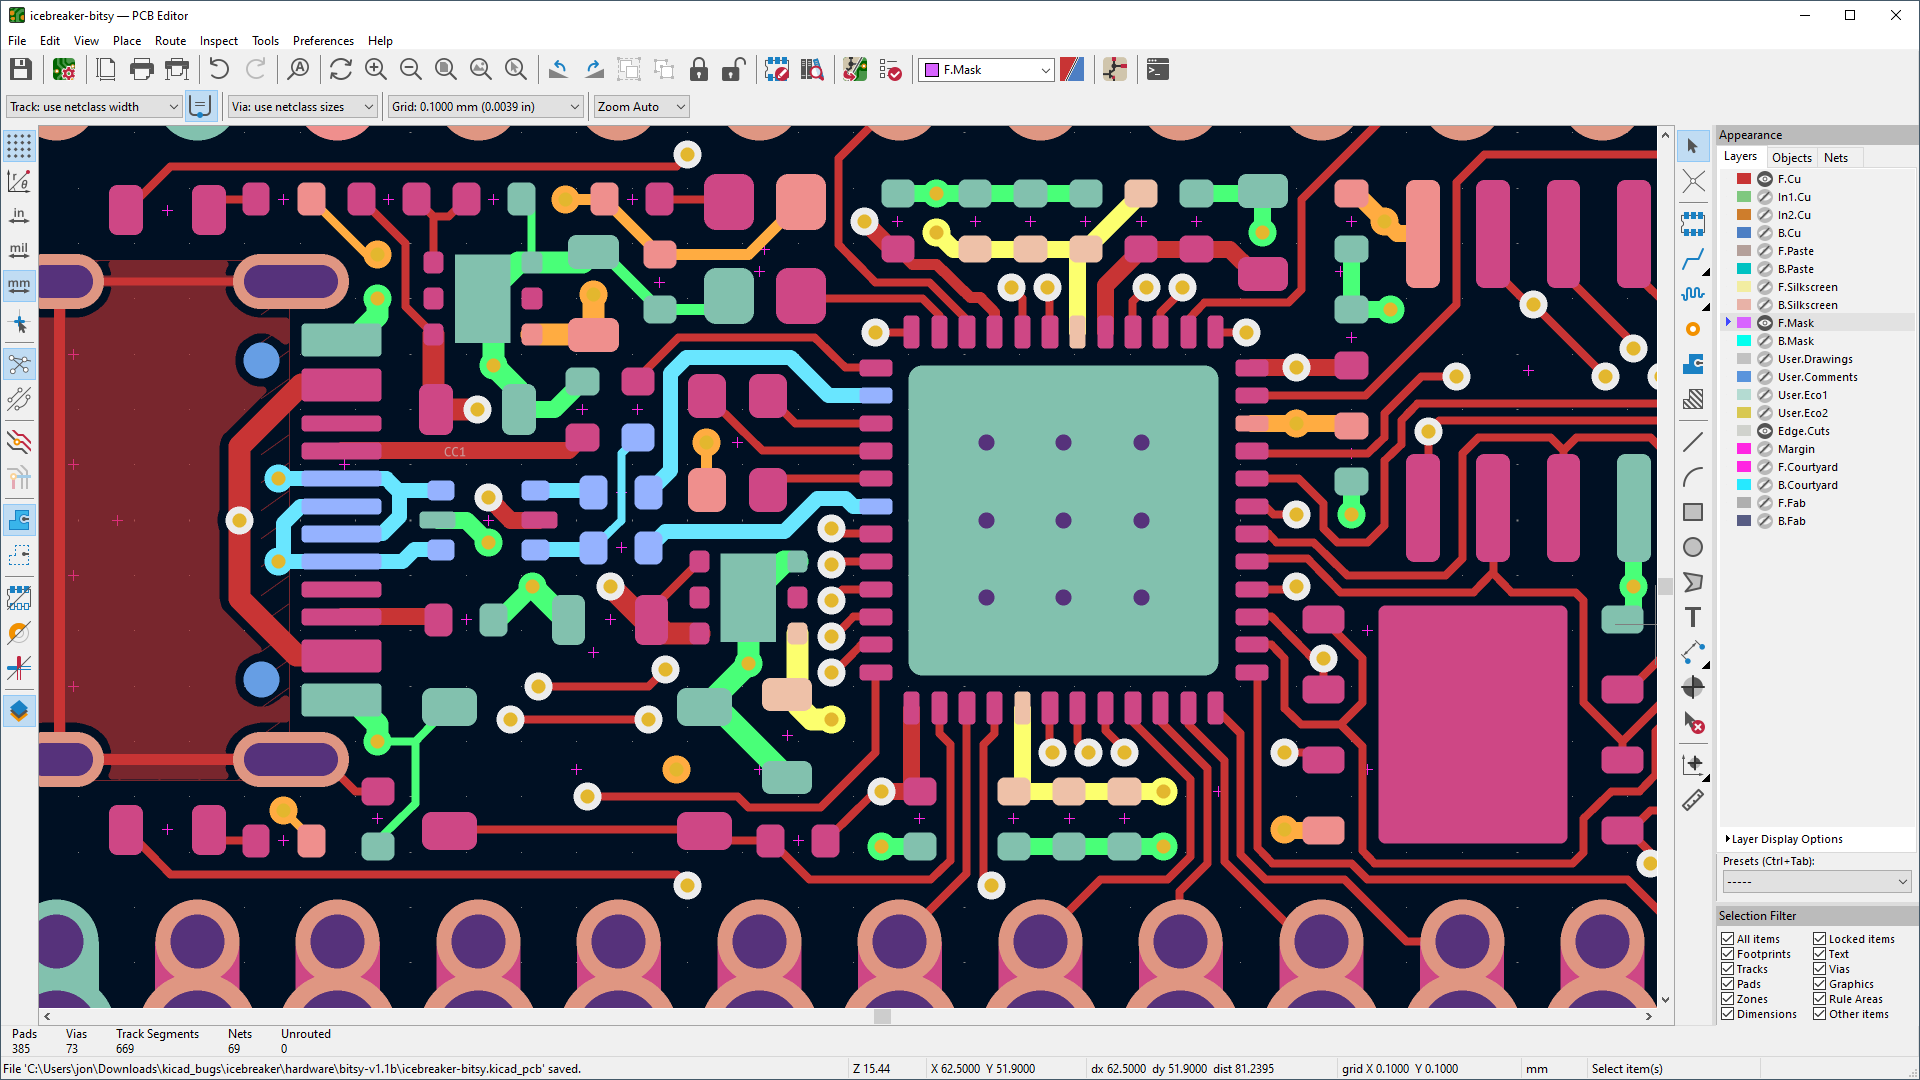
1. KiCad - A Powerful Open-Source Option
KiCad is one of the most popular free PCB software choices for beginners and professionals alike. This open-source tool offers everything you need for DIY PCB layout, from schematic capture to 3D visualization of your board.
- Key Features: Schematic editor, PCB layout editor, 3D viewer, and a vast library of components.
- Why It’s Great for Beginners: While it has a slight learning curve, KiCad’s interface is straightforward once you get the hang of it. Plus, there are countless online tutorials and a supportive community.
- Platform: Available on Windows, macOS, and Linux.
- Cost: Completely free.
For example, if you're designing a simple LED circuit with a 5V power supply and a 220-ohm resistor, KiCad lets you draw the schematic, assign footprints to components, and route traces on the PCB layout with ease.
2. LibrePCB - Simplified Design for Newcomers
LibrePCB is another excellent free PCB software designed with simplicity in mind. It’s perfect for those just starting with beginner electronics design because it focuses on usability over complex features.
- Key Features: Integrated library management, schematic and board editors, and multi-platform support.
- Why It’s Great for Beginners: Its clean interface and step-by-step workflow make it less intimidating than other tools.
- Platform: Works on Windows, macOS, and Linux.
- Cost: Free and open-source.
Imagine creating a basic sensor circuit with a microcontroller operating at 16 MHz. LibrePCB allows you to place components and route traces without getting bogged down by advanced settings, making it ideal for a simple circuit board design.
3. DesignSpark PCB - User-Friendly and Free
DesignSpark PCB is a free PCB software that offers a balance between simplicity and functionality. It’s tailored for hobbyists and beginners who want to create professional-looking designs without spending money.
- Key Features: Unlimited schematic sheets, integration with component libraries, and export options for manufacturing.
- Why It’s Great for Beginners: The software guides you through the design process with helpful prompts and an easy-to-navigate interface.
- Platform: Windows.
- Cost: Free with registration.
For instance, if you're working on a project with a 12V relay circuit, DesignSpark PCB helps ensure proper spacing and trace widths (e.g., 0.3 mm for low-current signals) to avoid design errors.
4. CircuitMaker - Community-Driven Design Tool
CircuitMaker is a free tool aimed at hobbyists and makers who want easy PCB design software. It’s built with collaboration in mind, allowing you to share projects and learn from others.
- Key Features: Schematic capture, PCB layout, and cloud-based project sharing.
- Why It’s Great for Beginners: Its modern interface and community resources make it approachable for those new to DIY PCB layout.
- Platform: Windows.
- Cost: Free with some limitations on advanced features.
If you're designing a small audio amplifier circuit with a 1 kHz signal range, CircuitMaker’s drag-and-drop functionality simplifies component placement and routing.
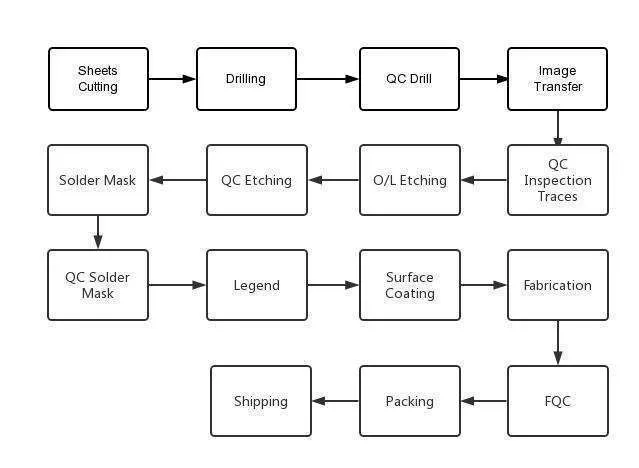
Step-by-Step Guide to Designing Your First PCB
Now that you know some of the best tools for simple circuit board design, let’s walk through the basic steps of creating a PCB using easy PCB design software. This process applies to most of the tools mentioned above.
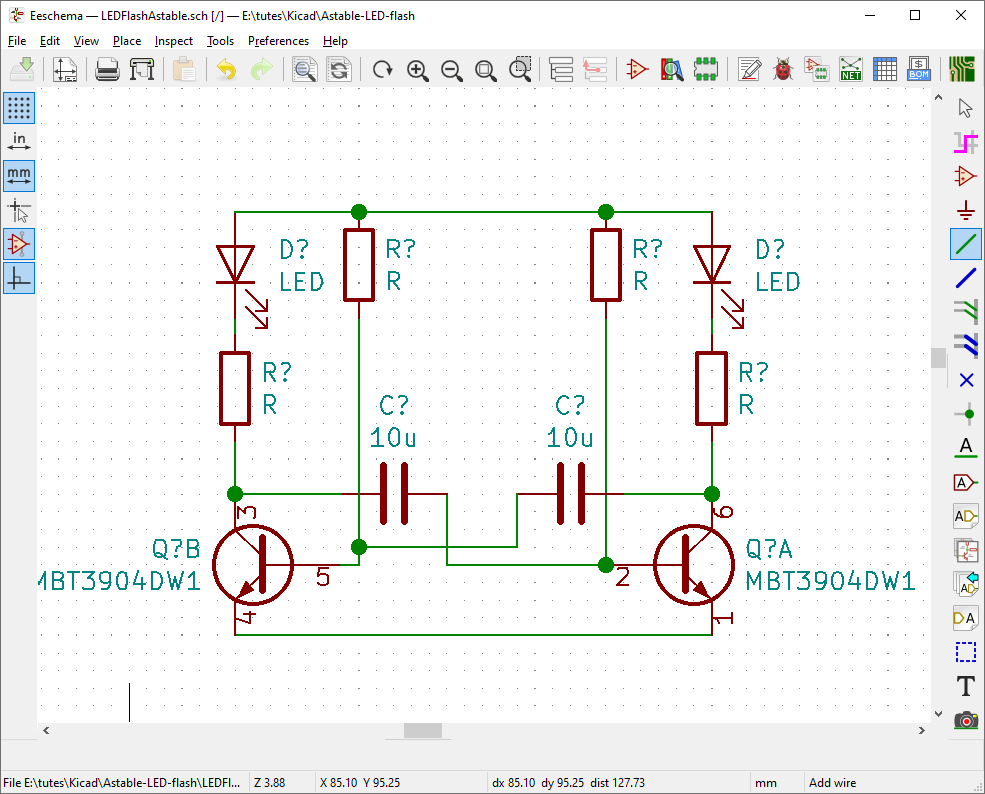
Step 1: Create a Schematic
Start by drawing a schematic of your circuit. This is like a blueprint that shows how components (resistors, capacitors, ICs) connect. For example, if you're building a 9V battery-powered LED circuit, place the battery, a 330-ohm resistor, and an LED in the schematic editor.
Step 2: Assign Footprints
Each component needs a physical footprint for the PCB layout. Most software has built-in libraries where you can select the correct footprint (e.g., through-hole for a standard resistor).
Step 3: Design the PCB Layout
Move to the layout editor to arrange components on the board. Keep high-current traces (e.g., 1 mm wide for 1A) separate from low-current signals to avoid interference. Place components logically to minimize trace lengths.
Step 4: Route Traces
Connect the components by drawing traces. For a beginner project, aim for trace widths of at least 0.25 mm for signals under 500 mA to ensure reliability.
Step 5: Export for Manufacturing
Once your design is complete, export the files (usually Gerber format) for manufacturing. Double-check for errors like unconnected pins or overlapping traces before finalizing.
Tips for Success in Beginner Electronics Design
As you dive into beginner electronics design, keep these practical tips in mind to improve your skills and avoid common pitfalls:
- Start Small: Begin with simple projects like a single-LED blinker circuit before tackling complex designs.
- Learn Basic Rules: Understand design rules like trace spacing (e.g., 0.2 mm minimum for 5V circuits) to prevent short circuits.
- Use Tutorials: Watch video guides or read documentation for your chosen software to master its features.
- Test Virtually: Many tools simulate circuits to check for errors before you build the physical board.
- Iterate: Your first design might not be perfect. Learn from mistakes and refine your DIY PCB layout.
Common Challenges and How to Overcome Them
Designing a PCB as a beginner can come with hurdles. Here are a few challenges you might face and how to address them using easy PCB design software.
Challenge 1: Overcrowded Layouts
If components are too close, it can lead to signal interference or manufacturing issues. Solution: Use the software’s design rule checker (DRC) to ensure proper spacing (e.g., 0.15 mm clearance for low-voltage designs).
Challenge 2: Missing Components in Libraries
Sometimes, a specific part isn’t in the software library. Solution: Search online for user-created libraries or manually create a footprint using datasheet dimensions.
Challenge 3: Routing Errors
Incorrectly routed traces can cause circuit failure. Solution: Double-check connections against your schematic and use autorouting features if available.
Why Choose Free PCB Software as a Beginner?
Opting for free PCB software offers several advantages for those new to electronics. First, it eliminates the financial barrier, letting you experiment without investing in expensive tools. Second, many free tools are open-source, meaning they’re constantly updated by a community of users. Finally, these tools often cater to hobbyists, so they prioritize simplicity over advanced features that beginners don’t yet need.
Taking Your Skills to the Next Level
Once you’re comfortable with simple circuit board design, consider exploring intermediate features in your software. For example, learn to design multi-layer boards for compact layouts or incorporate high-speed signals (e.g., 100 MHz) with proper impedance matching (typically 50 ohms for RF circuits). These skills will prepare you for more complex projects as you grow in beginner electronics design.
Conclusion: Start Designing Today with Easy PCB Software
Getting started with PCB design doesn’t have to be intimidating. With the right easy PCB design software like KiCad, LibrePCB, DesignSpark PCB, or CircuitMaker, you can create professional DIY PCB layouts without breaking the bank. These free PCB software options provide the tools and resources you need for simple circuit board design, making them perfect for beginner electronics design. Pick one that suits your needs, follow the steps outlined in this guide, and start bringing your electronics ideas to life.
At ALLPCB, we’re committed to supporting your journey from design to production. Once your PCB is ready, trust us to provide high-quality manufacturing services to turn your vision into reality. Dive into the world of electronics today with confidence!


