 ALLPCB


If you're new to electronics and wondering how to start building circuits, through-hole assembly is a fantastic entry point. This technique involves inserting component leads through pre-drilled holes on a printed circuit board (PCB) and soldering them in place. It’s ideal for beginners due to its simplicity and forgiving nature. In this guide, we’ll walk you through the essentials of through-hole components for beginners, tips on through-hole soldering iron selection, using through-hole PCB design software, building simple through-hole circuits, and important through-hole assembly safety practices. Let’s dive into the details to help you confidently start your electronics journey with ALLPCB.
What is Through-Hole Assembly?
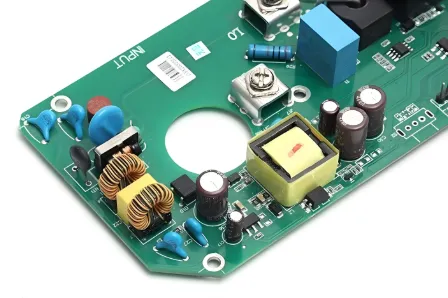
Through-hole assembly is a method of mounting electronic components onto a PCB. Unlike surface-mount technology, which places components directly on the board’s surface, through-hole components have long leads that pass through holes drilled into the PCB. These leads are then soldered on the opposite side to create a secure electrical connection. This approach is often preferred for beginners because the components are larger, easier to handle, and more durable during soldering compared to tiny surface-mount parts.
Through-hole technology has been a staple in electronics for decades due to its reliability. It’s commonly used in educational kits, hobbyist projects, and even some industrial applications where mechanical strength is critical. For beginners, starting with through-hole assembly offers a hands-on way to learn the basics of circuit building and soldering.
Why Choose Through-Hole Components for Beginners?
For those just starting out, through-hole components for beginners are an excellent choice. Here are a few reasons why:
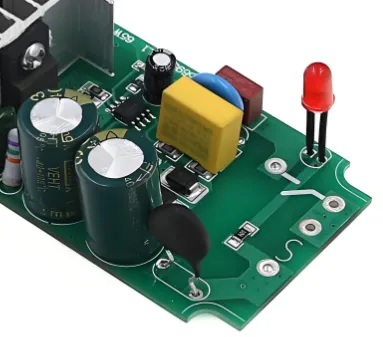
- Easy Handling: Through-hole components, such as resistors, capacitors, and LEDs, are larger than their surface-mount counterparts. This makes them easier to pick up, position, and solder without specialized tools.
- Visual Learning: The clear placement of leads through holes helps beginners understand how components connect on a circuit board, making it easier to grasp circuit design concepts.
- Forgiving Soldering: Soldering through-hole parts is more forgiving because the leads are sturdy, and there’s more room for error compared to tiny surface-mount pads.
- Availability: Many beginner kits and tutorials focus on through-hole components, so finding compatible parts and resources is straightforward.
Whether you’re building a simple LED circuit or experimenting with a basic amplifier, through-hole components provide a practical foundation for learning electronics.
Getting Started with Through-Hole Assembly: Essential Tools
Before you begin assembling and soldering, you’ll need the right tools. Here’s a list of essentials for through-hole assembly, tailored for beginners:
- Soldering Iron: A key tool for joining components to the PCB. We’ll cover through-hole soldering iron selection in detail below.
- Solder Wire: Use a rosin-core solder with a 60/40 tin-lead ratio or lead-free solder with a diameter of 0.8mm to 1.0mm for most through-hole work.
- Wire Cutters: To trim excess component leads after soldering.
- Desoldering Pump or Braid: Useful for correcting mistakes by removing solder.
- Multimeter: To test connections and ensure your circuit works as intended.
- PCB and Components: Start with a beginner-friendly kit or a custom-designed board from a reliable provider like ALLPCB.
Through-Hole Soldering Iron Selection: What to Look For
Choosing the right soldering iron is critical for successful through-hole assembly. For beginners, the goal is to find a tool that’s affordable, safe, and effective. Here are key factors to consider during through-hole soldering iron selection:
- Power Rating: A soldering iron with 25-40 watts is ideal for through-hole work. This range provides enough heat to melt solder without damaging components or the PCB. Avoid high-wattage irons (over 60W) as they can overheat delicate parts.
- Temperature Control: Opt for an iron with adjustable temperature settings. For through-hole soldering, a range of 260-300°C (500-570°F) works well for most components.
- Tip Size and Shape: A fine conical tip or small chisel tip (1-2mm) is best for precise soldering on through-hole pads. Replaceable tips are a bonus for versatility.
- Ergonomics: Look for a lightweight iron with a comfortable grip, especially if you’ll be soldering for long periods.
- Safety Features: A soldering iron with a heat-resistant handle and a stand to prevent accidental burns is essential.
For beginners, a budget-friendly soldering station with these features can cost between $20 and $50. Investing in a reliable iron ensures clean solder joints and reduces the risk of damaging your project.
Designing Your Circuit: Through-Hole PCB Design Software
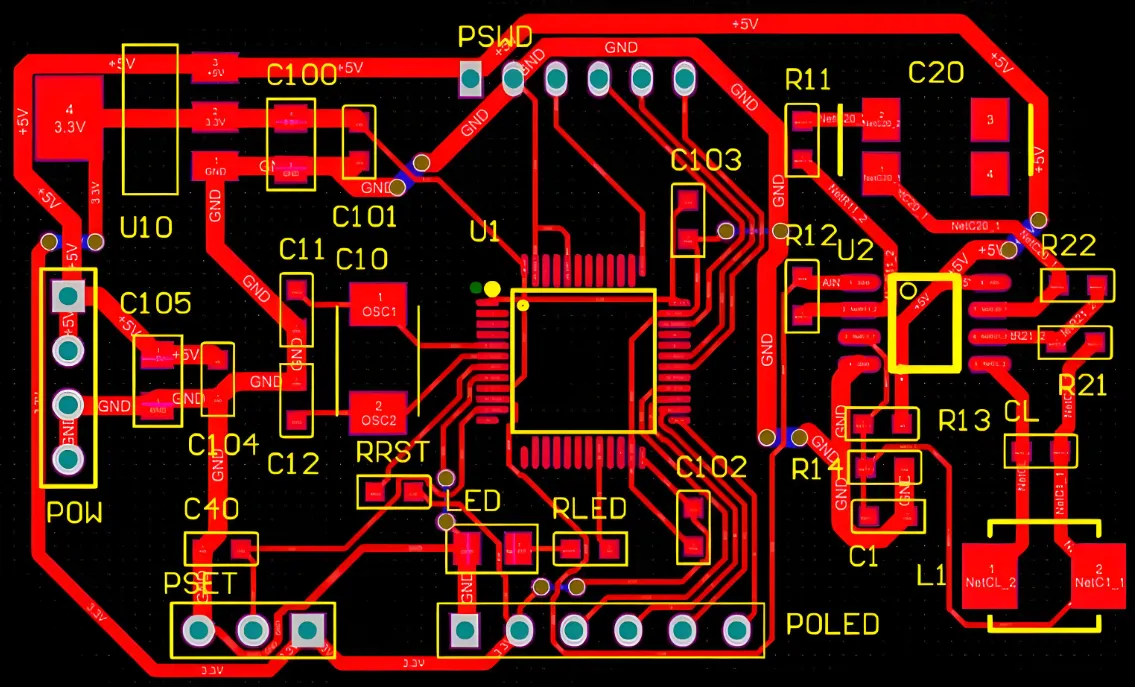
Before assembling components, you’ll need a PCB layout. Using through-hole PCB design software makes this process accessible, even for beginners. These tools allow you to create a digital blueprint of your circuit, specifying where each through-hole component will go. Here are some beginner-friendly features to look for in design software:
- User-Friendly Interface: Choose software with a simple layout and tutorials to help you get started.
- Through-Hole Component Libraries: Ensure the software includes a wide range of through-hole parts like resistors, capacitors, and ICs for easy placement.
- Auto-Routing: This feature helps connect components with traces automatically, saving time for beginners.
- Export Options: Look for software that allows you to export your design files in formats compatible with PCB manufacturing services like those offered by ALLPCB.
Start with a basic design for a simple circuit, such as a single LED with a resistor. Draw the schematic first, then place the components on the board layout, ensuring the holes align with the leads. Once your design is ready, you can have the PCB manufactured and start assembling.
Building Simple Through-Hole Circuits: Step-by-Step
Now that you have your tools and PCB, let’s build one of the simplest through-hole circuits: an LED blinker. This project is perfect for beginners and introduces key assembly concepts.
Materials Needed:
- PCB with through-hole pads
- LED (Light Emitting Diode)
- 220-ohm resistor
- 555 timer IC (through-hole package)
- Capacitors (e.g., 10μF and 0.01μF)
- 9V battery and connector
Steps to Assemble:
- Prepare the PCB: Ensure your PCB matches the circuit layout. Identify the holes for each component.
- Insert Components: Start with the resistor and capacitors. Push their leads through the designated holes, ensuring correct polarity for polarized components like LEDs and capacitors.
- Place the IC: Insert the 555 timer IC into its slot, aligning the notch on the IC with the marking on the PCB to avoid incorrect orientation.
- Solder the Leads: Heat your soldering iron to around 280°C (536°F). Touch the iron to the pad and lead, then apply solder until it flows around the joint. Avoid excessive solder to prevent bridging between pads.
- Trim Excess Leads: Use wire cutters to trim the leads close to the solder joint for a neat finish.
- Test the Circuit: Connect the 9V battery and check if the LED blinks. If it doesn’t, use a multimeter to troubleshoot for loose connections or incorrect component placement.
This simple circuit typically operates at a frequency determined by the resistor and capacitor values, often around 1-2 Hz for a visible blinking effect. It’s a great way to practice soldering and understand basic timing circuits.
Through-Hole Assembly Safety: Tips to Stay Protected
Working with electronics and soldering involves risks, so through-hole assembly safety is a priority. Follow these guidelines to protect yourself and your workspace:
- Work in a Ventilated Area: Soldering produces fumes that can be harmful if inhaled. Use a fume extractor or work near an open window to ensure proper ventilation.
- Wear Protective Gear: Use safety glasses to shield your eyes from solder splashes or debris. Avoid wearing loose clothing that could catch fire.
- Handle the Soldering Iron with Care: Always place the hot iron on a stand when not in use. Never touch the tip, as it can reach temperatures over 300°C (572°F), causing severe burns.
- Avoid Lead Exposure: If using lead-based solder, wash your hands after soldering to prevent ingestion. Consider lead-free solder for a safer alternative.
- Keep a Fire Extinguisher Nearby: Soldering involves heat, so have a small fire extinguisher or a bucket of sand ready in case of an emergency.
- Power Down Before Testing: Disconnect power sources before making adjustments to your circuit to avoid electric shocks.
Safety isn’t just about protecting yourself—it also ensures the longevity of your tools and projects. A clean, organized workspace with proper precautions can prevent accidents and improve your overall experience.
Common Mistakes in Through-Hole Assembly and How to Avoid Them
As a beginner, you might encounter a few hiccups during through-hole assembly. Here are common mistakes and tips to avoid them:
- Cold Solder Joints: These occur when the solder doesn’t fully melt, creating a weak connection. Ensure your iron is at the correct temperature (around 280°C) and heat both the pad and lead before applying solder.
- Component Misplacement: Double-check component orientation, especially for polarized parts like LEDs and ICs. Incorrect placement can damage components or prevent the circuit from working.
- Excessive Heat: Applying heat for too long (over 3-5 seconds per joint) can damage components or lift PCB pads. Work quickly and use a heat sink if needed.
- Solder Bridges: Avoid using too much solder, as it can create unintended connections between pads. If a bridge forms, use a desoldering pump to remove excess solder.
Practice on a scrap PCB or a cheap kit before working on important projects. This hands-on experience will help you refine your skills and build confidence.
Taking Your Through-Hole Skills to the Next Level
Once you’ve mastered the basics of through-hole assembly, consider expanding your knowledge. Here are a few ways to grow as an electronics hobbyist:
- Experiment with Complex Circuits: Move beyond simple through-hole circuits to projects like audio amplifiers or microcontroller-based designs.
- Learn PCB Fabrication: Partner with a trusted service like ALLPCB to turn your designs into high-quality boards. Understanding the fabrication process can improve your design skills.
- Explore Mixed Assembly: As you gain confidence, combine through-hole and surface-mount components in your projects for more compact and advanced designs.
Every project you complete builds your expertise. Start small, stay consistent, and soon you’ll be tackling intricate electronics with ease.
Conclusion
Through-hole assembly is a gateway to the exciting world of electronics, offering beginners a practical way to learn soldering, circuit design, and component handling. By focusing on through-hole components for beginners, making informed choices during through-hole soldering iron selection, using intuitive through-hole PCB design software, building simple through-hole circuits, and prioritizing through-hole assembly safety, you can create reliable projects while honing your skills. With the support of a trusted partner like ALLPCB for your PCB needs, you’re well-equipped to embark on this rewarding journey. Grab your tools, start with a basic circuit, and watch your electronics skills grow with each solder joint.


