 ALLPCB


If you're a hobbyist looking to master FR-4 PCB DIY assembly, you're in the right place. This guide will walk you through the essentials of assembling printed circuit boards (PCBs) made from FR-4 material, a popular and cost-effective choice for electronics projects. Whether you're new to FR-4 PCB hand soldering or exploring advanced techniques with a FR-4 PCB reflow oven, we’ve got you covered with practical tips and step-by-step instructions. Let’s dive into everything you need to know to create reliable and functional circuits at home.
What is FR-4 and Why is it Ideal for Hobbyists?
FR-4 is a type of material used as the base for most standard PCBs. It’s made from woven fiberglass cloth and epoxy resin, offering a strong, lightweight, and flame-resistant foundation for electronic components. This material is widely used due to its affordability, durability, and ability to handle a wide range of operating temperatures, typically from -50°C to 110°C. For hobbyists, FR-4 strikes the perfect balance between cost and performance, making it an excellent choice for DIY projects ranging from simple LED circuits to complex microcontroller boards.
One key advantage of FR-4 is its excellent thermal and electrical insulation properties. With a dielectric constant of around 4.5 at 1 MHz, it ensures minimal signal loss, which is crucial for maintaining the integrity of your circuit’s performance. Whether you're working on low-frequency or high-frequency applications, FR-4 provides a reliable substrate for soldering components and building functional electronics.

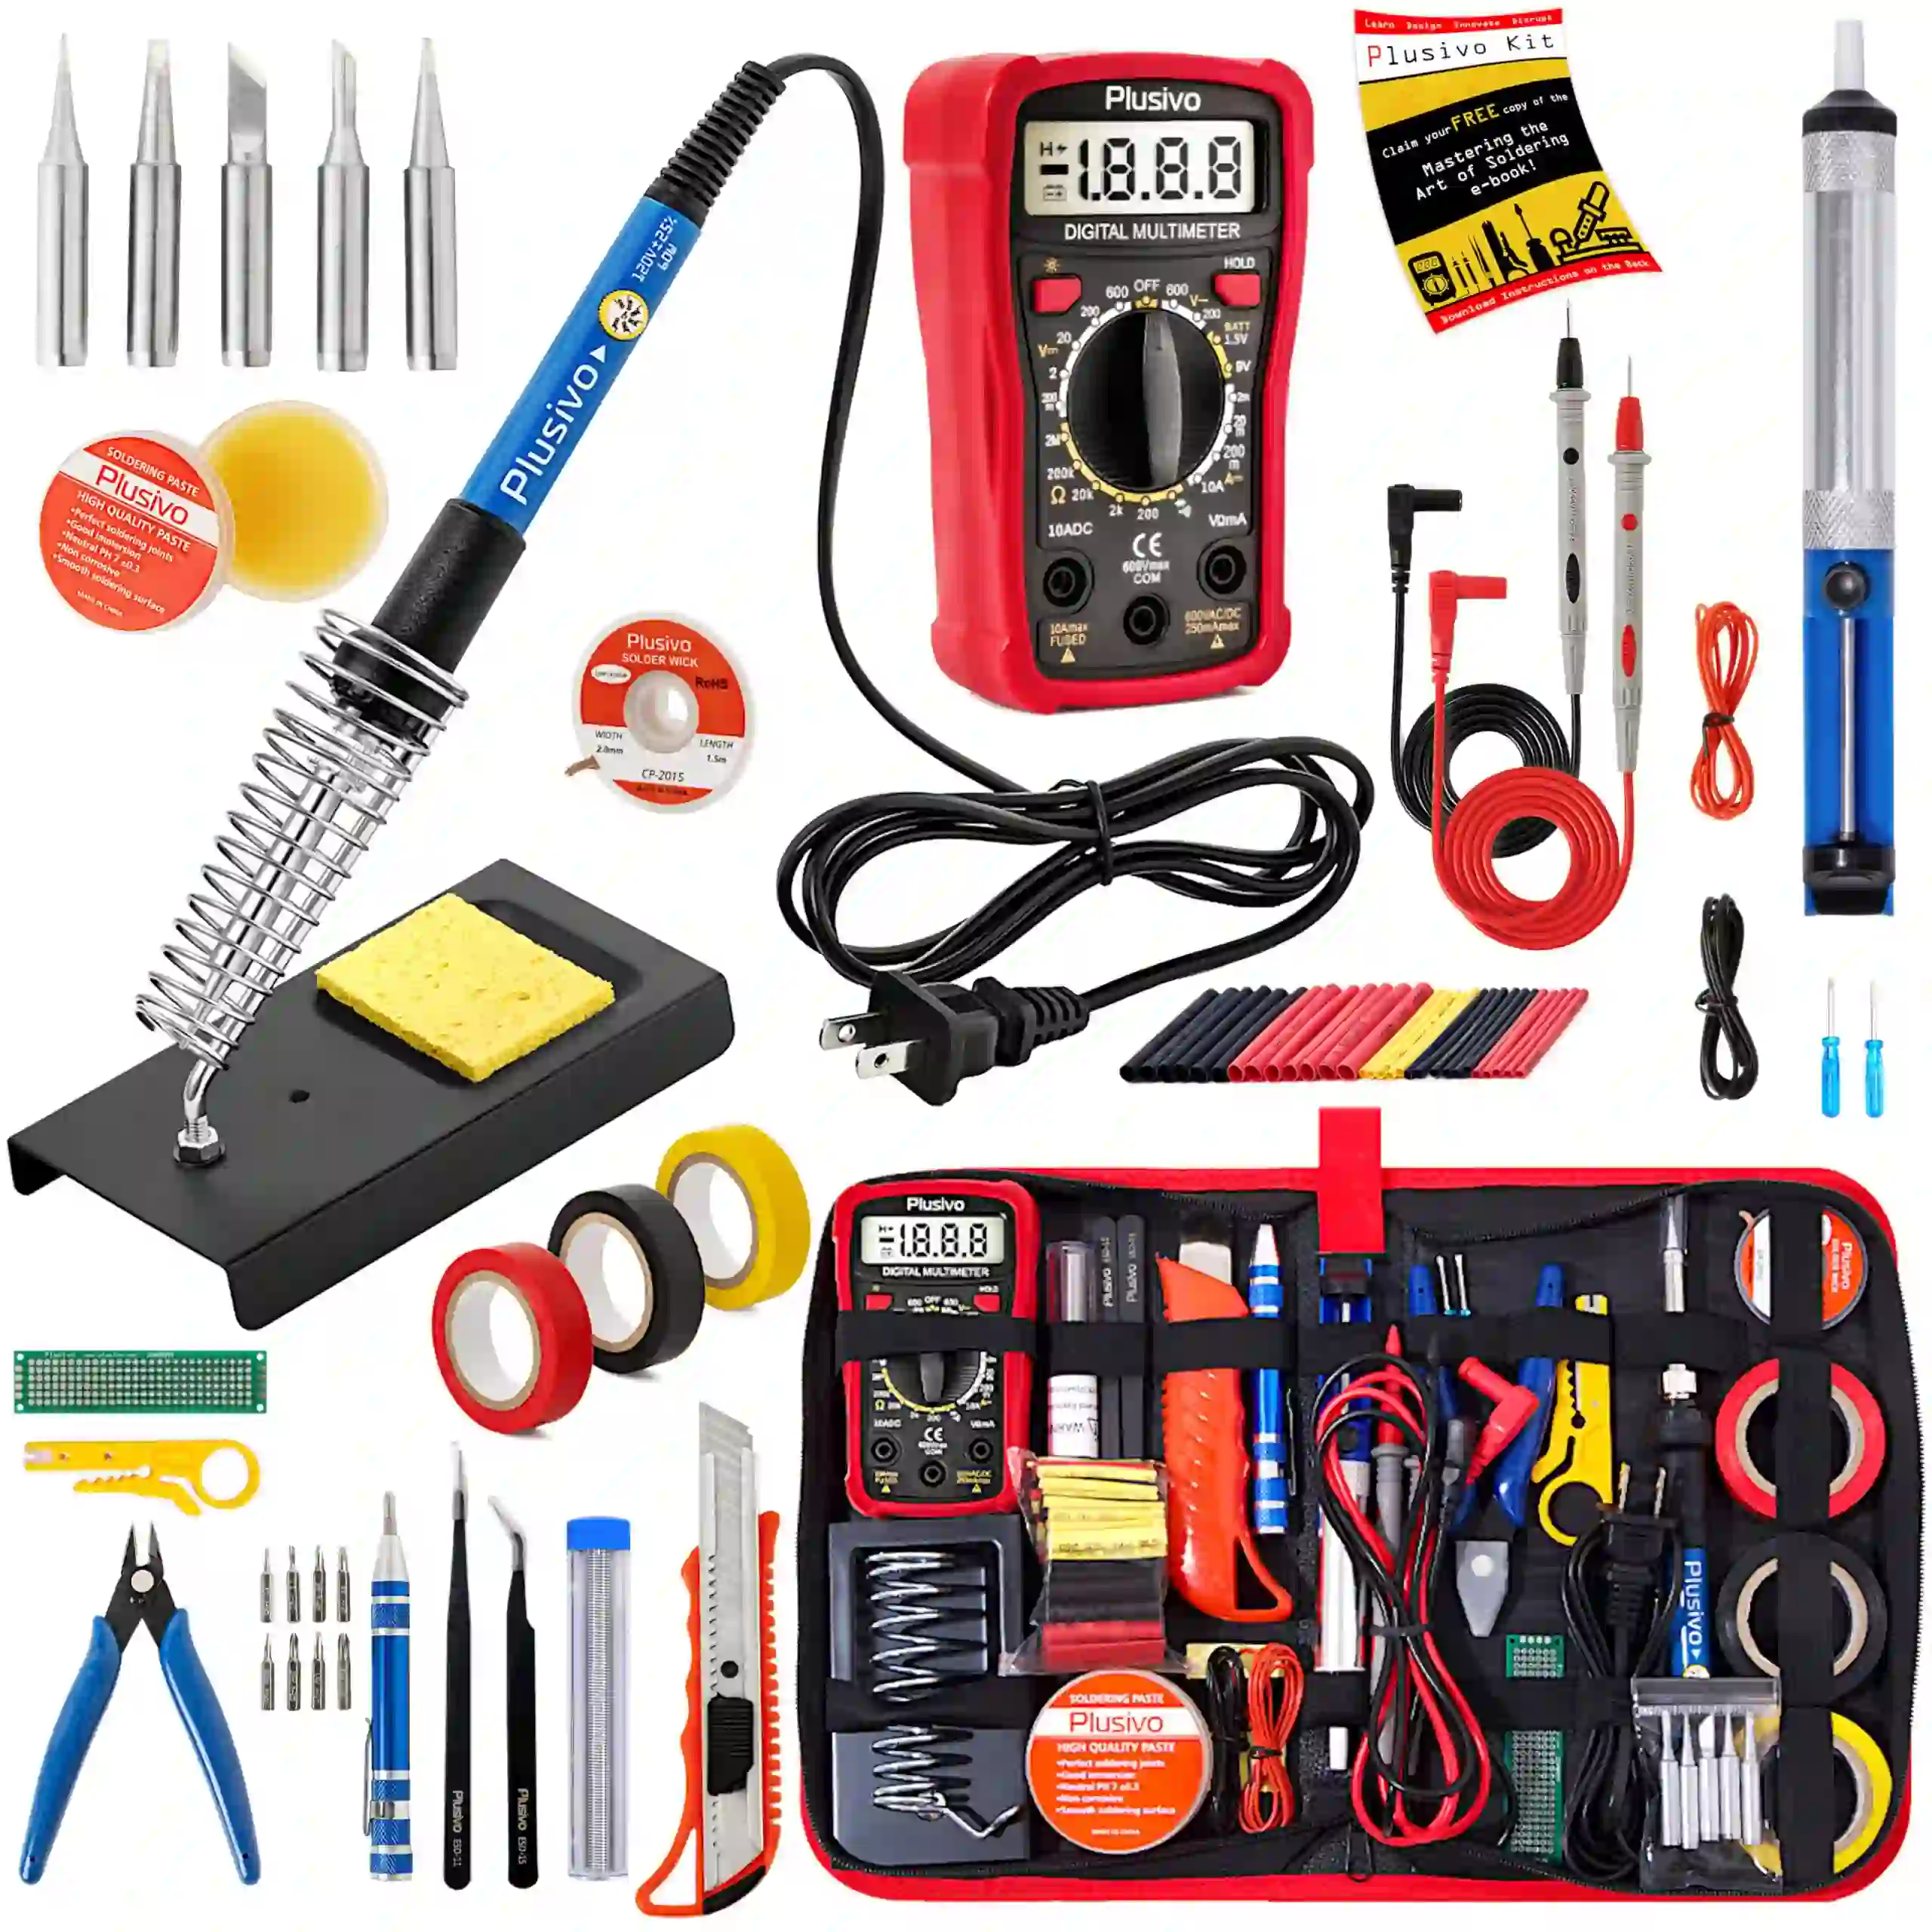
Essential Tools for FR-4 PCB Assembly
Before diving into FR-4 PCB assembly tips, let’s cover the basic tools and equipment you’ll need. Having the right setup will make your soldering and assembly process smoother and more efficient.
- Soldering Iron: A FR-4 PCB soldering iron with adjustable temperature control (ideally 25-40 watts) is essential for hand soldering. Look for one with a fine tip for precision work on small components.
- Solder Paste: Using high-quality FR-4 PCB solder paste is critical for surface-mount device (SMD) assembly. Choose a lead-free option with a melting point around 217°C for compatibility with most components.
- Hot Air Rework Station: A FR-4 PCB rework station is handy for desoldering components or working with SMD parts. It allows you to heat specific areas without damaging the board.
- Reflow Oven: For batch assembly of SMD components, a FR-4 PCB reflow oven ensures even heating and proper solder joint formation. A small tabletop oven can work for hobbyists.
- Flux: Flux helps clean the soldering area and improves solder flow, reducing the risk of cold joints.
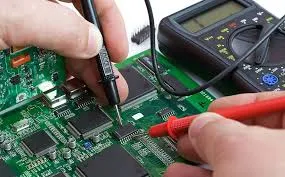
- Tweezers and Multimeter: Precision tweezers help place small components, while a multimeter is useful for testing connections and troubleshooting.
Step-by-Step Guide to FR-4 PCB DIY Assembly
Now that you have your tools ready, let’s walk through the process of assembling an FR-4 PCB. This guide covers both through-hole and surface-mount techniques to suit different project needs.
1. Preparing Your Workspace and PCB
Start by setting up a clean, well-lit workspace. Ensure your area is free of static electricity by using an anti-static mat or wrist strap, as static can damage sensitive components. Inspect your FR-4 PCB for any manufacturing defects like scratches or uneven copper traces. Clean the board with isopropyl alcohol and a soft brush to remove dust or residues that could interfere with soldering.
2. Gathering and Organizing Components
Before you begin, sort all components according to their type and value. For example, group resistors by their resistance value (e.g., 1kΩ, 10kΩ) and capacitors by capacitance (e.g., 10μF, 100μF). Double-check your bill of materials (BOM) to ensure nothing is missing. This step saves time and prevents mistakes during assembly.
3. Hand Soldering Through-Hole Components
For beginners, FR-4 PCB hand soldering of through-hole components is a great starting point. Follow these steps:
- Insert the component leads through the designated holes on the PCB.
- Heat the pad and lead simultaneously with your soldering iron set to around 300°C.
- Apply solder to the joint until it forms a small, shiny cone. Avoid using too much solder, as it can create bridges between pads.
- Trim excess leads with wire cutters after the solder cools.
Always work on one component type at a time, starting with the smallest (like resistors) and moving to larger parts (like connectors). This keeps the board organized and reduces the risk of damage to taller components.

4. Surface-Mount Device (SMD) Assembly with Solder Paste
For SMD components, using FR-4 PCB solder paste is the way to go. Here’s how to do it:
- Apply a small amount of solder paste to each pad using a syringe or stencil for precision. The paste should cover about 50-70% of the pad area to avoid excess.
- Place the SMD components onto the pads with tweezers, ensuring correct alignment with the PCB markings.
- Use a hot air rework station or reflow oven to heat the board. If using a FR-4 PCB reflow oven, follow a standard reflow profile with a peak temperature of around 245°C for lead-free solder.
- Inspect the joints after cooling to ensure they are shiny and well-formed, indicating a good connection.
SMD soldering can be tricky due to the small size of components, so practice on a scrap board if you’re new to this technique.
5. Testing and Troubleshooting
Once assembly is complete, visually inspect the board for solder bridges, cold joints, or misplaced components. Use a multimeter to check for continuity between connected points and ensure there are no short circuits. Power up the board gradually, starting with a low voltage if possible, to avoid damaging components in case of errors.
Advanced FR-4 PCB Assembly Tips for Hobbyists
Beyond the basics, here are some additional FR-4 PCB assembly tips to elevate your skills and ensure high-quality results.
Using a Hot Air Rework Station for Repairs
A FR-4 PCB rework station is invaluable for fixing mistakes or replacing components. Set the hot air temperature to around 280-300°C and use a low airflow setting to avoid blowing small parts off the board. Focus the heat on the component you’re removing, and use tweezers to lift it once the solder melts. Clean the pads with desoldering braid and flux before soldering a new component in place.
Optimizing Reflow Oven Profiles
If you’re using a FR-4 PCB reflow oven, understanding the reflow profile is key to preventing thermal stress on the board. A typical profile for lead-free solder includes:
- Preheat: 150-180°C for 60-90 seconds to activate the flux.
- Soak: 180-200°C for 60 seconds to stabilize the temperature.
- Reflow: Peak at 235-245°C for 20-30 seconds to melt the solder.
- Cooling: Gradual cooling to room temperature to avoid thermal shock.
Adjust these settings based on your specific solder paste and component specifications to achieve the best results.
Choosing the Right Soldering Iron Tip
When using a FR-4 PCB soldering iron, the tip shape matters. A fine conical tip (0.5-1mm) is ideal for precision work on small pads, while a chisel tip (1-2mm) works better for larger components or ground planes that require more heat transfer. Keep the tip clean by wiping it on a damp sponge or using a brass wire cleaner to ensure consistent performance.
Common Mistakes to Avoid in FR-4 PCB Assembly
Even with the best intentions, hobbyists can make errors during assembly. Here are some pitfalls to watch out for:
- Overheating Components: Applying too much heat (above 350°C for extended periods) can damage sensitive parts or lift pads from the FR-4 board. Keep soldering time under 3-5 seconds per joint.
- Using Too Much Solder: Excess solder can create bridges between pads, leading to short circuits. Use just enough to form a small, concave fillet around the joint.
- Ignoring Polarity: Components like diodes, capacitors, and ICs have specific orientations. Incorrect placement can result in circuit failure or component damage.
- Skipping Flux: Flux is essential for clean joints, especially with SMD components. Without it, solder may not flow properly, leading to weak connections.
Safety Precautions for FR-4 PCB Assembly
Working with soldering tools and electronics requires caution. Always prioritize safety with these practices:
- Work in a well-ventilated area to avoid inhaling solder fumes. Use a fume extractor if possible.
- Wear safety glasses to protect your eyes from solder splashes or debris.
- Keep your soldering iron in a stand when not in use to prevent burns or accidental damage.
- Unplug tools when not in use and store them safely out of reach of children.
Why Choose FR-4 for Your DIY Projects?
FR-4 remains the go-to material for hobbyists due to its versatility and reliability. With a typical thickness of 1.6mm, it provides enough structural strength for most projects while being easy to drill or cut if needed. Its thermal conductivity of approximately 0.25 W/m·K helps dissipate heat from components, reducing the risk of overheating in compact designs. Whether you’re prototyping a simple circuit or building a multi-layer board, FR-4 offers the performance you need at a price that fits a hobbyist’s budget.
Final Thoughts on Mastering FR-4 PCB Assembly
Assembling an FR-4 PCB can be a rewarding experience for hobbyists, offering a hands-on way to bring your electronic designs to life. By following the steps and FR-4 PCB assembly tips outlined in this guide, you’ll be well-equipped to tackle projects of varying complexity. From mastering FR-4 PCB hand soldering to leveraging tools like a FR-4 PCB reflow oven or FR-4 PCB rework station, each skill you develop brings you closer to creating professional-quality circuits at home.
Start small, practice often, and don’t be afraid to experiment with different techniques. With patience and the right tools, you’ll soon be assembling FR-4 PCBs with confidence and precision. Happy soldering!


