 ALLPCB


Are you an electronic hobbyist looking to dive into the world of home automation systems? If so, microprocessor-controlled devices are the heart of any smart home setup. In this guide, we’ll explore how microprocessors power smart home devices, their applications in IoT microprocessor control, and even touch on home automation PCB design. Whether you’re building a custom project or just curious about the tech behind modern homes, this comprehensive post will walk you through everything you need to know about microprocessor applications in home automation.
Let’s get started with a deep dive into the exciting intersection of microprocessors and smart home technology. By the end of this guide, you’ll have actionable insights to start or enhance your own projects!
What Are Microprocessor-Controlled Devices in Home Automation?
Microprocessors are tiny, powerful chips that act as the brain of many smart home devices. Think of them as mini-computers that process data, execute commands, and control hardware. In home automation systems, microprocessors manage everything from turning on lights to adjusting thermostats based on user input or sensor data.
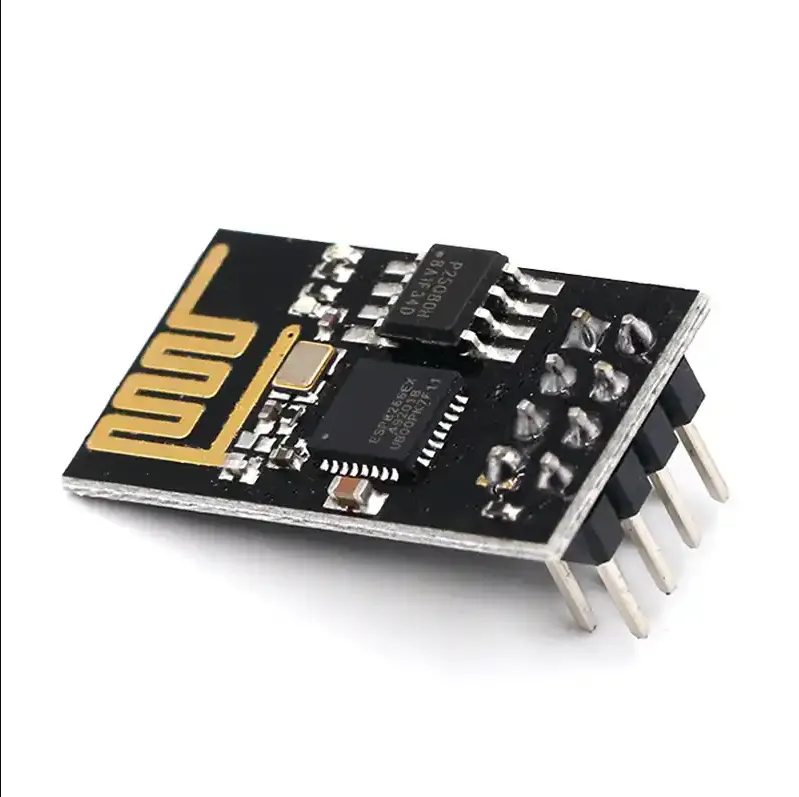
For electronic hobbyists, understanding microprocessors means you can build or tweak your own home automation setups. Common microprocessors like the ESP8266, Arduino boards, or PIC microcontrollers are affordable and widely used in DIY projects. They connect sensors, relays, and actuators to create systems that automate tasks in your home.
Why Microprocessors Matter in Smart Homes
Microprocessors bring intelligence to home automation. They take inputs from sensors—like temperature, motion, or light levels—and process them to trigger actions. For example, a microprocessor in a smart thermostat might read a temperature of 68°F (20°C) and signal the heater to turn on if it drops below a set threshold.
Without microprocessors, smart home devices would be dumb hardware. These chips enable IoT (Internet of Things) connectivity, allowing devices to communicate over Wi-Fi or Bluetooth. This is why microprocessor applications are central to creating efficient, responsive home automation systems.
Key Microprocessor Applications in Home Automation Systems
Let’s break down the specific ways microprocessors are used in smart home devices. As a hobbyist, knowing these applications can inspire your next project or help troubleshoot existing setups.
1. Lighting Control
Smart lighting is one of the most popular home automation features. Microprocessors in smart bulbs or switches interpret signals from apps or sensors to turn lights on or off, dim them, or change colors. For instance, an ESP8266 module can be programmed to control a relay that switches a light based on a motion sensor detecting movement.
In technical terms, the microprocessor reads a digital input (e.g., a HIGH signal at 3.3V from a PIR motion sensor) and outputs a signal to close a relay circuit, completing a 120V AC loop for the light. This simple setup is perfect for hobbyists starting with home automation systems.
2. Climate Control
Smart thermostats and HVAC systems rely on microprocessors to maintain comfort. Devices like the Nest Thermostat use chips to process temperature data from sensors and adjust heating or cooling. For DIY enthusiasts, a microcontroller like the Arduino Uno paired with a DHT11 temperature sensor (measuring with ±2°C accuracy) can control a small heater or fan via a relay.
3. Security and Surveillance
Microprocessors power smart security systems, including door locks, cameras, and alarms. They process inputs from motion detectors or RFID readers to unlock doors or send alerts. A Raspberry Pi, for example, can run a home surveillance system by connecting to a camera module and streaming video over Wi-Fi with a latency as low as 100ms under optimal conditions.
4. Appliance Automation
From smart plugs to robotic vacuums, microprocessors automate everyday appliances. A smart plug with a built-in microprocessor can monitor power usage (e.g., measuring current draw up to 15A) and allow remote control via an app. Hobbyists can replicate this by using a microcontroller to toggle power through a relay based on IoT commands.
How Microprocessors Enable IoT Microprocessor Control
The rise of IoT has transformed home automation, and microprocessors are at the core of this connectivity. IoT microprocessor control refers to how these chips communicate with other devices and the internet to create a seamless smart home experience.
Connecting Devices to the Internet
Many microprocessors come with built-in Wi-Fi or Bluetooth capabilities. The ESP32, for example, supports dual-band Wi-Fi (2.4GHz and 5GHz) with data rates up to 150 Mbps, making it ideal for IoT projects. This allows hobbyists to connect sensors or actuators to cloud platforms like Blynk or Home Assistant for remote monitoring and control.
Processing Real-Time Data
In IoT setups, microprocessors handle real-time data processing. For instance, a smart irrigation system might use a microcontroller to read soil moisture levels (via a sensor outputting 0-5V analog signals) every 10 seconds and activate a water pump if the value falls below a threshold. This responsiveness is key to effective home automation systems.
Integration with Voice Assistants
Microprocessors also enable integration with voice assistants like Alexa or Google Home. By connecting to these platforms via APIs, a hobbyist can program an ESP8266 to turn on a fan when a voice command is received. This shows how IoT microprocessor control bridges physical hardware and digital interfaces.
 "
"
Basics of Home Automation PCB Design with Microprocessors
For hobbyists looking to build custom smart home devices, designing a printed circuit board (PCB) is often the next step. Home automation PCB design involves creating a layout that integrates a microprocessor with other components like sensors, relays, and power supplies.
Choosing the Right Microprocessor
Start with a microprocessor suited to your project. The Arduino Nano is great for simple tasks due to its small size (43mm x 18mm) and 5V operation. For IoT projects, the ESP8266 or ESP32 offers built-in Wi-Fi and more GPIO pins (up to 17 usable pins on the ESP32) for connecting multiple devices.
Key Components in PCB Design
Your PCB will need more than just a microprocessor. Include:
- Voltage Regulators: To step down input voltages (e.g., from 12V to 3.3V for the ESP8266) with minimal ripple (under 50mV).
- Relays or MOSFETs: For switching high-power loads like lights or appliances (handling up to 10A at 120V AC).
- Sensors: Such as temperature or motion sensors with specific input ranges (e.g., 0-1023 analog values on a 10-bit ADC).
- Connectors: For power and data, ensuring impedance matching to avoid signal loss.
Design Tips for Hobbyists
Use free tools like KiCad or EasyEDA to design your PCB. Keep traces short to reduce noise, especially for high-frequency signals in Wi-Fi modules (targeting impedance around 50 ohms). Also, add decoupling capacitors (e.g., 0.1μF) near the microprocessor to stabilize power delivery.
Once designed, you can etch your PCB at home or order from a manufacturer. Test your board with a multimeter to ensure voltages are correct (e.g., 3.3V at the microprocessor pins) before connecting devices.

Popular Microprocessors for Home Automation Projects
Here’s a quick rundown of microprocessors hobbyists often use in home automation systems. Each has unique features that suit different projects.
- Arduino Uno/Nano: Beginner-friendly, operates at 5V, with 14 digital I/O pins. Great for simple relays and sensor projects but lacks built-in Wi-Fi.
- ESP8266: Affordable (often under $5), with integrated Wi-Fi and 11 GPIO pins. Perfect for IoT microprocessor control in small setups.
- ESP32: More powerful than ESP8266, with Bluetooth, dual-core processing at 240MHz, and up to 36 GPIO pins. Ideal for complex smart home devices.
- Raspberry Pi (3/4): A full microcomputer with 1.5GHz processing and 40 GPIO pins. Best for advanced projects like home servers or video surveillance.
- PIC Microcontrollers: Used in industrial-style setups, with low power consumption (as low as 1μA in sleep mode). Requires more programming knowledge.
Choose based on your project needs. For a basic light controller, an ESP8266 is enough. For a multi-device hub, consider an ESP32 or Raspberry Pi.
Challenges and Solutions in Microprocessor-Based Home Automation
While building home automation systems with microprocessors is exciting, challenges can arise. Here are common issues and how to tackle them.
Power Management
Smart devices often run 24/7, so power efficiency matters. Microprocessors like the ESP8266 draw around 80mA at 3.3V during active use. Use deep sleep modes (reducing current to 10μA) when idle to save energy.
Signal Interference
Wi-Fi and Bluetooth signals can interfere in crowded networks. Place antennas away from metal objects and use shielded cables for sensitive analog sensors to maintain signal integrity (targeting noise levels below 10mV).
Programming Complexity
Coding for microprocessors can be tricky for beginners. Start with platforms like Arduino IDE, which offers libraries for common tasks (e.g., Wi-Fi setup on ESP modules). Online communities and tutorials can also help debug issues.
Getting Started with Your Own Home Automation Project
Ready to build something? Here’s a simple project idea for hobbyists: a smart light controller using an ESP8266.
- Materials: ESP8266 board, relay module (5V, 10A rating), PIR motion sensor, breadboard, and jumper wires.
- Setup: Connect the PIR sensor output to a GPIO pin (e.g., D5) on the ESP8266. Wire the relay input to another GPIO (e.g., D6) and connect the relay output to a light circuit.
- Code: Use Arduino IDE to program the ESP8266. Write a sketch to read the sensor (HIGH at 3.3V for motion) and toggle the relay (HIGH to close the circuit).
- Test: Power the setup with a 5V USB supply. Walk past the sensor to see if the light turns on. Adjust the sensor’s sensitivity if needed (usually via a potentiometer).
This project costs under $15 and takes a few hours. Once it works, expand by adding Wi-Fi control to turn the light on/off via a smartphone app.
Future Trends in Microprocessor-Controlled Home Automation
The field of home automation is evolving fast. Here are trends hobbyists should watch:
- AI Integration: Microprocessors with embedded AI (like in some smart speakers) process voice commands locally, reducing latency to under 50ms.
- Energy Harvesting: Future chips may power themselves via ambient energy (e.g., solar or thermal), cutting reliance on batteries.
- Enhanced Security: With IoT risks growing, microprocessors are adding encryption hardware to secure data transmission (e.g., AES-128 standards).
Conclusion: Power Up Your Smart Home with Microprocessors
Microprocessor-controlled devices are the backbone of modern home automation systems. From controlling smart home devices to enabling IoT microprocessor control, these chips offer endless possibilities for electronic hobbyists. Whether you’re diving into home automation PCB design or building a simple light controller, understanding microprocessor applications is your first step to creating a smarter home.


