 ALLPCB


If you're a hobbyist looking to level up your DIY PCB projects, mastering manual solder paste application is a game-changer. This technique allows you to work with tiny surface-mount components at home, achieving professional results without expensive equipment. In this comprehensive guide, we'll walk you through every step of using solder paste for home soldering, from choosing the right tools like a solder paste syringe to applying it with precision using methods like the solder paste toothpick method. Whether you're soldering for DIY PCBs or tackling small repairs, this guide has you covered with actionable tips and detailed instructions.
Why Use Solder Paste for DIY PCBs and Home Soldering?
Solder paste is a mix of tiny solder particles and flux, designed to make soldering surface-mount devices (SMDs) easier. Unlike traditional soldering with a wire and iron, solder paste lets you apply solder directly to PCB pads before placing components. This is especially useful for hobbyists working on DIY PCBs with small, densely packed components. By using solder paste for home soldering, you can save time, reduce errors, and create cleaner, more reliable connections.
Manual application of solder paste is ideal for hobbyists because it doesn't require costly automated equipment like stencil printers. With simple tools and techniques, you can achieve great results right on your workbench. Let's dive into the essentials of getting started with hand soldering with solder paste.
What You Need for Manual Solder Paste Application
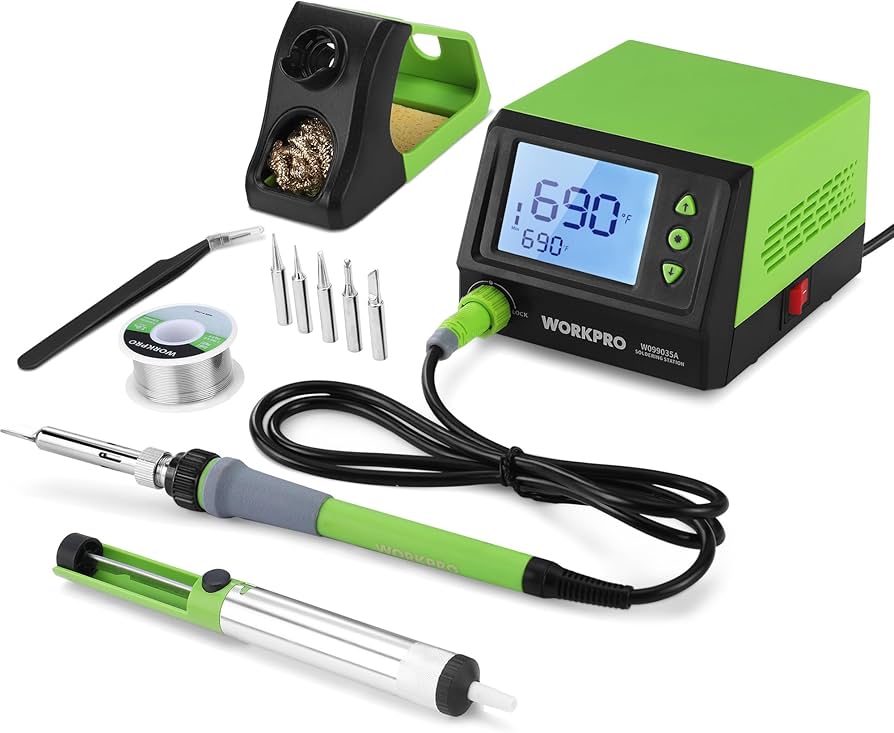
Before you begin, gather the right tools and materials. Having everything ready ensures a smooth process and reduces the risk of mistakes. Here's a list of essentials for manual solder paste application:
- Solder Paste: Choose a lead-free or leaded solder paste based on your preference and local regulations. Look for a paste with a fine particle size (Type 3 or Type 4) for better control with small components.
- Solder Paste Syringe: A syringe with a fine needle tip is perfect for precise application. It allows you to dispense small amounts of paste exactly where you need it.
- Toothpicks or Fine Tools: For the solder paste toothpick method, a toothpick or small probe helps spread or adjust paste on tiny pads.
- PCB and Components: Have your DIY PCB cleaned and ready, along with the SMD components you plan to solder.
- Hot Air Rework Station or Reflow Oven: While a soldering iron can work for larger components, a hot air tool or small reflow oven is ideal for melting solder paste evenly.
- Flux Pen: Extra flux can help with paste flow and prevent oxidation during heating.
- Tweezers: Precision tweezers are essential for placing small components accurately.
- Cleaning Supplies: Isopropyl alcohol, a brush, and lint-free wipes to clean the PCB before and after soldering.
Step-by-Step Guide to Manual Solder Paste Application
Now that you have your tools ready, let's walk through the process of applying solder paste manually. This step-by-step guide focuses on practical techniques for hobbyists using solder paste for DIY PCBs.
Step 1: Prepare Your Workspace and PCB
Start by setting up a clean, well-lit workspace. Any dust or debris on your PCB can interfere with soldering, so use isopropyl alcohol and a brush to clean the board thoroughly. Ensure the copper pads are free of oxidation—shiny pads mean better solder adhesion. If the pads look dull, a quick scrub with a fine abrasive pad can help.
Secure the PCB on a flat surface using a PCB holder or double-sided tape to prevent movement during application. A stable board is crucial for precision when using a solder paste syringe.
Step 2: Choose and Prepare Your Solder Paste
Solder paste comes in different compositions and viscosities. For hobbyists, a no-clean solder paste is often the best choice because it leaves minimal residue and doesn't require extensive cleanup. Check the paste's shelf life and storage conditions—most pastes need to be refrigerated and brought to room temperature (about 25°C or 77°F) before use to ensure proper consistency.
If using a solder paste syringe, attach a fine needle tip (around 0.5mm to 1mm diameter) for better control. Gently squeeze out a small amount of paste onto a piece of scrap paper to test the flow and remove any air bubbles.

Step 3: Apply Solder Paste to PCB Pads
This is the core of manual solder paste application. Hold the syringe at a 45-degree angle to the PCB and gently squeeze to dispense a small dot of paste onto each pad. The amount of paste depends on the pad size—for a typical 0603 resistor pad (1.6mm x 0.8mm), a dot about 0.5mm in diameter is usually enough. Too much paste can cause bridging between pads, while too little may result in weak joints.
For very small or closely spaced pads, consider the solder paste toothpick method. After dispensing a tiny amount of paste, use a toothpick to spread it evenly across the pad or to remove excess. This method gives you extra control and works well for intricate designs.
Work systematically across the board, applying paste to all pads for one component before moving to the next. This helps maintain consistency and prevents the paste from drying out.
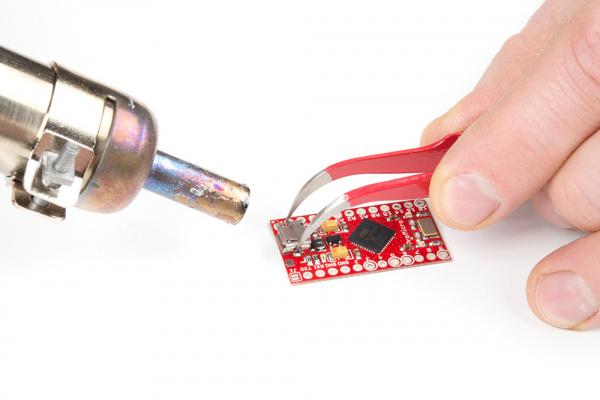
Step 4: Place Components on the Paste
Using precision tweezers, carefully place each SMD component onto its corresponding pads. The sticky nature of solder paste will hold the component in place temporarily. Align the component's leads or contacts with the paste-covered pads, ensuring proper orientation (check polarity for capacitors and LEDs). Press down lightly to embed the component into the paste, but avoid excessive force that could displace the paste.
For densely populated boards, place components in order of size—start with smaller ones like resistors and capacitors before moving to larger ICs. This reduces the risk of knocking over already-placed parts.
Step 5: Reflow the Solder Paste
Once all components are placed, it's time to melt the solder paste to form permanent connections. For hand soldering with solder paste, a hot air rework station is the most accessible tool for hobbyists. Set the temperature to around 220-250°C (428-482°F) for lead-free solder paste, or 180-200°C (356-392°F) for leaded paste, depending on the manufacturer's recommendations.
Hold the hot air nozzle about 2-3 inches (5-7 cm) above the board and move it in slow, circular motions to heat the area evenly. You'll see the paste turn shiny as it melts—this usually takes 30-60 seconds per section. Avoid overheating, as it can damage components or lift pads from the PCB.
If you don't have a hot air tool, a small toaster oven can work as a makeshift reflow oven. Preheat the oven to the appropriate temperature and follow a reflow profile (gradual heating and cooling) to prevent thermal shock. Always monitor the process closely to avoid burning the board.
Step 6: Inspect and Clean the Board
After reflowing, let the PCB cool naturally for a few minutes. Inspect the solder joints under a magnifying glass or microscope. Look for shiny, smooth joints that fully wet the pads and component leads. If you spot bridges (solder connecting adjacent pads) or cold joints (dull, uneven solder), apply additional flux and reheat the area with a soldering iron or hot air tool to correct it.
Finally, clean the board with isopropyl alcohol and a brush to remove any flux residue. Even with no-clean paste, cleaning improves the board's appearance and prevents long-term corrosion.
Tips for Success with Solder Paste for Home Soldering
To ensure consistent results with solder paste for home soldering, keep these tips in mind:
- Work Quickly but Carefully: Solder paste can dry out if exposed to air for too long. Apply it and place components within 10-15 minutes to avoid issues.
- Store Paste Properly: Keep unused solder paste in the refrigerator (around 5-10°C or 41-50°F) to extend its shelf life, typically 6-12 months. Always let it warm up to room temperature before use.
- Practice on Scrap Boards: If you're new to manual solder paste application, practice on a test PCB to get a feel for the syringe and toothpick methods before working on your actual project.
- Use Minimal Paste: A common mistake is applying too much paste. Remember that a thin layer (about 0.1-0.2mm thick) is often enough for most SMD pads.
- Check Component Datasheets: Some components have specific reflow profiles or temperature limits. Review their datasheets to avoid damage during heating.
Common Challenges and How to Overcome Them
Even with careful preparation, you might face some hurdles during hand soldering with solder paste. Here are common issues and solutions:
- Solder Bridging: If solder connects adjacent pads, use a soldering iron with a fine tip and solder wick to remove excess solder. Adding flux before reheating can help separate the joints.
- Uneven Paste Application: If paste dots are inconsistent, refine your technique with the solder paste syringe by applying steady pressure. The toothpick method can also help even out small discrepancies.
- Components Shifting: If components move during reflow, ensure the paste is tacky enough to hold them in place before heating. Applying a small dab of paste on larger components can provide extra grip.
- Cold Solder Joints: Dull or cracked joints indicate insufficient heat. Reheat the area with a hot air tool or iron, adding a touch of flux to improve flow.
Why Manual Solder Paste Application is Perfect for Hobbyists
For hobbyists, solder paste for DIY PCBs offers a cost-effective way to tackle complex projects without investing in professional equipment. Techniques like the solder paste toothpick method and using a solder paste syringe make it accessible to anyone with basic tools and a bit of patience. Plus, mastering manual solder paste application builds skills that translate to more advanced electronics work, opening doors to intricate designs and repairs.
Compared to traditional soldering, solder paste reduces the risk of overheating components with a soldering iron since the heat is applied more uniformly during reflow. It also allows you to work faster on boards with multiple components, as you apply paste and place parts in one go before heating.
Conclusion: Start Soldering with Confidence
Mastering manual solder paste application is a valuable skill for any hobbyist working on DIY PCBs. By following this step-by-step guide, you can achieve clean, reliable solder joints using simple tools like a solder paste syringe or the solder paste toothpick method. From preparing your workspace to reflowing and inspecting your work, each step builds toward professional-quality results in home soldering.
With practice, you'll gain confidence in hand soldering with solder paste, making even the smallest components manageable. So, grab your tools, start small, and watch your electronics projects come to life with precision and ease. We're here to support your journey with resources and expertise for all your PCB needs.


