 ALLPCB


If you're an electrical engineer working on printed circuit board (PCB) rework, you’ve likely encountered the challenge of dealing with conformal coatings. These protective layers shield PCBs from moisture, dust, and chemicals, but they can be a hurdle during repairs. So, how do you handle conformal coating removal techniques, conformal coating rework, and conformal coating reapplication? In short, the process involves identifying the coating type, using the right removal method (like chemical solvents or mechanical abrasion), and reapplying a compatible coating with precision to maintain protection. This blog dives deep into each step, offering practical advice, specific techniques, and actionable tips to ensure successful conformal coating repair and rework.
Whether you're troubleshooting a high-value PCB or performing routine maintenance, understanding conformal coating types and the best practices for handling them is crucial. Let’s explore the ins and outs of this process to help you achieve reliable results every time.
What Is Conformal Coating and Why Is It Used on PCBs?
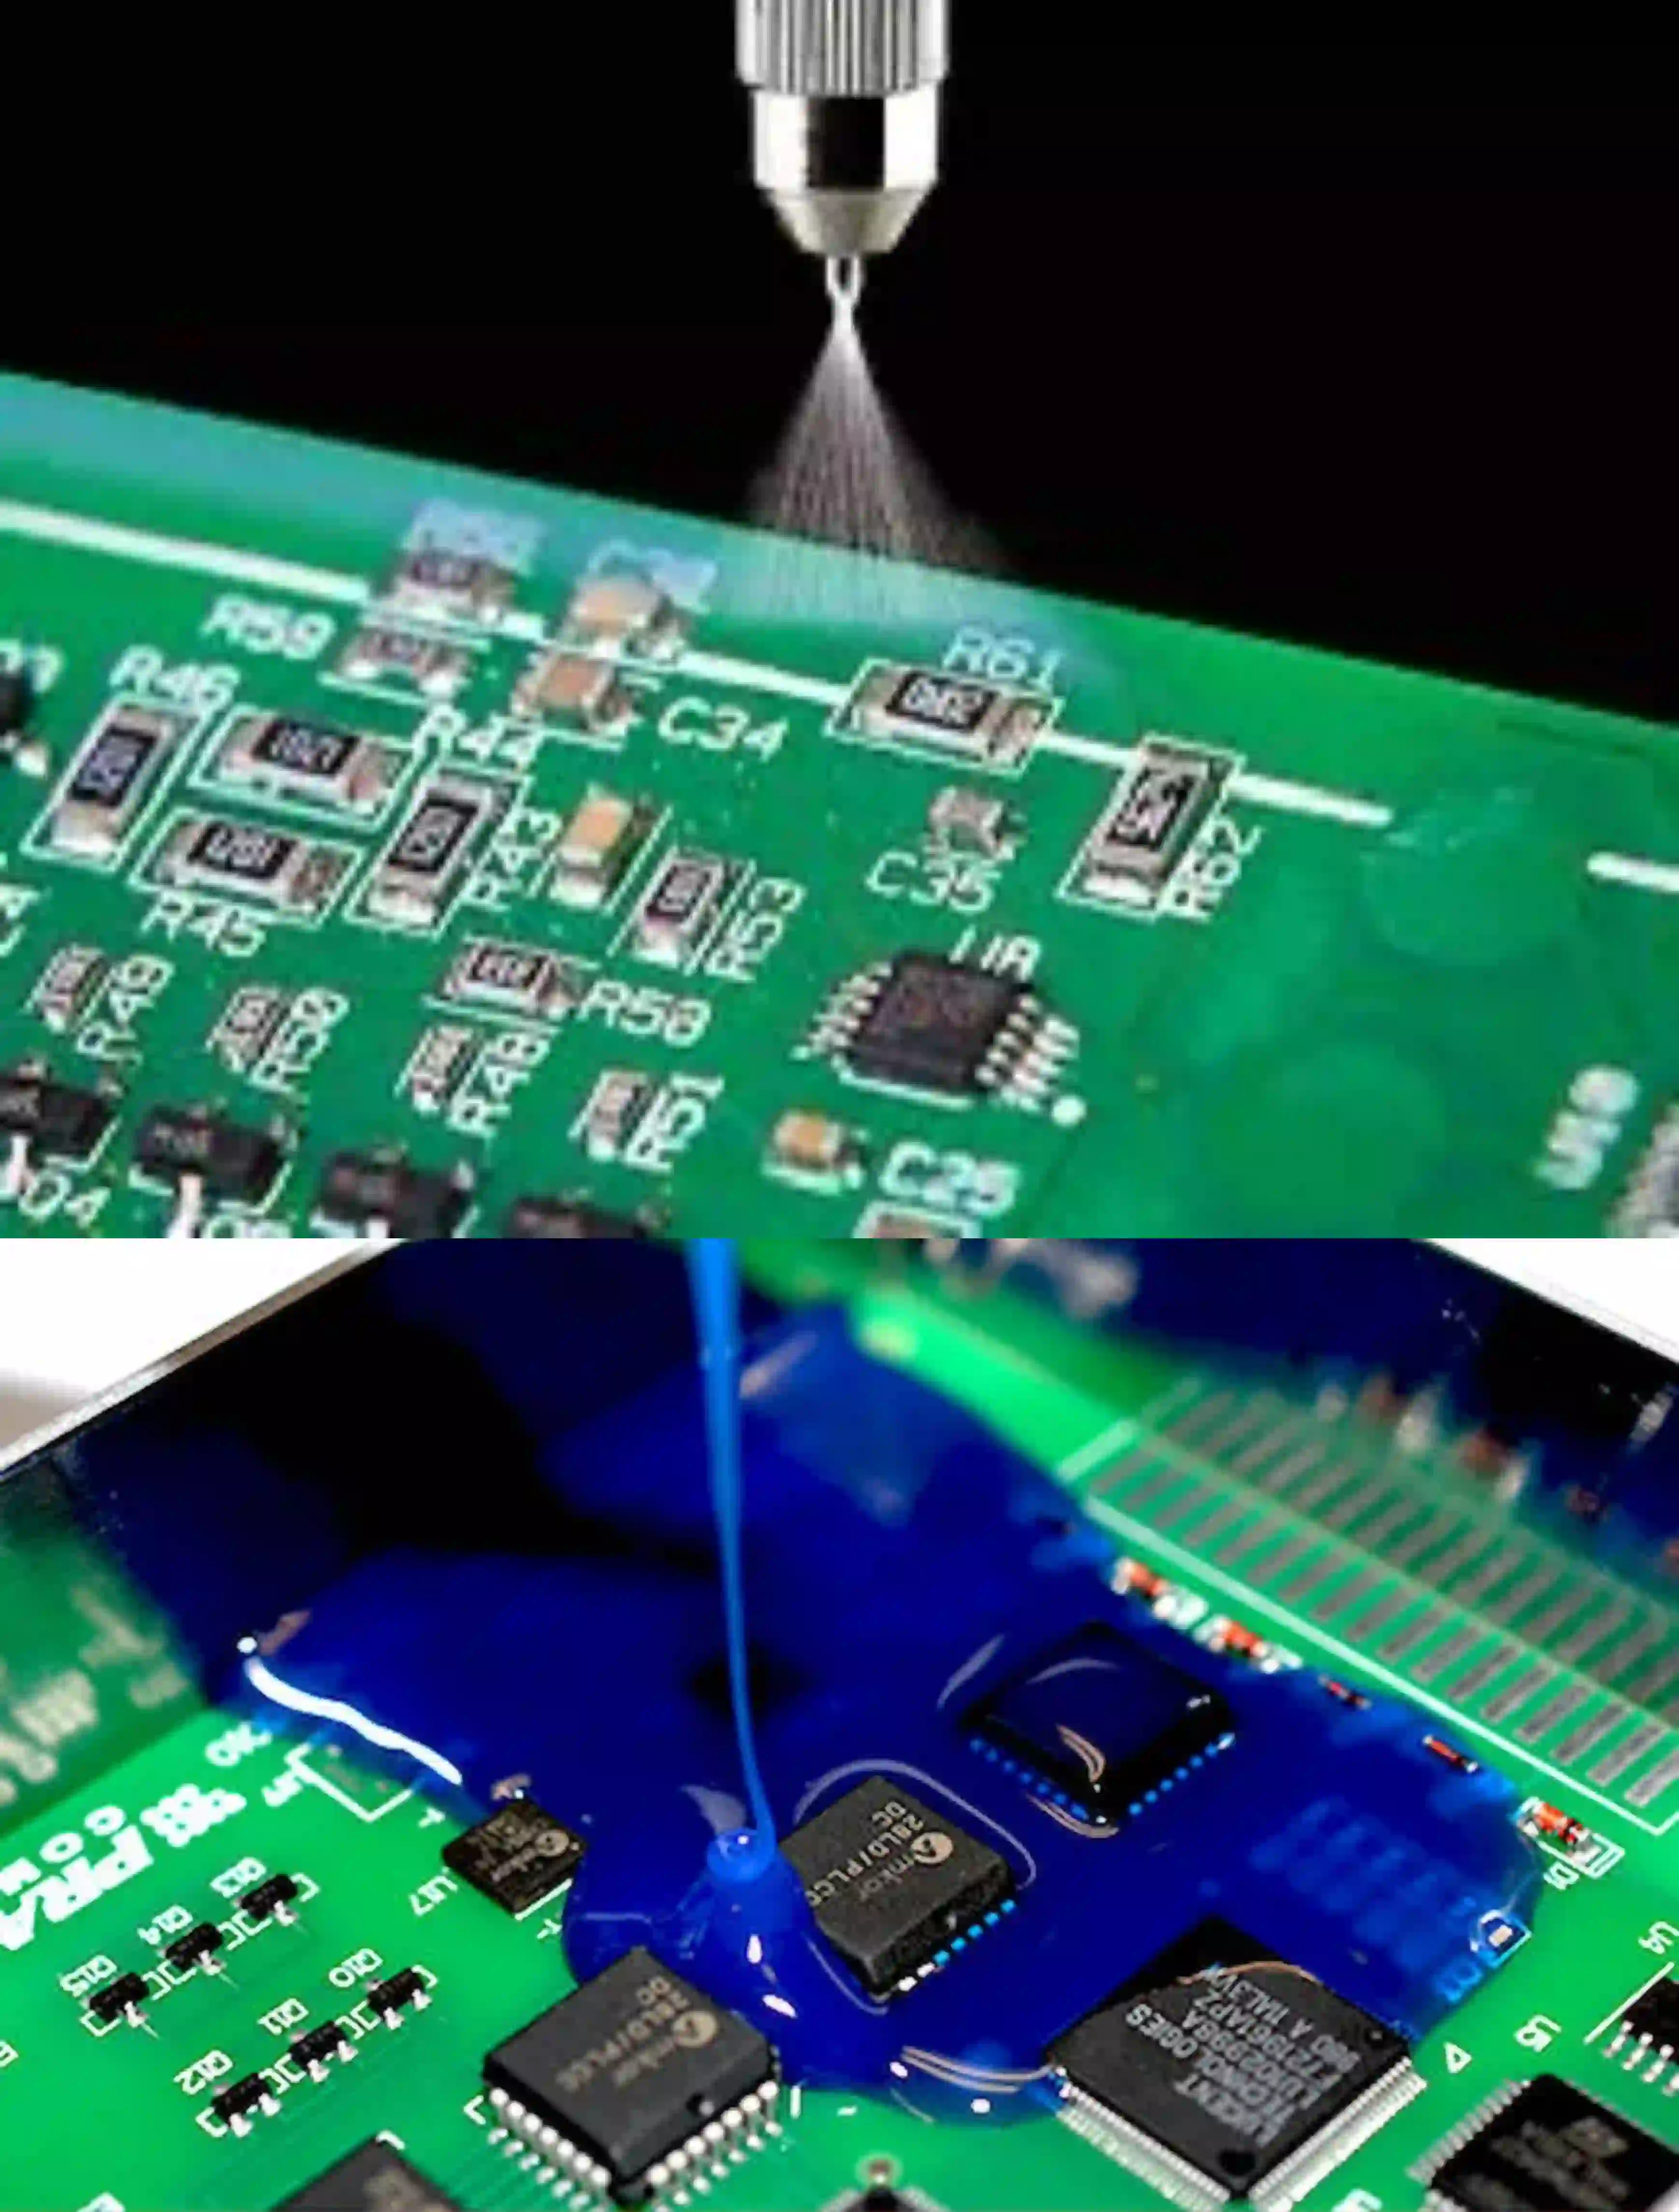
Conformal coating is a thin protective layer applied to PCBs to safeguard electronic components from environmental hazards like moisture, dust, chemicals, and temperature extremes. Typically ranging from 25 to 75 micrometers in thickness, these coatings "conform" to the shape of the board, ensuring complete coverage. For electrical engineers, conformal coatings are vital in industries such as aerospace, automotive, and medical devices, where reliability under harsh conditions is non-negotiable.
However, during PCB rework or repair, this protective layer often needs to be removed to access components or traces. Once repairs are complete, conformal coating reapplication is necessary to restore protection. Knowing the type of coating and the right methods for removal and reapplication can save time, prevent damage, and maintain the board’s integrity.

Understanding Different Conformal Coating Types
Before diving into removal and rework, it’s essential to identify the type of conformal coating on your PCB. Each type has unique properties, affecting how it’s removed and reapplied. Here are the most common conformal coating types electrical engineers encounter:
- Acrylic (AR): Easy to apply and remove, often used for general-purpose protection. Soluble in common solvents like acetone or isopropyl alcohol.
- Silicone (SR): Highly flexible and resistant to temperature extremes, ideal for vibration-prone environments. Removal often requires specialized solvents or mechanical methods.
- Polyurethane (UR): Offers excellent chemical resistance, often used in harsh environments. Removal can be challenging and may require strong solvents or abrasion.
- Epoxy (ER): Extremely durable but rigid, making it prone to cracking under stress. Removal typically involves thermal or mechanical methods due to its toughness.
- Parylene (XY): A vapor-deposited coating with superior barrier properties but very difficult to remove without specialized equipment like plasma etching.
Identifying the coating type is the first step in conformal coating rework. Check the PCB documentation or consult the manufacturer if possible. If unknown, visual inspection (e.g., texture or color) or a small solvent test in an inconspicuous area can provide clues.
Conformal Coating Removal Techniques: A Step-by-Step Guide
Removing conformal coating during PCB rework requires precision to avoid damaging the board or components. The method you choose depends on the coating type, available tools, and the board’s sensitivity. Below are the most effective conformal coating removal techniques for electrical engineers:
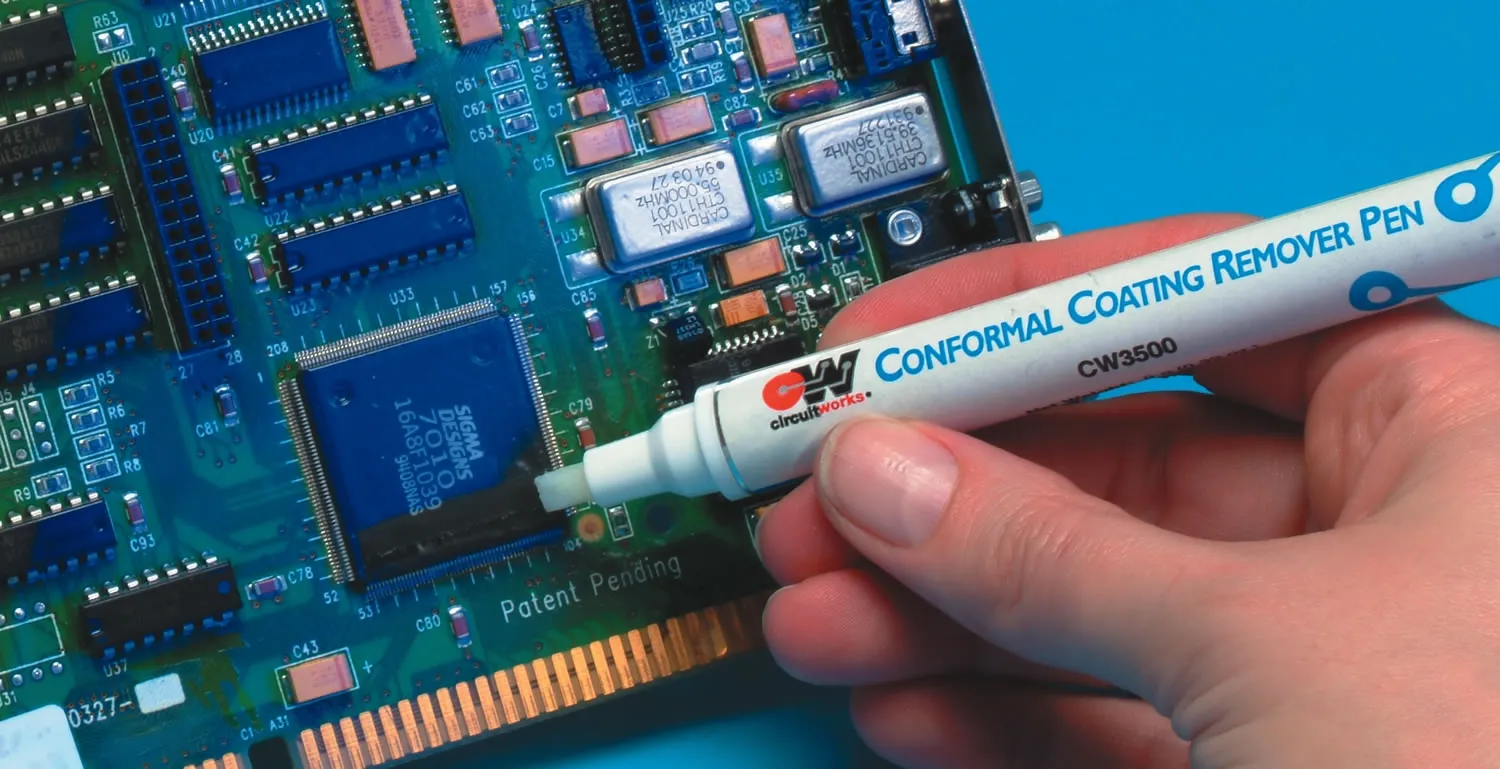
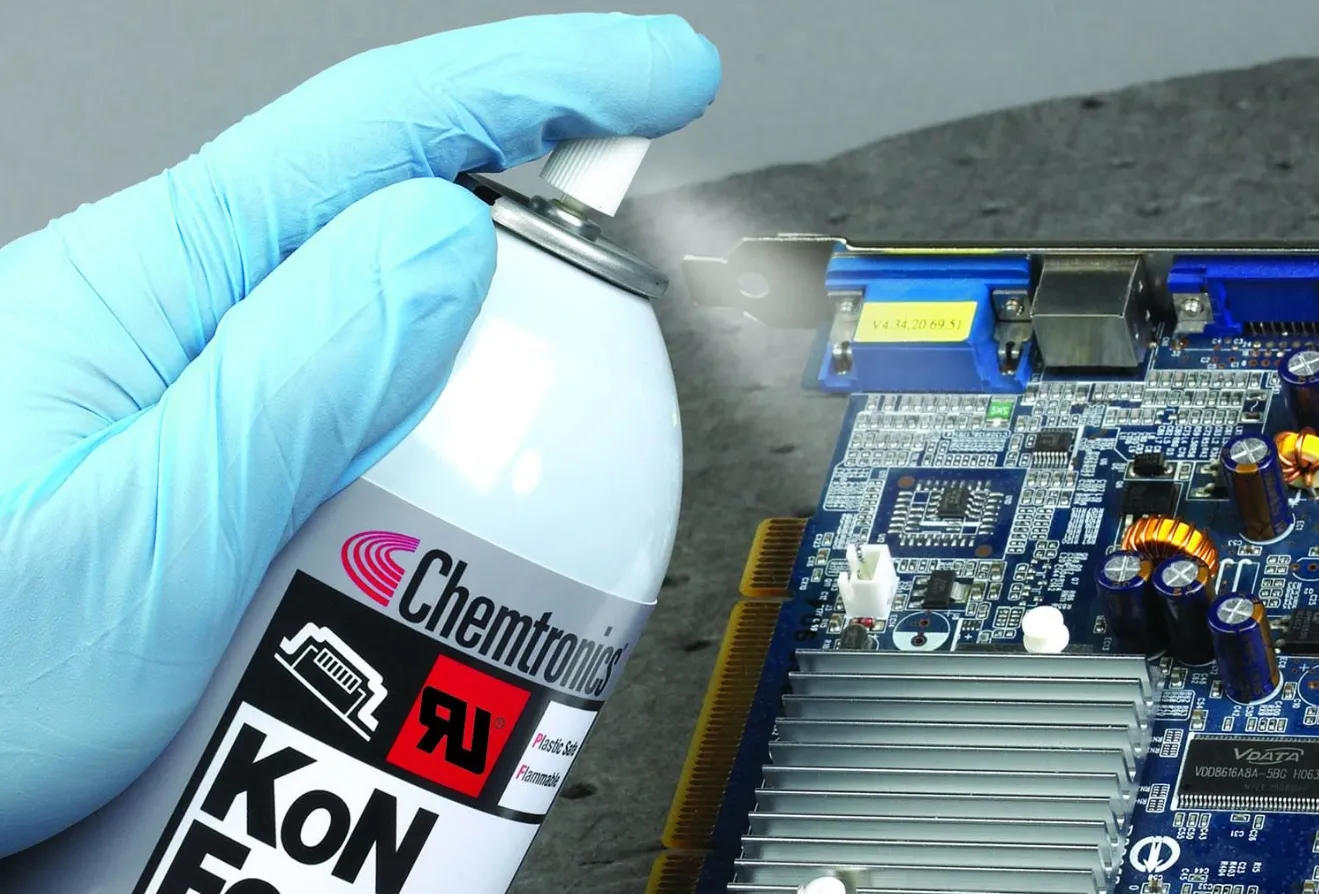
1. Chemical Removal
This method uses solvents to dissolve the coating. It’s most effective for acrylic and some polyurethane coatings.
- Tools Needed: Solvent (e.g., acetone for acrylics, methylene chloride for tougher coatings), cotton swabs, brushes, and protective gear (gloves, goggles).
- Steps:
- Work in a well-ventilated area and wear protective gear.
- Apply the solvent to a small area using a swab or brush.
- Wait 1-2 minutes for the coating to soften, then gently wipe or scrape it away.
- Repeat until the desired area is clear, then clean with isopropyl alcohol to remove residue.
- Caution: Solvents can damage certain components or plastics. Test on a small area first and avoid prolonged exposure.
2. Mechanical Removal
For tougher coatings like silicone or epoxy, mechanical methods such as abrasion may be necessary.
- Tools Needed: Micro-abrasive tools, sandpaper (fine grit, 400-600), or a rotary tool with a soft brush attachment.
- Steps:
- Isolate the area to be reworked using masking tape to protect surrounding components.
- Gently abrade the coating with sandpaper or a rotary tool at low speed (e.g., 500-1000 RPM).
- Check progress frequently to avoid damaging traces or components.
- Clean the area with compressed air or a soft brush to remove debris.
- Caution: Excessive force can damage copper traces or solder masks. Use minimal pressure and fine tools.
3. Thermal Removal
Thermal methods use heat to soften or burn off coatings, often for epoxy or polyurethane.
- Tools Needed: Hot air rework station or heat gun (temperature-controlled, ideally 200-300°C).
- Steps:
- Set the heat gun to a low temperature and test on a scrap board if possible.
- Apply heat to the coating for 10-20 seconds, keeping the nozzle 2-3 inches away.
- Use tweezers or a plastic scraper to peel away the softened coating.
- Clean the area with isopropyl alcohol to remove residue.
- Caution: Overheating can damage components or cause delamination. Monitor temperature closely and avoid sensitive areas.
4. Plasma Etching (for Parylene)
Parylene coatings are notoriously difficult to remove. Plasma etching, which uses ionized gas to strip the coating, is often the only viable method.
- Tools Needed: Access to a plasma etching machine (often outsourced to specialized facilities).
- Steps: Consult with a service provider for specific instructions, as this requires industrial equipment.
- Caution: This method is expensive and not feasible for small-scale rework. Consider it only for high-value PCBs.
Best Practices for Conformal Coating Rework
During conformal coating rework, the goal is to remove only the necessary amount of coating without compromising the PCB. Here are some tips to ensure success:
- Mask Sensitive Areas: Use heat-resistant tape or silicone masks to protect areas that don’t need rework. This prevents accidental damage to components or untouched coating.
- Work in Small Sections: Focus on a 1-2 square inch area at a time to maintain control and minimize risk.
- Test Removal Methods: If unsure of the coating type, test your chosen method on a non-critical area or scrap board first.
- Document the Process: Note the coating type, removal method, and any issues encountered. This can streamline future rework projects.
For example, while working on a high-frequency PCB for a telecommunications project, I once encountered a silicone coating that resisted chemical removal. Switching to a fine-grit abrasive tool at low speed (around 800 RPM) allowed me to clear a small area for component replacement without damaging nearby traces rated for signals up to 2 GHz.
Conformal Coating Reapplication: Restoring Protection
After completing repairs, conformal coating reapplication is critical to restore the PCB’s environmental protection. Here’s how to do it effectively:
1. Surface Preparation
Before reapplying, ensure the PCB surface is clean and free of debris or old coating residue.
- Clean the area with isopropyl alcohol (90% or higher) using a lint-free cloth or swab.
- Remove any dust or particles with compressed air.
- Allow the board to dry completely (typically 5-10 minutes) to avoid trapping moisture under the new coating.
2. Choose the Right Coating
Match the new coating to the original type or select one compatible with the PCB’s operating environment. For instance, if the original was a polyurethane coating for chemical resistance in an industrial setting, stick with polyurethane unless a better alternative is justified.
3. Application Methods
The application method depends on the coating type and available tools. Common methods include:
- Brush Application: Ideal for small areas. Use a fine brush to apply thin, even layers (25-50 micrometers per layer). Allow 1-2 hours of curing between layers if multiple are needed.
- Spray Application: Use an aerosol can or spray gun for larger areas. Maintain a distance of 8-12 inches and apply in a sweeping motion for uniform coverage. Typical curing time is 2-4 hours at room temperature.
- Dip Coating: Submerge the PCB in a coating solution for full coverage. Best for high-volume production, not rework. Curing times vary (check manufacturer specs).
- Selective Coating Machines: For precision, automated machines can apply coating only to specific areas, avoiding connectors or test points. Often used in professional settings.
4. Curing and Inspection
Follow the manufacturer’s curing instructions, which may involve air drying (24-48 hours) or heat curing (e.g., 80°C for 30 minutes). After curing, inspect the coating under magnification (10x or higher) for bubbles, pinholes, or unevenness. Reapply if defects are found, as even a small gap can compromise protection.
Common Challenges in Conformal Coating Repair and Solutions
Even with careful planning, conformal coating repair can present challenges. Here are some common issues and how to address them:
- Uneven Removal: If removal leaves an uneven surface, lightly sand the area with fine-grit sandpaper (600 grit) before reapplication to ensure adhesion.
- Component Damage: If solvents or heat affect components, consider using localized masking or switching to a gentler removal method like micro-abrasion.
- Poor Adhesion of New Coating: This often results from inadequate cleaning. Double-check surface preparation and ensure no oily residues remain.
- Coating Over Connectors: Avoid applying coating to connectors or test points by masking them during reapplication. If coated accidentally, remove with a swab and solvent before curing.
Conclusion: Mastering Conformal Coating Rework for Reliable PCBs
Handling conformal coating removal techniques, conformal coating rework, and conformal coating reapplication is a critical skill for electrical engineers involved in PCB repair. By understanding conformal coating types, selecting the appropriate removal method, and following best practices for conformal coating repair, you can ensure your reworked PCBs remain protected and reliable. Whether you’re using chemical solvents for acrylic coatings or thermal methods for epoxy, precision and preparation are key.
Next time you face a rework project, refer to this guide for step-by-step instructions and practical tips. Have a specific challenge or experience with conformal coating rework? Share your thoughts or questions in the comments below—we’d love to hear from fellow engineers! Keep experimenting, stay safe, and ensure your PCBs are ready for any environment.


