ALLPCB


If you've ever soldered components onto a PCB and ended up with a blob of solder connecting two pins that shouldn't be connected, you've encountered a solder bridge. These pesky little shorts can cause circuits to malfunction, but don’t worry—fixing them is easier than you think! In this guide, we'll walk you through DIY solder bridge removal, home PCB repair, and essential soldering iron techniques to help beginners turn their soldering messes into masterpieces. Whether you're new to electronics or just need a refresher, you'll find practical tips, step-by-step instructions, and tools like a solder wick tutorial to master fixing PCB shorts for beginners.
Let’s dive into the world of soldering repairs with actionable advice that will boost your confidence and skills. By the end of this post, you'll know how to spot, remove, and prevent solder bridges, ensuring your projects work flawlessly.
What Are Solder Bridges and Why Do They Happen?
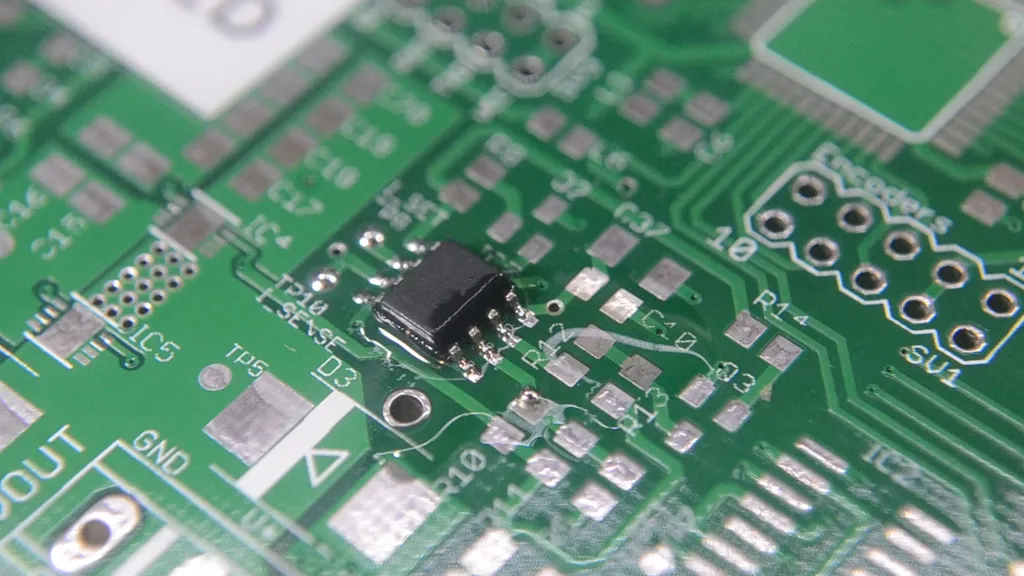
A solder bridge is an unintended connection formed by excess solder between two or more points on a printed circuit board (PCB). This can happen between adjacent pins on an integrated circuit (IC), pads, or traces, causing a short circuit that disrupts the intended flow of electricity. The result? Your circuit might fail to work, or worse, components could get damaged due to incorrect current paths.
So, why do solder bridges form in the first place? Here are the most common culprits:
- Too Much Solder: Applying more solder than needed can create blobs that spread to nearby pins or pads.
- Improper Soldering Temperature: If your soldering iron is too hot or too cold, the solder may not flow properly, leading to uneven application.
- Lack of Flux: Flux helps solder flow smoothly and prevents oxidation. Without it, solder can clump and form bridges.
- Poor Technique: Shaky hands or incorrect iron angles can cause solder to spread where it shouldn’t.
- Close Component Spacing: Modern PCBs often have tightly packed components, making it easier for solder to bridge small gaps.
Understanding these causes is the first step to prevention and repair. Now, let’s move on to the tools you’ll need for DIY solder bridge removal and home PCB repair.
Essential Tools for Solder Bridge Removal and PCB Repair
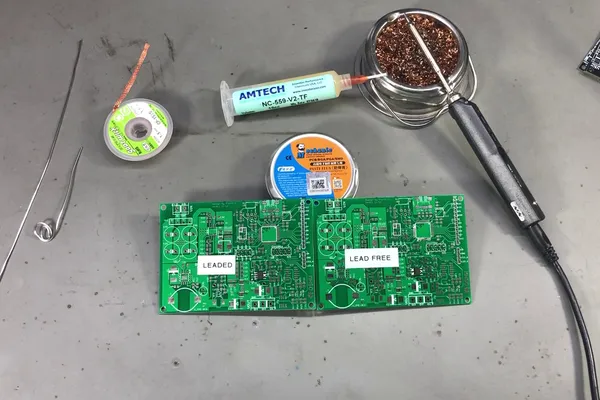
Before you start fixing solder bridges, make sure you have the right tools on hand. Here’s a beginner-friendly list of must-haves for home PCB repair:
- Soldering Iron (25-40W): A temperature-controlled iron is ideal for precise work. Look for one with a fine tip (1mm or smaller) for detailed tasks.
- Solder Wick (Desoldering Braid): This braided copper wire absorbs excess solder when heated, making it perfect for removing bridges.
- Flux: Available in liquid or paste form, flux cleans the area and helps solder flow or be removed more easily.
- Desoldering Pump: Also known as a solder sucker, this tool vacuums up molten solder for quick removal.
- Tweezers: Precision tweezers help handle small components and clean up debris.
- Isopropyl Alcohol (90% or higher) and Brush: For cleaning the PCB after repairs to remove flux residue.
- Magnifying Glass or Loupe: Useful for inspecting tiny solder joints and bridges on densely packed boards.
With these tools ready, you’re set to tackle solder bridges and other soldering mishaps. Let’s break down the process of fixing PCB shorts for beginners.
Step-by-Step Guide to DIY Solder Bridge Removal
Removing a solder bridge might seem intimidating at first, but with the right approach, it’s a straightforward task. Follow these steps to clean up your PCB and restore functionality.
Step 1: Prepare Your Workspace
Set up a clean, well-lit area with good ventilation. Soldering produces fumes, so work in a space with a fan or open window. Place your PCB on a non-conductive surface, like a silicone mat, to avoid static damage. Gather all your tools so they’re within reach.
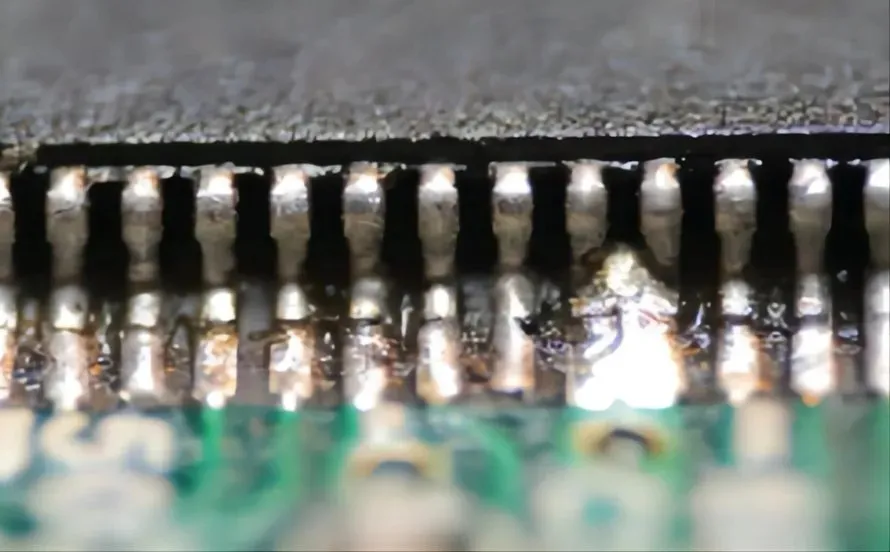
Step 2: Inspect the Solder Bridge
Use a magnifying glass to locate the solder bridge. Look for excess solder connecting two pins, pads, or traces. Identifying the exact spot will help you target your removal efforts without damaging nearby components.
Step 3: Apply Flux to the Bridge
Dab a small amount of flux onto the solder bridge using a brush or flux pen. Flux reduces surface tension and helps the solder flow when heated, making it easier to remove.
Step 4: Use a Soldering Iron to Heat the Area
Set your soldering iron to a moderate temperature (around 300°C or 570°F for most lead-free solders). Place the tip of the iron on the solder bridge to melt the solder. Avoid holding the iron on the board for more than 3-5 seconds to prevent overheating components or lifting traces.
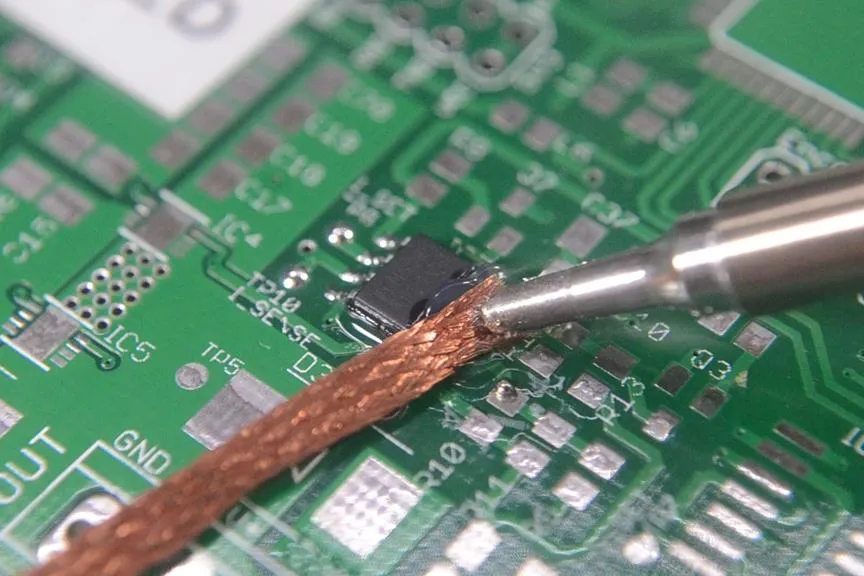
Step 5: Remove Excess Solder with Solder Wick
Here’s a quick solder wick tutorial for effective removal. Cut a small piece of solder wick (about 1-2 inches long) and place it over the molten solder bridge. Press the soldering iron tip onto the wick, allowing it to absorb the solder. You’ll see the wick soak up the excess solder, leaving the pins or pads clean. Repeat if necessary.
Step 6: Clean and Inspect the Area
Once the bridge is removed, use isopropyl alcohol and a brush to clean off any leftover flux residue. Inspect the area again with a magnifying glass to ensure no solder remains and the pins are separate. Test for continuity with a multimeter to confirm the short is gone.
Soldering Iron Techniques to Prevent Solder Bridges
Prevention is always better than repair, so let’s explore some soldering iron techniques to avoid solder bridges in the first place. These tips are especially useful for beginners who are still mastering their soldering skills.
Technique 1: Use the Right Amount of Solder
Apply just enough solder to form a small, shiny cone around the joint. A good rule of thumb is to touch the solder wire to the joint for only 1-2 seconds after heating the pad and component lead. Too much solder increases the risk of bridges.
Technique 2: Maintain Proper Iron Temperature
For most hobbyist projects using lead-free solder, set your iron between 280-320°C (536-608°F). If the temperature is too low, the solder won’t flow properly, leading to cold joints or bridges. If it’s too high, you risk damaging components or the PCB.
Technique 3: Angle Your Iron Correctly
Hold the soldering iron at a 45-degree angle to the joint. This allows for precise control and minimizes the chance of solder spreading to adjacent pins. Keep your hand steady and avoid dragging the tip across multiple pads.
Technique 4: Work on One Pin at a Time
When soldering multi-pin components like ICs, focus on one pin at a time. Don’t rush to apply solder to all pins in one go, as this can cause excess solder to pool and form bridges. Take breaks if needed to maintain focus.
Technique 5: Use Flux Generously
Flux isn’t just for removal—it’s also a preventative tool. Apply flux to the pads before soldering to ensure the solder flows smoothly and adheres only where it’s supposed to. This reduces the likelihood of unwanted connections.
Fixing PCB Shorts for Beginners: Beyond Solder Bridges
Solder bridges aren’t the only cause of shorts on a PCB. Other issues, like damaged traces or debris, can also create unintended connections. Here are some additional tips for fixing PCB shorts for beginners.
Check for Hidden Shorts
Use a multimeter in continuity mode to test between pins or traces that shouldn’t be connected. If you hear a beep or see a low resistance reading (close to 0 ohms), there’s a short. Visually inspect the board for stray solder bits, dust, or damaged insulation that might be causing the issue.
Repair Damaged Traces
If a trace is scratched or broken, it can sometimes cause a short by exposing conductive paths. Use a conductive pen to redraw the trace or apply a small amount of solder to reconnect it. Be cautious not to create new bridges in the process.
Clean Thoroughly After Repairs
Residue from flux or debris can sometimes cause subtle shorts. After any repair, clean the board with isopropyl alcohol and a soft brush. Let it dry completely before powering on the circuit to avoid any risk of shorting due to moisture.
Common Mistakes to Avoid During Solder Bridge Removal
As a beginner, it’s easy to make mistakes when attempting DIY solder bridge removal. Here are some pitfalls to watch out for:
- Overheating the Board: Holding the soldering iron on a spot for too long can lift pads or damage components. Limit contact to 3-5 seconds per attempt.
- Using Too Much Force: Don’t press hard with the iron or tools like tweezers. Gentle pressure is enough to melt solder or remove components without breaking the PCB.
- Skipping Flux: Flux is crucial for effective solder removal. Without it, the solder may not wick up properly, leaving you with a mess.
- Ignoring Safety: Always wear safety glasses and work in a ventilated area. Solder fumes and small flying debris can be hazardous.
Troubleshooting Tips for Persistent Solder Bridges
If you’ve followed the steps above and still can’t remove a solder bridge, don’t give up. Here are some troubleshooting ideas:
- Switch Tools: If solder wick isn’t working, try a desoldering pump to suck up the excess solder.
- Adjust Temperature: Increase the soldering iron temperature slightly (by 10-20°C) if the solder isn’t melting easily. Be cautious not to overheat.
- Check Your Wick: Old or oxidized solder wick may not absorb solder well. Use a fresh piece for better results.
- Reapply Flux: If the area seems dry or the solder isn’t flowing, add more flux to refresh the surface.
Final Thoughts on Mastering Solder Bridges
Turning a soldering mess into a masterpiece is all about patience, practice, and the right techniques. With this guide, you’ve learned the essentials of DIY solder bridge removal, home PCB repair, and soldering iron techniques to prevent and fix issues. From using a solder wick tutorial to mastering fixing PCB shorts for beginners, you now have the tools and knowledge to tackle soldering challenges head-on.
Remember that soldering is a skill that improves with time. Each project you complete builds your confidence and precision. Keep experimenting, stay safe, and soon you’ll be creating flawless PCBs that work as intended. If you’re looking for high-quality PCB manufacturing or assembly services to support your hobbyist projects, our team at ALLPCB is here to help with reliable solutions tailored to your needs.