 ALLPCB


If you're diving into DIY electronics and looking to master stencil printing for PCB assembly at home, you're in the right place. Stencil printing is a crucial step in applying solder paste accurately to your printed circuit boards (PCBs) for surface-mount device (SMD) assembly. To get started, you'll need the right tools and equipment for a smooth and precise process. Key items include a high-quality stencil, a squeegee, solder paste, a stable work surface, and proper cleaning supplies. In this comprehensive guide, we'll walk you through the essential tools and equipment for stencil printing at home, covering everything from basic setups to tips for achieving professional results in your home assembly setup.
Why Stencil Printing Matters for DIY Electronics
Stencil printing is a fundamental technique in PCB assembly, especially when working with SMD components. It ensures that solder paste is applied evenly and precisely to the pads on your PCB, which is critical for creating reliable electrical connections. For hobbyists and DIY enthusiasts, mastering stencil printing at home can elevate the quality of your projects, making them look and function more like professionally manufactured boards. With the right stencil printing tools and PCB assembly equipment, you can achieve consistent results without the need for expensive industrial setups.
In this blog, we'll break down the must-have tools for solder paste application, explain how to use them effectively, and share practical tips for setting up a home assembly environment. Whether you're a beginner or an experienced maker, this guide will help you build a functional and efficient workspace for your DIY electronics projects.
What You Need for Stencil Printing at Home: The Basics
Before diving into the detailed list of tools, let's cover the core purpose of stencil printing in PCB assembly. A stencil is a thin sheet, usually made of stainless steel or durable plastic, with cutouts that match the layout of the pads on your PCB. By aligning the stencil over the board and spreading solder paste across it, you deposit paste only where it's needed. This process requires specific PCB assembly equipment and a steady hand, especially in a home setup. Below are the essential tools to get you started with stencil printing at home.
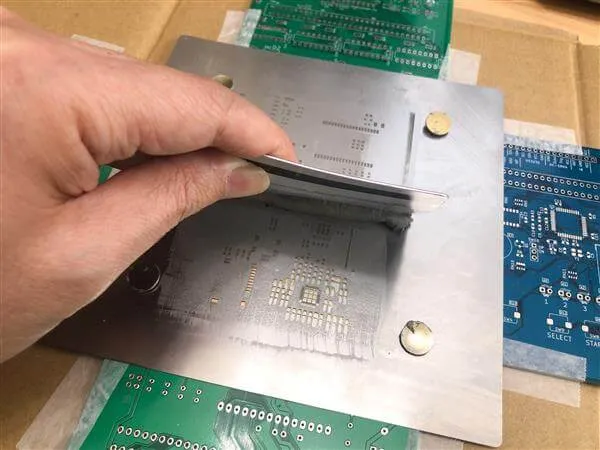
1. A High-Quality Stencil
The stencil is the heart of the stencil printing process. For home use, you can opt for laser-cut stainless steel stencils, which offer precision and durability. These stencils typically have a thickness of 0.1mm to 0.15mm, depending on the size of the components you're working with. Thinner stencils (around 0.1mm) are ideal for fine-pitch components with smaller pads, while thicker ones (0.15mm) work better for larger components requiring more solder paste.
For DIY electronics, ensure the stencil matches your PCB design exactly. Many online platforms allow you to upload your Gerber files to create custom stencils tailored to your board's layout. A well-made stencil ensures accurate solder paste application and minimizes errors like bridging or insufficient paste.
2. Solder Paste
Solder paste is a mixture of tiny solder particles and flux, used to create electrical and mechanical connections between SMD components and the PCB. For home assembly setups, choose a lead-free solder paste with a no-clean flux to simplify the process and reduce health risks. Common alloys like SAC305 (tin-silver-copper) are widely used due to their reliability and compatibility with most components. Store your solder paste in a refrigerator at around 4-8°C to maintain its shelf life, and always let it reach room temperature (about 25°C) before use to ensure smooth application.
A small 50g or 100g syringe or jar of solder paste is usually enough for home projects. Look for paste with a Type 3 or Type 4 particle size, as these are suitable for fine-pitch components often found in modern electronics.
3. Squeegee for Solder Paste Application
A squeegee is used to spread solder paste evenly across the stencil, pushing it through the cutouts onto the PCB pads. For DIY electronics, a manual squeegee works well and is cost-effective. You can choose between metal or plastic squeegees, with metal ones offering better control and durability. A squeegee with a width of 50-100mm is ideal for most small to medium-sized PCBs.
When using a squeegee, apply consistent pressure at a 45-degree angle to ensure even distribution of solder paste. Too much pressure can cause paste to smear under the stencil, while too little may result in uneven application.
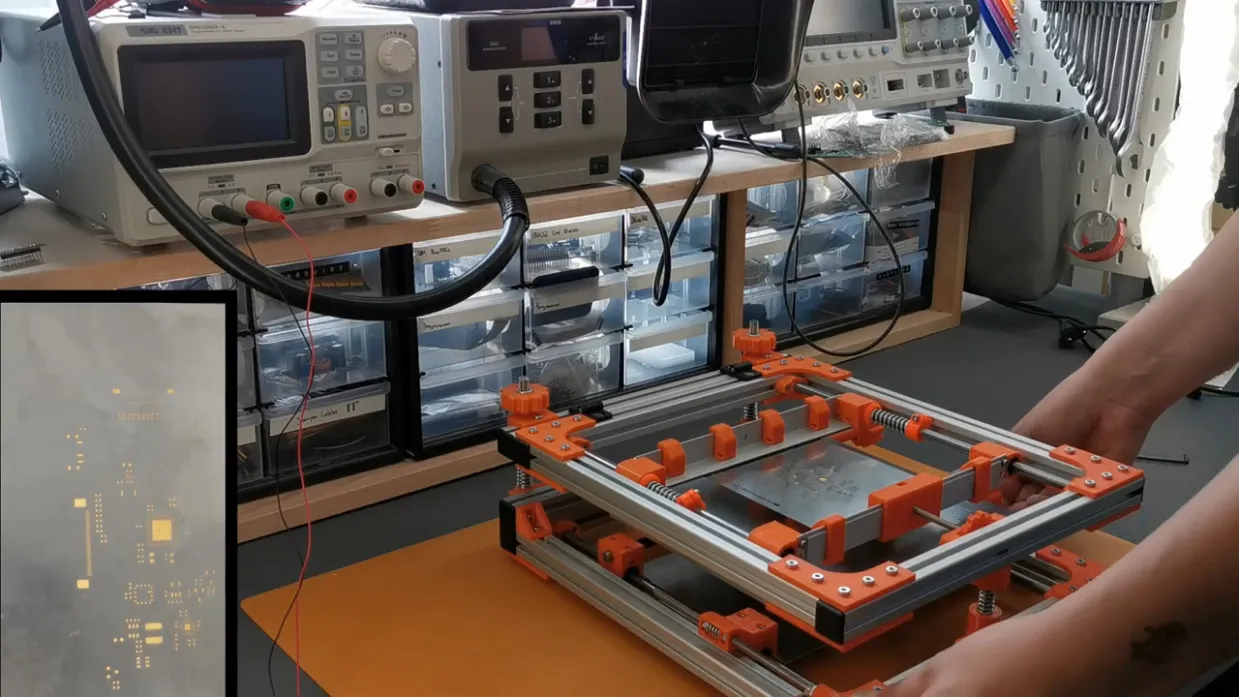
4. Stable Work Surface and PCB Holder
A flat, stable work surface is essential for accurate stencil printing at home. Any slight tilt or movement can misalign the stencil and ruin the solder paste application. Consider using a small workbench or a dedicated desk for your home assembly setup. To keep the PCB in place during printing, use a PCB holder or a simple jig made from foam or rubber to prevent slipping.
For added precision, some hobbyists use a stencil frame or alignment jig to hold both the stencil and PCB securely. While not strictly necessary for beginners, these tools can significantly improve consistency in solder paste application.
Additional Tools for a Seamless Home Assembly Setup
Beyond the basics, several additional stencil printing tools and accessories can make your workflow smoother and more efficient. These items help with preparation, application, and cleanup, ensuring your DIY electronics projects are successful.
5. Isopropyl Alcohol and Cleaning Supplies
After stencil printing, you'll need to clean the stencil and squeegee to prevent dried solder paste from clogging the apertures or contaminating future projects. Isopropyl alcohol (IPA) with a concentration of 70-90% is ideal for cleaning. Use lint-free wipes or cotton swabs to remove residue from the stencil's surface and edges. Proper cleaning extends the life of your stencil and ensures consistent results for each use.
Keep a small spray bottle of IPA and a roll of paper towels handy on your workbench for quick cleanups. Always wear gloves when handling IPA to protect your skin.
6. Tweezers and Magnifying Glass
For fine-pitch components and small PCBs, tweezers are invaluable for placing components after solder paste application. A magnifying glass or a low-cost USB microscope can help you inspect the solder paste deposits to ensure they’re uniform and correctly aligned. These tools are especially useful when working with components as small as 0402 or 0201 sizes, where precision is critical.
7. Masking Tape or Alignment Aids
Aligning the stencil with the PCB can be tricky, especially in a home assembly setup without professional equipment. Use masking tape to temporarily secure the stencil to the PCB or workbench, ensuring it doesn’t shift during solder paste application. Alternatively, small alignment pins or DIY jigs can help maintain perfect positioning.
Setting Up Your Home Assembly Workspace
Creating an efficient home assembly setup is just as important as having the right stencil printing tools. A well-organized workspace reduces errors, saves time, and makes DIY electronics projects more enjoyable. Here are some tips to optimize your environment for stencil printing at home.
Good Lighting and Ventilation
Ensure your workspace has bright, focused lighting to help you see small details on the PCB and stencil. A desk lamp with adjustable brightness works well for this purpose. Additionally, solder paste and cleaning chemicals like IPA can release fumes, so work in a well-ventilated area. Open a window or use a small fan to keep the air circulating.
Organized Storage for Tools and Materials
Keep your PCB assembly equipment organized to avoid clutter and misplaced items. Use small containers or a toolbox to store solder paste, tweezers, cleaning supplies, and other tools. Label everything clearly so you can find what you need quickly. A tidy workspace also reduces the risk of contaminating your PCB with debris or stray solder paste.
Temperature and Humidity Control
Solder paste is sensitive to temperature and humidity, which can affect its consistency during application. Aim to work in an environment with a temperature of 20-25°C and humidity below 60%. If possible, store your solder paste in a sealed container in the fridge when not in use to prevent it from drying out or absorbing moisture.
Tips for Successful Solder Paste Application at Home
With the right tools and setup, stencil printing at home can yield professional-quality results. However, the process requires practice and attention to detail. Here are some practical tips to help you master solder paste application in your DIY electronics projects.
- Practice on Scrap Boards: Before working on your actual project, test your stencil printing technique on a scrap PCB or a piece of cardboard. This helps you get a feel for the squeegee pressure and angle without risking your main board.
- Use the Right Amount of Paste: Apply a small bead of solder paste along one edge of the stencil, roughly 1-2cm wide. Too much paste can lead to smearing, while too little won’t fill all the apertures properly.
- Work Quickly but Carefully: Solder paste can dry out if left exposed to air for too long. Complete the printing process within 5-10 minutes, and cover the paste container when not in use.
- Inspect After Printing: After lifting the stencil, check the paste deposits under a magnifying glass. Look for uniform coverage and clean edges. If you spot issues like bridging (paste connecting adjacent pads), wipe off the paste with IPA and reprint.
Scaling Up Your Home Assembly Setup
As you gain experience with stencil printing at home, you might want to invest in advanced tools to improve efficiency and handle more complex projects. Consider adding these upgrades to your PCB assembly equipment collection over time.
- Manual Stencil Printer: A small desktop stencil printer can automate the alignment and printing process, reducing errors and saving time. These are compact enough for home use and often cost under $200.
- Hot Air Rework Station: After applying solder paste and placing components, a hot air station helps reflow the solder for a permanent bond. Look for one with adjustable temperature settings (typically 200-450°C) for versatility.
- ESD Protection: Electrostatic discharge (ESD) can damage sensitive components. Use an ESD mat and wrist strap to protect your electronics during assembly.
Conclusion: Building Your Stencil Printing Skills at Home
Stencil printing at home is an accessible and rewarding skill for anyone interested in DIY electronics. With the essential tools and equipment—such as a quality stencil, solder paste, squeegee, and a stable work surface—you can achieve precise solder paste application and create professional-looking PCBs. Setting up a dedicated home assembly workspace with proper lighting, ventilation, and organization further enhances your success rate.
Start with the basics, practice your technique, and gradually upgrade your PCB assembly equipment as your skills grow. By investing time and effort into mastering stencil printing tools and processes, you'll open up new possibilities for your electronics projects, from simple circuits to complex multi-layer designs. Dive into this hands-on journey, and watch your DIY creations come to life with precision and reliability.


