 ALLPCB


Introduction
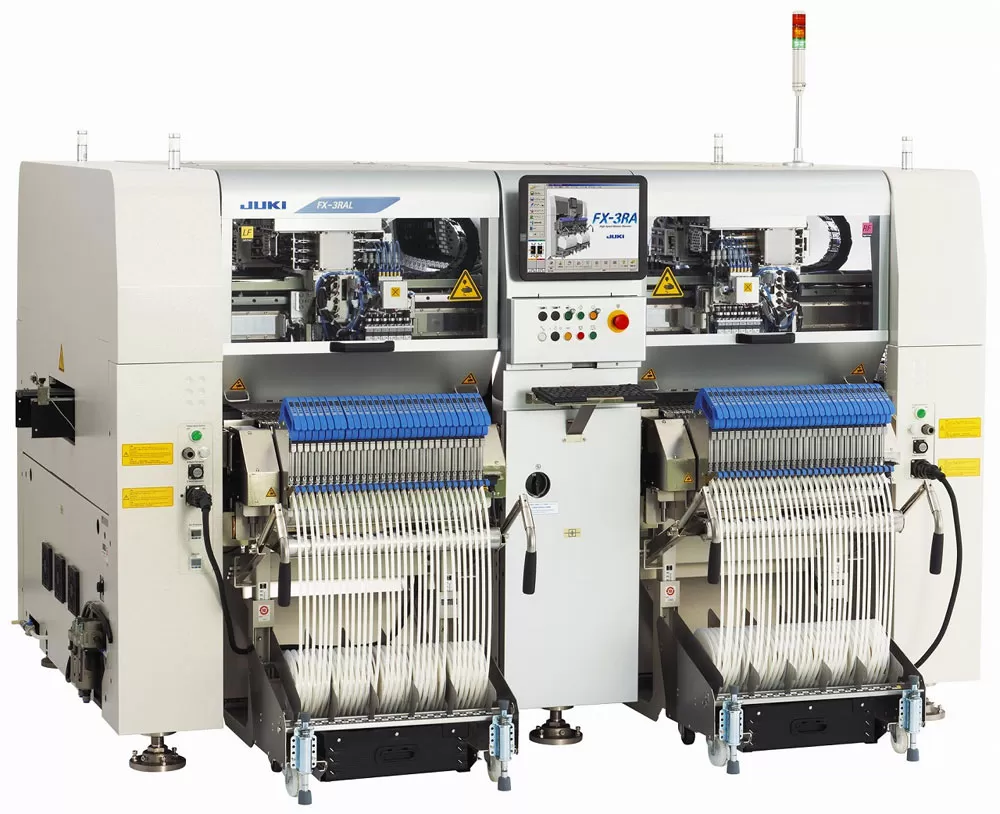
Pick and place machines form the core of surface mount technology (SMT) assembly lines, handling the precise placement of components onto printed circuit boards. Proper maintenance of these machines directly impacts production yield, component placement accuracy, and overall equipment uptime. Electrical engineers responsible for SMT lines must prioritize a structured pick and place machine maintenance schedule to prevent downtime and costly repairs. Neglecting routine tasks can lead to issues like misplacements, nozzle failures, or mechanical wear, disrupting high-volume assembly. This article outlines practical strategies for SMT machine preventative maintenance, focusing on actionable steps tailored for engineering teams. By following these guidelines, engineers can extend machine life and maintain consistent performance.
Why Pick and Place Machine Maintenance Matters
In SMT assembly, pick and place machines operate under demanding conditions, cycling thousands of components per hour with micron-level precision. Dust, residue from solder paste, and mechanical friction accumulate over time, degrading performance if not addressed. A well-implemented SMT equipment maintenance program minimizes these risks, ensuring compliance with industry standards like IPC-9850A for placement accuracy characterization. Engineers benefit from reduced defect rates, as clean nozzles and lubricated axes prevent common faults such as skipped picks or tombstoning. Moreover, preventative maintenance aligns with quality management principles in ISO 9001:2015, promoting systematic checks that catch issues early. Ultimately, investing time in maintenance schedules translates to reliable production and lower total cost of ownership.
Failure to maintain these systems often stems from reactive rather than proactive approaches, leading to unplanned stops that cascade through the assembly line. For instance, clogged nozzles can halt placement entirely, forcing manual interventions. Regular upkeep also preserves calibration, vital for handling fine-pitch components in modern electronics. Electrical engineers should view maintenance not as overhead but as a critical engineering control for process stability.
Key Mechanisms and Common Failure Points in Pick and Place Machines
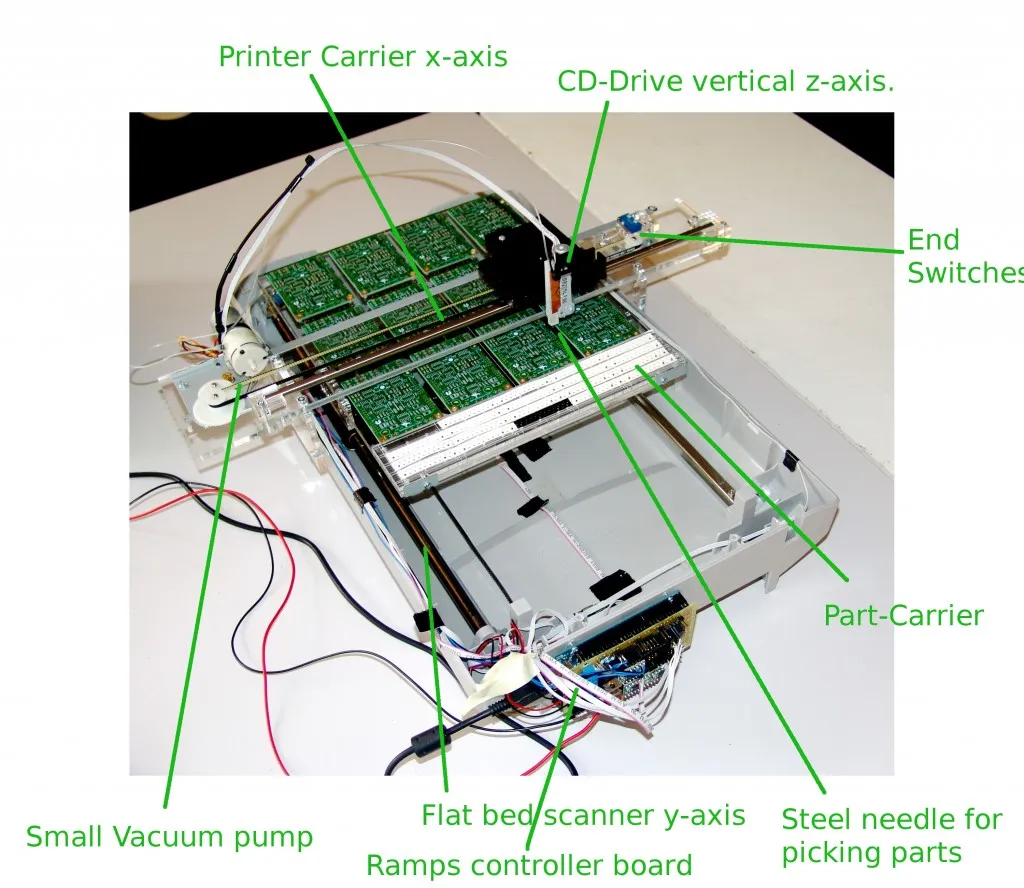
Pick and place machines rely on vacuum nozzles, vision systems, feeders, and linear motion systems for operation. Nozzles pick components via vacuum suction, but residue buildup inside the tip reduces grip, causing drop errors. Vision cameras align parts, yet dust on lenses leads to offset placements detectable only post-reflow. Feeders supply components, and jammed tapes or worn vibrators interrupt flow. Linear axes, driven by belts, screws, or rails, experience backlash from insufficient lubrication, affecting speed and repeatability as defined in IPC-9850A testing protocols.
Environmental factors exacerbate these issues; excess humidity promotes corrosion on electrical contacts, while vibrations loosen fasteners. Overheating from poor airflow around motors shortens servo life. Engineers troubleshooting these must isolate root causes, such as verifying vacuum pressure or inspecting belt tension. Understanding these mechanisms guides targeted interventions, preventing minor wear from escalating into major overhauls.
Establishing a Pick and Place Machine Maintenance Schedule
A comprehensive pick and place machine maintenance schedule divides tasks into daily, weekly, monthly, and periodic intervals for efficiency. Daily routines focus on visual inspections and basic cleaning to keep the machine operational. Start by wiping external surfaces to remove dust and paste residue, then warm up the system for at least 20 minutes to stabilize temperatures. Check nozzles for clogs, feeders for smooth tape advancement, and belts for debris. Verify air pressure and vacuum levels, ensuring no leaks in lines. Log any anomalies to track trends.
Weekly tasks build on dailies with deeper cleaning and lubrication. Inspect X and Y axes for smooth motion, applying grease to screws and guides as needed. Clean vision system lenses with approved solvents. Test feeder alignment and replace worn O-rings. These steps in SMT machine preventative maintenance prevent friction-related wear.
Monthly maintenance involves filter cleaning, belt tension checks, and full nozzle audits. Calibrate placement accuracy using test boards, referencing IPC-9850A methodologies. Examine electrical panels for secure connections and signs of arcing.
Periodic overhauls, every three to six months, include belt replacements, full lubrication cycles, and professional alignment. Annual reviews assess overall wear, aligning with ISO 9001:2015 documentation requirements. Customize schedules based on usage hours, prioritizing high-throughput lines.
- Daily — Surface cleaning, nozzle checks, warm-up, air/vacuum verification
- Weekly — Axis lubrication, lens cleaning, feeder tests
- Monthly — Filter service, calibration, belt inspections
- Quarterly/Semi-Annual — Belt/O-ring replacement, full alignment
- Annual — Comprehensive audit, electrical checks
Pick and Place Nozzle Cleaning Procedures
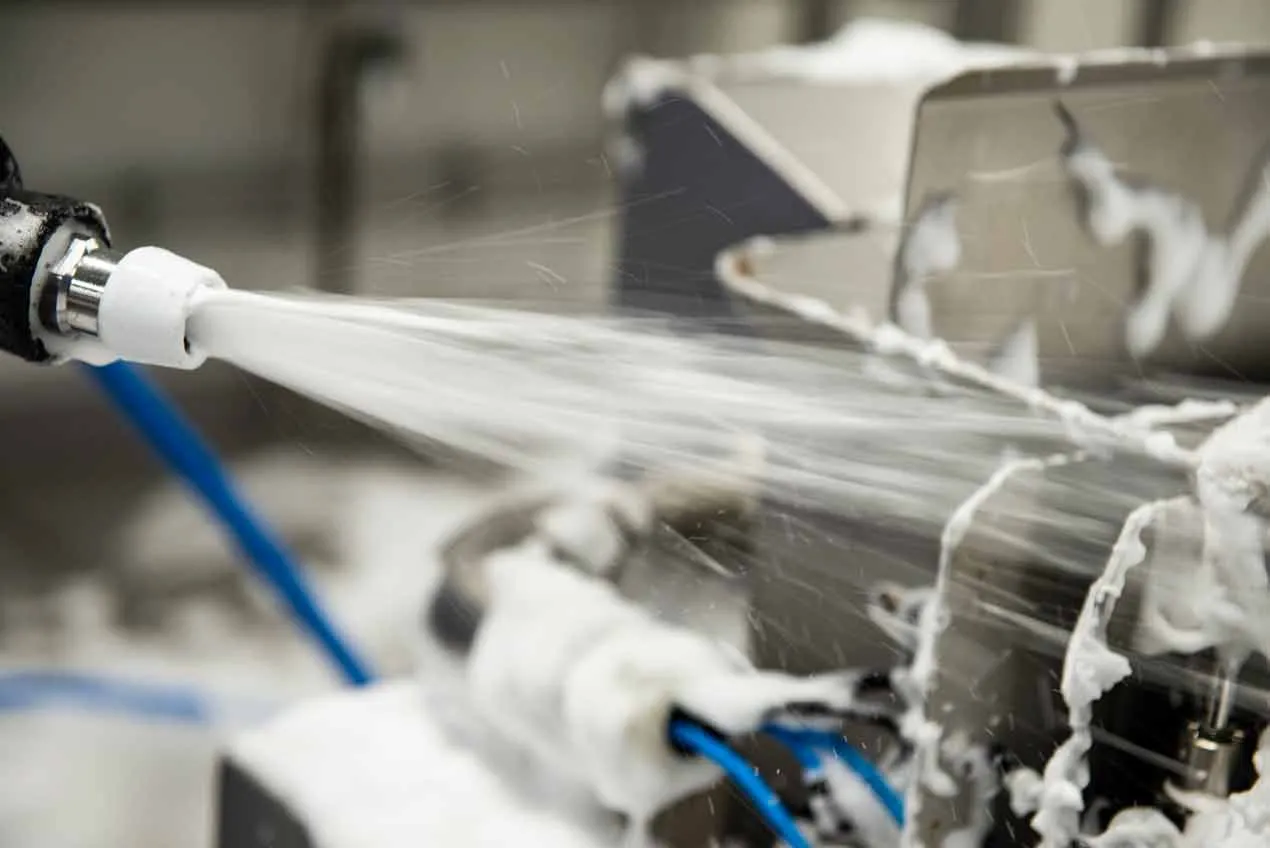
Pick and place nozzle cleaning stands out as a high-impact task in SMT equipment maintenance, directly affecting pick-up rates. Nozzles accumulate flux, paste, and oxide from components, narrowing bores and weakening vacuum. Begin by removing nozzles from the head, powering down the machine first. Use isopropyl alcohol on lint-free swabs to gently rotate inside the tip eight times forward and backward, dislodging debris without scratching. For stubborn buildup, employ ultrasonic baths with neutral cleaners, followed by air drying.
Avoid metal tools that deform tips; instead, opt for plastic probes if needed. Inspect under magnification for cracks or wear, replacing damaged units promptly. Dry cleaning with compressed air suits light dirt, while wet methods handle heavy residue. Integrate this into daily routines for high-use nozzles, extending life and reducing errors.
Related Reading: Understanding Pick and Place Machine Nozzles: Types, Selection, and Best Practices
Troubleshoot persistent clogs by checking feeder tape adhesion or vacuum leaks upstream. Proper cleaning ensures compliance with placement standards, minimizing defects downstream.
Lubricating Pick and Place Machines: Best Practices
Lubricating pick and place machines targets linear motion components to reduce wear and maintain precision. Apply white lithium grease to X and Y axis screws, rails, and guides, wiping excess to prevent attraction of contaminants. Perform this weekly or after 500 operating hours, powering off and isolating the machine. Use manufacturer-specified lubricants to avoid chemical incompatibility or gumming.
Over-lubrication traps dust, accelerating failure, so use minimal amounts and cycle axes to distribute evenly. Check belts for tension without lubrication, as they rely on dry operation. Monitor for hardened residue, cleaning before reapplying.
In humid environments, inspect for corrosion on lubricated surfaces. This practice sustains speed and accuracy, aligning with equipment characterization in IPC-9850A.
Troubleshooting Common Issues and Best Practices
Engineers often face skipped picks, traced to nozzle wear or low vacuum. Verify pressure at 60-90 PSI, adjusting regulators. Misalignments signal axis backlash; tighten or lubricate as needed. Feeder jams require tape path cleaning and vibrator checks.
Best practices include operator training on standardized checklists, ESD controls during maintenance, and logging for predictive trends. Environmentally, maintain clean rooms with controlled airflow. Integrate AOI feedback to correlate machine performance with defects.
Related Reading: The Advantages of Using Pick and Place Machines for Prototype Assembly
Conclusion
Effective pick and place machine maintenance ensures long-term reliability through structured schedules, targeted cleaning, and lubrication. Electrical engineers implementing these practices achieve higher yields and uptime in SMT lines. Prioritize daily habits while scaling to periodic deep dives, referencing standards for validation. Consistent application prevents failures, supports quality goals, and optimizes assembly efficiency.
FAQs
Q1: What does a typical pick and place machine maintenance schedule include?
A1: A pick and place machine maintenance schedule features daily cleaning and inspections, weekly lubrication of axes, monthly calibrations, and quarterly part replacements. Focus on nozzles, feeders, and vision systems to catch wear early. This SMT machine preventative maintenance approach minimizes downtime and sustains accuracy for electrical engineers managing production.
Q2: How often should pick and place nozzle cleaning be performed?
A2: Perform pick and place nozzle cleaning daily for high-use tips, using alcohol swabs or ultrasonic methods. Weekly deep cleans address buildup, preventing pick errors. Inspect for damage during routines to maintain vacuum integrity in SMT equipment maintenance.
Q3: What are the steps for lubricating pick and place machines?
A3: Power down, apply grease to screws and rails sparingly, then cycle axes to distribute. Do this weekly, cleaning old residue first. Use compatible lubricants to avoid issues, ensuring smooth motion in linear systems as part of SMT machine preventative maintenance.
Q4: Why is SMT equipment maintenance critical for placement accuracy?
A4: SMT equipment maintenance preserves nozzle function, axis alignment, and calibration, directly impacting placement per IPC-9850A. Neglect leads to defects like offsets or drops. Regular schedules support reliable performance in demanding assembly environments.


