ALLPCB


Repairing an electronic Printed Circuit Board (PCB) can be a daunting task, but with the right tools, techniques, and patience, it’s a skill you can master. Whether you're dealing with damaged traces, faulty components, or complex Ball Grid Array (BGA) chips, this guide will walk you through the process step by step. From basic soldering to advanced reballing techniques, we’ll cover everything you need to know about PCB repair, focusing on key areas like BGA components, soldering, and reballing.
At its core, PCB repair involves identifying the issue, replacing or fixing damaged parts, and ensuring the board functions as intended. This blog post will dive deep into actionable methods, tools, and best practices to help you restore your electronic boards effectively.
What Is PCB Repair and Why Is It Important?
PCB repair is the process of fixing a malfunctioning or damaged circuit board to restore its functionality. PCBs are the backbone of electronic devices, connecting components like resistors, capacitors, and integrated circuits (ICs) through conductive traces. When a PCB fails, it can lead to device malfunction, data loss, or costly replacements. Repairing a PCB is often more cost-effective than replacing the entire board or device, especially for high-value or custom electronics.
Common reasons for PCB damage include physical stress, overheating, power surges, or manufacturing defects. Issues like broken traces, damaged pads, or failed BGA components can disrupt the flow of electricity, causing the device to fail. By mastering PCB repair, you can extend the life of your electronics and save significant costs.
Tools and Equipment for PCB Repair
Before diving into repair techniques, let’s go over the essential tools you’ll need for effective PCB repair, including soldering and BGA reballing tasks. Having the right equipment ensures precision and prevents further damage to the board.
- Soldering Iron or Station: A temperature-controlled soldering iron (around 25-40 watts) or a soldering station is crucial for soldering and desoldering components. Look for one with fine tips for precision work on small components.
- Hot Air Rework Station: Essential for working with BGA components, as it allows you to heat and remove or reflow solder without direct contact. Typical temperature ranges for BGA work are 300-350°C for reflow.
- Desoldering Tools: Desoldering wick (braid) and a desoldering pump help remove old solder from joints and pads.
- Tweezers and Magnifiers: Precision tweezers are necessary for handling tiny components, while a magnifying glass or microscope aids in inspecting small solder joints and traces.
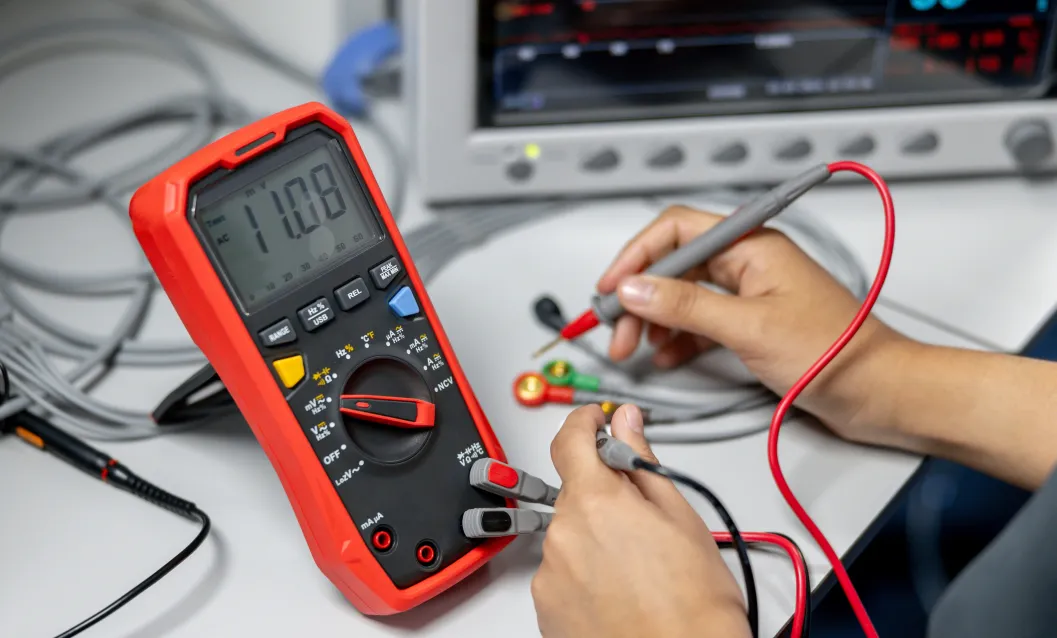
- Multimeter: Used to test continuity, voltage, and resistance to diagnose faults. For example, a typical continuity test should show near 0 ohms for intact traces.
- BGA Reballing Kit: Includes stencils, solder balls (often 0.3mm to 0.6mm in diameter), and flux for reballing BGA chips.
- Isopropyl Alcohol and Brushes: For cleaning the board after soldering to remove flux residue and prevent corrosion.
- ESD Protection: Use an antistatic wrist strap and mat to prevent electrostatic discharge (ESD) from damaging sensitive components.
Related Reading: Troubleshooting Cold Solder Joints: A Practical Guide for Electronics Repair
Step-by-Step Guide to Basic PCB Repair
Let’s start with the fundamental steps for repairing a PCB. These apply to common issues like damaged traces or through-hole components before moving to advanced techniques like BGA repair.
1. Diagnose the Problem
The first step in PCB repair is identifying the issue. Use a multimeter to test for continuity across traces and check for shorts or open circuits. Look for visible damage like burnt components, cracked solder joints, or broken traces. For example, a burnt resistor might show a resistance reading far outside its labeled value (e.g., 10kΩ reading as infinite ohms).
2. Clean the Board
Before making repairs, clean the PCB with isopropyl alcohol (90% or higher) and a soft brush to remove dust, debris, and old flux. This prevents contamination during soldering and ensures better adhesion of new solder.
3. Repair Damaged Traces
If a trace is broken, you can repair it using a conductive pen or by soldering a small jumper wire across the break. For precise repairs, scrape away the solder mask to expose the copper, then apply a thin layer of solder to reconnect the trace.
Related Reading: PCB Trace Repair for Beginners: A Hobbyist's Guide to Saving Damaged Boards
4. Replace Faulty Components
For through-hole components, use a desoldering pump or wick to remove old solder, then insert the new component and solder it in place. Ensure the solder joint is shiny and forms a small cone around the lead, indicating a good connection.
5. Test the Board
After repairs, test the board with a multimeter to confirm continuity and correct voltage levels at key points. Power on the device if possible to verify functionality.
Advanced PCB Repair: Soldering Techniques
Soldering is a critical skill for PCB repair, especially when dealing with surface-mount devices (SMDs) or fine-pitch components. Proper soldering ensures reliable connections without damaging nearby parts.
Basics of Soldering for PCB Repair
Use a fine-tip soldering iron set to around 300°C for most components. Apply flux to the pads to improve solder flow and prevent oxidation. Place a small amount of solder on the tip (tinning), then touch it to the pad and component lead simultaneously. The solder should flow evenly, creating a smooth, shiny joint. Avoid excessive heat, as prolonged exposure (over 3-5 seconds per joint) can damage components or lift pads.
Desoldering Components
To remove components, apply flux and use desoldering wick to absorb old solder. Place the wick over the joint, heat it with the iron, and let the solder flow into the braid. For stubborn joints, a desoldering pump can suck up molten solder quickly.
Soldering SMD Components
For SMDs like resistors or capacitors, apply solder to one pad first, then position the component with tweezers and reflow the solder to secure one side. Solder the other side afterward. For ICs with multiple pins, use a drag soldering technique: apply flux, place a bead of solder across the pins, and drag the iron tip to create even joints.

Working with BGA Components: Challenges and Solutions
Ball Grid Array (BGA) components are among the most challenging to repair on a PCB due to their dense array of solder balls hidden beneath the chip. These components are common in modern electronics like GPUs, CPUs, and memory chips. Issues like cold solder joints, ball voiding, or misalignment often require BGA rework or reballing.
What Is BGA Rework?
BGA rework involves removing a faulty BGA component, cleaning the site, and soldering a new or refurbished chip back onto the PCB. A hot air rework station is essential for this process, as it provides uniform heat to reflow the solder balls without direct contact.
Steps for BGA Rework:
- Preheat the Board: Use a preheater or the rework station to warm the PCB to about 150-180°C to prevent thermal shock.
- Remove the BGA: Set the hot air station to 300-350°C and direct heat over the BGA for 30-60 seconds until the solder melts. Lift the chip with tweezers.
- Clean the Pads: Remove old solder from the PCB pads using desoldering wick and flux. Clean with isopropyl alcohol.
- Place the New BGA: Align the new or reballed BGA using a stencil or alignment tool. Apply flux to the pads.
- Reflow Solder: Use the hot air station to heat the area again, allowing the solder balls to melt and form connections. Cool the board gradually.
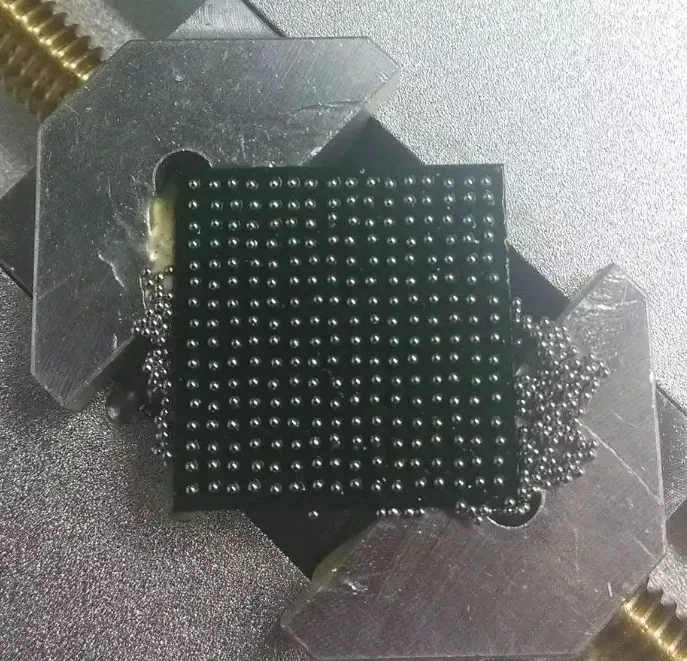
What Is BGA Reballing?
BGA reballing is the process of replacing the solder balls on the underside of a BGA chip to refurbish it for reuse or repair. This is often necessary when solder balls are damaged, missing, or have poor connections.
Steps for BGA Reballing:
- Remove Old Solder Balls: Heat the underside of the BGA with a hot air station and use desoldering wick to clean off old solder.
- Apply Flux: Spread a thin layer of flux over the cleaned pads to prepare for new solder balls.
- Place Solder Balls: Use a BGA stencil matching the chip’s ball pattern. Pour solder balls (typically 0.4mm or 0.5mm diameter) into the stencil holes and ensure they settle onto the pads.
- Reflow the Balls: Heat the chip with the hot air station at around 250-300°C to melt the solder balls onto the pads. Cool slowly to avoid stress fractures.
- Inspect: Check the balls under a microscope for uniformity and alignment before reinstalling the chip.
Common Mistakes to Avoid in PCB Repair
Even experienced technicians can make errors during PCB repair, especially with delicate BGA components. Here are some pitfalls to watch out for:
- Overheating Components: Excessive heat can damage BGA chips or lift PCB pads. Stick to recommended temperature ranges (e.g., 300-350°C for BGA reflow) and limit exposure time.
- Poor Alignment: Misaligned BGA chips during rework can cause short circuits or open connections. Use alignment tools or stencils for precision.
- Insufficient Cleaning: Leftover flux or debris can lead to corrosion or poor solder joints. Always clean thoroughly after soldering.
- Ignoring ESD Protection: Static discharge can destroy sensitive components. Always use an antistatic wrist strap and mat.
Tips for Successful PCB Repair with BGA Components
To improve your success rate, especially with complex repairs involving BGA components, soldering, and reballing, keep these tips in mind:
- Practice on scrap boards to hone your soldering and BGA rework skills before tackling valuable electronics.
- Invest in a good hot air rework station with adjustable temperature and airflow settings for precise control.
- Use high-quality flux to ensure clean, reliable solder joints and prevent oxidation during reflow.
- Document the board’s layout or take photos before starting repairs to ensure components are replaced correctly.
- Work in a well-ventilated area to avoid inhaling solder fumes, and use a fume extractor if possible.
Conclusion
Repairing an electronic PCB, whether it’s fixing a simple trace or performing advanced BGA reballing, requires patience, precision, and the right tools. By following the steps outlined in this guide, you can tackle common issues like damaged components, broken traces, and faulty BGA chips with confidence. Mastering soldering techniques and understanding the intricacies of BGA rework and reballing will not only save you money but also enhance your skills in electronics repair.
Remember to start with basic repairs and gradually move to more complex tasks as you gain experience. With practice and attention to detail, PCB repair can become a rewarding skill for any electronics enthusiast or professional. Equip yourself with the tools and knowledge shared here, and you’ll be well on your way to restoring even the most challenging circuit boards.