 ALLPCB


If you're diving into the world of electronics upgrade or looking to enhance your skills in electronics manufacturing, soldering components onto a printed circuit board (PCB) is a fundamental skill to master. For beginners and even seasoned hobbyists, choosing easy solder PCB electronics components can make the process smoother and more rewarding. In this guide, we'll explore the best components to start with for a solder components upgrade, along with tips and techniques to help you succeed in your hardware hacking journey.
Whether you're upgrading an existing device or building a custom project from scratch, starting with components that are forgiving and straightforward to solder will build your confidence. Let's dive into the details of selecting the right parts, tools, and methods for a successful PCB upgrade.
Why Start with Easy-to-Solder Components for Electronics Upgrades?
When it comes to electronics upgrade projects, soldering can be intimidating at first. Choosing components that are easy to work with reduces the risk of damaging parts or creating poor connections. Easy-to-solder components typically have larger leads or pads, require lower soldering temperatures, and are less sensitive to heat damage. This makes them ideal for beginners in electronics manufacturing or anyone experimenting with hardware hacks.
By starting with these components, you can focus on perfecting your soldering technique without the added stress of handling delicate or complex parts. Over time, as your skills improve, you can move on to more intricate components and designs for your solder components upgrade projects.
Benefits of Choosing Easy Solder PCB Electronics
- Lower Learning Curve: Components with larger leads or through-hole designs are simpler to position and solder, helping you avoid frustration.
- Reduced Risk of Damage: These parts are often more robust and less likely to break or overheat during soldering.
- Cost-Effective: Many easy-to-solder components are affordable, making them perfect for practice and experimentation.
- Versatility: These components are widely used in various electronics upgrade projects, from simple repairs to custom builds.
Top Easy-to-Solder Components for PCB Upgrades
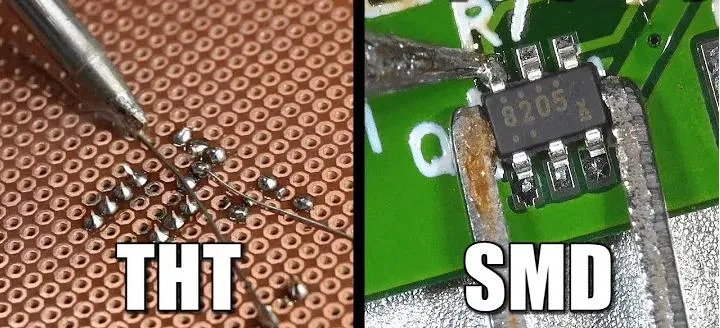
For anyone starting with easy solder PCB electronics, focusing on through-hole components is a great choice. These parts have leads that go through the board, providing more surface area for soldering and making them easier to handle. Below are some of the best components to start with for your solder components upgrade projects.
1. Resistors
Resistors are one of the most basic and essential components in any circuit. They are used to limit current or divide voltage, and their through-hole versions are incredibly easy to solder.
- Why They're Easy: Resistors have two long leads that are simple to insert into a PCB and solder in place. Their cylindrical shape makes them easy to grip with tweezers or fingers.
- Typical Use: Found in almost every electronics upgrade project to control current flow. For example, a 1kΩ resistor might be used to limit current to an LED, ensuring it doesn't burn out.
- Soldering Tip: Use a soldering iron at around 300°C (572°F) to avoid overheating. Apply solder to the joint for no more than 2-3 seconds.
2. Capacitors (Through-Hole)
Capacitors store and release electrical energy, often used for filtering noise or stabilizing voltage in circuits. Through-hole electrolytic and ceramic capacitors are beginner-friendly.
- Why They're Easy: Like resistors, they have long leads for easy insertion and soldering. They are also larger than their surface-mount counterparts, making them easier to handle.
- Typical Use: A 10μF electrolytic capacitor might be added during an electronics manufacturing project to smooth out power supply fluctuations.
- Soldering Tip: Pay attention to polarity for electrolytic capacitors—solder the negative lead to the marked side on the PCB to avoid damage.
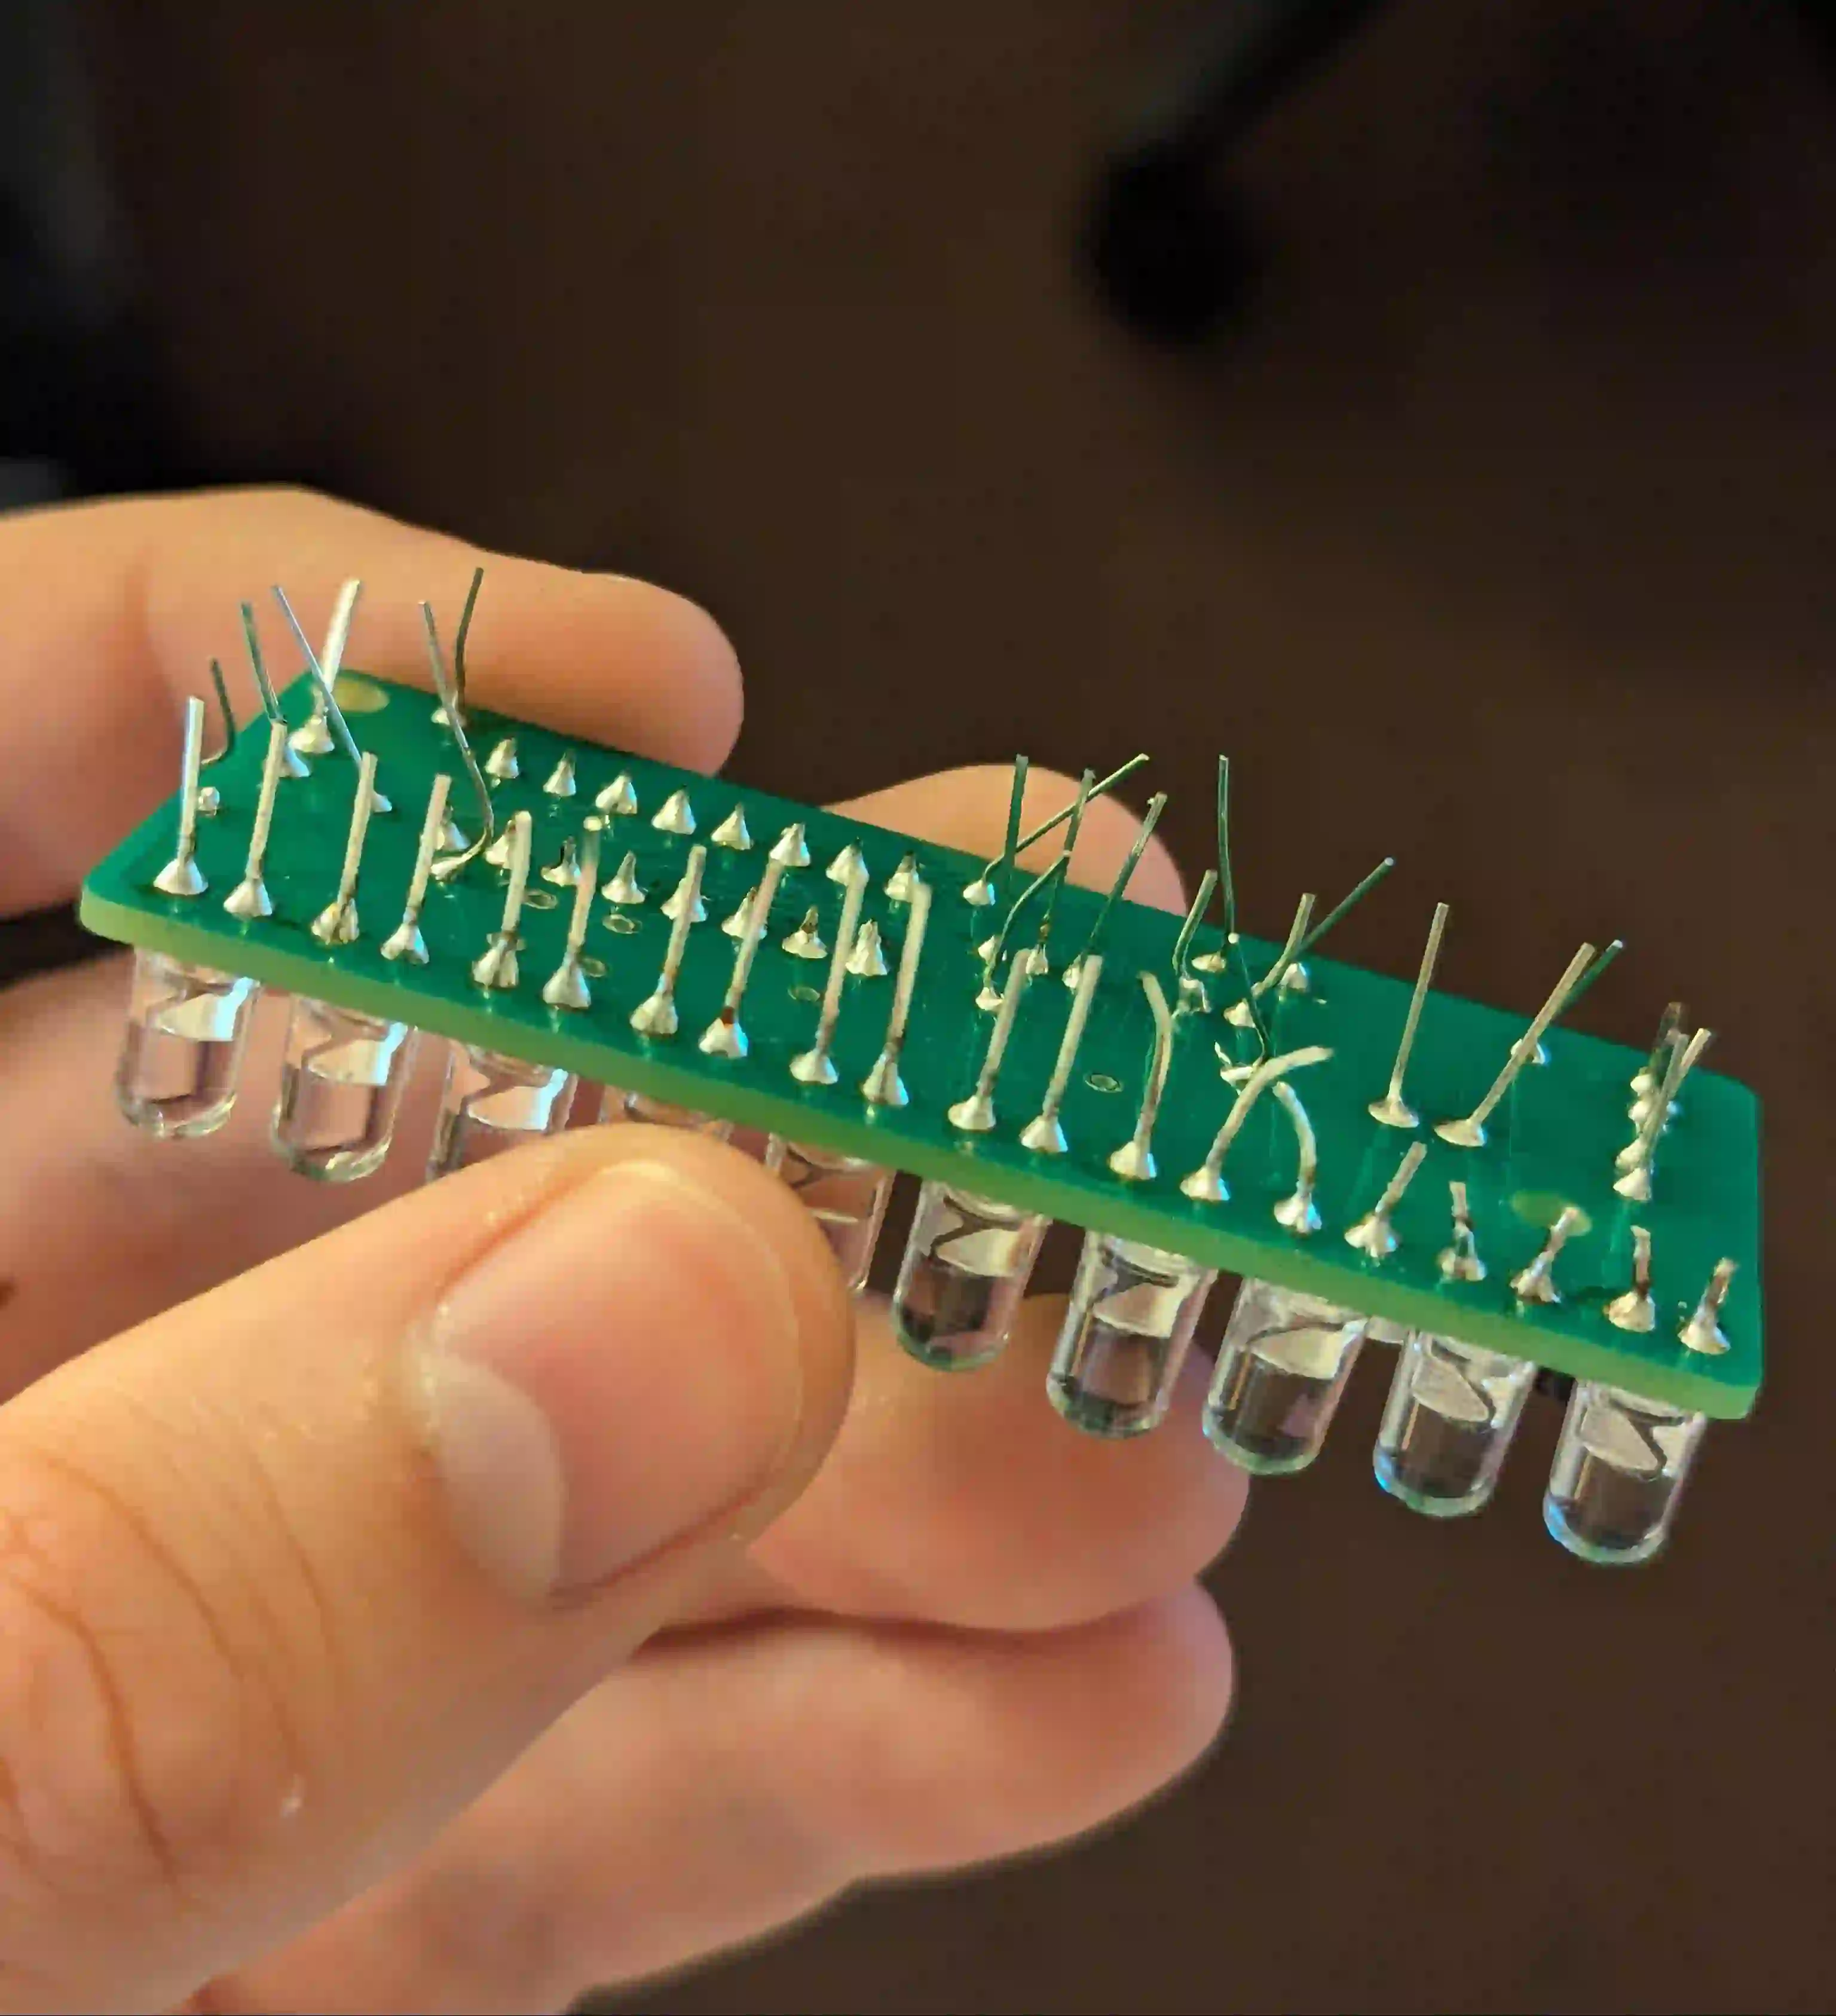
3. LEDs (Light Emitting Diodes)
LEDs are popular for adding visual feedback to projects, such as power indicators or status lights. Through-hole LEDs are a fantastic choice for beginners.
- Why They're Easy: They have two leads (anode and cathode) that are easy to insert and solder. Their larger size compared to surface-mount LEDs makes alignment simple.
- Typical Use: Often used in solder components upgrade projects to indicate whether a device is powered on. For instance, a 3mm red LED with a forward voltage of 2.0V can be added to a circuit with a matching resistor.
- Soldering Tip: Ensure correct polarity by aligning the longer lead (anode) with the positive side of the circuit. Keep soldering time short to prevent heat damage.
4. Diodes
Diodes allow current to flow in one direction only, protecting circuits from reverse voltage. Through-hole diodes are straightforward to solder.
- Why They're Easy: Similar to resistors and LEDs, their leads are long and easy to work with. They are also durable and less sensitive to heat.
- Typical Use: A 1N4007 diode, with a peak reverse voltage of 1000V, can be used in power supply circuits during an electronics upgrade to prevent damage from reverse polarity.
- Soldering Tip: Check the diode’s band to identify the cathode and align it correctly on the PCB.
5. Transistors (Through-Hole)
Transistors act as switches or amplifiers in circuits. Through-hole versions, such as the common NPN or PNP types, are great for beginners.
- Why They're Easy: They typically have three leads (base, collector, emitter) that are spaced apart, making soldering manageable even for newbies.
- Typical Use: A 2N2222 NPN transistor can be used in an electronics manufacturing project to switch a small motor on and off with a low-power signal.
- Soldering Tip: Double-check the pinout diagram for the specific transistor to ensure correct placement before soldering.
Essential Tools for Soldering Easy PCB Components
Before you start soldering for your electronics upgrade, having the right tools is crucial. Using quality equipment ensures clean solder joints and prevents damage to components or the PCB. Here’s what you’ll need for working with easy solder PCB electronics.
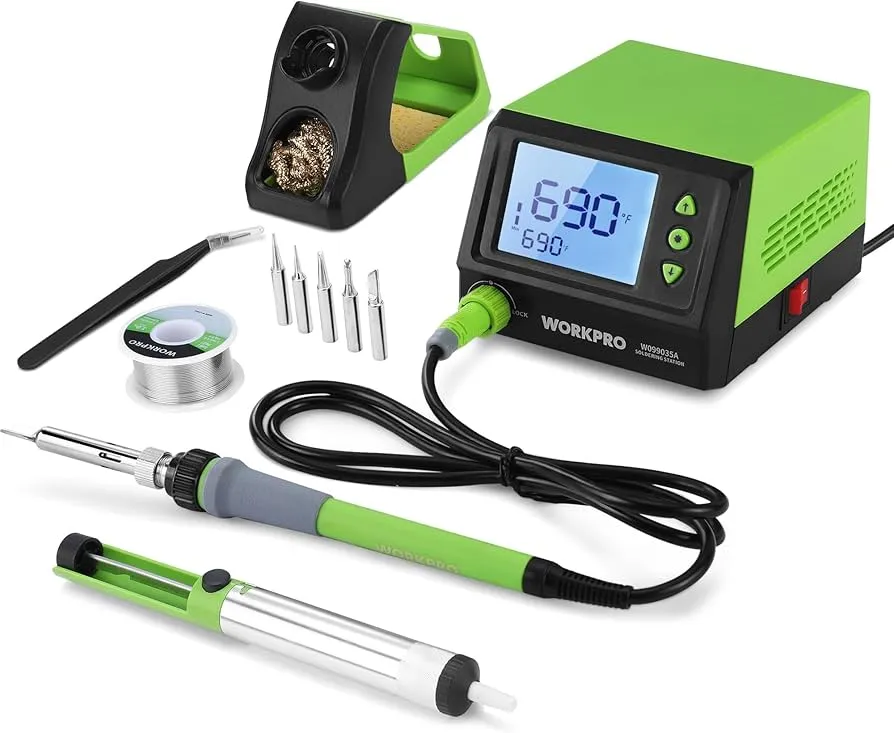
1. Soldering Iron
A soldering iron with adjustable temperature control (25-40W) is ideal for beginners. Set it to around 300°C (572°F) for most through-hole components to avoid overheating.
2. Solder Wire
Use rosin-core solder with a 60/40 tin-lead ratio or lead-free solder with a diameter of 0.8-1.0mm. This type melts easily and creates reliable joints for solder components upgrade tasks.
3. Desoldering Tools
A solder sucker or desoldering braid is essential for correcting mistakes. These tools help remove excess solder without damaging the PCB.
4. Helping Hands or Tweezers
Helping hands with magnifying glass or precision tweezers can hold components in place while you solder, making the process easier and safer.
5. Multimeter
A multimeter is useful for testing connections after soldering. For instance, you can measure resistance across a soldered resistor (e.g., 1kΩ) to confirm it’s correctly installed.
Step-by-Step Guide to Soldering Components for PCB Upgrades
Now that you have your components and tools ready, let’s walk through the process of soldering for an electronics upgrade. Follow these steps to ensure strong, reliable connections for your easy solder PCB electronics.
Step 1: Prepare Your Workspace
Set up a clean, well-lit area with good ventilation. Use a heat-resistant mat to protect your surface, and keep a small fan nearby to disperse solder fumes.
Step 2: Insert the Component
Place the component leads through the corresponding holes on the PCB. Ensure the component sits flush against the board, and bend the leads slightly on the underside to hold it in place.
Step 3: Heat the Joint
Touch the tip of your preheated soldering iron to the pad and the component lead simultaneously. Hold it there for 1-2 seconds to heat the area evenly.
Step 4: Apply Solder
Feed a small amount of solder wire to the heated joint. The solder should melt and flow smoothly around the lead and pad, forming a shiny, cone-shaped connection. Avoid applying too much solder, as it can create bridges between pads.
Step 5: Trim Excess Leads
Once the solder cools (after about 5 seconds), use wire cutters to trim the excess leads close to the joint. Be careful not to cut into the solder itself.
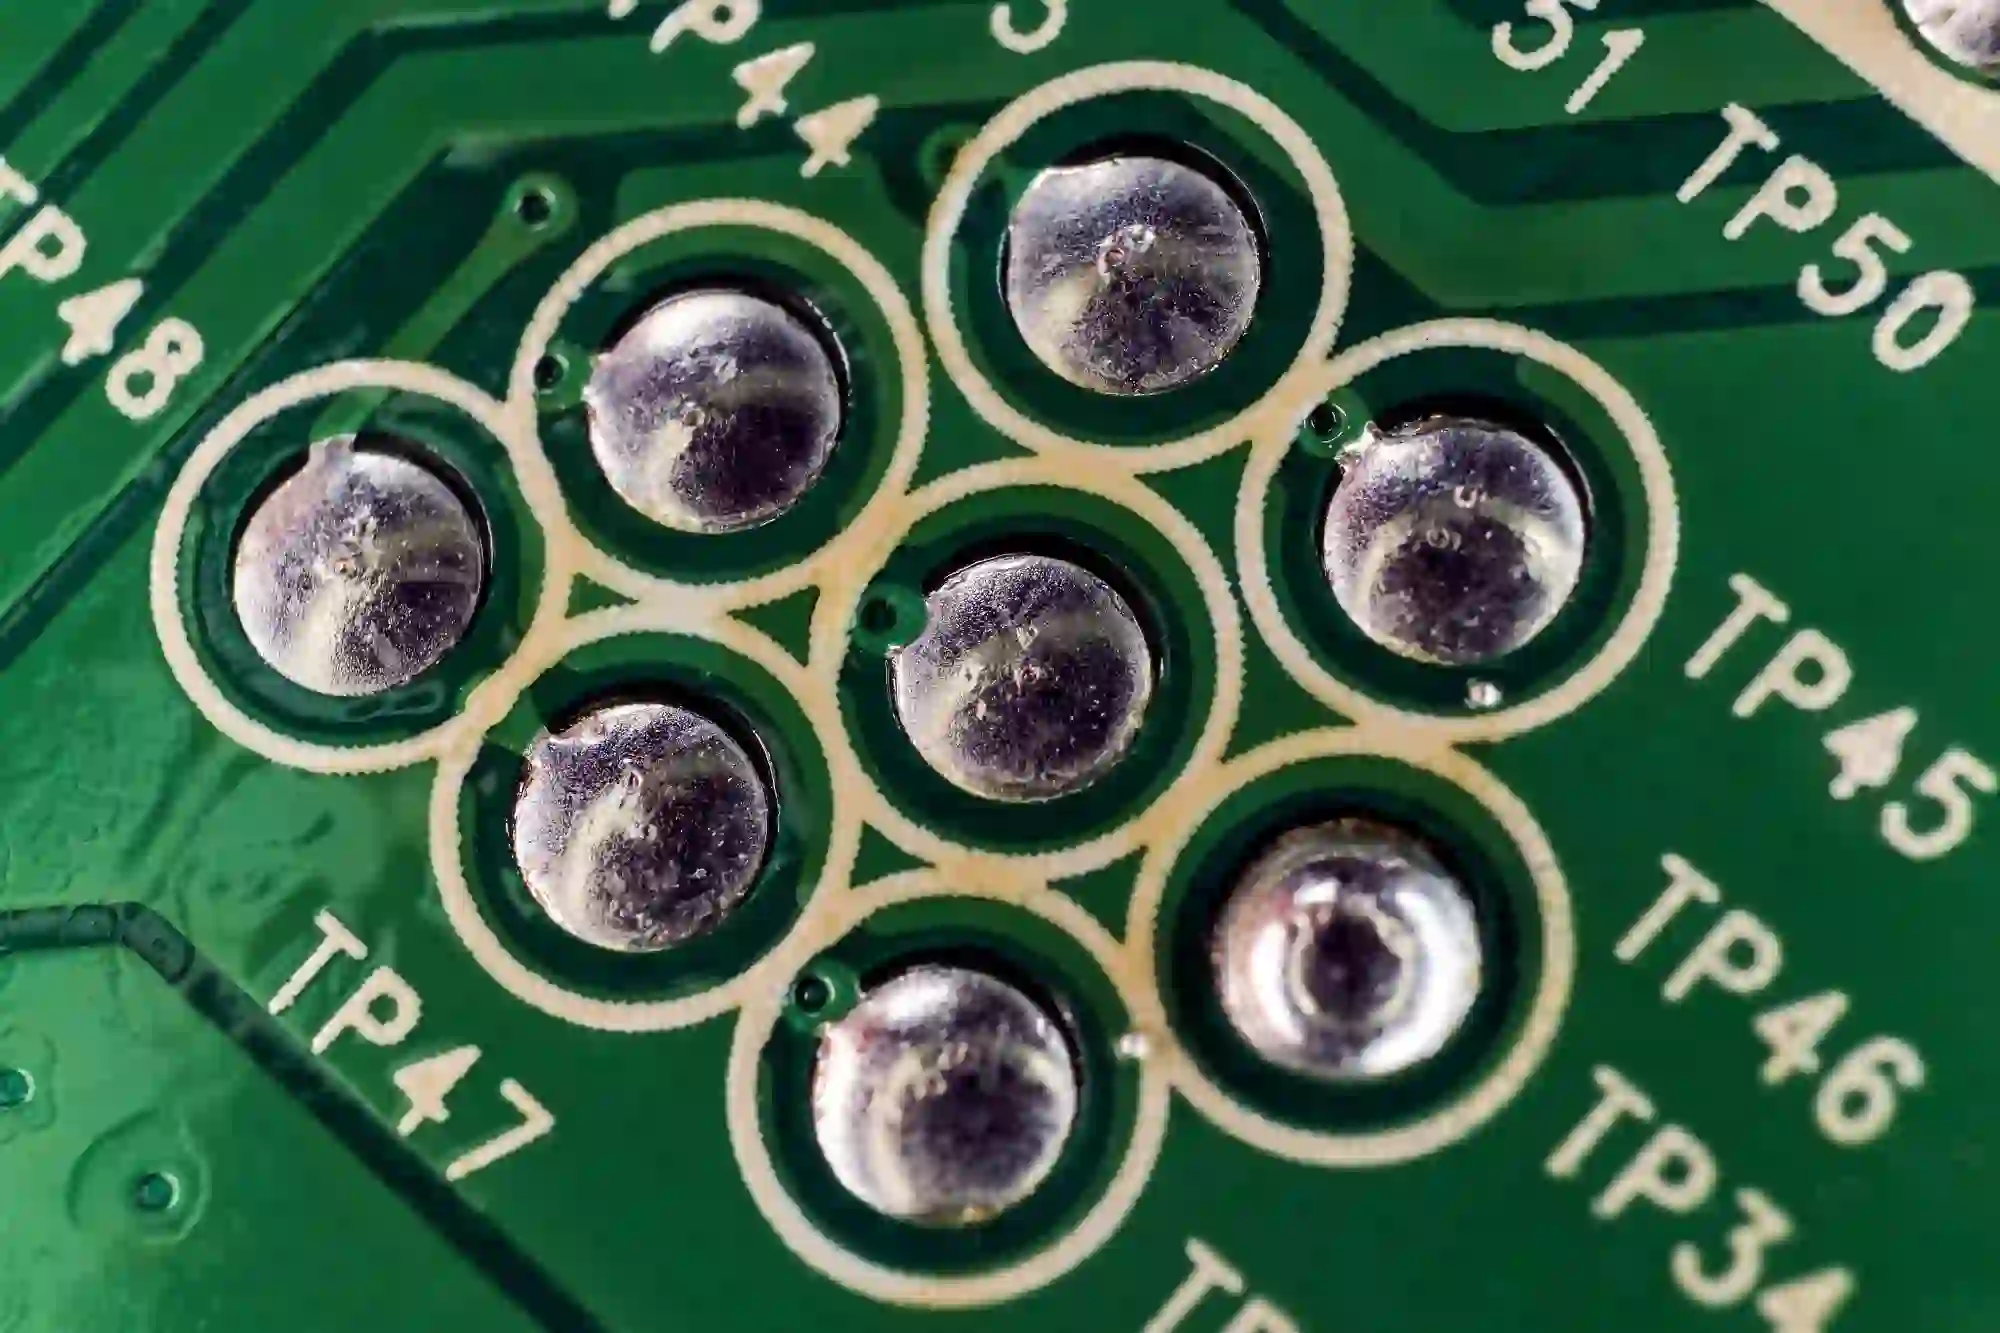
Step 6: Inspect the Joint
Check the solder joint for a smooth, shiny appearance. A dull or grainy joint may indicate a "cold solder joint," which can cause poor conductivity. If needed, reheat and add more solder.
Common Mistakes to Avoid When Soldering PCB Components
Even with easy solder PCB electronics, mistakes can happen. Here are some pitfalls to watch out for during your solder components upgrade projects.
- Overheating Components: Applying heat for too long (more than 3-4 seconds) can damage sensitive parts like LEDs or capacitors. Work quickly and use the right temperature.
- Using Too Much Solder: Excess solder can create bridges between nearby pads, causing short circuits. Use just enough to cover the joint.
- Poor Joints: Cold solder joints, which look dull or cracked, can lead to unreliable connections. Reheat and reflow the solder if needed.
- Ignoring Polarity: Components like LEDs, diodes, and electrolytic capacitors must be oriented correctly. Double-check markings on the PCB and component before soldering.
Tips for Success in Electronics Manufacturing and Upgrades
As you gain experience with electronics manufacturing and PCB upgrades, keep these tips in mind to improve your skills and achieve better results.
- Practice on Scrap Boards: Before working on a critical project, practice soldering and desoldering on old or scrap PCBs to build confidence.
- Use Flux for Cleaner Joints: Applying flux to pads before soldering can help the solder flow more smoothly, resulting in stronger connections.
- Keep Your Iron Tip Clean: Regularly clean the soldering iron tip with a damp sponge or brass wire cleaner to remove oxidation and ensure consistent heat transfer.
- Start Small: Begin with simple electronics upgrade projects, like adding an LED indicator, before tackling complex circuits with multiple components.
Conclusion: Start Your Hardware Hacking Journey with Confidence
Soldering is a gateway skill for anyone interested in electronics upgrade and electronics manufacturing. By starting with easy solder PCB electronics like resistors, capacitors, LEDs, diodes, and transistors, you can build a solid foundation for more advanced hardware hacking projects. With the right tools, techniques, and a bit of practice, you’ll be ready to take on any solder components upgrade task with confidence.
Remember to prioritize safety, work patiently, and inspect your solder joints carefully. As you grow more comfortable with soldering, you can explore more complex components and designs, unlocking endless possibilities for custom electronics projects. Get started today, and let your creativity in hardware hacking shine!


