ALLPCB


If you're just starting with printed circuit board (PCB) projects and wondering how to drill holes for components at home, you're in the right place. PCB drilling for beginners can seem tricky, but with the right tools and techniques, you can create clean, precise holes every time. In this guide, we'll walk you through the entire process of DIY PCB drilling, from gathering the necessary tools to mastering simple PCB drilling techniques. Whether you're using a handheld tool or drilling PCB with a drill press, we've got you covered with actionable steps and tips tailored for hobbyists.
Let's dive into the world of PCB drilling and explore how to drill PCB at home with confidence. This comprehensive guide will break down everything you need to know to get started and achieve professional-looking results on a budget.
What Is PCB Drilling and Why Is It Important?
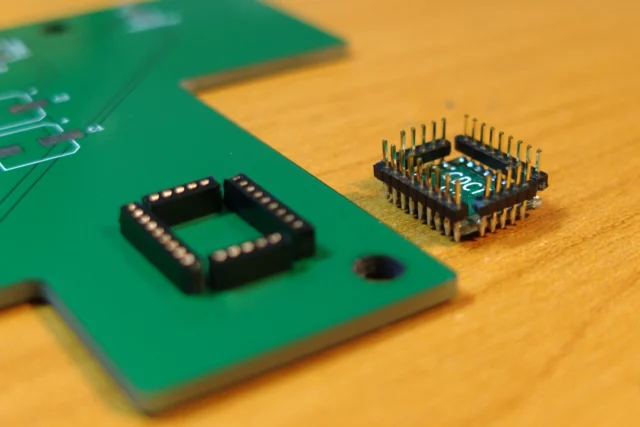
PCB drilling is the process of creating holes in a printed circuit board to mount electronic components or create vias for electrical connections between layers. These holes must be precise in size and placement to ensure components fit correctly and the circuit functions as intended. For beginners, mastering PCB drilling is a critical step in DIY electronics projects, as poorly drilled holes can lead to misaligned components or damaged boards.
Drilling holes in a PCB isn't just about making space for components like resistors, capacitors, or ICs. It also affects the structural integrity of the board and the overall performance of the circuit. A hole that's too large or off-center can cause weak connections, while drilling too aggressively can crack the board or damage copper traces. That's why learning simple PCB drilling techniques is essential for hobbyists working on projects at home.
Tools and Materials Needed for DIY PCB Drilling
Before you start drilling, gather the right PCB drilling tools for hobbyists. Having the proper equipment will make the process smoother and help you avoid common mistakes. Here's a list of essentials for drilling PCB at home:
- Drill Bits: Use carbide or high-speed steel (HSS) drill bits designed for PCB drilling. Common sizes range from 0.6 mm to 1.5 mm, depending on component leads. For example, a 0.8 mm bit works well for most through-hole components.
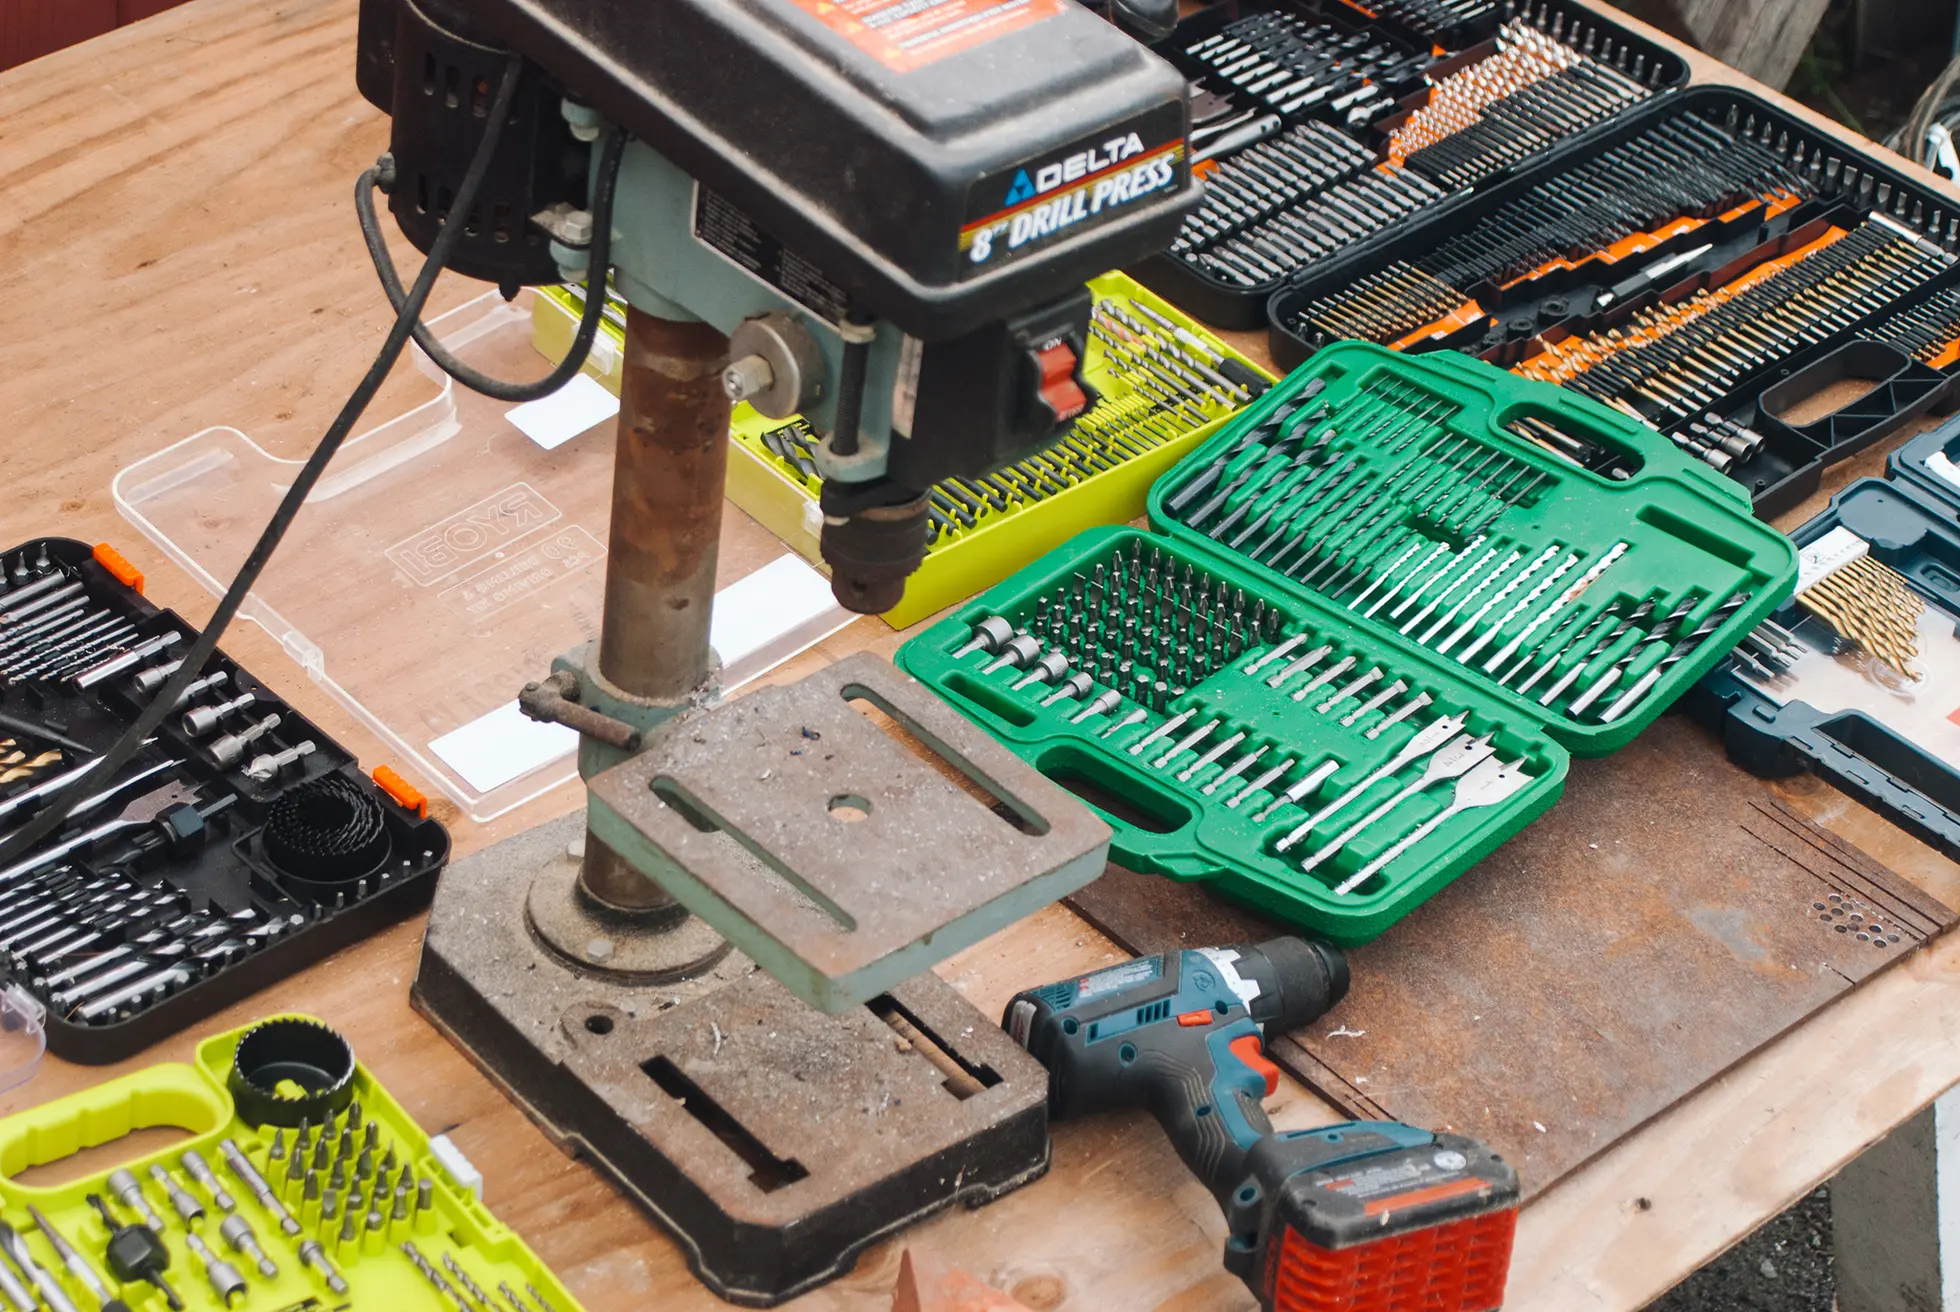
- Hand Drill or Drill Press: A handheld rotary tool (like a mini drill) is affordable for beginners, while a drill press offers better precision and control for drilling PCB with a drill press.
- PCB Board: Ensure your board is ready for drilling, with etched copper traces and marked hole locations.
- Drill Guide or Template: This helps align holes accurately, especially for beginners.
- Clamps or Vice: Secure your PCB to prevent movement during drilling.
- Safety Gear: Wear safety goggles to protect your eyes from debris, and use a dust mask to avoid inhaling fine particles.
- Backing Material: Place a piece of scrap wood or hardboard under the PCB to prevent damage to your work surface and reduce tear-out on the board's underside.
- Marker or Punch: Use these to mark or indent hole locations before drilling for better accuracy.
Step-by-Step Guide to PCB Drilling for Beginners
Now that you have your tools ready, let's walk through the process of how to drill PCB at home. Follow these steps to ensure clean, accurate holes without damaging your board.
Step 1: Prepare Your PCB and Workspace
Start by cleaning your PCB to remove dust or debris that could interfere with drilling. Double-check the layout to confirm hole locations, either by referring to your design file or using a printed template. Mark the centers of each hole with a fine-tip marker or a center punch to create a small indent. This indent will guide your drill bit and prevent it from wandering.
Set up your workspace with good lighting and ventilation. Secure the PCB to your work surface using clamps or a vice, ensuring it won't move during drilling. Place a backing material like scrap wood underneath to protect your table and provide support.
Step 2: Choose the Right Drill Bit
Select a drill bit that matches the size of the holes you need. For most through-hole components, a 0.8 mm to 1.0 mm bit is ideal. If you're unsure, check the component datasheets for recommended hole sizes. Using a bit that's too large can make components loose, while a bit that's too small can prevent proper insertion.
Ensure your drill bit is sharp and designed for PCB materials, such as fiberglass or FR4. Dull bits can cause rough edges or crack the board. Carbide bits are more durable and provide cleaner cuts compared to standard steel bits.
Step 3: Set Up Your Drill or Drill Press
If you're using a handheld drill for DIY PCB drilling, attach the chosen bit securely and set the speed to a high setting (around 10,000 to 15,000 RPM). High speeds reduce the chance of the bit catching and damaging the board. For drilling PCB with a drill press, adjust the depth stop to avoid drilling too deep, and set a moderate speed for better control.
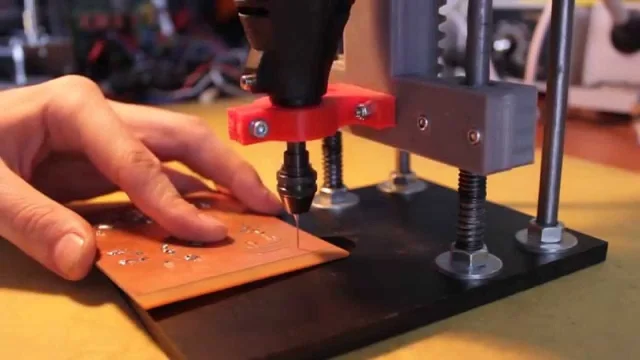
Step 4: Drill the Holes with Precision
Position the drill bit over the marked hole location or indent. If using a handheld drill, hold it perpendicular to the board to ensure straight holes. Apply gentle, steady pressure and let the drill do the work—don't force it, as this can break the bit or damage the PCB.
For a drill press, lower the bit slowly and maintain a consistent speed. Drill through the board until the bit exits the other side, then lift it back up carefully. Avoid drilling multiple holes in one go without clearing debris, as this can cause overheating or bit breakage.
Step 5: Clean and Inspect the Holes
After drilling, remove the PCB from the clamps and shake off loose debris. Use a small brush or compressed air to clean out dust from the holes. Inspect each hole under good lighting to ensure it's the correct size and free of burrs. If the edges are rough, you can lightly sand them with fine-grit sandpaper or use a larger bit to deburr by hand.
Check if your components fit properly in the holes. If a hole is too tight, carefully enlarge it with a slightly bigger bit, but be cautious not to overdo it.
Simple PCB Drilling Techniques for Better Results
Beyond the basic steps, there are a few simple PCB drilling techniques that can elevate your skills and help you avoid common pitfalls. These tips are especially useful for beginners working on DIY projects at home.
- Start with a Pilot Hole: For larger holes (above 1.2 mm), drill a smaller pilot hole first (e.g., 0.5 mm) to guide the larger bit. This reduces the risk of the bit slipping or cracking the board.
- Use a Drill Guide: A drill guide or template ensures consistent hole placement, especially for complex boards with many holes.
- Work in Batches: If drilling multiple holes, do them in small batches to avoid overheating your drill or bit. Take breaks to let the tool cool down.
- Keep the Bit Perpendicular: Tilting the drill can create uneven or oval-shaped holes, which may not hold components securely. Always aim for a 90-degree angle to the board.
- Avoid Excessive Pressure: Let the drill's speed cut through the material. Pushing too hard can snap small bits or damage the PCB's delicate layers.
Suggested Reading: Mastering PCB Drilling: A Comprehensive Guide to Techniques, Equipment, and Best Practices
Common Mistakes to Avoid in PCB Drilling
Even with the best intentions, beginners can make mistakes during PCB drilling. Here are some common errors and how to avoid them:
- Using the Wrong Drill Bit Size: Always match the bit to the component's lead size. Test on a scrap board if you're unsure.
- Drilling Without Securing the Board: An unsecured PCB can shift, leading to misaligned holes or injuries. Always clamp it down.
- Ignoring Safety Precautions: PCB dust can be harmful if inhaled, and debris can get in your eyes. Wear protective gear at all times.
- Drilling Too Fast or Too Slow: Too slow a speed can cause the bit to grab the material, while too fast can overheat it. Aim for a balanced speed setting, especially with handheld tools.
- Not Cleaning Debris: Dust and fragments can clog holes or damage your drill bit. Clean the board and tool regularly during the process.
Handheld Drill vs. Drill Press: Which Is Better for PCB Drilling?
When deciding between a handheld drill and a drill press for PCB drilling, consider your budget, skill level, and project needs. Here's a quick comparison to help you choose:
- Handheld Drill: Affordable and portable, making it ideal for beginners on a budget. However, it requires a steady hand for precision and can be tiring for large numbers of holes.
- Drill Press: Offers superior accuracy and control, especially for repetitive tasks or larger boards. It's more expensive and takes up space, but it's a worthwhile investment for frequent hobbyists.
For most beginners, starting with a handheld drill is fine. As you gain experience and take on more complex projects, upgrading to a drill press for drilling PCB with a drill press can save time and improve results.
Safety Tips for DIY PCB Drilling
Safety should always come first when drilling PCB at home. Here are key precautions to follow:
- Wear safety goggles to shield your eyes from flying debris.
- Use a dust mask or work in a well-ventilated area to avoid inhaling PCB dust, which can be hazardous.
- Keep your workspace clutter-free to prevent accidents.
- Unplug your drill when changing bits or making adjustments.
- Handle small drill bits carefully to avoid breakage or injury.
Conclusion: Master PCB Drilling with Practice
PCB drilling for beginners doesn't have to be intimidating. By following this step-by-step guide, using the right PCB drilling tools for hobbyists, and applying simple PCB drilling techniques, you can create perfect holes every time. Whether you're learning how to drill PCB at home with a handheld tool or drilling PCB with a drill press, the key is preparation, precision, and patience.
Start with small projects to build your skills, and don't be afraid to experiment with different setups to find what works best for you. With practice, your DIY PCB drilling will become second nature, opening up a world of possibilities for custom electronics projects. Remember to prioritize safety and take your time to ensure clean, accurate results that make assembling your circuits a breeze.