 ALLPCB


Are you looking to create your own printed circuit boards (PCBs) at home without breaking the bank or handling dangerous chemicals? DIY PCB etching at home is a fantastic way to prototype your electronics projects using common household materials like vinegar and hydrogen peroxide. In this comprehensive guide, we’ll walk you through an easy PCB etching method, share a homemade PCB etchant recipe, and show you how to achieve great results with PCB etching without ferric chloride. Whether you're a hobbyist or a beginner in electronics, this step-by-step tutorial will help you get started with confidence.
Why Choose DIY PCB Etching at Home?
Creating your own PCBs at home offers several advantages. It’s cost-effective, allows for quick prototyping, and gives you full control over the design process. While professional PCB manufacturing ensures precision and scalability, DIY methods are perfect for small-scale projects or learning purposes. By using household materials, you can avoid the hassle and safety concerns of handling industrial chemicals like ferric chloride, making PCB etching with vinegar and peroxide a safer and more accessible option.
What You’ll Need for DIY PCB Etching
Before diving into the process, let’s gather the necessary materials and tools. The beauty of this easy PCB etching method is that most items can be found at home or purchased affordably at a local store.
- Copper-clad board: This is the base material for your PCB. You can find single-sided or double-sided boards online or at electronics stores.
- Design transfer materials: Laser printer, glossy paper (like magazine pages), and an iron for toner transfer.
- Etchant solution ingredients: White vinegar (5% acetic acid), hydrogen peroxide (3% solution), and table salt.
- Safety gear: Rubber gloves, safety goggles, and a well-ventilated workspace to protect yourself.
- Containers: A non-metallic container (like a plastic tray) for the etchant solution.
- Tools: Fine sandpaper, permanent marker (optional), drill or rotary tool for holes, and acetone or rubbing alcohol for cleaning.
Understanding the Basics of PCB Etching
PCB etching is the process of removing unwanted copper from a copper-clad board to create conductive traces for your circuit. In traditional methods, strong chemicals dissolve the copper, but our homemade PCB etchant recipe uses vinegar and hydrogen peroxide to achieve a similar result more safely. The vinegar acts as a mild acid, while hydrogen peroxide serves as an oxidant to speed up the reaction. Salt is added as a catalyst to further enhance the etching process.
This method is slower than using industrial etchants, often taking 30-60 minutes compared to 10-15 minutes with ferric chloride. However, the trade-off is worth it for beginners who prioritize safety and convenience over speed.
Related Reading: The Ultimate Guide to PCB Etching: From Design to Perfect Circuits
Step-by-Step Guide to DIY PCB Etching at Home
Let’s break down the process into clear, actionable steps. Follow along carefully to ensure the best results with this easy PCB etching method.
Step 1: Design Your PCB Layout
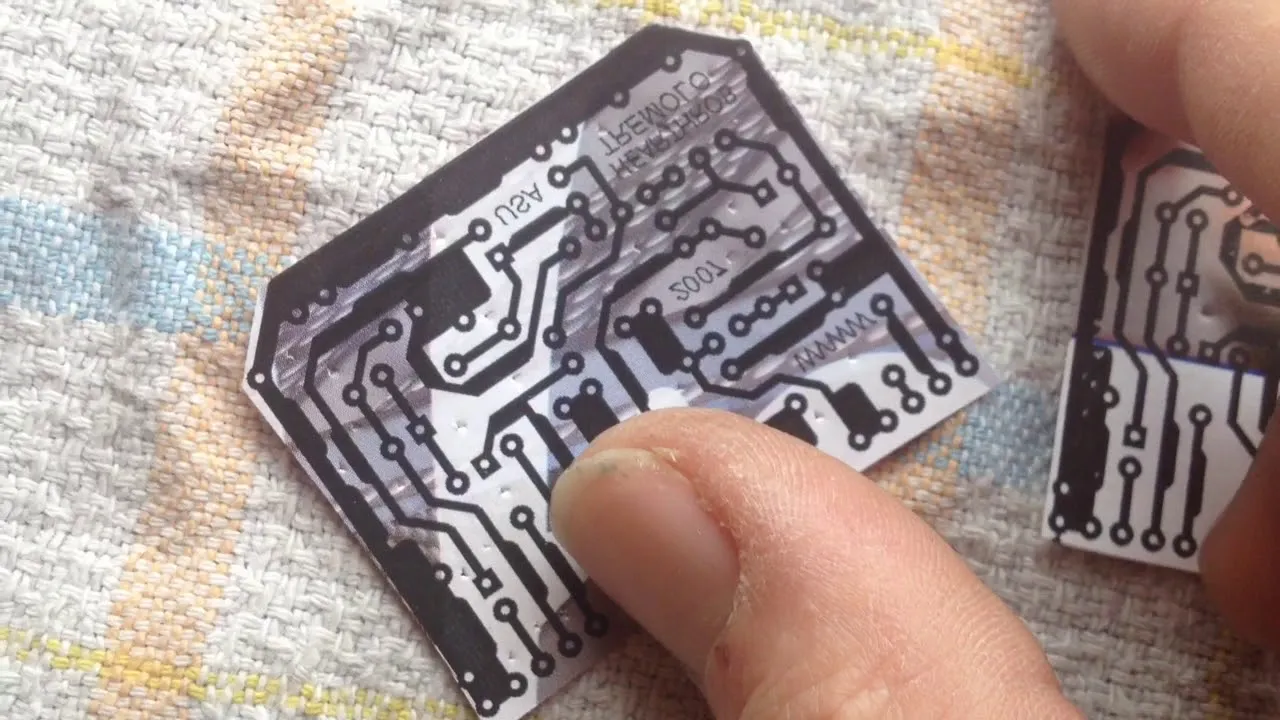
Start by designing your circuit layout using software like a free open-source tool. Ensure your design includes traces with a minimum width of 0.25 mm for reliable etching, as finer traces may not transfer well with DIY methods. Once your design is ready, print it on glossy paper using a laser printer. The toner will act as a resist during etching, protecting the copper traces you want to keep.
Step 2: Prepare the Copper-Clad Board
Clean the copper-clad board thoroughly to remove any dirt or oxidation. Use fine sandpaper (400-600 grit) to lightly sand the surface until it’s shiny. Wipe it down with rubbing alcohol or acetone to ensure there’s no residue. A clean surface is crucial for proper toner transfer and etching.
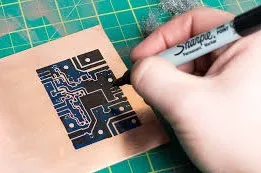
Step 3: Transfer the Design to the Board
Place the printed design face-down on the copper board. Use an iron set to a high temperature (no steam) to heat the paper for 5-10 minutes. Apply firm, even pressure to ensure the toner adheres to the copper. After cooling, soak the board in water for a few minutes to soften the paper, then gently peel or rub it off. You should see the black toner pattern on the copper. If any areas are incomplete, touch them up with a permanent marker.
Step 4: Prepare the Homemade PCB Etchant Recipe
Now, let’s mix the etchant solution for PCB etching with vinegar and peroxide. In a non-metallic container, combine the following:
- 1 part white vinegar (about 200 ml)
- 1 part hydrogen peroxide (about 200 ml, 3% concentration)
- 1 teaspoon of table salt
Stir the mixture gently until the salt dissolves. This solution is much safer than traditional etchants, but still handle it with care. Wear gloves and goggles, and work in a well-ventilated area to avoid inhaling fumes.
Note: The exact ratio may vary slightly depending on the strength of your vinegar and peroxide. If etching is too slow, you can add a bit more peroxide (up to a 1:2 ratio with vinegar). Avoid using higher concentrations of peroxide (like 30%), as they can be hazardous.
Step 5: Etch the PCB
Place the prepared board into the etchant solution, ensuring the copper side is fully submerged. Agitate the container gently every 5-10 minutes to keep the solution moving over the board. This helps speed up the etching process. Depending on the solution’s strength and the copper thickness (typically 1 oz/ft2 or 35 micrometers), etching can take 30-60 minutes. You’ll see the exposed copper dissolve, leaving behind the toner-protected traces.
Check the board periodically. Once all unwanted copper is gone, remove the board and rinse it thoroughly with water to stop the etching process.
Step 6: Clean and Finish the Board
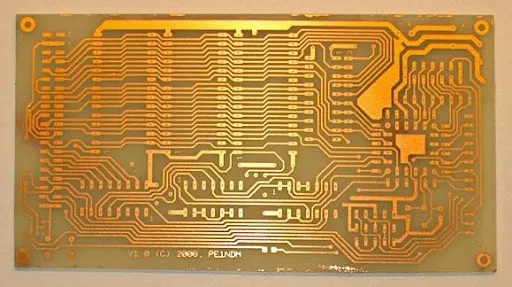
After rinsing, use acetone or rubbing alcohol to remove the toner from the board, revealing the copper traces underneath. Inspect the traces for any breaks or defects. If everything looks good, drill holes for components using a small drill bit (0.8-1.2 mm for most through-hole components). Sand the edges of the board if needed for a neat finish.
Related Reading: DIY PCB Etching for Simple Lab Devices: A Beginner's Guide
Tips for Successful PCB Etching Without Ferric Chloride
While this method is beginner-friendly, a few tips can help you achieve better results:
- Work in a warm environment: The etching process is faster at higher temperatures (around 25-30°C or 77-86°F). You can warm the solution slightly by placing the container in a larger tray of warm water—do not heat it directly.
- Monitor the solution: If the etchant turns dark blue or green, it’s becoming saturated with dissolved copper and may slow down. Prepare a fresh batch if needed.
- Dispose of waste responsibly: The used etchant contains copper ions, which can be harmful to the environment. Do not pour it down the drain. Instead, store it in a labeled container and take it to a local hazardous waste disposal facility.
- Test on a small board first: If you’re new to DIY PCB etching at home, practice on a scrap piece of copper-clad board to get a feel for the process.
Common Challenges and How to Overcome Them
Even with an easy PCB etching method, you might encounter a few hiccups. Here’s how to address them:
- Uneven etching: This can happen if the solution isn’t agitated enough or if air bubbles form on the board. Gently shake the container or use a small brush to remove bubbles during etching.
- Under-etching or over-etching: If copper remains in unwanted areas, leave the board in the solution longer. If traces start to dissolve, remove the board immediately and rinse it. Timing is key, so check frequently.
- Poor toner transfer: Ensure the board is clean and the iron is hot enough. If the design doesn’t transfer well, increase the ironing time or pressure.
Safety Precautions for DIY PCB Etching
Although PCB etching with vinegar and peroxide is safer than using harsh chemicals, you still need to take precautions:
- Always wear protective gear, including gloves and goggles, to avoid skin or eye contact with the solution.
- Work in a well-ventilated area to prevent inhaling any fumes from the reaction.
- Keep the etchant solution away from children and pets.
- Label all containers clearly to avoid accidental misuse.
Why Use Household Materials for PCB Etching?
Opting for PCB etching without ferric chloride has several benefits beyond safety. Household materials like vinegar and hydrogen peroxide are easy to source, inexpensive, and don’t require special storage or handling procedures. While the etching time is longer—often 45 minutes compared to 10 minutes with stronger acids—the reduced risk makes it ideal for beginners. Additionally, this method produces less toxic waste, though proper disposal is still necessary.
Scaling Up: Beyond Beginner PCB Etching
Once you’ve mastered this basic homemade PCB etchant recipe, you might want to explore ways to improve efficiency or handle more complex designs. Consider investing in a small aquarium pump to agitate the solution automatically, reducing etching time by up to 20%. You can also experiment with slightly adjusting the vinegar-to-peroxide ratio for faster results, though always prioritize safety by avoiding high concentrations of chemicals.
For more advanced projects, look into double-sided etching or finer trace designs with a minimum width of 0.15 mm, though this may require better transfer methods or professional assistance for consistent results.
Conclusion: Start Your DIY PCB Journey Today
DIY PCB etching at home is an accessible and rewarding way to bring your electronics projects to life. With this step-by-step guide, you’ve learned an easy PCB etching method using household materials like vinegar and hydrogen peroxide. Our homemade PCB etchant recipe offers a safer alternative to traditional chemicals, ensuring that even beginners can achieve great results without ferric chloride.
By following the detailed steps—designing, transferring, etching, and finishing—you can create functional PCBs for your prototypes or small projects. Remember to prioritize safety, practice patience during the etching process, and dispose of waste responsibly. With a little practice, you’ll gain confidence in crafting custom circuit boards tailored to your needs.
Ready to dive into PCB etching with vinegar and peroxide? Gather your materials, set up a safe workspace, and start experimenting with this beginner-friendly technique. Your next great project is just an etch away!


