 ALLPCB


If you're new to the world of electronics manufacturing and wondering how to protect your printed circuit boards (PCBs) from environmental hazards, mastering the conformal coating application process is essential. Conformal coating is a thin, protective layer applied to PCBs to shield them from moisture, dust, chemicals, and temperature extremes. In this comprehensive guide, we'll walk you through the entire process step by step, covering various application methods like spray, dip, and brush techniques, along with masking strategies to ensure precision. Whether you're a hobbyist or a professional, this guide will help you achieve reliable and long-lasting protection for your electronics.
What Is Conformal Coating and Why Does It Matter?
Conformal coating is a polymeric film that "conforms" to the surface of a PCB, creating a barrier against environmental threats. This protective layer enhances the durability and reliability of electronic components by preventing corrosion, short circuits, and damage caused by humidity, thermal shock, or contamination. It's widely used in industries like aerospace, automotive, and consumer electronics where reliability is non-negotiable.
Without proper coating, a PCB exposed to harsh conditions could fail prematurely, leading to costly repairs or replacements. By applying conformal coating, you can extend the lifespan of your electronics, ensuring they perform consistently even in challenging environments. Now, let's dive into the detailed steps and methods for applying conformal coating effectively.
Understanding the Basics Before You Start
Before you begin the conformal coating application process, it's important to understand the types of coatings available and the specific requirements of your project. Common types of conformal coatings include acrylic, silicone, polyurethane, epoxy, and parylene, each with unique properties suited for different applications. For instance, silicone coatings offer excellent flexibility and high-temperature resistance, while acrylic coatings are easy to apply and repair.
Additionally, consider the environment your PCB will face. Will it be exposed to high humidity, extreme temperatures, or chemical exposure? These factors will determine the best coating type and application method for your needs. Once you've chosen the right material, you're ready to prepare for the application process.
Step-by-Step Guide to the Conformal Coating Application Process
The conformal coating application process involves several critical steps to ensure a uniform and effective protective layer. Follow this guide to achieve professional results, even as a beginner.
Step 1: Prepare Your Workspace and Materials
Start by setting up a clean, well-ventilated workspace. Dust and contaminants can compromise the coating's effectiveness, so ensure your area is free from debris. Gather all necessary materials, including the chosen conformal coating, application tools (spray gun, brush, or dip tank), masking materials (tape or liquid latex), cleaning solvents, and safety equipment like gloves and masks.
Safety is paramount when working with chemicals. Many conformal coatings emit fumes during application, so wear protective gear and work in a space with proper ventilation or a fume hood. Also, read the manufacturer's instructions for your specific coating to understand curing times, recommended thickness, and safety precautions.
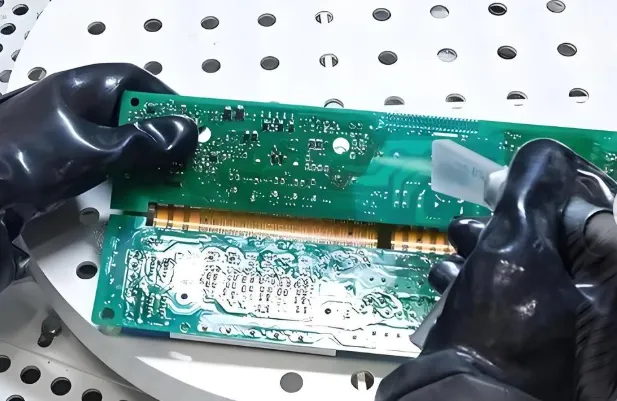
Step 2: Clean the PCB Thoroughly
A clean PCB is essential for proper adhesion of the conformal coating. Any residue, such as flux, oils, or dirt, can prevent the coating from bonding correctly, leading to weak spots or peeling. Use a suitable solvent, like isopropyl alcohol, and a soft brush or lint-free cloth to clean the board. For stubborn residues, consider an ultrasonic cleaner for a more thorough result.
After cleaning, allow the PCB to dry completely. Moisture trapped under the coating can cause bubbles or delamination, reducing its protective capabilities. Inspect the board under good lighting to ensure no contaminants remain before proceeding.
Step 3: Apply Masking for Precision Using Conformal Coating Masking Techniques
Masking is a crucial step in the conformal coating process to protect areas of the PCB that should remain uncoated, such as connectors, switches, or test points. Effective conformal coating masking techniques ensure that the coating is applied only where needed, maintaining the functionality of these components.
Common masking materials include tapes, liquid latex, or custom-designed masks. Apply masking tape or liquid latex to cover sensitive areas, ensuring a tight seal to prevent coating seepage. For complex designs, consider using peelable solder masks that can be easily removed after coating. Test your masking on a scrap board if possible to confirm it withstands the application process without lifting or leaking.
Proper masking not only protects critical areas but also saves time during rework or repairs. Take your time with this step to avoid costly mistakes.
Step 4: Choose and Apply the Conformal Coating Method
There are several methods for applying conformal coating, each suited to different project scales and precision requirements. Below, we explore the most common techniques: spray, dip, and brush application.
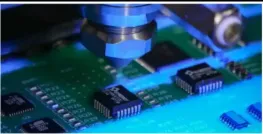
Conformal Coating Spray Application
Spray application is one of the most popular methods due to its speed and ability to cover large areas evenly. It’s ideal for medium to high-volume production or when a thin, uniform layer is needed. You can use an aerosol can for small projects or a professional spray gun for larger batches.
To apply conformal coating via spray, hold the nozzle about 8-12 inches (20-30 cm) from the PCB and use smooth, sweeping motions. Rotate the board 90 degrees after each pass, repeating until you've covered all sides (a full 360-degree rotation). This ensures the coating reaches under components and into tight spaces. Apply multiple thin layers rather than a single thick one to avoid drips or uneven coverage. Typical coating thickness ranges from 25 to 75 micrometers, depending on the material and application requirements.
Ensure proper ventilation during spray application, as fumes can be hazardous. For professional setups, use a spray booth to contain overspray and maintain a clean environment.
Conformal Coating Dip Application
Dip application, or immersion, is a highly efficient method for coating large batches of PCBs quickly. It ensures complete coverage, even in hard-to-reach areas, making it suitable for high-volume manufacturing. However, it requires careful control to avoid excessive coating buildup.
To use the conformal coating dip application method, prepare a tank or container with the coating material diluted to the manufacturer's specifications. Slowly immerse the PCB into the liquid, ensuring no air bubbles form on the surface. Withdraw the board at a controlled rate (typically 1-2 inches per second) to prevent drips and achieve a uniform layer. Allow excess coating to drain off before moving to the curing stage.
This method may not be ideal for boards with sensitive components that can't be fully submerged. Masking is critical here to protect areas that shouldn’t be coated, as the entire board will be immersed unless protected.
Conformal Coating Brush Application
Brush application is a manual method best suited for small-scale projects, touch-ups, or repairs. It offers precise control over where the coating is applied but can result in uneven thickness if not done carefully. Use a soft, fine-bristled brush to apply the coating in thin, even strokes, working in small sections to maintain consistency.
For the conformal coating brush application, start with a small amount of coating on the brush to avoid drips. Apply multiple light coats, allowing each layer to partially cure before adding the next. This method is time-consuming for large boards but works well for intricate areas or when equipment for spray or dip methods isn’t available.
Be cautious of brush marks or air bubbles, as they can compromise the protective layer. Practice on a scrap piece to refine your technique before working on the actual PCB.
Step 5: Cure the Conformal Coating
After applying the coating, it must cure to form a solid protective layer. Curing methods and times vary depending on the coating type. Some coatings cure at room temperature over 24-48 hours, while others require heat (e.g., 80°C for 30 minutes) or UV light exposure for faster results (often just a few minutes under a UV lamp).
Follow the manufacturer’s guidelines for curing conditions to avoid under-curing, which can leave the coating tacky and ineffective, or over-curing, which may cause cracking. If using heat, ensure the PCB components can withstand the temperature without damage. Monitor the curing process to achieve the desired hardness and adhesion.
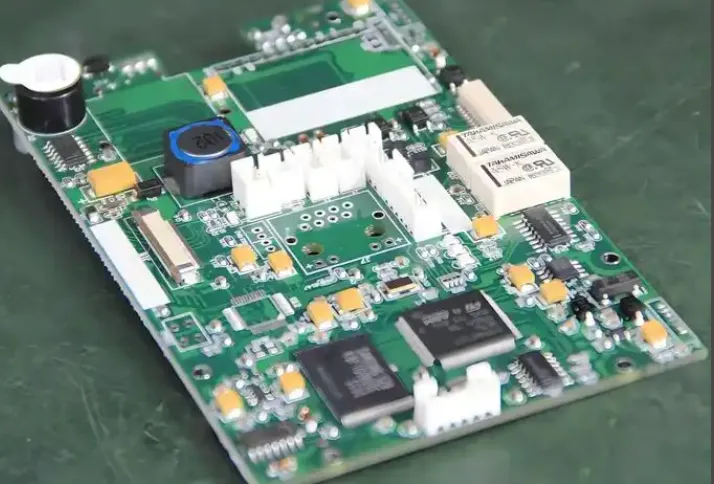
Step 6: Inspect and Remove Masking
Once the coating has cured, inspect the PCB under good lighting or with a magnifying tool to check for defects like bubbles, pinholes, or uneven thickness. Use a multimeter to verify dielectric properties if needed, ensuring the coating provides adequate insulation (typical dielectric strength for conformal coatings ranges from 500 to 1500 volts per mil).
Carefully remove the masking materials without damaging the coating or components. If liquid latex was used, peel it off gently. For tape, use a slow, steady motion to avoid lifting the coating. Touch up any missed spots with a brush if necessary, then re-cure as needed.
Tips for a Successful Conformal Coating Application
To ensure the best results, keep these practical tips in mind during the conformal coating application process:
- Control Thickness: Aim for a coating thickness of 25-75 micrometers, as excessive thickness can stress components, while too thin a layer may not provide adequate protection.
- Work in Batches: For spray or dip methods, process multiple boards together to maintain consistency in application and curing conditions.
- Test First: Always test your chosen method and material on a scrap board to identify potential issues like adhesion problems or masking failures.
- Maintain Equipment: Clean spray guns, brushes, or dip tanks after use to prevent contamination or clogging that could affect future applications.
- Document the Process: Record the coating type, application method, curing time, and environmental conditions for each project to replicate successful results or troubleshoot issues.
Common Mistakes to Avoid in Conformal Coating Application
Even with careful preparation, beginners often encounter pitfalls during the conformal coating process. Here are some common mistakes and how to avoid them:
- Inadequate Cleaning: Skipping or rushing the cleaning step can lead to poor adhesion. Always clean thoroughly and verify the board is free of contaminants.
- Improper Masking: Failing to mask sensitive areas can result in coated connectors or switches, rendering them unusable. Double-check masking before applying the coating.
- Over-Application: Applying too much coating in one pass can cause drips or pooling, leading to uneven protection. Use multiple thin layers for better control.
- Ignoring Curing Conditions: Not following the recommended curing time or temperature can compromise the coating's effectiveness. Stick to the guidelines provided by the coating manufacturer.
Conclusion: Protect Your PCBs with Confidence
Mastering the conformal coating application process is a valuable skill for anyone working with electronics. By following this step-by-step guide, you can confidently apply conformal coating using spray, dip, or brush methods while employing effective masking techniques to protect critical areas. Whether you're safeguarding a single prototype or coating batches of PCBs for production, the right preparation, application, and curing practices will ensure your electronics remain reliable under harsh conditions.
Start with small projects to build your skills, and don't hesitate to experiment with different methods to find what works best for your needs. With practice, you'll achieve professional-quality results that enhance the durability and performance of your electronic designs. Protect your PCBs today and ensure they stand the test of time!


