ALLPCB


Introduction
PCB rework and repair are vital processes in electronics manufacturing and maintenance, allowing engineers to address failures without scrapping entire assemblies. Component replacement often stands out as a common task during PCB repair, where defective parts like SMDs or BGAs must be swapped out efficiently. Solder paste for rework serves as the cornerstone material, providing the precise alloy-flux mixture needed for reliable new joints. Proper solder paste application for rework ensures joint integrity, minimizes defects, and complies with industry benchmarks. This guide delves into techniques, best practices, and troubleshooting for electric engineers handling these operations. Mastering these steps can significantly reduce downtime and costs in production environments.
Understanding PCB Rework and Repair
PCB rework involves removing and replacing components on an assembled board to restore functionality, while PCB repair focuses on fixing physical damage like lifted pads or broken traces. Both processes demand precision to avoid further harm to surrounding areas or the substrate. In component replacement, engineers first assess the failure mode, such as overheating or mechanical stress, before proceeding. Solder paste for repair bridges the gap between old solder removal and new joint formation, offering controlled deposition. These activities align with established procedures in IPC-7711/7721, which outline methods for rework and repair of electronic assemblies. Understanding the distinction helps teams select the right approach for sustained board reliability.
The relevance of PCB rework grows in high-mix, low-volume production or field service scenarios, where full replacement proves uneconomical. Effective solder paste use prevents issues like tombstoning or bridging during reflow. Engineers benefit from these skills in prototyping, where iterations are frequent. Ultimately, proficient PCB repair extends product lifecycles and supports lean manufacturing goals.
Technical Principles of Solder Paste in PCB Rework
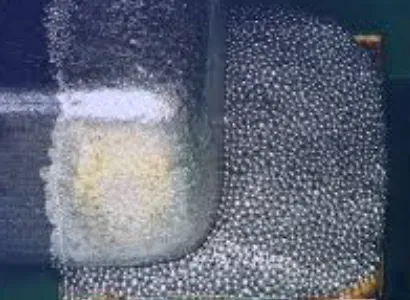
Solder paste consists of microscopic solder spheres suspended in flux, designed to form reliable joints upon heating. The flux activates to remove oxides, promote wetting, and leave minimal residue post-reflow. For PCB rework, the paste's viscosity must suit manual or semi-automated application, ensuring even deposit without slumping. No-clean formulations dominate solder paste for rework due to their low-residue profile, reducing cleaning needs on sensitive assemblies. Water-soluble variants offer higher activity for heavily oxidized pads but require thorough post-process rinsing to prevent corrosion. Particle size influences printability and joint voids, with Type 4 or 5 pastes favoring fine-pitch work.
Thermal behavior plays a key role in solder paste application for rework. The alloy, typically SAC305 for lead-free, melts uniformly under controlled profiles to match component tolerances. Flux chemistry dictates activation temperature and compatibility with board finishes like ENIG or HASL. Engineers must consider paste shelf life and storage, as improper handling leads to separation or degradation. These principles underpin defect-free component replacement, balancing flow and stability.
Related Reading: Solder Paste vs. Solder Wire: Which Should You Use?
Preparing the PCB Site for Solder Paste Application
Site preparation sets the foundation for successful solder paste for repair. After component removal using hot air or conduction tools, technicians inspect pads for residue or damage per IPC-A-610 acceptability criteria. Mechanical or chemical cleaning removes old solder and oxides, often with wick, pump, or mild abrasives. Preheat the board gently to drive off moisture and enhance paste adhesion without warping. Verify pad coplanarity and integrity, as deformed sites compromise joint quality. This step prevents contamination that could cause voids or weak bonds during reflow.
Cleanliness directly impacts solder paste performance in component replacement. Residues from prior fluxes interfere with new paste wetting, leading to cold joints. Use isopropyl alcohol or specialized cleaners, followed by drying and inspection under magnification. Document findings to track rework history. Proper prep aligns with J-STD-001 requirements for soldered assemblies, ensuring process control.
Methods for Solder Paste Application in Rework
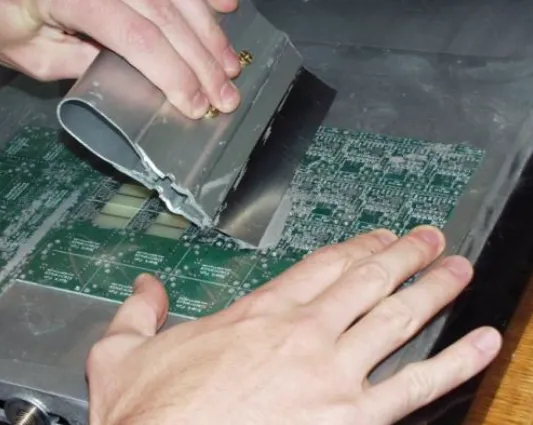
Several techniques suit solder paste application for rework, each with trade-offs in precision and speed. Stencil printing offers the highest accuracy for multi-pad components, using frameless mini-stencils aligned over the site. Engineers cut or fabricate stencils matching pad arrays, then squeegee paste through apertures for uniform volume. This method excels in production rework, mimicking original assembly. For prototypes or isolated pads, syringe dispensing provides flexibility, allowing pinpoint deposition via needle tips. Control pressure and angle to avoid excess, which causes bridging.
Jet dispensing automates paste placement for complex geometries, but manual syringe remains accessible for benchtop PCB repair. Preheat the board slightly to reduce paste viscosity, aiding flow onto pads. Aim for 75-125% pad coverage by volume, inspected via shadow moiré or X-ray if available. Compare methods: stencils minimize variability, syringes enable quick fixes. Select based on component pitch and site accessibility.
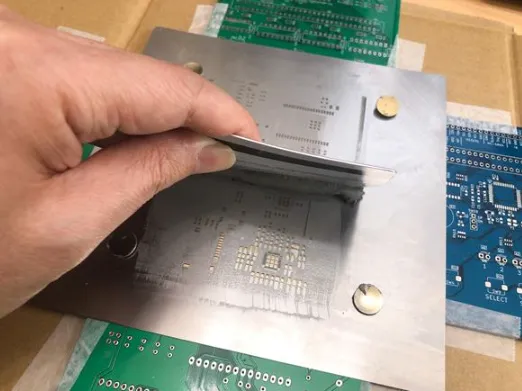
Hand application with spatulas suits emergencies but risks inconsistency. Always agitate paste jars before use to remix settled powder. Post-application, level deposits with a brush if needed. These methods ensure solder paste for rework integrates seamlessly into the process.
Component Placement and Reflow After Paste Application
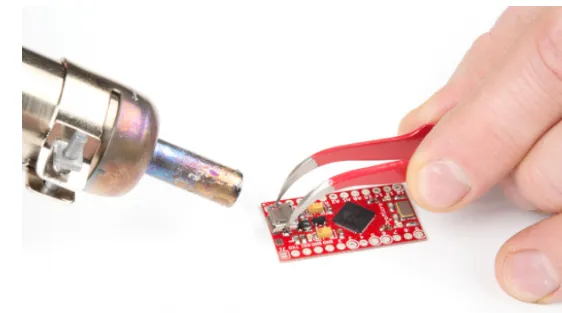
Once solder paste for rework sits on pads, precise placement follows. Use tweezers or vacuum pick-up tools under microscope vision for alignment, especially fine-pitch QFNs or BGAs. Gentle pressure seats the component, displacing air without disturbing paste. Secure with fixturing if multi-sided. Reflow employs hot air stations with bottom preheat, profiling to peak temperatures that melt paste without overheating neighbors.
Monitor profiles to avoid flux charring or delamination. Nitrogen ambient reduces oxidation for high-reliability joints. Post-reflow, clean if using water-soluble paste and inspect for fillet formation, voids, or bridges. This sequence completes effective component replacement in PCB rework.
Best Practices for Reliable PCB Rework
Adhere to IPC-7711/7721 guidelines throughout for standardized outcomes. Train operators on certification modules covering tools and procedures. Maintain equipment calibration, like stencil printers and reflow stations, for repeatability. Use data logging for thermal profiles to verify compliance. Select solder paste matched to alloy and flux needs of the assembly class.
Volume control prevents defects: too little causes open joints, excess leads to shorts. Implement 100% optical inspection post-paste, pre-placement. Preheat boards to stabilize temperature gradients. Document every step for traceability. These practices elevate PCB repair quality.
Related Reading: PCB Rework Station for SMT Components: A Comprehensive Guide
Troubleshooting Common Issues in Solder Paste Rework
Insufficient wetting often stems from pad contamination, resolved by aggressive cleaning before solder paste application for rework. Bridges from excess paste require stencil thickness optimization or syringe technique refinement. Voids indicate trapped flux or rapid cooling; extend soak times in profiles. Tombstoning hits small passives due to uneven heating, mitigated by symmetric airflow.
Solder balls scatter from high-velocity squeegeeing; reduce speed and use finer mesh stencils. Residue corrosion from uncleaned water-soluble paste demands immediate rinsing. Microscope exams and cross-sections aid root cause analysis. Systematic troubleshooting sustains high yields in PCB rework.
Conclusion
Mastering solder paste application for rework empowers electric engineers to handle component replacement with confidence and precision. From site prep to reflow, each step builds toward robust joints compliant with industry standards. Practical methods like stencil and syringe balance accuracy and accessibility in PCB repair. Troubleshooting sharpens skills for real-world challenges. Implementing these insights minimizes defects, cuts costs, and prolongs assembly life. Prioritize process control for enduring reliability.
FAQs
Q1: What types of solder paste are best for PCB rework?
A1: No-clean solder paste for rework suits most applications due to minimal residues that avoid post-cleaning risks. Water-soluble options excel on oxidized pads but require thorough water rinsing to prevent corrosion. Match particle size to pitch, like Type 4 for fine features. Always verify alloy compatibility with the board finish for optimal wetting during component replacement.
Q2: How do you apply solder paste for repair using a stencil?
A2: Align a mini-stencil precisely over cleaned pads, then squeegee paste evenly with controlled pressure and speed. Lift stencil perpendicularly to avoid smearing. Inspect volume uniformity under light. This method ensures consistent deposits for reliable PCB repair joints. Preheat aids adhesion on cooler boards.
Q3: What are common mistakes in solder paste application for rework?
A3: Over-application leads to bridging, while under-application causes weak joints; measure volumes accurately. Skipping pad cleaning traps oxides, hindering wetting. Improper storage degrades paste consistency. Follow IPC guidelines and inspect at each stage to catch issues early in component replacement.
Q4: Can syringe dispensing replace stencil for PCB rework?
A4: Yes, syringes work well for low-volume or irregular sites in PCB rework, offering pinpoint control. Preheat pads for better flow, and use fine needles for precision. Though less uniform than stencils, practice yields good results for quick repairs. Combine with vision aids for fine-pitch.
References
IPC-7711/7721D — Rework, Modification and Repair of Electronic Assemblies. IPC, 2024
J-STD-001H — Requirements for Soldered Electrical and Electronic Assemblies. IPC, 2022
IPC-A-610H — Acceptability of Electronic Assemblies. IPC, 2020