 ALLPCB


Creating a DIY PCB stencil with a laser cutter is an excellent way for hobbyists to streamline surface mount technology (SMT) assembly at home. Whether you're prototyping a new design or assembling a small batch of boards, using materials like Mylar or acrylic and the right laser cutter settings can save time and improve precision. In this guide, we'll walk you through the process of making your own PCB stencil, focusing on choosing the best materials and optimizing laser cutter settings for clean, accurate results.
This comprehensive blog post will cover everything you need to know about crafting a DIY PCB stencil using a laser cutter. From selecting between Mylar and acrylic to fine-tuning power and speed settings, we’ll provide actionable tips and detailed steps to help you succeed in your SMT projects. Let’s dive into the world of DIY PCB stencils and get started with the essentials.
Why Use a Laser Cutter for DIY PCB Stencils?
For hobbyists working on SMT assembly, applying solder paste to tiny pads can be a tedious and error-prone task if done by hand. A stencil simplifies this by allowing you to apply paste evenly across all pads in one go. Using a laser cutter to create your stencil ensures precision, especially for intricate designs with fine-pitch components. Unlike manual cutting methods, a laser cutter can produce clean, consistent openings that match your PCB layout perfectly.
Laser cutters are also accessible to many hobbyists through local maker spaces or affordable desktop models. They offer a cost-effective way to produce stencils compared to professional metal stencils, which can be expensive for one-off projects. With the right materials and settings, you can achieve professional-quality results at a fraction of the cost.

Choosing the Right Material for Your DIY PCB Stencil
Selecting the appropriate material is critical for creating a functional and durable PCB stencil. The two most popular options for hobbyists using laser cutters are Mylar and acrylic. Both have unique properties that make them suitable for different project needs. Let’s break down the characteristics of each material to help you decide which is best for your DIY PCB stencil.
Mylar: The Go-To Choice for Flexibility and Affordability
Mylar, a type of polyester film, is a favorite among hobbyists for DIY PCB stencils due to its affordability and ease of use. Typically available in thicknesses ranging from 3 to 7 mils (0.003 to 0.007 inches), Mylar is thin, flexible, and heat-resistant, making it ideal for short-run SMT projects. You can purchase Mylar sheets at craft stores or online for as little as $1-2 per sheet, keeping costs low for prototyping.
Mylar works exceptionally well with laser cutters, as it can be cut precisely to create small openings for solder paste. However, it’s not as durable as metal stencils, lasting for about 10-20 uses before showing signs of wear. This makes it perfect for one-off designs or small batches where longevity isn’t a priority. Additionally, Mylar’s flexibility allows it to conform to slight irregularities on a PCB surface, ensuring even solder paste application.
Acrylic: A Durable but Less Flexible Option
Acrylic, a type of rigid plastic, is another material option for DIY PCB stencils, though it’s less common than Mylar. Available in sheets with thicknesses starting at around 0.06 inches (60 mils), acrylic is much sturdier and can withstand more uses—potentially up to 50 or more—before degrading. It’s a good choice if you need a stencil for repeated projects or if durability is a concern.
However, acrylic has some downsides for stencil making. Its rigidity means it doesn’t conform to uneven PCB surfaces as well as Mylar, which can lead to uneven solder paste application. Acrylic also requires more powerful laser settings to cut through, which may not be suitable for low-wattage desktop laser cutters often used by hobbyists. Sheets of acrylic can cost between $5-10 depending on size and thickness, making it a bit pricier than Mylar for initial setup.

Other Material Options to Consider
Beyond Mylar and acrylic, some hobbyists experiment with materials like laser printer transparency sheets, which are clear plastic films about 4 mils thick. These are budget-friendly, often costing $0.50-1 per sheet at office supply stores, and can be cut with a laser. However, they are less durable than Mylar, typically lasting only 5-10 uses, and may not handle high temperatures as well during reflow soldering.
For most hobbyists, Mylar strikes the best balance of cost, ease of cutting, and usability. If you’re just starting out with DIY PCB stencils, begin with Mylar before exploring other materials.
Preparing Your Design for Laser Cutting
Before you start cutting your stencil, you need to prepare a digital design file that matches your PCB layout. This step is crucial for ensuring the stencil openings align perfectly with the solder pads on your board. Here’s how to get started with the design process.
Exporting the Solder Paste Layer
Most PCB design software allows you to export a specific layer for solder paste, often labeled as “tCream” or “bCream” for top and bottom layers, respectively. Use this layer to create your stencil design, as it contains the exact shapes and positions of the pads where solder paste will be applied. Export the layer as a vector file format like DXF or EPS, which are compatible with most laser cutter software.
Ensure the scale of your exported file is set to 1:1 to match the actual size of your PCB. Double-check the dimensions after exporting to avoid any scaling errors that could misalign the stencil openings.
Adjusting Pad Openings for Precision
For fine-pitch components with small pads (e.g., 0.5mm pitch or less), consider reducing the size of the stencil openings by about 10-20% compared to the actual pad size. This prevents excess solder paste from being applied, which can cause bridging between pins during reflow. Many design tools allow you to shrink the shapes in the solder paste layer before exporting, or you can adjust them in vector editing software.

Laser Cutter Settings for Cutting Mylar and Acrylic
Getting the laser cutter settings right is essential for clean cuts and precise stencil openings. The optimal settings depend on the material, thickness, and the power of your laser cutter. Below are general guidelines for cutting Mylar and acrylic, but always test on a scrap piece of material first, as different machines may require adjustments.
Settings for Mylar (3-7 mil Thickness)
Mylar is relatively easy to cut with even low-power laser cutters (e.g., 5W diode lasers or 40W CO2 lasers). Start with the following settings as a baseline:
- Power: 10-20% (for a 40W CO2 laser) or 50-70% (for a 5W diode laser)
- Speed: 50-100 mm/s (slower speeds for thicker Mylar)
- Frequency: 1000-5000 Hz (if adjustable on your machine)
These settings should produce clean cuts without burning or melting the edges of the Mylar. If you notice charring or rough edges, reduce the power or increase the speed. For very fine details, multiple passes at lower power can help maintain precision.
Settings for Acrylic (60 mil Thickness or More)
Acrylic requires more power due to its thickness and density. It’s best suited for higher-wattage CO2 lasers (40W or above). Suggested starting settings include:
- Power: 50-70% (for a 40W CO2 laser)
- Speed: 10-20 mm/s
- Frequency: 5000-10000 Hz
Acrylic cuts may produce more residue or melted edges, so ensure proper ventilation and clean the stencil after cutting. Multiple passes might be necessary for thicker sheets to achieve a complete cut without excessive heat buildup.

Step-by-Step Guide to Cutting Your DIY PCB Stencil
Now that you’ve chosen your material and dialed in the settings, let’s go through the process of cutting your stencil with a laser cutter. Follow these steps for a smooth workflow.
Step 1: Secure the Material
Place your chosen material (Mylar or acrylic) on the laser cutter bed and secure it with tape or weights to prevent movement during cutting. Ensure the surface is flat to avoid uneven cuts.
Step 2: Load and Align Your Design
Import your stencil design file into the laser cutter software. Use the machine’s preview or alignment tools to position the design correctly on the material. Double-check that the scale matches your PCB dimensions.
Step 3: Test Cut on Scrap Material
Before cutting your final stencil, run a test on a small piece of the same material. Check for clean edges and accurate sizing of the openings. Adjust power or speed if needed.
Step 4: Cut the Stencil
Once satisfied with the test, proceed to cut the full stencil. Monitor the process to ensure there are no issues like material shifting or burning.
Step 5: Clean and Inspect
After cutting, remove the stencil from the laser bed and clean off any residue or debris. Inspect the openings under a magnifying glass to ensure they are free of burrs or uncut areas. For Mylar, be gentle to avoid tearing.
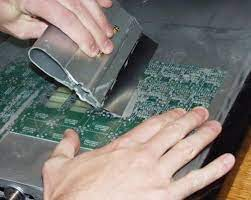
Using Your DIY PCB Stencil for Solder Paste Application
With your stencil ready, it’s time to apply solder paste to your PCB. Here’s how to do it effectively:
- Align the stencil over your PCB, ensuring the openings match the solder pads. Use tape or a stencil frame to hold it in place.
- Apply a small amount of solder paste to one edge of the stencil.
- Use a squeegee or credit card to spread the paste evenly across the stencil, pushing it through the openings onto the pads.
- Lift the stencil carefully to avoid smudging the paste.
- Inspect the paste application for consistency before placing components.
Tips for Success with DIY PCB Stencils
To get the best results from your DIY PCB stencil, keep these tips in mind:
- Start Simple: If you’re new to laser cutting stencils, begin with larger pad sizes and simpler designs to build confidence.
- Store Properly: Keep Mylar stencils flat or rolled to avoid creases, and store acrylic stencils away from heat to prevent warping.
- Clean After Use: Wipe down your stencil with isopropyl alcohol after each use to remove solder paste residue and extend its lifespan.
- Experiment with Settings: Every laser cutter is different, so don’t hesitate to tweak power and speed based on your machine and material.
Conclusion: Mastering DIY PCB Stencils with a Laser Cutter
Crafting a DIY PCB stencil with a laser cutter is a game-changer for hobbyists working on SMT assembly. By choosing the right material—whether it’s affordable and flexible Mylar or durable acrylic—and fine-tuning your laser cutter settings, you can create precise stencils that make solder paste application quick and consistent. This guide has walked you through the essentials, from material selection to cutting techniques, ensuring you have the knowledge to tackle your next PCB project with confidence.
With practice, you’ll refine your process and achieve even better results, saving time and effort on every build. Embrace the power of DIY PCB stencils and take your electronics prototyping to the next level. Start experimenting with your laser cutter today and see the difference a well-made stencil can make in your workflow.


