ALLPCB


Overview
Face landmark detection locates facial regions such as the eyebrows, eyes, nose, mouth, and jaw. It is used in many applications. This guide demonstrates face landmark detection using OpenCV and a Raspberry Pi. A pre-trained facial landmark detector from the dlib library is used to estimate locations of key facial structures, and Python OpenCV is used to visualize the detected facial regions.
Required components
Hardware
- Raspberry Pi 3
- Pi camera module
Software
- OpenCV
- Python 3
- dlib
- imutils
- NumPy
Notes on setup
Before running this project on a Raspberry Pi, install OpenCV, imutils, dlib, NumPy, and other dependencies. OpenCV is used for digital image processing tasks such as object detection and face recognition.
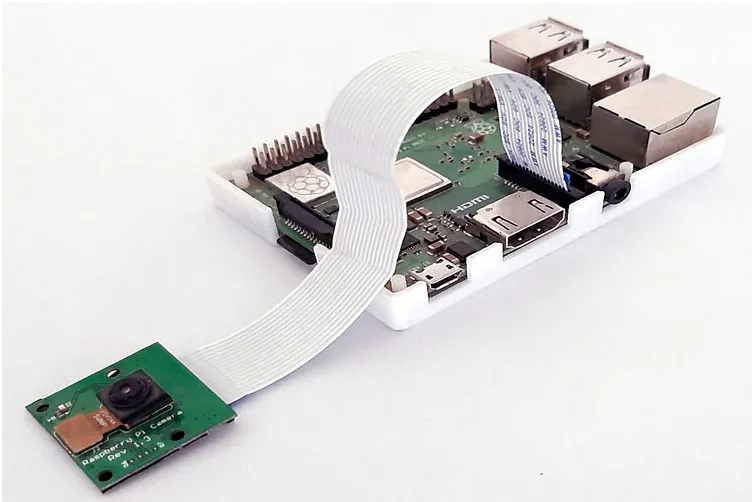
For details on connecting the Pi camera to a Raspberry Pi, follow a Pi camera setup guide for your platform.
Installing OpenCV on Raspberry Pi
OpenCV will be used for image processing on the Raspberry Pi. First, update the system and install required dependencies.
sudo apt-get update
sudo apt-get install libhdf5-dev -y sudo apt-get install libhdf5-serial-dev -y sudo apt-get install libatlas-base-dev -y sudo apt-get install libjasper-dev -y sudo apt-get install libqtgui4 -y sudo apt-get install libqt4-test -y
Install OpenCV for Python:
pip3 install opencv-contrib-python==4.1.0.25
Install imutils, which provides convenience functions such as translation, rotation, resizing, and easier OpenCV image display:
pip3 install imutils
Install dlib, a toolkit that contains machine learning algorithms and tools for solving practical problems:
pip3 install dlib
Install NumPy:
pip3 install numpy
How dlib detects facial parts
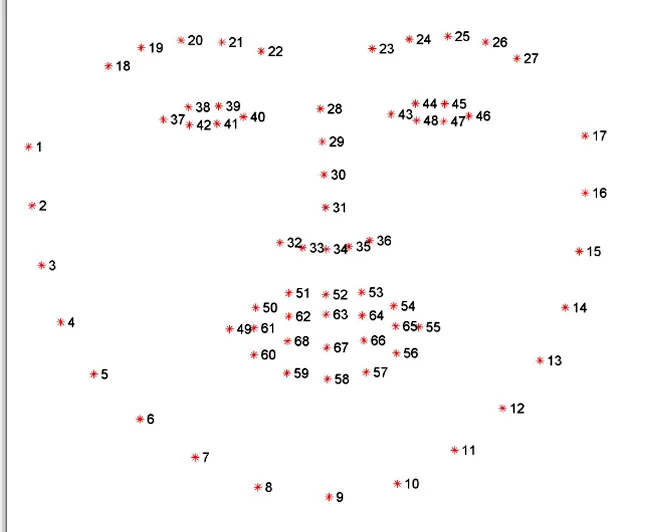
The dlib pre-trained facial landmark detector estimates the (x, y) coordinates of 68 facial landmarks mapped to facial structures. The dlib predictor is trained on the iBUG 300-W dataset. The following images illustrate the 68-point indexing:
Running face landmark detection on Raspberry Pi
The complete Python code using dlib's pre-trained predictor is provided at the end of this page. The following sections explain important parts of the code.
Imports and camera initialization
Start by importing the required libraries and initializing the Pi camera. Set the resolution to 640x480 and frame rate to 30 fps.
from imutils import face_utils import numpy as np import argparse import imutils import dlib import cv2 from picamera.array import PiRGBArray from picamera import PiCamera
camera = PiCamera() camera.resolution = (640, 480) camera.framerate = 30
Argument parser and dlib initialization
Use an argument parser to provide the path to the facial landmark predictor, then initialize dlib's HOG-based face detector and load the pre-trained shape predictor.
ap = argparse.ArgumentParser() ap.add_argument("-p", "--shape-predictor", required=True, help="path to facial landmark predictor") args = vars(ap.parse_args()) detector = dlib.get_frontal_face_detector() predictor = dlib.shape_predictor(args["shape_predictor"])
Capturing frames and handling key events
Start capturing frames from the Pi camera using capture_continuous. Display a live preview window and read keyboard input. Press the "s" key to capture a frame for processing.
rawCapture = PiRGBArray(camera, size=(640, 480)) for frame in camera.capture_continuous(rawCapture, format="bgr", use_video_port=True): image = frame.array cv2.imshow("Frame", image) key = cv2.waitKey(1) & 0xFF rawCapture.truncate(0) if key == ord("s"): image = imutils.resize(image, width=400) gray = cv2.cvtColor(image, cv2.COLOR_BGR2GRAY) rects = detector(gray, 1) # Loop over detected faces for (i, rect) in enumerate(rects): # Determine facial landmarks for the face region shape = predictor(gray, rect) shape = face_utils.shape_to_np(shape) # Loop over each facial part individually for (name, (i, j)) in face_utils.FACIAL_LANDMARKS_IDXS.items(): clone = image.copy() cv2.putText(clone, name, (10, 30), cv2.FONT_HERSHEY_SIMPLEX, 0.7, (0, 0, 255), 2) # Draw circles for the specific facial part for (x, y) in shape[i:j]: cv2.circle(clone, (x, y), 1, (0, 0, 255), -1) # Extract the ROI for the facial part and resize (x, y, w, h) = cv2.boundingRect(np.array([shape[i:j]])) roi = image[y:y + h, x:x + w] roi = imutils.resize(roi, width=250, inter=cv2.INTER_CUBIC) # Display the facial part and its ROI cv2.imshow("ROI", roi) cv2.imshow("Image", clone) cv2.waitKey(0) # Visualize all facial landmarks on the face for (x, y) in shape: cv2.circle(image, (x, y), 1, (0, 0, 255), -1) cv2.imshow("Image", image) cv2.waitKey(0)
Testing the detector
To test the project, create a directory and navigate into it:
mkdir face-part-detector cd face-part-detector
Download the file shape_predictor_68_face_landmarks.dat, extract it, and place the file in the project directory. Create a file named detect.py and paste the code shown above.
Run the script with:
python3 detect.py --shape-predictor shape_predictor_68_face_landmarks.dat
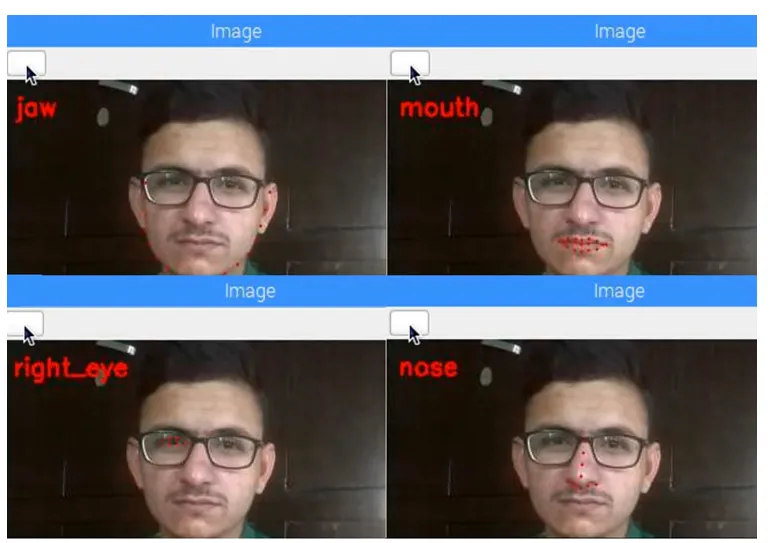
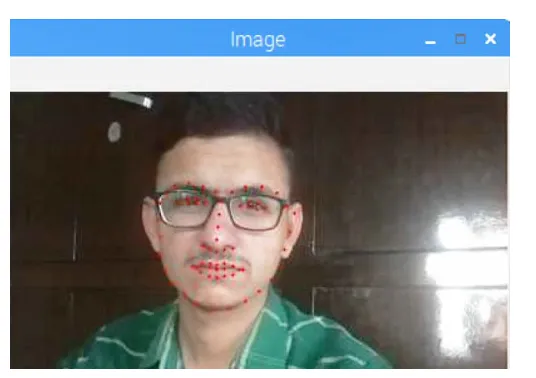
A window will show the live camera preview. Press "s" to select a frame from the stream. The mouth region will show red points corresponding to detected landmarks. Use the Escape key to step through other facial regions.