ALLPCB


Introduction
Copper weight plays a pivotal role in printed circuit board design, particularly when considering design for manufacturability, or DFM. It refers to the thickness of the copper foil used on PCB layers, directly influencing electrical performance, thermal management, and fabrication feasibility. Engineers must balance copper weight selection with requirements for current carrying capacity, trace width, and overall board reliability. Incorrect choices can lead to manufacturing defects, such as etching undercuts or excessive warpage, increasing costs and delays. In high-power applications, optimal copper weight ensures robust power layer design and effective thermal dissipation. This article explores these relationships through engineering principles and practical guidance tailored for electrical engineers.
What Is Copper Weight and Why It Matters for DFM
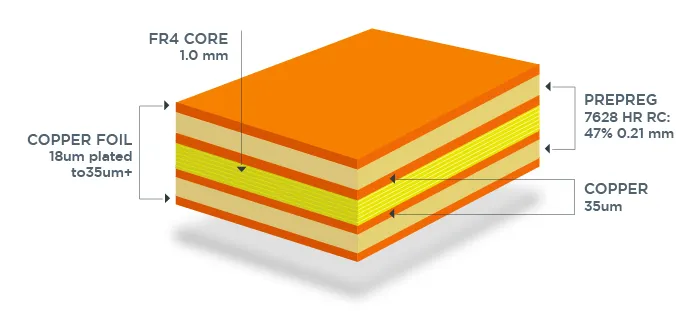
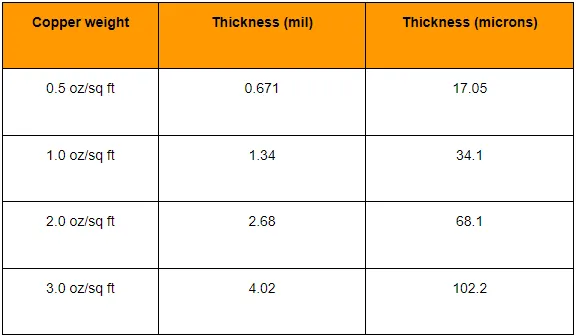
Copper weight measures the mass of copper per square foot of surface area, expressed in ounces per square foot, or oz/ft2. Common values include 1 oz/ft2, equivalent to approximately 35 microns or 1.37 mils in thickness, which serves as the standard for most designs. Heavier weights, such as 2 oz/ft2 at 70 microns or 3 oz/ft2 at 105 microns, provide greater conductivity but demand adjusted design rules. During fabrication, the starting copper foil weight determines finished thickness after plating and etching processes. For DFM, copper weight affects etch factor, minimum feature sizes, and panel utilization efficiency.
Selecting appropriate copper weight aligns design intent with manufacturing capabilities, preventing issues like over-etching in heavy copper boards. Lighter weights enable finer trace widths and higher densities, ideal for signal integrity in high-speed circuits. Conversely, heavier copper supports copper weight DFM strategies in power electronics by enhancing current carrying capacity without excessive trace widths. Industry standards like IPC-2152 guide these decisions by relating copper thickness to thermal and electrical limits. Ignoring these factors risks yield losses, as heavier copper requires longer etch times and precise control to maintain trace geometries. Ultimately, copper weight optimization streamlines production while meeting performance targets.
Technical Principles of Copper Weight in PCB Design
Copper weight directly governs current carrying capacity, as thicker copper reduces resistance and allows higher amperage for a given temperature rise. According to IPC-2152, trace width calculations must account for copper thickness, external versus internal layer positioning, and ambient conditions to avoid overheating. For instance, doubling copper weight from 1 oz/ft2 to 2 oz/ft2 can halve the required trace width for the same current, freeing space for routing. This principle extends to power layer design, where full copper pours benefit from heavier weights to minimize voltage drops across large areas. Engineers model these using finite element analysis to predict hotspots.
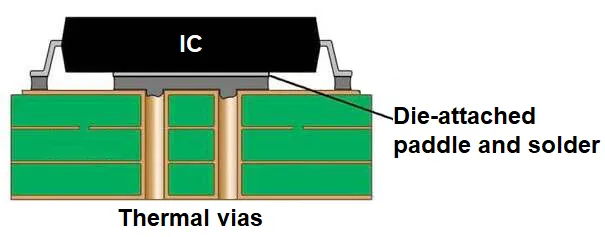
Thermal dissipation improves with increased copper weight due to higher cross-sectional area for heat spreading. Thicker copper conducts heat laterally more effectively, reducing temperature gradients in high-power density boards. In multilayer stackups, asymmetric copper weights between layers can induce warpage during lamination and reflow, as differential thermal expansion stresses the core. IPC-6012 specifies minimum finished copper thicknesses to ensure plating uniformity and via reliability. Power layers with 2 oz/ft2 or more excel in applications like motor drives, distributing heat evenly to vias and planes. However, excessive weight complicates via filling and increases drill aspect ratios.
Etching processes reveal copper weight's DFM challenges, as heavier foils etch slower from the sides, leading to trapezoidal trace profiles. This undercutting demands wider minimum trace widths and spaces, often 50% more than for 1 oz/ft2. Fabricators adjust etchants and conveyor speeds accordingly, but design rules must incorporate these tolerances early. In high-frequency designs, skin effect limits current to the copper surface, making weight less impactful beyond 2 oz/ft2 for signals. For power integrity, heavier inner layers support plane capacitance while outer layers handle component connections.
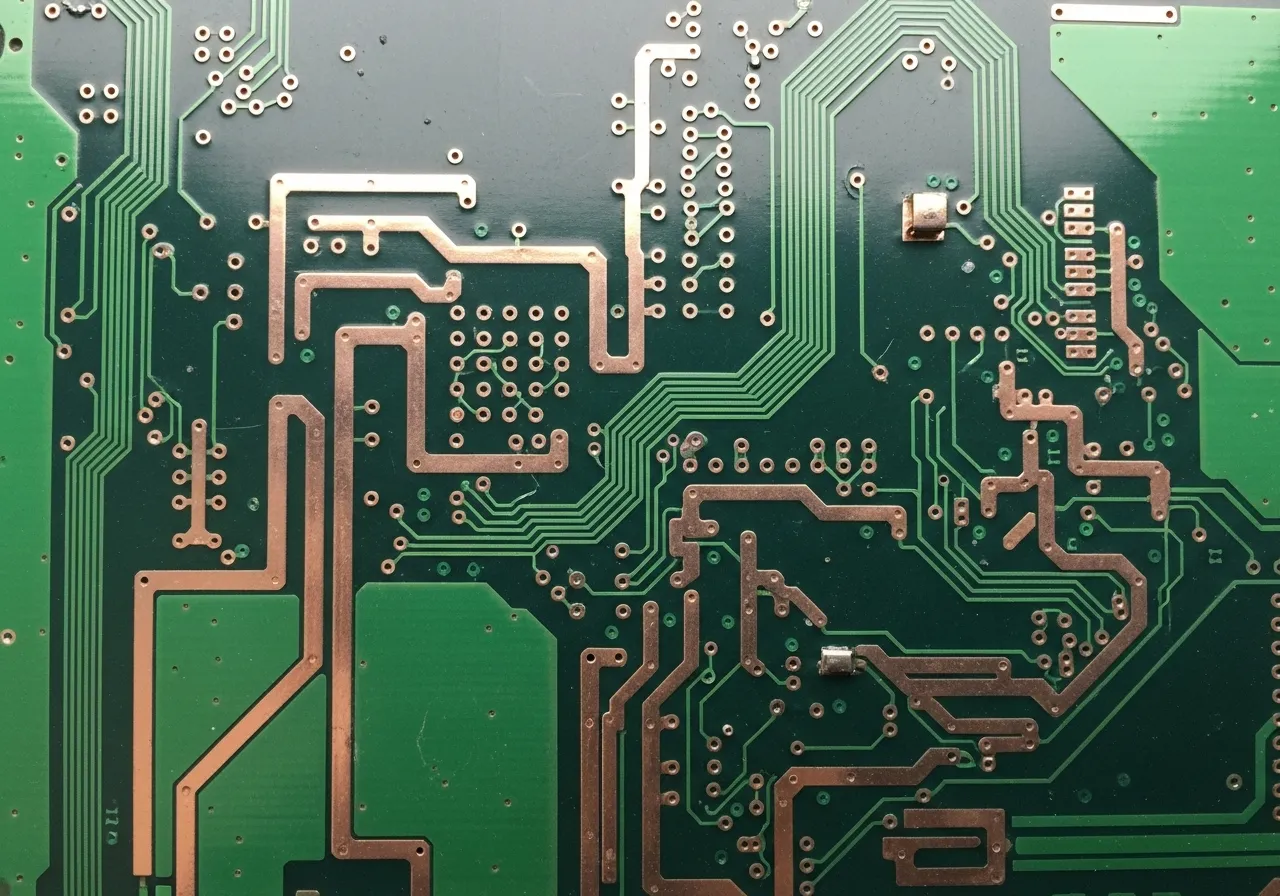
Trace width optimization hinges on copper weight to meet current carrying capacity without compromising density. Lighter copper necessitates wider traces, potentially crowding boards and raising impedance mismatches. Standards emphasize derating for board temperature and airflow, ensuring margins for real-world operation. Power layer design leverages solid copper fills, where weight dictates inductance and ripple current handling. Thermal simulations validate these choices, correlating weight to junction temperatures.
Best Practices for Copper Weight Selection in DFM
Start by assessing peak currents and thermal budgets to select copper weight, prioritizing IPC-2152 charts for trace sizing. For boards under 5A per trace, 1 oz/ft2 suffices with standard 10 mil widths; scale up for higher loads. Specify finished copper thickness in stackup drawings, accounting for 20-30% plating buildup on outer layers. Balance weights across layers to minimize warpage, using 1 oz/ft2 internals and 2 oz/ft2 externals for power-heavy designs. Collaborate with fabricators on DFM reviews to confirm etch capabilities for chosen weights.
Incorporate copper weight DFM by widening traces proportionally: add 0.5-1 mil per oz beyond 1 oz/ft2 baseline. Use via stitching arrays on power layers to enhance thermal dissipation and current sharing. Simulate power distribution networks early, verifying voltage drops stay below 5%. For multilayer boards, heavier power planes reduce loop inductance, improving EMI performance. Test prototypes with thermal cameras to correlate weight choices with hotspot mitigation. Document all assumptions in fabrication notes for repeatability.
Hybrid stackups, mixing weights per layer, optimize cost and performance but require symmetric pairing to control bow and twist. Adhere to minimum annular ring rules, enlarged for heavy copper plating. Progressive etching techniques handle up to 4 oz/ft2 reliably when designs respect spacing minima.
Troubleshooting Common Copper Weight Issues
Engineers often encounter overheating in power sections due to underestimated current carrying capacity with light copper. Review trace widths against IPC-2152, widening by 20-50% or upgrading weight resolves this. Warpage from mismatched outer heavy copper appears post-lamination; symmetrize layers or add constraint cores. Etch defects like shorts stem from inadequate spacing; iterate DFM with 1.5x minimums for 2 oz/ft2. Thermal throttling in dense designs improves via copper-balanced pours and weight increases.
Conclusion
Mastering copper weight ensures PCB designs excel in manufacturability, reliability, and performance. Key considerations include its effects on current carrying capacity, trace width, power layer design, and thermal dissipation. By applying standards like IPC-2152 and structured analysis, engineers mitigate DFM risks effectively. Optimal selection drives efficient production and robust operation in demanding applications. Prioritize simulation and collaboration for superior outcomes.
FAQs
Q1: What is the standard copper weight for most PCBs, and how does it impact copper weight DFM?
A1: The standard is 1 oz/ft2, or 35 microns thick, balancing cost, etch precision, and performance. It supports typical trace widths of 5-10 mils for signals, easing DFM by minimizing undercutting risks. Heavier weights demand wider features and longer processes, so reserve them for high-current needs to avoid yield issues.
Q2: How does copper weight affect current carrying capacity and trace width?
A2: Thicker copper increases cross-section, boosting current capacity for a given width and temperature rise per IPC-2152. For example, 2 oz/ft2 halves needed trace width versus 1 oz/ft2 at the same amperage. This allows compact routing but requires DFM adjustments for etching.
Q3: Why is copper weight critical for power layer design and thermal dissipation?
A3: Heavier copper in power layers reduces resistance and spreads heat evenly, preventing hotspots. It enhances thermal dissipation through better conduction to heatsinks or vias. Designs optimize by using 2-3 oz/ft2 planes, ensuring low voltage drop and reliable high-power operation.
Q4: Can varying copper weights across layers cause PCB issues?
A4: Yes, asymmetry induces warpage from CTE mismatch during thermal cycling. Balance weights or use cores for stability, aligning with DFM for flatness. This maintains via integrity and assembly yield.
References
IPC-2152 — Standard for Determining Current-Carrying Capacity in Printed Board Design. IPC, 2009
IPC-6012E — Qualification and Performance Specification for Rigid Printed Boards. IPC, 2017
IPC-2221B — Generic Standard on Printed Board Design. IPC, 2012