 ALLPCB


Are you struggling with residue on your printed circuit boards (PCBs) after cleaning, or wondering how to perfect the rinsing process to ensure optimal performance? The rinsing step in PCB cleaning is often overlooked, but it’s vital for removing contaminants and preventing long-term damage. In this comprehensive guide, we’ll dive deep into PCB cleaning rinsing techniques, the role of deionized water for PCB rinsing, the best rinsing agents for PCB cleaning, effective methods for removing residue after PCB cleaning, and the importance of drying PCBs after rinsing. Let’s explore how mastering the rinse can elevate your PCB production process.
Why Rinsing Matters in PCB Cleaning
Rinsing is a critical step in the PCB cleaning process. During manufacturing and assembly, PCBs are exposed to contaminants like flux residues, dust, oils, and other particles. If not properly removed, these contaminants can lead to corrosion, short circuits, or poor adhesion of protective coatings. Rinsing ensures that cleaning agents and loosened debris are completely washed away, leaving the board clean and ready for the next stage of production or use.
A poor rinse can undo all the hard work of cleaning, leaving behind harmful residues that degrade performance over time. For instance, ionic residues from flux can attract moisture, leading to dendritic growth and electrical failures. Studies suggest that even a small amount of residue—measured in micrograms per square centimeter—can increase the risk of failure in high-reliability applications like aerospace or medical devices. That’s why understanding and implementing effective rinsing techniques is non-negotiable for anyone involved in PCB manufacturing or repair.
Essential PCB Cleaning Rinsing Techniques
There are several approaches to rinsing PCBs, each suited to different types of contaminants, board designs, and production scales. Below, we’ll cover the most common and effective PCB cleaning rinsing techniques to help you achieve spotless results.
Manual Rinsing with Brushes
For small-scale operations or rework, manual rinsing is often the go-to method. This involves using a soft-bristled brush and a rinsing agent to gently scrub the PCB surface under a steady stream of liquid. The brushing action helps dislodge stubborn residues while the rinse washes them away. This technique is particularly effective for localized cleaning, such as after soldering repairs.
However, manual rinsing requires care to avoid damaging delicate components or traces. Always use a non-abrasive brush and ensure the rinsing liquid is compatible with the board materials. A typical setup might involve rinsing for 1-2 minutes per area, depending on the level of contamination.
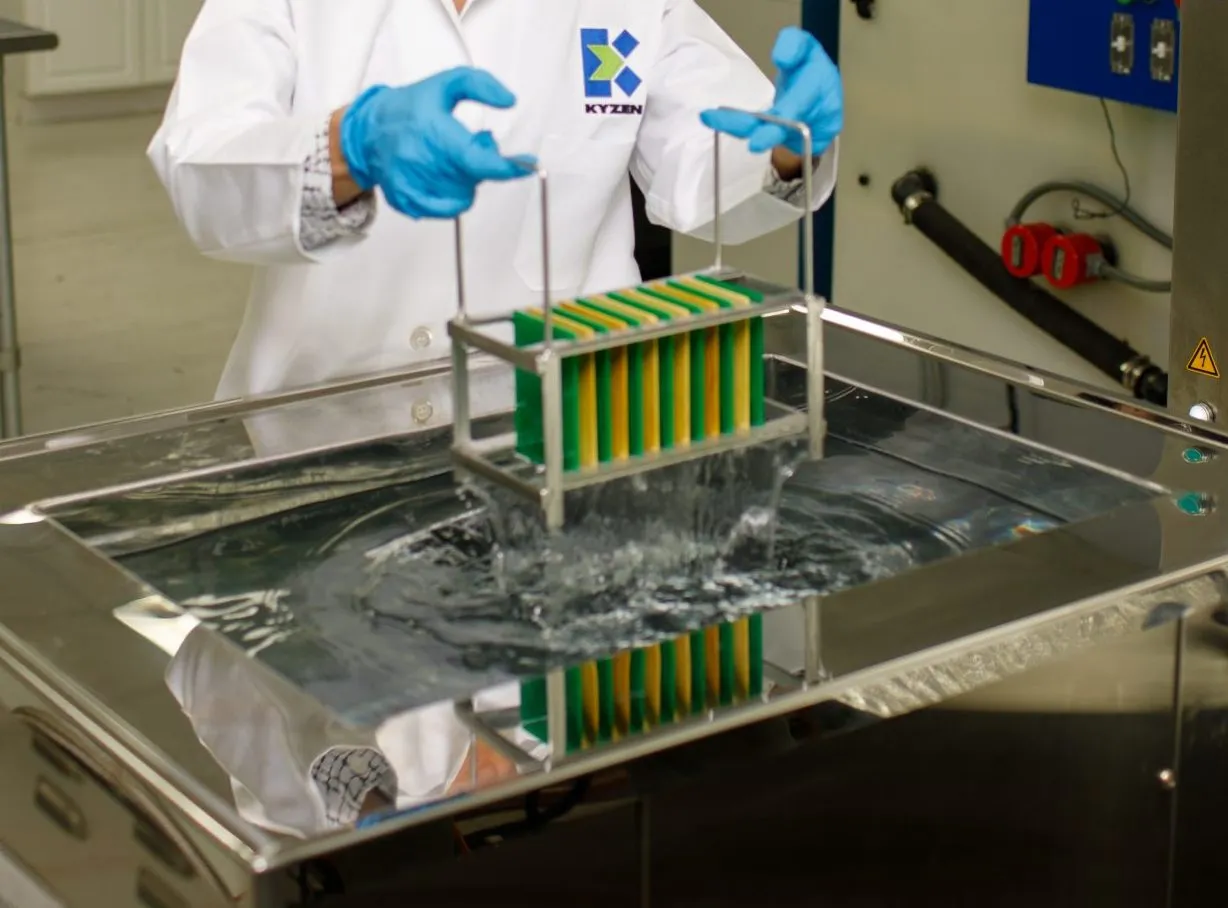
Immersion Rinsing
Immersion rinsing involves submerging the PCB in a tank of rinsing liquid, often with gentle agitation to enhance cleaning. This method is ideal for batch processing and ensures uniform coverage across the entire board. Immersion tanks can be equipped with ultrasonic waves to further loosen residues, making this a powerful technique for complex or densely populated boards.
For best results, immersion rinsing should last between 2-5 minutes, with agitation speeds around 50-100 RPM, depending on the equipment and board sensitivity. The rinse liquid must be regularly monitored and replaced to prevent contamination buildup.
Spray Rinsing
Spray rinsing uses pressurized jets of liquid to blast away residues from the PCB surface. This method is highly efficient for high-volume production lines, as it can be automated and integrated into existing cleaning systems. Spray rinsing is particularly effective for removing ionic residues and ensuring a spot-free finish.
The pressure of the spray should be carefully controlled—typically between 20-40 PSI—to avoid damaging components or dislodging solder joints. Additionally, the angle of the spray (often 45 degrees) and the distance from the board (around 6-12 inches) play a crucial role in achieving uniform cleaning.
The Role of Deionized Water for PCB Rinsing
When it comes to choosing a rinsing medium, deionized water for PCB rinsing is often the gold standard, especially for the final rinse. But why is it so widely recommended, and how does it impact the cleaning process?
Deionized (DI) water is water that has been purified to remove ions, minerals, and impurities. Unlike tap water, which contains dissolved salts and minerals, DI water leaves no residue when it evaporates. This is critical for PCBs, as mineral deposits from tap water can cause staining or contribute to ionic contamination, leading to electrical issues.
In high-reliability applications, DI water with a resistivity of 18 MΩ-cm (megohm-centimeters) is often used to ensure the highest purity. For comparison, tap water typically has a resistivity of less than 0.01 MΩ-cm, making it unsuitable for PCB rinsing. Using DI water in the final rinse step ensures a spot-free finish and minimizes the risk of long-term corrosion.
However, DI water alone may not be sufficient for removing all types of residues, especially organic contaminants like flux. In such cases, it’s often used in combination with other rinsing agents or as a final step after a preliminary rinse with a solvent. Many manufacturers employ a multi-stage rinsing process, starting with a solvent or detergent rinse, followed by a DI water rinse to remove any remaining traces of cleaning agents.
Choosing the Right Rinsing Agents for PCB Cleaning
While DI water is ideal for the final rinse, other rinsing agents for PCB cleaning are often necessary to tackle specific contaminants. The choice of agent depends on the type of residue, the board’s materials, and the environmental or safety regulations in place.
Isopropyl Alcohol (IPA)
Isopropyl alcohol, with a concentration of 90% or higher, is a popular rinsing agent for removing flux residues and organic contaminants. It evaporates quickly, reducing the need for extensive drying, and is safe for most PCB materials when used correctly. However, IPA is flammable and should be handled with proper ventilation and safety precautions.
Aqueous Cleaners
Aqueous-based cleaners, often diluted with water, are effective for removing ionic residues and water-soluble fluxes. These cleaners are environmentally friendly compared to solvent-based options and can be safely disposed of in many cases. They are typically used in immersion or spray systems, followed by a DI water rinse to remove any remaining cleaner.
Specialty Solvents
For stubborn residues or specific applications, specialty solvents formulated for electronics cleaning may be used. These solvents are designed to target particular contaminants without damaging sensitive components. Always check the compatibility of the solvent with your PCB materials, as some can degrade plastics or coatings if used improperly.
The key to selecting a rinsing agent is balancing effectiveness with safety and environmental impact. Always follow the manufacturer’s guidelines for dilution ratios and exposure times—overuse of harsh chemicals can damage the board or leave unwanted residues.
Removing Residue After PCB Cleaning
Even with the best rinsing techniques, some residue may remain on the PCB if the process isn’t optimized. Removing residue after PCB cleaning requires a combination of thorough rinsing, proper agent selection, and sometimes additional steps to ensure a pristine surface.
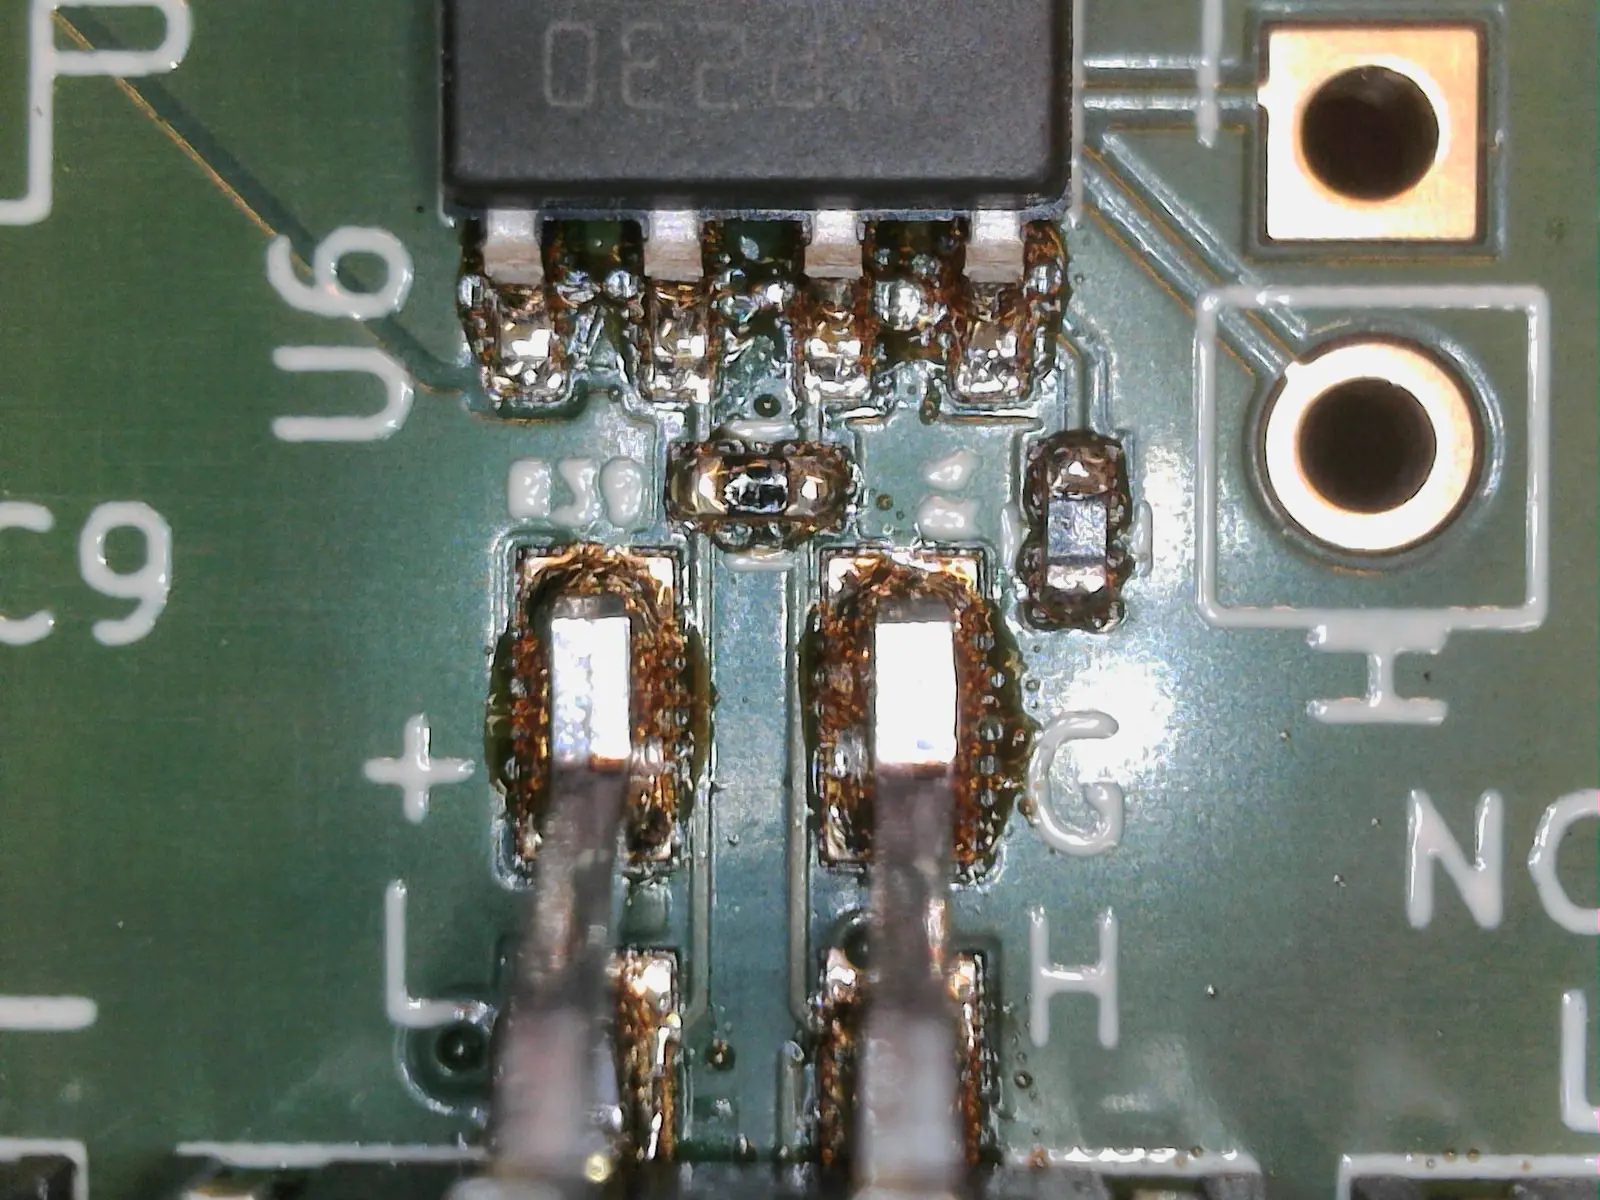
One common issue is incomplete removal of flux residues, which can be ionic (conductive) or non-ionic (non-conductive). Ionic residues are particularly problematic as they can cause current leakage or corrosion over time. To address this, a multi-stage rinse with an aqueous cleaner followed by DI water is often effective. Testing for residue levels using an ionograph or surface insulation resistance (SIR) test can confirm cleanliness. Industry standards like IPC-6012 suggest that ionic residue levels should be below 1.56 micrograms per square centimeter of sodium chloride equivalent for high-reliability boards.
For non-ionic residues, such as rosin-based flux, a solvent rinse may be necessary. If residue persists after rinsing, consider using an ultrasonic cleaner for stubborn spots, but limit exposure time to 1-2 minutes to avoid damaging components.
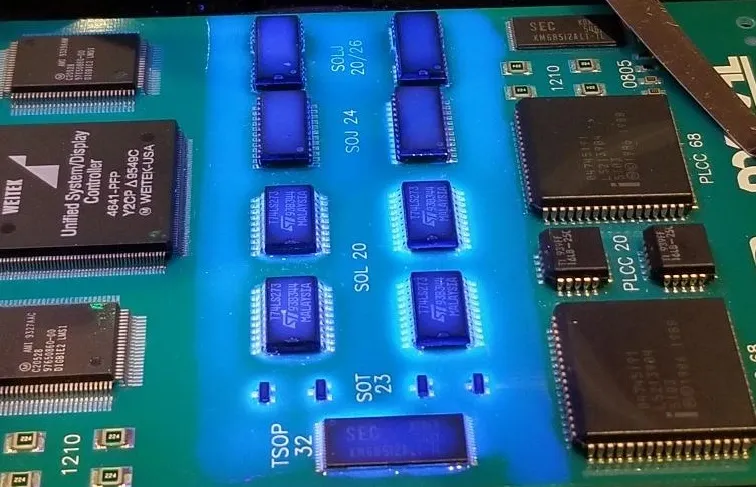
Another tip is to inspect the PCB under UV light after rinsing. Many flux residues fluoresce under UV, making it easier to spot areas that need additional cleaning. This step is especially useful for densely populated boards where residues can hide under components.
Drying PCBs After Rinsing: The Final Touch
Once rinsing is complete, drying PCBs after rinsing is just as important as the cleaning and rinsing steps. Improper drying can lead to trapped moisture, which causes oxidation, corrosion, or electrical shorts. Let’s explore the best methods for drying PCBs effectively.
Air Drying
Air drying is the simplest method, often used for low-volume or manual cleaning. After rinsing, place the PCB in a well-ventilated area or under sunlight to allow moisture to evaporate naturally. However, this method is slow and may not be suitable for humid environments, as it can take several hours for complete drying.
Compressed Air Drying
Using compressed air to blow moisture off the PCB is a quick and effective method, especially for removing water from under components or in tight spaces. Use clean, dry air at a pressure of 20-30 PSI to avoid damaging the board. Ensure the air source is free of oil or contaminants, as these can reintroduce residue.
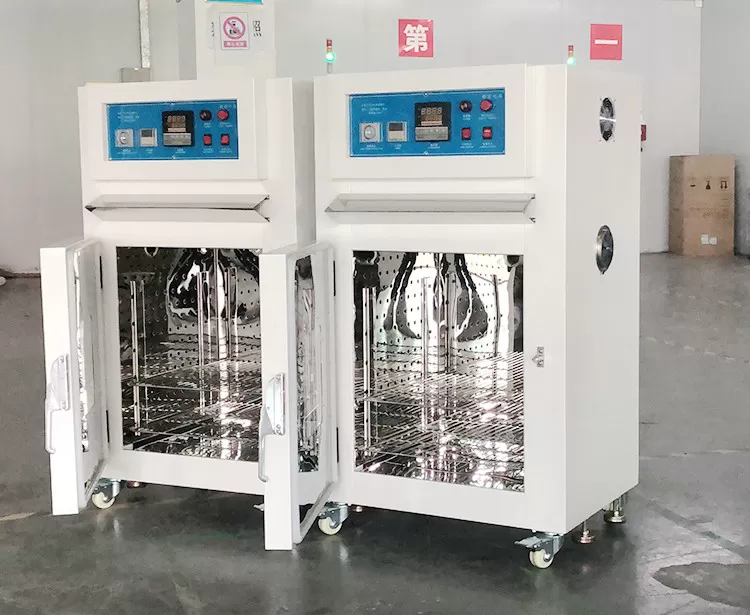
Hot Air Drying
Hot air dryers or ovens are commonly used in production environments. These systems circulate warm air (typically 60-80°C) over the PCB for 5-10 minutes to evaporate moisture. Hot air drying is efficient and ensures uniform drying, but the temperature must be controlled to prevent thermal stress on components or solder joints.
Regardless of the method, always verify that the PCB is completely dry before proceeding to the next stage, such as coating or testing. Moisture trapped under components can lead to failures that are hard to detect until the board is in use.
Best Practices for a Flawless Rinse and Clean PCB
To wrap up, let’s summarize some best practices to ensure your rinsing process is as effective as possible:
- Use the Right Technique: Match your rinsing method—manual, immersion, or spray—to the scale of production and type of contamination.
- Prioritize Deionized Water: Always use deionized water for PCB rinsing in the final stage to avoid mineral deposits and ensure a spot-free finish.
- Select Compatible Agents: Choose rinsing agents for PCB cleaning that target specific residues without damaging the board.
- Inspect for Residue: After rinsing, test or inspect the board to confirm complete removing residue after PCB cleaning.
- Dry Thoroughly: Use appropriate methods for drying PCBs after rinsing to prevent moisture-related issues.
By following these steps, you can master the art of the rinse and ensure your PCBs are clean, reliable, and ready for peak performance. Whether you’re working on a small prototype or a large production run, attention to detail in the rinsing process can make all the difference in the quality and longevity of your electronic assemblies.
Conclusion: Elevate Your PCB Cleaning with Proper Rinsing
Rinsing may seem like a small step in the grand scheme of PCB manufacturing, but it holds the key to preventing costly failures and ensuring reliable performance. By implementing effective PCB cleaning rinsing techniques, using deionized water for PCB rinsing, selecting the right rinsing agents for PCB cleaning, focusing on removing residue after PCB cleaning, and mastering drying PCBs after rinsing, you can achieve flawless results every time.
At ALLPCB, we understand the importance of every step in the PCB production process. That’s why we’re committed to providing resources and insights to help engineers and manufacturers like you succeed. Keep these tips in mind, and take your PCB cleaning process to the next level with the art of the rinse.


