ALLPCB


Printed Circuit Boards (PCBs) are the backbone of modern electronics, but inner layer defects can lead to costly failures and production delays. If you're a manufacturer dealing with issues like PCB inner layer short circuit, open circuit inner layer, or delamination inner layer causes, this guide is for you. We’ll dive into the root causes of these common defects, provide actionable troubleshooting steps, and offer prevention strategies to ensure high-quality PCB production.
In this comprehensive blog, we’ll break down each defect type, explore why they happen, and share practical solutions to help you maintain reliability in your manufacturing process. Let’s get started with understanding these issues and how to tackle them effectively.
Understanding PCB Inner Layer Defects: Why They Matter
Inner layer defects in PCBs can compromise the functionality and durability of electronic devices. These defects often go unnoticed until testing or field failures occur, making early detection and troubleshooting critical for manufacturers. The most common inner layer issues include short circuits, open circuits, and delamination. Each of these problems can stem from design flaws, material issues, or manufacturing errors, and they can lead to significant downtime or product recalls if not addressed.
By identifying the causes and implementing targeted solutions, manufacturers can reduce waste, improve yield rates, and ensure customer satisfaction. Let’s explore each defect in detail, starting with short circuits in the inner layers.
PCB Inner Layer Short Circuit: Causes and Troubleshooting
A PCB inner layer short circuit occurs when two conductive paths in the inner layers of a multilayer PCB unintentionally connect, causing current to flow where it shouldn’t. This can lead to overheating, component damage, or complete board failure.
Common Causes of Inner Layer Short Circuits
- Manufacturing Errors: During the etching process, residual copper can remain on the board, creating unintended connections between traces. For instance, if a clearance of less than 0.2 mm is not maintained between traces, the risk of shorts increases.
- Drilling Misalignment: Misaligned vias or through-holes can cause inner layer traces to connect improperly. A misalignment as small as 0.1 mm can bridge adjacent layers.
- Dielectric Breakdown: If the insulating material between layers is too thin or of poor quality, it may fail to prevent electrical crossover. A dielectric thickness below 0.15 mm often heightens this risk.
- Contamination: Dust, moisture, or debris trapped during lamination can create conductive paths, leading to shorts.
Troubleshooting Steps for Short Circuits
- Visual Inspection: Use a magnifying tool or automated optical inspection (AOI) to check for visible copper residues or misaligned vias on inner layers. Focus on areas with dense trace layouts.
- Electrical Testing: Perform a continuity test using a multimeter to identify unintended connections between traces. Test points should show infinite resistance if no short exists.
- X-Ray Inspection: For multilayer boards, X-ray imaging can reveal hidden shorts caused by drilling errors or internal contamination.
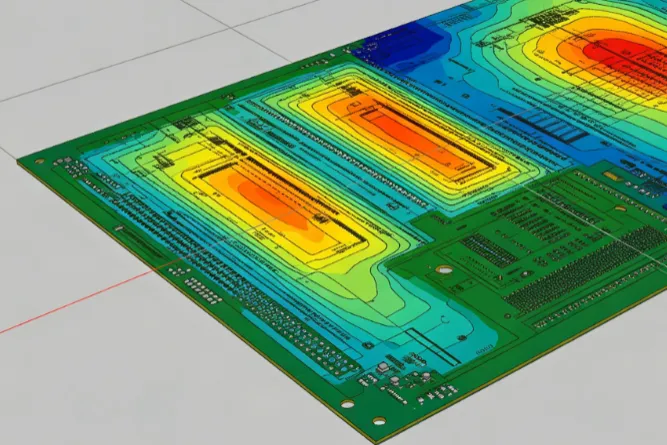
- Thermal Imaging: Apply power to the board and use a thermal camera to detect hotspots, which often indicate a short circuit location.
Prevention Tips
Ensure strict design rules with adequate spacing (at least 0.25 mm for high-density designs) between traces. Use high-quality dielectric materials with a breakdown voltage above 500V. Additionally, maintain cleanroom conditions during manufacturing to avoid contamination.
Open Circuit Inner Layer: Identifying and Fixing Breaks
An open circuit inner layer defect happens when a conductive path is interrupted, preventing current from flowing through a trace or via. This can result in non-functional components or entire sections of the board failing to operate.
Root Causes of Open Circuits in Inner Layers
- Etching Errors: Over-etching during manufacturing can remove too much copper, breaking traces. For example, a trace width below 0.15 mm is prone to such issues.
- Mechanical Stress: Excessive bending or vibration during handling can crack inner layer traces, especially in thinner boards (below 1.6 mm thickness).
- Poor Via Plating: Incomplete copper plating in vias can cause disconnections between layers. A plating thickness below 25 micrometers often leads to weak connections.
- Thermal Stress: Repeated thermal cycles during soldering can cause micro-cracks in traces, especially if the board’s glass transition temperature (Tg) is below 150°C.
Troubleshooting Open Circuits
- Continuity Testing: Use a multimeter to check for breaks in the circuit. Measure resistance between test points; an open circuit will show infinite resistance.
- Microsection Analysis: Cut a cross-section of the board and inspect it under a microscope to identify broken traces or poor via plating.
- X-Ray Inspection: Similar to short circuits, X-ray imaging can detect hidden breaks in inner layer traces or vias.
- Signal Testing: Apply a test signal to the board and use an oscilloscope to trace where the signal stops, pinpointing the open circuit location.
Prevention Strategies
Design traces with a minimum width of 0.2 mm to avoid over-etching risks. Use materials with a Tg of at least 170°C for boards exposed to high thermal stress. Implement strict quality checks for via plating to ensure uniform copper deposition.
Delamination Inner Layer Causes: Why Layers Separate
Delamination inner layer causes refer to the separation of layers within a multilayer PCB, often due to weak bonding or environmental factors. This defect can lead to structural failure, signal loss, or complete board malfunction.
Primary Causes of Delamination
- Moisture Absorption: If the board absorbs moisture before or during lamination, it can create steam pockets during soldering, causing layers to separate. A moisture content above 0.2% significantly increases this risk.
- Thermal Stress: High temperatures during reflow soldering (above 260°C) can weaken the adhesive bonds between layers, especially if the material’s thermal expansion coefficient (CTE) exceeds 70 ppm/°C.
- Poor Material Quality: Using low-grade prepreg or laminate materials with inconsistent resin content can result in weak interlayer bonding.
- Manufacturing Pressure Issues: Insufficient or uneven pressure during the lamination process can prevent proper adhesion, leading to voids or weak spots.
Troubleshooting Delamination
- Visual and Tactile Inspection: Look for visible blisters or bubbles on the board surface. Tap the board lightly to detect hollow sounds, which indicate delamination.
- Ultrasonic Testing: Use ultrasonic scanning to identify internal voids or layer separation without damaging the board.
- Thermal Stress Testing: Subject the board to controlled thermal cycles (e.g., 25°C to 260°C) and observe if delamination worsens, indicating weak bonding.
- Cross-Section Analysis: Cut the board and examine under a microscope to confirm separation between layers and identify the root cause.
Prevention Techniques
Store raw materials and unfinished boards in a controlled environment with humidity below 50%. Use high-quality laminate materials with a CTE below 60 ppm/°C to handle thermal stress. Optimize lamination parameters, ensuring pressure is evenly distributed (typically 200-300 psi) during pressing.
General Best Practices for Preventing Inner Layer Defects
While each defect has specific causes and solutions, some overarching practices can help manufacturers minimize inner layer issues across the board.
- Robust Design Rules: Use design software to enforce minimum spacing, trace width, and via specifications. For example, maintain a clearance of at least 0.25 mm for inner layer traces in high-density designs.
- Material Selection: Choose materials with appropriate thermal and mechanical properties, such as FR-4 with a Tg above 170°C for standard applications.
- Process Control: Implement strict controls during etching, drilling, and lamination to avoid errors. Regularly calibrate equipment to maintain precision within 0.05 mm tolerances.
- Quality Assurance: Conduct thorough testing at each production stage, including AOI, X-ray, and electrical tests, to catch defects early.
- Environmental Control: Maintain cleanroom conditions with temperature (20-25°C) and humidity (40-50%) levels to prevent contamination and moisture issues.
Advanced Tools for Detecting Inner Layer Defects
Modern technology offers powerful tools to help manufacturers detect and diagnose inner layer defects with precision.
- Automated Optical Inspection (AOI): Scans for surface-level defects and misalignments with a resolution down to 0.01 mm.
- X-Ray Imaging Systems: Reveals hidden issues like shorts, opens, and delamination in multilayer boards without destructive testing.
- Time-Domain Reflectometry (TDR): Measures signal integrity to locate open circuits or shorts by analyzing impedance changes along traces, often with an accuracy of 1 ohm.
- Ultrasonic Testing Equipment: Detects internal voids or delamination by analyzing sound wave reflections through the board.
Conclusion: Building Reliable PCBs Through Effective Troubleshooting
Inner layer defects like PCB inner layer short circuit, open circuit inner layer, and delamination inner layer causes pose significant challenges for manufacturers. However, with a clear understanding of their causes, targeted troubleshooting methods, and proactive prevention strategies, you can minimize these issues and ensure high-quality PCB production.
By adopting robust design practices, using advanced diagnostic tools, and maintaining strict process controls, manufacturers can reduce failure rates and improve product reliability. Whether you’re dealing with a short circuit caused by residual copper or delamination due to thermal stress, the steps outlined in this guide provide a practical roadmap to address and prevent these defects.
Implementing these solutions not only saves time and resources but also strengthens your reputation as a reliable PCB manufacturer. Keep refining your processes, stay updated on industry best practices, and prioritize quality at every stage to achieve consistent success in PCB manufacturing.