 ALLPCB


In the intricate world of electronics, printed circuit boards (PCBs) are the backbone of nearly every device. However, even the most carefully designed PCB can fail if contaminants are present. These invisible threats can cause performance issues, corrosion, and even complete system breakdowns. So, what are the common types of PCB contaminants, and how do they impact performance? In this comprehensive guide, we’ll explore the different contaminants, their effects—like flux residue on PCB performance—and provide actionable insights on identifying ionic contamination, preventing corrosion, and troubleshooting failures due to contamination.
Whether you’re an engineer, a hobbyist, or a manufacturer, understanding these challenges is key to ensuring reliable electronics. Let’s dive into the microscopic world of PCB contaminants and uncover solutions to keep your boards functioning at their best.
What Are PCB Contaminants and Why Do They Matter?
PCB contaminants are unwanted substances that settle on or within a circuit board during manufacturing, assembly, or use. These can range from dust particles to chemical residues left behind during soldering. While they may seem minor, contaminants are responsible for a significant percentage of PCB failures—studies suggest that up to 25% of board failures are linked to ionic contamination alone.
The impact of these contaminants can be catastrophic. They can degrade signal integrity, cause short circuits, or lead to corrosion over time. For high-stakes applications like medical devices or aerospace systems, such failures can have serious consequences. By identifying and addressing contaminants early, you can prevent costly rework and ensure long-term reliability.
Types of PCB Contaminants: A Closer Look
Understanding the types of PCB contaminants is the first step to mitigating their effects. Below, we break down the most common culprits that can compromise your board’s performance.
1. Flux Residue
Flux is a chemical used during soldering to clean metal surfaces and improve solder flow. However, if not properly cleaned after assembly, flux residue can remain on the PCB. This sticky substance can attract dust and moisture, creating a breeding ground for other issues. The effects of flux residue on PCB performance include reduced insulation resistance and potential short circuits, especially in high-humidity environments.
2. Ionic Contamination
Ionic contamination refers to charged particles, such as salts or acids, often left behind from flux or handling during assembly. These particles can conduct electricity, leading to leakage currents or dendritic growth—tiny metallic structures that form between conductive traces and cause shorts. Ionic contamination is a leading cause of failures, especially in high-density boards where traces are closely spaced.
3. Dust and Particulate Matter
Dust, dirt, and other particulates can settle on PCBs during manufacturing or in the field. While they may not always cause immediate issues, over time, they can trap moisture and create conductive paths, especially in humid conditions. This is a common concern for devices used in industrial or outdoor settings.
4. Oils and Fingerprints
Human handling can introduce oils and salts from fingerprints onto a PCB. These contaminants can interfere with soldering quality or create conductive paths if not cleaned properly. This is why cleanroom protocols and gloves are often recommended during assembly.
5. Moisture and Humidity
While not a contaminant in the traditional sense, moisture can act as a catalyst for other contaminants. It can dissolve ionic residues, increasing conductivity and accelerating corrosion. Boards exposed to high humidity without proper conformal coating are particularly vulnerable.
Effects of Flux Residue on PCB Performance
Flux residue is one of the most common contaminants and can have a profound impact on PCB performance. When left uncleaned, it can:
- Reduce Insulation Resistance: Flux residue can lower the resistance between traces, causing leakage currents. For example, in high-impedance circuits, even a small drop in resistance—say from 10 MΩ to 1 MΩ—can disrupt signal accuracy.
- Attract Moisture: The sticky nature of flux residue can trap water vapor, creating conductive paths and increasing the risk of shorts.
- Promote Corrosion: Over time, flux residues, especially those with active chemical components, can react with metal surfaces, leading to corrosion of traces and pads.
In critical applications like automotive electronics, where boards are exposed to varying temperatures and humidity, flux residue can lead to intermittent failures or complete system shutdowns. Cleaning flux residue after soldering using appropriate solvents or aqueous cleaning systems is essential to avoid these issues.
Identifying Ionic Contamination on PCBs
Ionic contamination is often invisible to the naked eye, making it a silent threat to PCB reliability. However, there are proven methods to detect it before it causes failures.
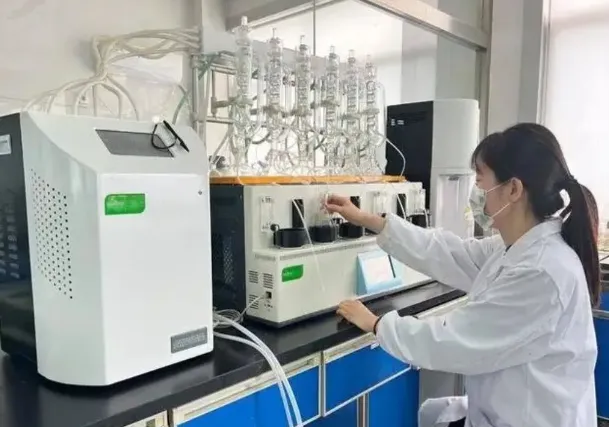
Testing Methods for Ionic Contamination
One of the most widely used methods is the Resistivity of Solvent Extract (ROSE) test. This test measures the conductivity of a solvent after it has been used to wash the PCB. A higher conductivity indicates a higher level of ionic contamination. Industry standards, such as those set by the IPC (Institute of Printed Circuits), recommend maintaining contamination levels below 1.56 μg/cm2 of sodium chloride equivalent for reliable performance.
Another method is ion chromatography, which provides a detailed breakdown of the specific ionic species present on the board. This is particularly useful for identifying the source of contamination, whether it’s from flux, handling, or environmental exposure.
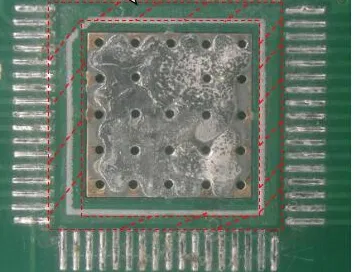
Visual Indicators
While ionic contamination isn’t always visible, signs like white residues or corrosion on solder joints can indicate its presence. Under a microscope, you might also observe dendritic growth between traces—a clear sign of ionic activity.
Corrosion Prevention in PCBs: Safeguarding Your Boards
Corrosion is a direct result of contaminants interacting with environmental factors like moisture and temperature. Preventing corrosion in PCBs requires a multi-layered approach to protect your boards from degradation.
1. Proper Cleaning After Assembly
Thoroughly cleaning PCBs after soldering removes flux residues and ionic contaminants that can initiate corrosion. Use appropriate cleaning agents, such as isopropyl alcohol or specialized aqueous solutions, depending on the type of flux used.
2. Conformal Coating
Applying a conformal coating creates a protective barrier against moisture and contaminants. Common coatings include acrylic, silicone, and polyurethane, each suited for different environmental conditions. For example, silicone coatings are ideal for high-humidity environments due to their excellent moisture resistance.
3. Controlled Storage and Handling
Store PCBs in a dry, clean environment to minimize exposure to dust and humidity. Use anti-static bags and desiccants to further protect boards during storage. During assembly, ensure operators wear gloves to prevent oil and salt transfer from hands.
4. Design Considerations
Incorporate corrosion-resistant materials and finishes in your PCB design. For instance, using gold plating on connectors can prevent oxidation, while spacing traces farther apart reduces the risk of dendritic growth caused by ionic contamination.
Troubleshooting PCB Failures Due to Contamination
When a PCB fails, contamination is often a root cause. Troubleshooting these failures systematically can help identify the issue and prevent recurrence.
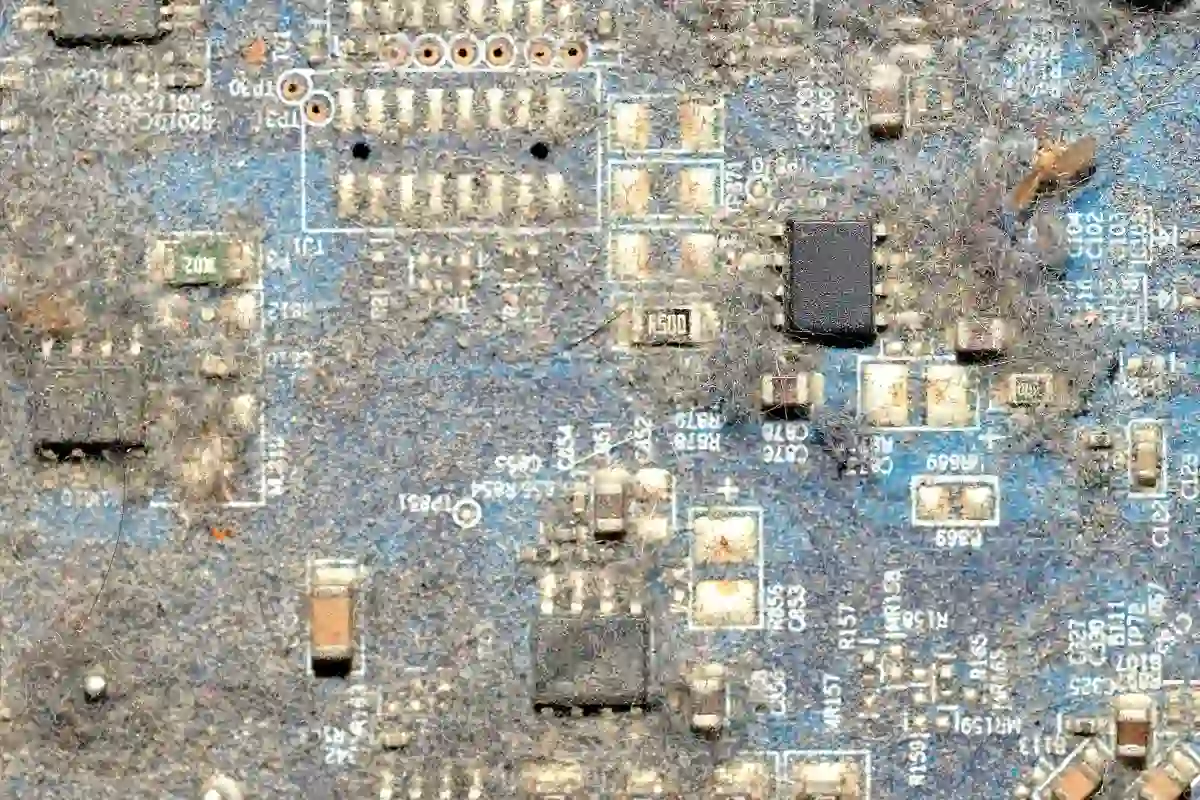
Step 1: Visual Inspection
Start with a detailed visual inspection under magnification. Look for signs of flux residue, corrosion, or white powdery deposits that indicate ionic contamination. Pay close attention to areas around solder joints and high-density trace regions.
Step 2: Electrical Testing
Use a multimeter to check for unexpected conductivity between traces. A lower-than-expected insulation resistance (e.g., below 1 MΩ in critical areas) can point to contamination-related issues. Additionally, functional testing can reveal intermittent failures caused by leakage currents.
Step 3: Contamination Testing
If visual and electrical tests suggest contamination, perform a ROSE test or ion chromatography to confirm the presence of ionic residues. These tests can also help determine if the contamination level exceeds industry thresholds.
Step 4: Cleaning and Rework
If contamination is confirmed, clean the board using appropriate methods. For severe cases, rework may be necessary, such as replacing corroded components or re-soldering affected joints. After cleaning, apply a protective coating to prevent future issues.
Step 5: Review Processes
Finally, evaluate your manufacturing and handling processes to identify how contamination occurred. Was it due to inadequate cleaning after soldering? Poor storage conditions? Addressing these root causes can prevent future failures.
Best Practices for Contamination-Free PCBs
Prevention is always better than cure when it comes to PCB contaminants. Here are some best practices to maintain clean, reliable boards:
- Implement Cleanroom Standards: Use controlled environments during assembly to minimize dust and particulate contamination.
- Choose the Right Flux: Opt for no-clean flux when possible, as it leaves minimal residue. If using water-soluble flux, ensure thorough cleaning post-soldering.
- Regular Testing: Incorporate contamination testing into your quality control process to catch issues early.
- Environmental Protection: Design enclosures or use coatings to shield PCBs from harsh conditions like humidity or industrial pollutants.
The Cost of Ignoring PCB Contaminants
Neglecting contaminants can lead to more than just board failures. It can result in costly product recalls, damaged reputation, and lost customer trust. For instance, in industries like aerospace, a single failure due to contamination can cost millions in damages and downtime. Investing in contamination prevention and regular testing is a small price to pay compared to the potential consequences of neglect.
Conclusion: Keeping Your PCBs Clean and Reliable
PCB contaminants, though often invisible, pose a significant threat to the performance and longevity of electronic devices. From flux residue affecting insulation resistance to ionic contamination causing shorts, these issues can derail even the best designs. By understanding the types of PCB contaminants, identifying ionic residues through testing, preventing corrosion with protective measures, and troubleshooting failures effectively, you can ensure your boards remain reliable under any condition.
At ALLPCB, we’re committed to helping you achieve the highest standards of quality and reliability in your electronics projects. With proper care and attention to contamination control, your PCBs can perform at their peak, delivering consistent results for years to come. Implement the strategies outlined in this guide to safeguard your boards and stay ahead in the ever-evolving world of electronics.


