ALLPCB


Are you looking to maximize the performance and longevity of your ICT (In-Circuit Testing) fixtures? Proper maintenance is key to ensuring reliable test results and avoiding costly downtime in electronics manufacturing. In this comprehensive guide, we’ll cover everything electrical engineers need to know about ICT fixture maintenance schedules, test probe cleaning, probe replacement, fixture calibration, and troubleshooting ICT fixtures. Whether you’re managing a high-volume production line or a small-scale testing setup, these tips and best practices will help you keep your fixtures in top shape.
Let’s dive into the details of maintaining ICT test fixtures, breaking down each critical aspect with actionable advice and practical insights tailored for engineers like you.
Why ICT Test Fixture Maintenance Matters
In-Circuit Testing is a vital process in electronics manufacturing, used to detect defects like short circuits, open circuits, and component failures on printed circuit boards (PCBs). ICT fixtures, which house test probes and connect the PCB to the testing system, are at the heart of this process. However, without regular maintenance, fixtures can degrade, leading to inaccurate test results, increased false positives, and even damage to the PCBs being tested.
By following a consistent ICT fixture maintenance schedule, you can extend the lifespan of your equipment, reduce repair costs, and ensure reliable testing. For instance, neglecting probe cleaning can lead to poor contact with test points, resulting in signal integrity issues or impedance mismatches—problems that could skew test readings by as much as 10-20% in critical applications. Let’s explore how to avoid these pitfalls with a structured approach to maintenance.

Creating an Effective ICT Fixture Maintenance Schedule
A well-defined ICT fixture maintenance schedule is the foundation of reliable testing. Without a schedule, maintenance tasks can be overlooked, leading to unexpected failures. Here’s a practical schedule tailored for electrical engineers managing ICT systems:
- Daily Checks (5-10 minutes): Inspect fixtures for visible debris, dust, or damage. Wipe down surfaces with a non-abrasive cloth to prevent buildup that could interfere with test probes or alignment.
- Weekly Maintenance (30-60 minutes): Focus on test probe cleaning (detailed below) and check for loose connections or misaligned components. Verify that fixture clamps and guides are functioning properly to avoid PCB misalignment during testing.
- Monthly Deep Inspection (2-3 hours): Perform a thorough examination of mechanical parts, such as springs and hinges, for wear and tear. Conduct fixture calibration to ensure accurate positioning and pressure on test points—misalignment by even 0.1 mm can cause contact issues.
- Quarterly Overhaul (4-6 hours): Plan for a full fixture teardown if possible. Inspect and replace worn-out probes (see probe replacement section), lubricate moving parts with manufacturer-recommended products, and test the fixture with a known-good PCB to validate performance.
- Annual Calibration and Certification (Full Day): Schedule professional calibration services to verify the fixture meets original specifications. This is critical for high-precision applications where signal integrity at frequencies above 1 MHz is a concern.
Pro Tip: Use a digital checklist or maintenance software to track tasks and set reminders. This ensures nothing slips through the cracks, especially in busy production environments.
Mastering Test Probe Cleaning for Optimal Performance
Test probe cleaning is one of the most critical maintenance tasks for ICT fixtures. Probes are the direct interface between the fixture and the PCB, and any contamination—such as flux residue, dust, or oxidation—can disrupt electrical contact. Poor contact can increase resistance by 50 mΩ or more per test point, leading to false failures or missed defects.
Here’s a step-by-step guide to cleaning test probes effectively:
- Power Down and Disconnect: Always turn off the ICT system and disconnect the fixture to avoid electrical hazards.
- Remove Loose Debris: Use compressed air (at a pressure of 20-30 psi) to blow away dust and particles from the probe tips and surrounding areas. Wear safety goggles during this step.
- Use a Cleaning Solution: Apply a small amount of isopropyl alcohol (IPA, 90% or higher) to a lint-free swab or brush. Gently scrub the probe tips to remove flux or oxidation buildup. Avoid excessive force, as it can damage delicate probe tips.
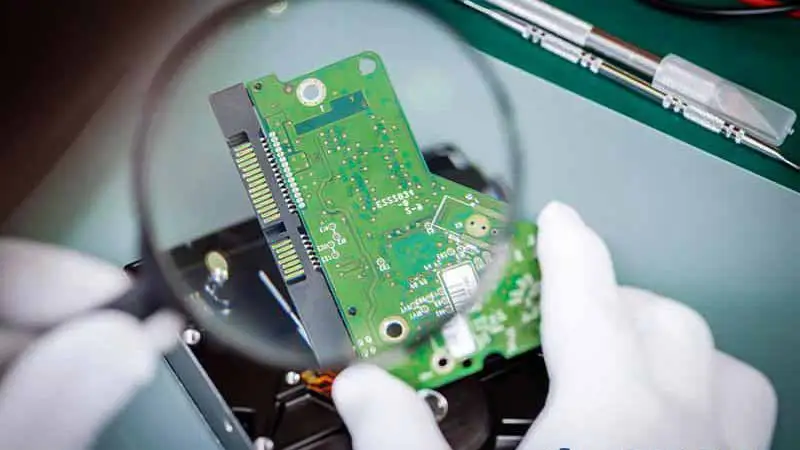
- Inspect for Wear: After cleaning, visually check the probes under magnification (10x or higher) for signs of pitting or deformation. If damage is evident, consider probe replacement.
- Dry and Test: Allow the probes to air dry or use a low-heat air gun. Reassemble the fixture and run a test cycle with a reference PCB to confirm proper contact.
Cleaning Frequency: For high-volume testing environments (over 500 cycles per day), clean probes weekly. For lower volumes, a bi-weekly cleaning may suffice. Adjust based on the type of PCBs being tested—those with heavy flux residue may require more frequent cleaning.

Knowing When and How to Handle Probe Replacement
Even with regular cleaning, test probes have a finite lifespan due to mechanical wear and electrical degradation. Knowing when to perform probe replacement can prevent testing errors and protect your PCBs from damage. On average, standard spring-loaded probes are rated for 100,000 to 500,000 cycles, depending on the manufacturer and testing conditions.
Signs It’s Time for Probe Replacement
- Inconsistent Test Results: If you notice an increase in false positives or negatives, worn probes may be failing to make proper contact.
- Physical Damage: Bent, corroded, or pitted probe tips can no longer provide reliable connections.
- Reduced Spring Force: Over time, the internal springs in probes lose tension, reducing contact pressure. If probes fail to return to their full height after compression, replacement is necessary.
Steps for Replacing Probes
- Identify the Correct Probe: Check the fixture documentation or manufacturer’s specs to ensure you’re using the exact probe type (e.g., tip style, spring force of 4-6 oz, and plating material).
- Safely Remove Old Probes: Use a probe extraction tool or needle-nose pliers to gently pull out the damaged probes. Avoid damaging the probe sockets.
- Install New Probes: Insert the new probes into the sockets, ensuring they are seated correctly. Apply gentle pressure to avoid bending the tips.
- Test the Fixture: Run a test cycle with a known-good PCB to verify contact and alignment. Measure contact resistance if possible—values should typically be below 10 mΩ per point.
Stocking spare probes and scheduling replacements during quarterly maintenance can minimize downtime. Always source probes from reputable suppliers to avoid compatibility issues.
The Importance of Fixture Calibration for Accuracy
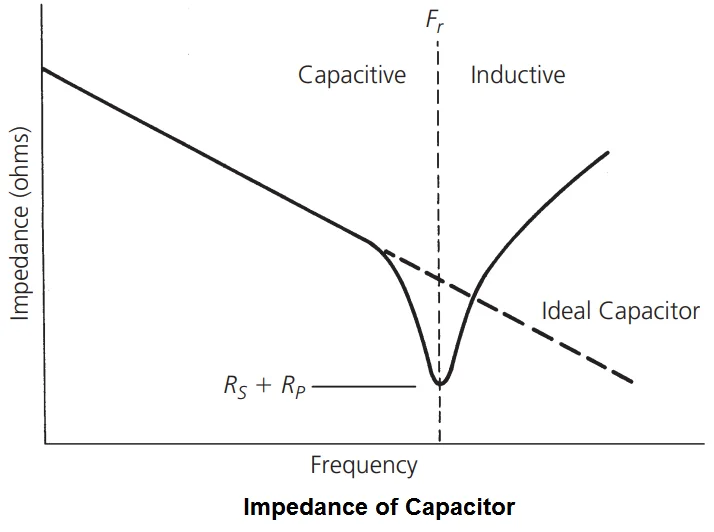
Fixture calibration ensures that your ICT fixture maintains precise alignment and pressure on test points, which is critical for accurate measurements. Miscalibration can lead to improper probe contact, resulting in signal loss or incorrect readings. For high-speed digital circuits, even a slight deviation in contact pressure can affect impedance matching at frequencies above 100 MHz.
How to Calibrate an ICT Fixture
- Check Alignment: Use a calibration board or reference PCB provided by the fixture manufacturer to verify that probes align with test points within a tolerance of ±0.05 mm.
- Adjust Probe Pressure: Measure the spring force of probes using a force gauge. Most ICT probes require 4-8 oz of force for optimal contact—adjust or replace springs if outside this range.
- Validate Electrical Continuity: Use a multimeter to confirm that each probe achieves continuity with its corresponding test point. Resistance should be minimal (under 10 mΩ).
- Document Results: Record calibration data, including date, adjustments made, and test results. This helps track fixture performance over time.
Calibration Frequency: Perform basic alignment checks monthly and full calibration quarterly or after 10,000 test cycles, whichever comes first. For critical applications, consider investing in automated calibration tools or services from the fixture manufacturer.
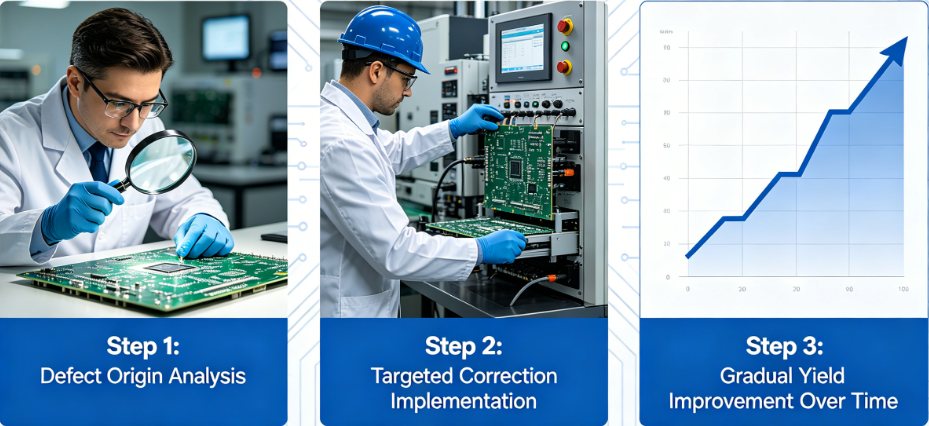
Troubleshooting ICT Fixtures: Common Issues and Fixes
Even with a solid maintenance routine, issues can arise with ICT fixtures. Troubleshooting ICT fixtures quickly and effectively is a skill every electrical engineer should master. Below are common problems and their solutions:
1. Inconsistent Test Results
- Cause: Dirty or worn probes, poor fixture alignment.
- Fix: Clean probes as described earlier and check alignment with a calibration board. Replace probes if cleaning doesn’t resolve the issue.
2. False Failures on Known-Good PCBs
- Cause: Incorrect probe pressure or electrical noise.
- Fix: Verify probe spring force and ensure the fixture is properly grounded to minimize noise interference. Check for loose wiring in the fixture.
3. Mechanical Jamming or Misalignment
- Cause: Debris in moving parts or worn-out hinges/clamps.
- Fix: Disassemble affected areas, clean thoroughly, and lubricate with a manufacturer-approved lubricant. Replace damaged components if necessary.
4. High Contact Resistance
- Cause: Oxidized or damaged probe tips.
- Fix: Clean probes with IPA or replace them if oxidation persists. Measure resistance post-cleaning to confirm improvement (target under 10 mΩ).
Troubleshooting Tip: Keep a log of issues and resolutions. Over time, patterns may emerge (e.g., frequent failures after 5,000 cycles), helping you adjust your ICT fixture maintenance schedule for better prevention.

Best Practices for Long-Term Reliability
Beyond the specific tasks of cleaning, calibration, and troubleshooting, adopting these best practices can further extend the lifespan of your ICT fixtures:
- Train Your Team: Ensure all operators and technicians are trained in proper handling and maintenance procedures to avoid user-induced damage.
- Store Fixtures Properly: When not in use, store fixtures in a clean, dry environment to prevent dust buildup and corrosion. Use protective covers if available.
- Monitor Usage: Track the number of test cycles per fixture. High-cycle fixtures (above 100,000 cycles) may require more frequent maintenance or replacement of critical components.
- Partner with Manufacturers: Establish a relationship with your fixture and probe suppliers for access to technical support, spare parts, and calibration services.
Conclusion: Invest in Maintenance for Reliable Results
Maintaining ICT test fixtures isn’t just about preventing failures—it’s about ensuring the reliability and accuracy of your testing process. By sticking to a consistent ICT fixture maintenance schedule, mastering test probe cleaning and probe replacement, performing regular fixture calibration, and knowing how to tackle troubleshooting ICT fixtures, you can avoid downtime, reduce costs, and deliver high-quality PCBs.
As an electrical engineer, your expertise in maintaining these systems directly impacts production outcomes. Start by implementing the tips and schedules outlined in this guide, and adjust based on your specific testing environment.