 ALLPCB


Are you new to soldering and struggling to create strong, reliable solder joints for your electronics projects? Don’t worry! This beginner-friendly guide will walk you through the essentials of soldering techniques, tools like the soldering iron and solder wire, and tips for mastering PCB soldering. Whether you're a hobbyist tackling your first project or looking to improve your skills, you'll learn how to achieve perfect connections every time with practical advice on using flux, handling components, and avoiding common mistakes.
In this detailed post, we’ll break down everything you need to know about beginner soldering. From choosing the right tools to step-by-step instructions for creating flawless solder joints on printed circuit boards (PCBs), we’ve got you covered. Let’s dive into the world of hobbyist soldering and set you up for success in your electronics projects!
Why Soldering Matters for Electronics Projects
Soldering is the backbone of any electronics project. It’s the process of joining two or more metal components together by melting a filler material, known as solder, to create a strong electrical and mechanical bond. For hobbyists working on DIY gadgets or repairing devices, mastering soldering techniques ensures your circuits work reliably. Poor solder joints can lead to weak connections, intermittent failures, or even complete circuit breakdowns, so getting it right is crucial.
Whether you're building a simple LED circuit or assembling a complex PCB for a microcontroller, soldering is a skill that opens up endless possibilities in electronics. With the right approach and tools, even beginners can create professional-quality connections. Let’s start by understanding the basic tools you’ll need for PCB soldering.
Essential Tools for Beginner Soldering
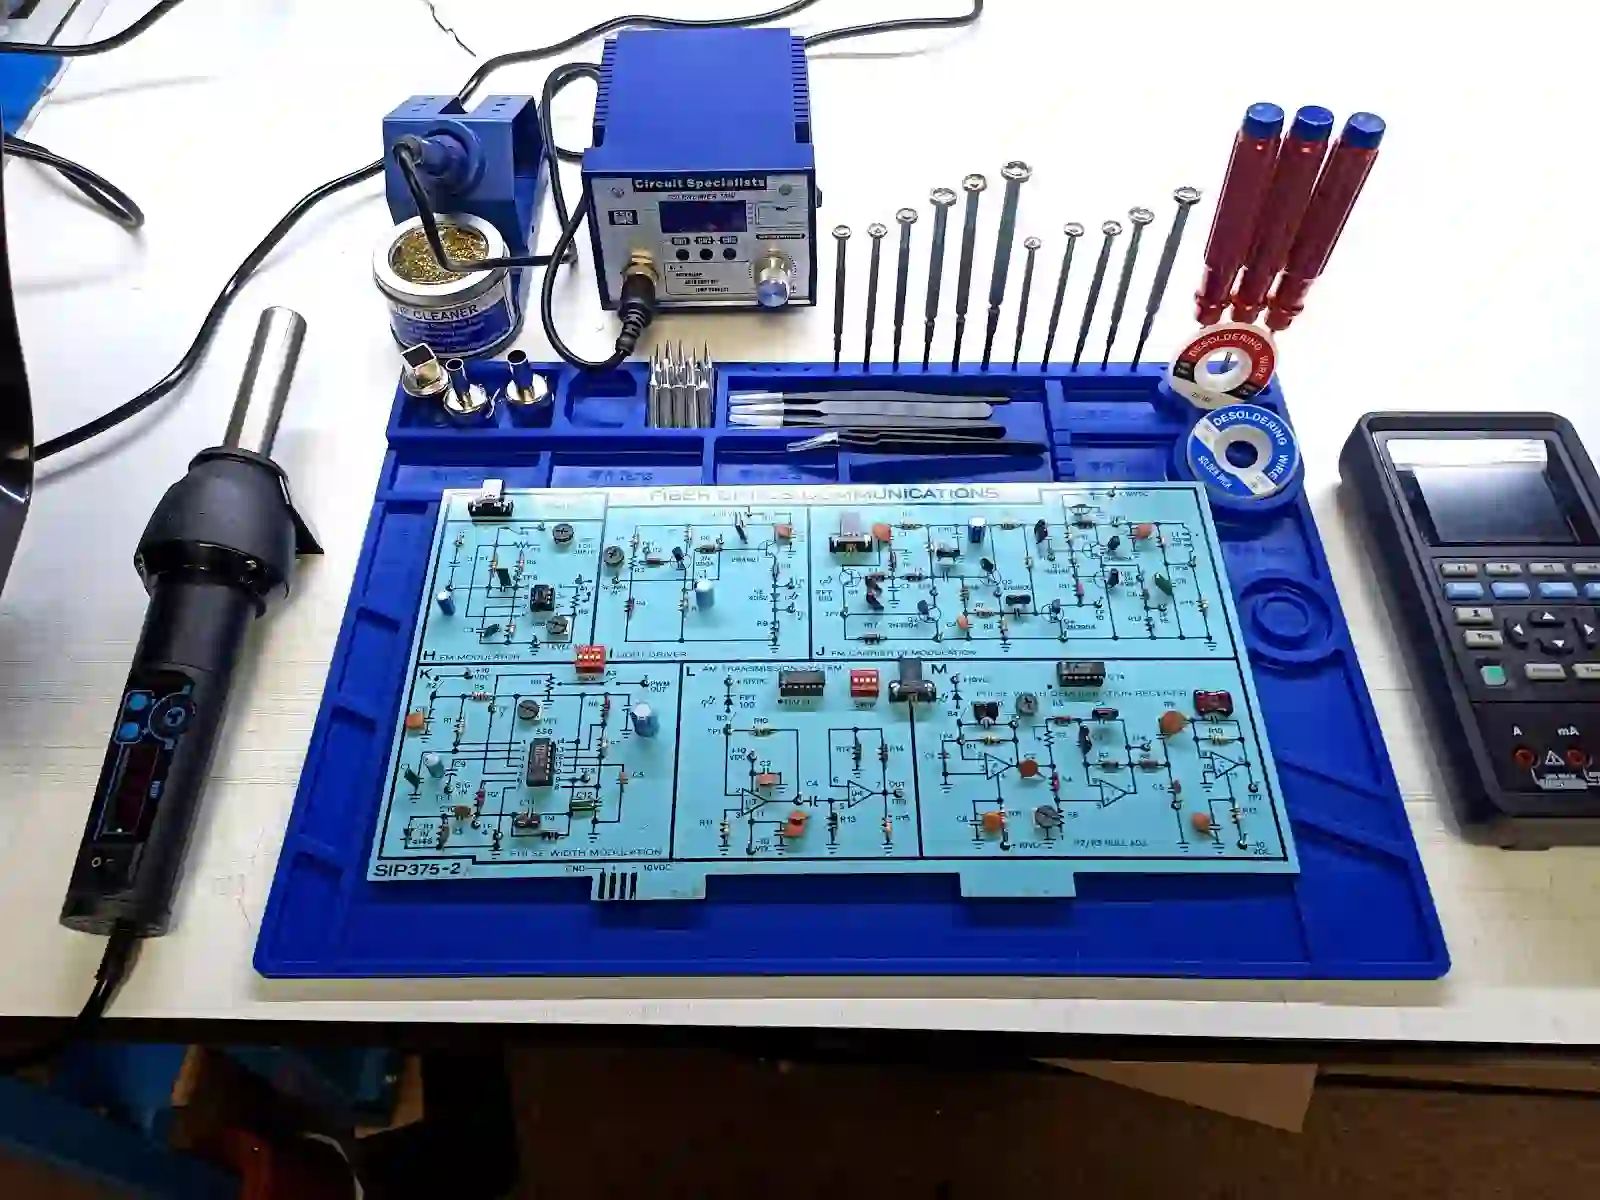
Before you start soldering, you need the right tools. Investing in quality equipment will make your hobbyist soldering journey smoother and safer. Here’s a list of must-haves for creating perfect solder joints:
- Soldering Iron: This is your primary tool. For beginners, a 25-40 watt soldering iron with a fine tip (1mm or smaller) works well for most electronics projects. Adjustable temperature models (ranging from 300°C to 400°C) give you more control, especially for delicate PCBs.
- Solder Wire: Choose a rosin-core solder wire with a diameter of 0.6mm to 1mm for general PCB work. A common alloy is 60/40 (60% tin, 40% lead) for its low melting point (around 183°C), though lead-free options (like 99.3% tin, 0.7% copper) are safer and environmentally friendly, melting at slightly higher temperatures (around 217°C).
- Flux: Flux cleans the metal surfaces by removing oxidation, helping the solder flow smoothly. Use rosin flux or a flux pen for electronics to ensure clean, shiny joints.
- Soldering Stand and Sponge: A stand keeps your hot iron safe when not in use, and a damp sponge helps clean the tip during soldering to prevent oxidation.
- Desoldering Tools: A solder sucker or desoldering braid helps remove mistakes or excess solder from your PCB.
- Safety Gear: Wear safety glasses to protect your eyes from solder splashes, and work in a well-ventilated area to avoid inhaling fumes.
With these tools in hand, you're ready to start soldering. But first, let’s talk about setting up a safe and efficient workspace for your electronics projects.
Setting Up Your Soldering Workspace
A proper workspace is key to safe and effective soldering. Follow these tips to prepare your area for beginner soldering:
- Choose a Stable Surface: Work on a non-flammable, heat-resistant surface like a silicone mat or a dedicated workbench.
- Good Lighting: Ensure your workspace is well-lit so you can see small components and solder joints clearly.
- Ventilation: Soldering produces fumes that can be harmful. Use a small fan or a fume extractor to keep the air clean.
- Keep Tools Handy: Arrange your soldering iron, solder wire, flux, and other tools within easy reach to avoid clutter and accidents.
Once your workspace is ready, it’s time to learn the fundamental soldering techniques for creating strong connections on a PCB.
Basic Soldering Techniques for Beginners
Soldering may seem tricky at first, but with practice, you’ll get the hang of it. Here’s a step-by-step guide to PCB soldering for hobbyists:
Step 1: Prepare Your Components and PCB
Before touching the soldering iron, make sure your components and PCB are ready. Insert the component leads through the correct holes on the PCB. Double-check the placement and orientation, especially for polarized components like diodes or capacitors. Bend the leads slightly on the underside to hold them in place temporarily.
Step 2: Clean the Surfaces
Dirty or oxidized surfaces prevent good solder flow. Use isopropyl alcohol and a brush to clean the PCB pads and component leads. Applying a small amount of flux to the pads also helps improve wetting (the ability of solder to spread evenly over the surface).
Step 3: Heat the Soldering Iron
Turn on your soldering iron and set it to the appropriate temperature. For most electronics projects, 300°C (572°F) works well for leaded solder, while lead-free solder may require 350°C (662°F). Let the iron heat up for a few minutes, then tin the tip by applying a thin layer of solder to it. This prevents oxidation and ensures better heat transfer.
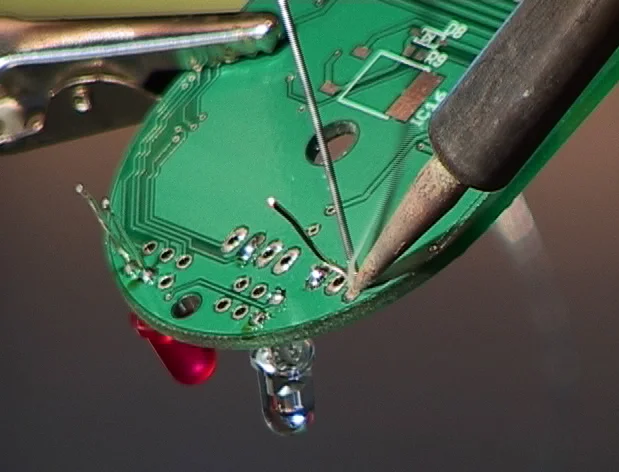
Step 4: Apply Heat to the Joint
Place the soldering iron tip on the PCB pad and the component lead simultaneously. Hold it there for 1-2 seconds to heat both surfaces evenly. Avoid applying too much pressure, as it can damage the board or components.
Step 5: Add Solder Wire
Once the joint is hot, touch the solder wire to the pad (not the iron tip). The heat will melt the solder, and it should flow smoothly around the lead and pad, forming a shiny, cone-shaped joint. Use just enough solder—typically 1-2mm of wire per joint—to avoid excess buildup. Remove the solder wire first, then the iron, to prevent cold joints.
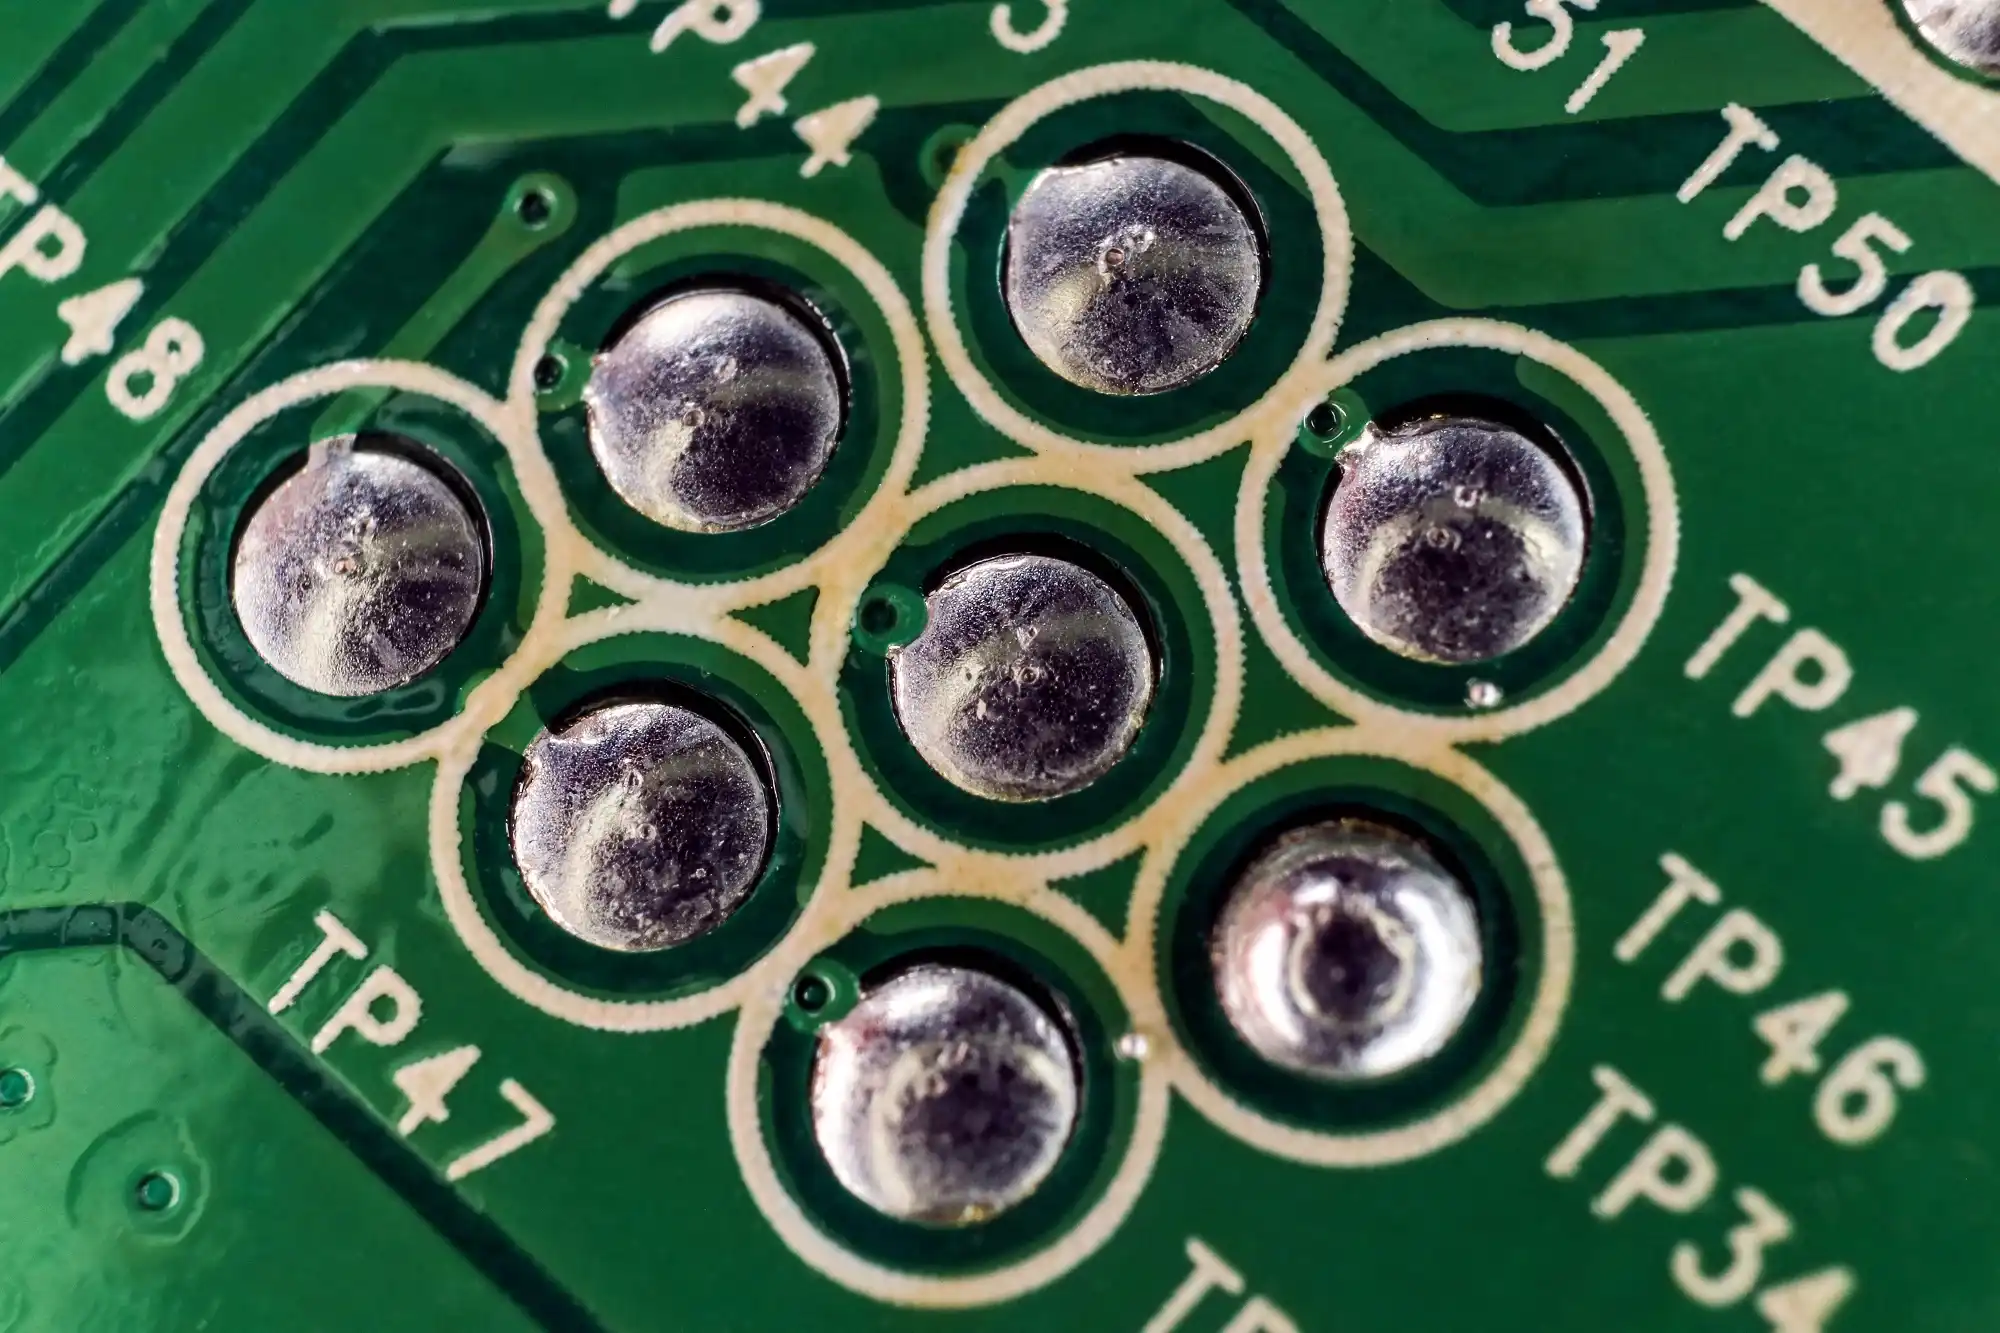
Step 6: Inspect the Joint
A good solder joint looks shiny and smooth, with the solder fully covering the pad and lead without gaps or blobs. If it appears dull or grainy, it might be a cold joint, which is weak and unreliable. Reheat and add a tiny bit more solder if needed.
Step 7: Trim Excess Leads
After the joint cools (about 5 seconds), use wire cutters to trim the excess component leads close to the solder joint. Be careful not to cut into the joint itself.
Using Flux for Better Solder Joints
Flux is a game-changer in soldering, especially for beginners. It removes oxidation from metal surfaces, allowing the solder to bond properly. Without flux, you might end up with dull, weak joints that fail over time. Here’s how to use it effectively in your hobbyist soldering projects:
- Apply Sparingly: Use a flux pen or a small brush to apply a thin layer to the PCB pads before soldering. Too much flux can leave a messy residue.
- Clean After Soldering: Some fluxes are "no-clean," but others leave a sticky residue that can attract dust or corrode over time. Use isopropyl alcohol and a brush to clean the area after soldering.
Flux is especially helpful when working on older PCBs or components with slight oxidation. It ensures a clean, shiny joint every time.
Common Soldering Mistakes and How to Avoid Them
As a beginner, you’re bound to make a few mistakes while learning soldering techniques. Here are some common issues in PCB soldering and how to fix or prevent them:
- Cold Joints: These occur when the solder doesn’t fully melt or bond, resulting in a dull, grainy appearance. Prevent them by ensuring both the pad and lead are heated evenly before adding solder. Fix by reheating the joint and adding a small amount of fresh solder.
- Excess Solder: Too much solder creates blobs that can short-circuit nearby pads. Use a desoldering braid or solder sucker to remove excess material.
- Overheating Components: Prolonged heat can damage sensitive components like ICs or capacitors. Limit soldering time to 3-5 seconds per joint, and use a heat sink (like a small alligator clip) on component leads to absorb excess heat.
- Lifting PCB Pads: Applying too much force or heat can lift delicate copper pads from the board. Use a light touch with the iron and avoid dragging the tip across the PCB.
Tips for Perfect Solder Joints Every Time
Now that you know the basics of soldering, let’s fine-tune your skills with these expert tips for hobbyist soldering:
- Practice on Scrap Boards: Before working on your actual project, practice soldering and desoldering on an old or spare PCB. This builds confidence and helps you perfect your technique.
- Use the Right Tip: A fine, conical tip is ideal for small electronics components, while a chisel tip works better for larger joints or wires.
- Work Quickly: Minimize heat exposure by soldering each joint in under 5 seconds. If it takes longer, let the area cool before trying again.
- Keep Your Iron Tip Clean: Wipe the tip on a damp sponge frequently during soldering to remove old solder and oxidation. A clean tip transfers heat better.
- Check Your Work: Use a magnifying glass to inspect solder joints for cracks, gaps, or excess solder. A good joint should look like a small, shiny volcano.
Soldering Safety Tips for Beginners
Soldering involves heat and potentially harmful materials, so safety is a priority. Follow these guidelines to protect yourself during electronics projects:
- Handle Hot Tools Carefully: A soldering iron can reach temperatures over 300°C. Always place it in a stand when not in use, and never touch the tip.
- Avoid Fumes: Solder and flux release fumes that can irritate your lungs. Work in a ventilated space or use a fume extractor.
- Protect Your Eyes: Wear safety glasses to shield against solder splashes or flying debris when trimming leads.
- Keep Water Away: Never use a wet sponge or cloth near electrical components to avoid shorts or shocks.
Advancing Your Soldering Skills for Complex Projects
Once you’re comfortable with basic PCB soldering, you can take on more challenging electronics projects. Surface-mount devices (SMDs), for example, are smaller and require finer control. Use a soldering iron with a very fine tip (0.5mm or less) and lower temperatures (around 280°C) to avoid damaging tiny components. Tweezers are also handy for positioning SMD parts.
Additionally, consider learning desoldering techniques to repair or modify circuits. A hot air rework station can help with removing SMD components without damaging the board. As you grow as a hobbyist, these skills will expand the scope of your projects.
Conclusion: Start Soldering with Confidence
Soldering is an essential skill for anyone diving into electronics projects. With the right tools like a reliable soldering iron, quality solder wire, and flux, plus a solid understanding of soldering techniques, you can create perfect solder joints every time. Start small, practice often, and follow the safety tips outlined in this guide to build your confidence as a hobbyist.
By mastering beginner soldering, you’re setting the foundation for countless creative and functional projects. From simple circuits to intricate PCBs, your ability to make strong, reliable connections will bring your ideas to life. Grab your tools, set up your workspace, and start soldering today!


