 ALLPCB


If you're looking to master BGA rework using hot air techniques, you've come to the right place. Ball Grid Array (BGA) rework can be challenging, but with the right approach, equipment, and knowledge of key factors like BGA rework hot air temperature, BGA rework nozzle size, BGA rework flux application, BGA rework failure analysis, and BGA rework equipment setup, you can achieve reliable results. In this guide, we'll break down the essentials of BGA rework, providing practical tips and step-by-step advice to help you succeed in repairing or replacing BGA components on printed circuit boards (PCBs).
This blog will dive deep into the world of BGA rework, covering everything from setting up your workstation to troubleshooting common issues. Whether you're a seasoned technician or a beginner in PCB repair, you'll find actionable insights to improve your skills and ensure high-quality outcomes.
What is BGA Rework and Why Use Hot Air?
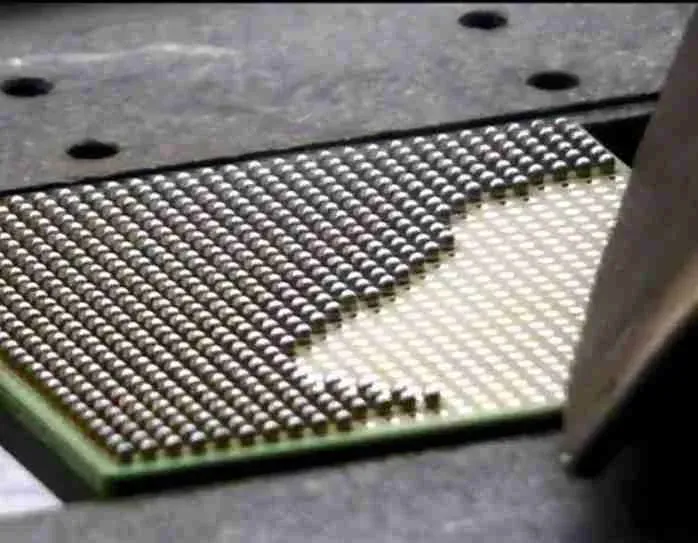
BGA rework refers to the process of removing, replacing, or repairing Ball Grid Array components on a PCB. BGAs are surface-mount packages with an array of solder balls underneath, connecting the component to the board. Unlike traditional components with visible leads, BGAs require specialized techniques due to their hidden connections, making rework a delicate task.
Hot air is one of the most common and effective methods for BGA rework. It allows for precise heating of the solder balls to melt them without damaging the component or the surrounding board. Hot air rework stations provide controlled temperature and airflow, ensuring even heat distribution. This method is ideal for both desoldering and soldering BGAs, offering flexibility and accuracy when done correctly.

Essential BGA Rework Equipment Setup
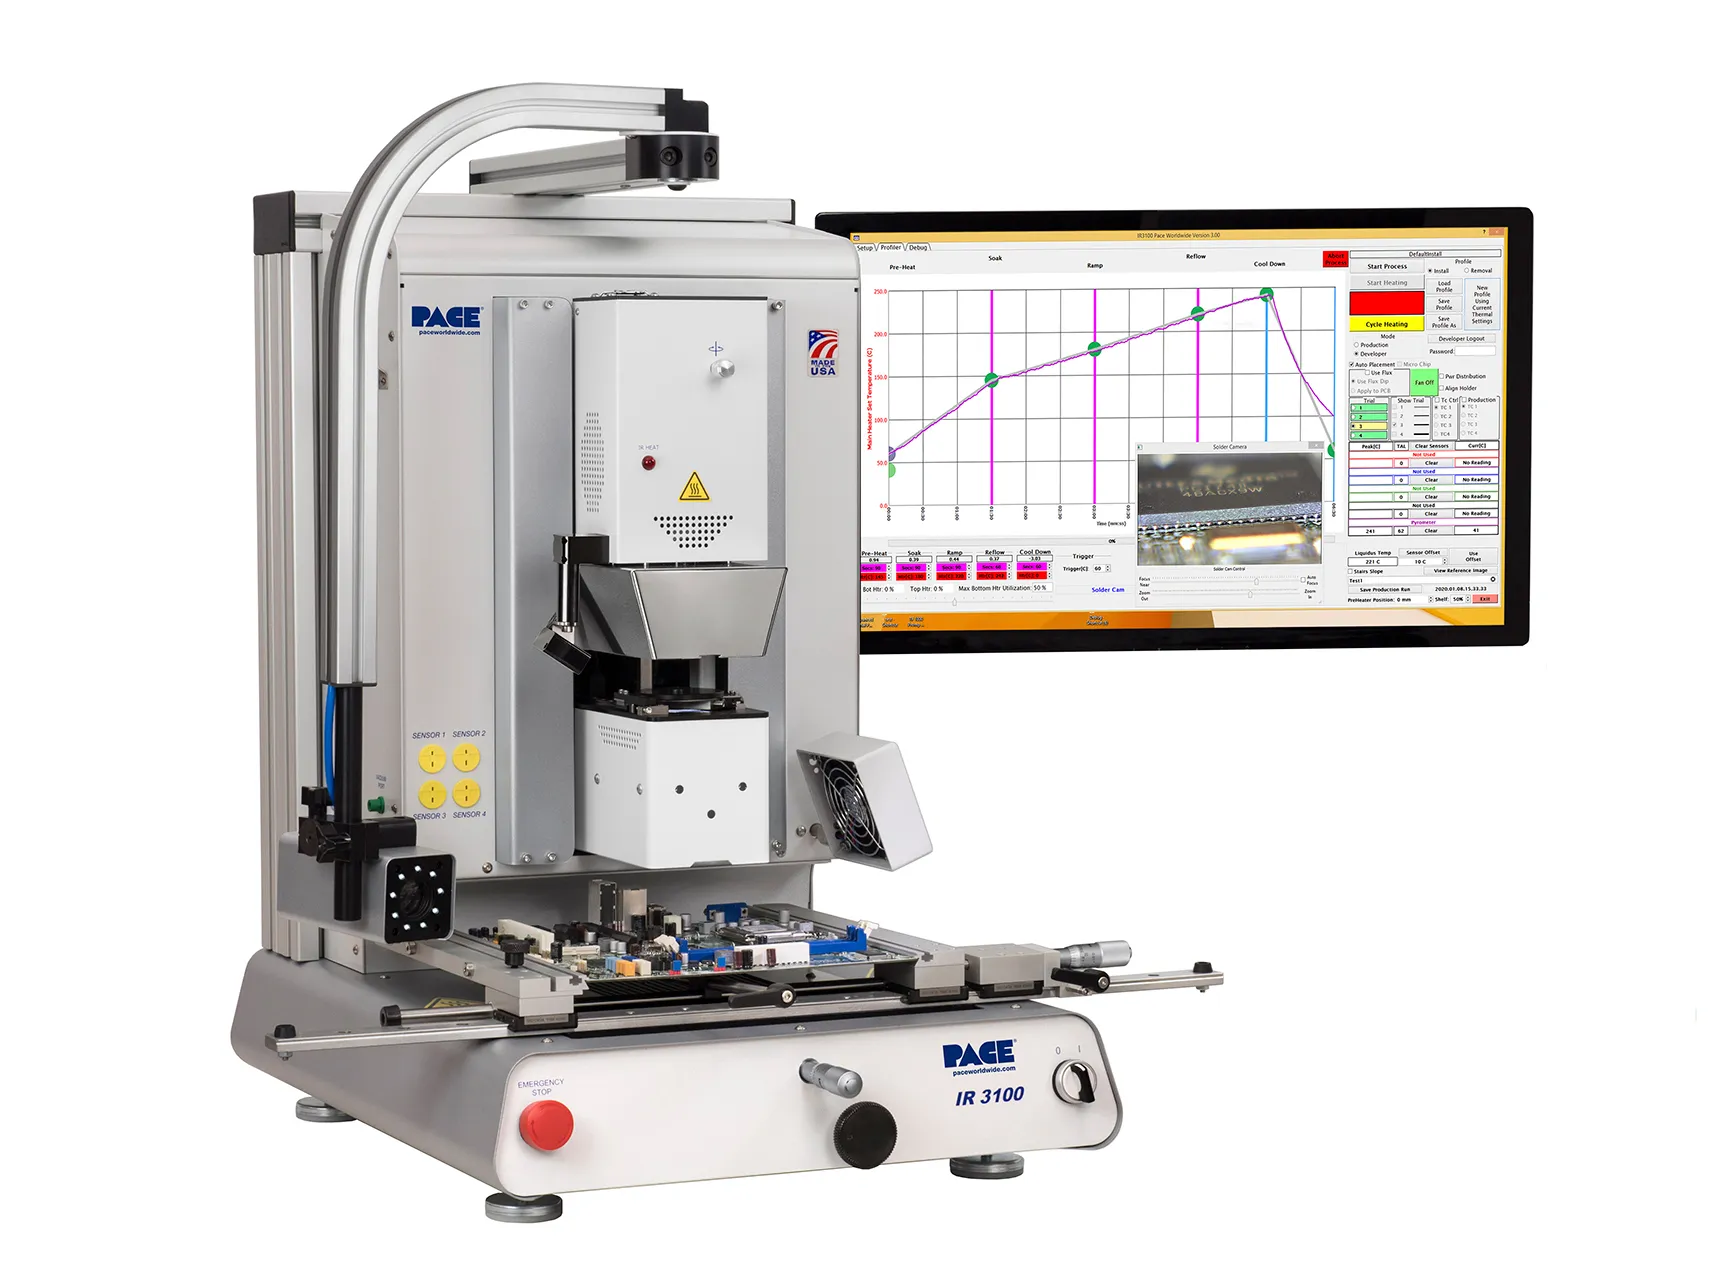
Before diving into techniques, let’s talk about BGA rework equipment setup. Having the right tools is critical for success. Here's what you’ll need:
- Hot Air Rework Station: Choose a station with adjustable temperature (up to 400°C or 752°F) and airflow settings. Digital displays for precise control are a plus.
- Nozzles: A variety of nozzle sizes to match different BGA dimensions. More on selecting the right BGA rework nozzle size later.
- Preheater: A bottom-side preheater helps warm the PCB evenly, reducing thermal stress during rework. Look for one with a temperature range of 100-200°C (212-392°F).
- Thermocouple: For monitoring board and component temperature in real-time.
- Flux and Solder Balls: Essential for soldering and reballing BGAs.
- Vacuum Pickup Tool: For safely lifting the BGA component after desoldering.
- Magnification Tools: A microscope or magnifying glass to inspect solder joints and alignment.
Setting up your equipment involves creating a clean, static-free workspace. Place the PCB on a stable surface, ideally with an ESD (electrostatic discharge) mat. Ensure your hot air station and preheater are calibrated, and keep all tools within easy reach. Proper setup minimizes errors and protects sensitive components from damage.
Related Reading: BGA Rework: Advanced Techniques for Repairing Ball Grid Array Components
Mastering BGA Rework Hot Air Temperature
One of the most critical aspects of BGA rework is managing BGA rework hot air temperature. Incorrect temperatures can damage the BGA, the PCB, or nearby components. The goal is to melt the solder balls (typically lead-free solder melts at 217-220°C or 423-428°F) without overheating.
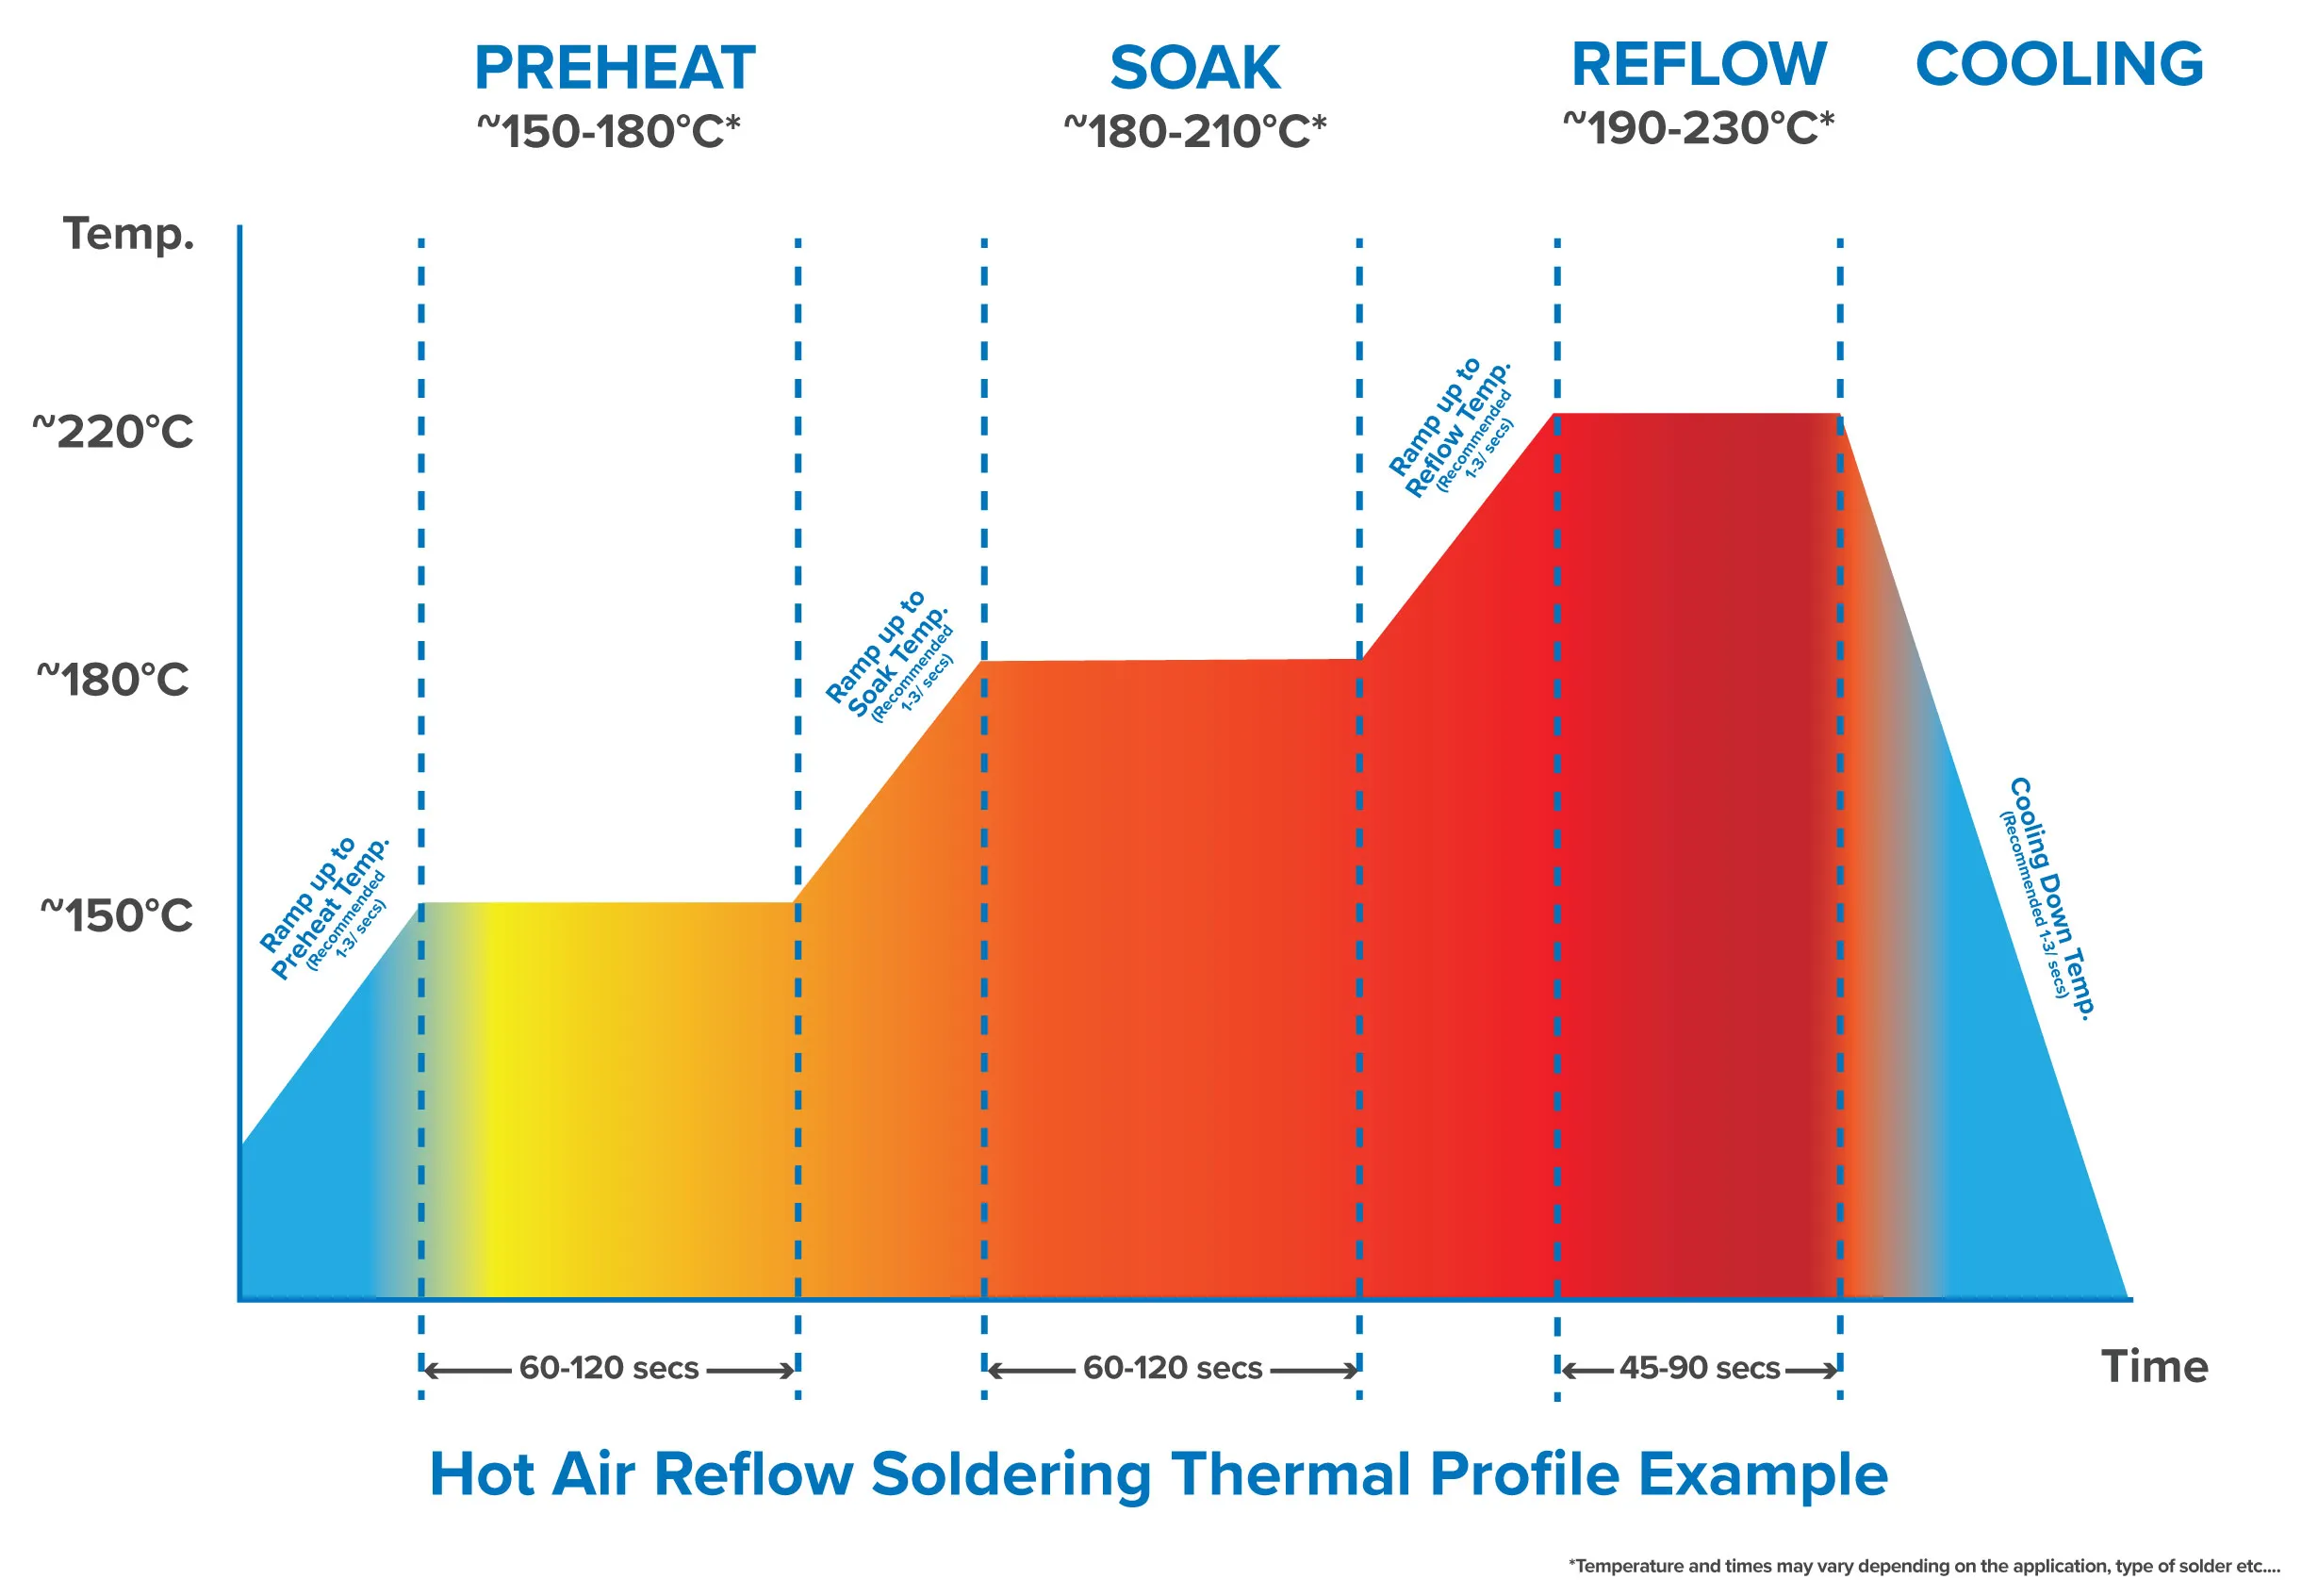
Here’s a general temperature profile for BGA rework using hot air:
- Preheat Stage: Use a bottom-side preheater at 100-150°C (212-302°F) for 1-2 minutes to warm the PCB and reduce thermal shock.
- Soak Stage: Set the hot air station to 180-200°C (356-392°F) for 30-60 seconds to bring the BGA and surrounding area to a uniform temperature.
- Reflow Stage: Increase to 220-250°C (428-482°F) for 30-45 seconds to melt the solder balls. Avoid exceeding 260°C (500°F) to prevent component damage.
- Cooling Stage: Gradually reduce heat and allow the board to cool naturally. Forced cooling can cause thermal stress.
Always use a thermocouple to monitor the actual temperature on the PCB. Different boards and components may require slight adjustments, so refer to the BGA’s datasheet for specific thermal limits. Practice on scrap boards to fine-tune your temperature settings before working on valuable projects.
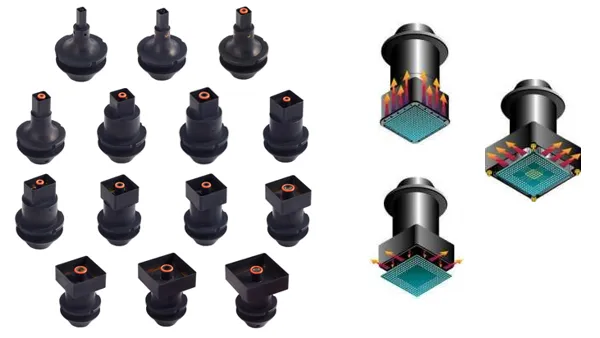
Choosing the Right BGA Rework Nozzle Size
Selecting the correct BGA rework nozzle size is crucial for even heat distribution. The nozzle directs hot air over the BGA, and a mismatch can lead to uneven heating, cold solder joints, or damage to adjacent components.
As a rule of thumb, the nozzle should be slightly larger than the BGA package. For example:
- For a 10mm x 10mm BGA, use a 12mm x 12mm nozzle.
- For a 20mm x 20mm BGA, opt for a 22mm x 22mm nozzle.
If the nozzle is too small, heat won’t cover the entire component, leaving some solder balls unmelted. If it’s too large, excess heat can affect nearby components. Many hot air stations come with interchangeable nozzles, so ensure you have a set that matches the BGAs you commonly work with. Additionally, position the nozzle 5-10mm above the component to avoid direct contact and ensure proper airflow.
Perfecting BGA Rework Flux Application
Flux plays a vital role in BGA rework, and proper BGA rework flux application ensures clean, reliable solder joints. Flux removes oxidation from the solder balls and pads, improves wetting, and prevents defects like bridging or cold joints.
Here’s how to apply flux effectively:
- Clean the Area: Before applying flux, clean the PCB and BGA pads with isopropyl alcohol (90% or higher) and a brush to remove dirt or old flux residue.
- Apply Flux: Use a no-clean, tacky flux designed for BGA rework. Apply a thin, even layer to the BGA pads using a flux pen or syringe. Avoid excessive flux, as it can cause splattering during heating.
- Position the BGA: If soldering a new component, place it on the fluxed pads, ensuring alignment with the help of a stencil or magnification tool.
- Heat with Hot Air: Proceed with the heating process as described earlier. The flux will activate and aid in forming strong solder connections.
After rework, clean any remaining flux residue with alcohol and a brush to prevent corrosion over time. Using the right amount of flux is key—too little won’t clean the surfaces, while too much can create a mess.
Step-by-Step Hot Air BGA Rework Process
Now that we’ve covered the key elements, let’s walk through the complete BGA rework process using hot air. This step-by-step guide combines all the aspects discussed so far.
- Prepare the Workspace: Set up your equipment as outlined in the BGA rework equipment setup section. Secure the PCB and protect nearby components with heat-resistant tape if needed.
- Preheat the PCB: Use a bottom-side preheater at 100-150°C (212-302°F) for 1-2 minutes to warm the board evenly.
- Remove the Old BGA (if applicable): Set your hot air station to 220-250°C (428-482°F), using the appropriate BGA rework nozzle size. Heat the component for 30-45 seconds until the solder melts, then lift it with a vacuum pickup tool.
- Clean the Pads: Remove old solder from the PCB pads using a desoldering braid and clean with alcohol.
- Apply Flux: Add a thin layer of flux to the pads as described in the BGA rework flux application section.
- Place the New BGA: Align the new component using a stencil or magnification tool. If reballing is required, attach new solder balls to the BGA first.
- Reflow with Hot Air: Follow the BGA rework hot air temperature profile, heating the component to form solid connections.
- Cool and Inspect: Let the board cool naturally, then inspect the solder joints under magnification for alignment and defects.
Following these steps carefully will help ensure a successful rework. Practice and patience are essential, especially when dealing with high-density or sensitive boards.
Related Reading: BGA Rework for Beginners: A Hobbyist's Guide to Repairing Electronics
Common Issues and BGA Rework Failure Analysis
Even with the best techniques, things can go wrong. Understanding BGA rework failure analysis helps you identify and fix issues quickly. Here are some common problems and their causes:
- Cold Solder Joints: Caused by insufficient heat or uneven temperature distribution. Ensure the BGA rework hot air temperature reaches the melting point across all solder balls, and check your nozzle size.
- Bridging: Excess solder or flux can cause short circuits between pads. Use the right amount of flux and clean thoroughly after rework.
- Component Misalignment: Poor placement before reflow can shift the BGA. Use alignment tools and double-check positioning.
- Thermal Damage: Overheating can warp the PCB or damage the BGA. Stick to recommended temperature profiles and monitor with a thermocouple.
- Incomplete Solder Melting: If the preheat or reflow stage is too short, some solder balls may not melt. Extend the heating time slightly and ensure even airflow with the correct BGA rework nozzle size.
To analyze failures, inspect the reworked area under a microscope. Look for visible defects in solder joints, such as cracks or uneven shapes. Testing the board for functionality can also reveal issues like open circuits or shorts. Documenting each rework attempt helps identify patterns and improve your process over time.
Tips for Successful BGA Rework
To wrap up, here are some additional tips to enhance your BGA rework skills:
- Always use a preheater to minimize thermal stress on the PCB.
- Keep your hot air station and nozzles clean to ensure consistent performance.
- Practice on scrap boards before attempting rework on critical projects.
- Invest in quality flux and solder materials for reliable results.
- Stay updated on BGA component datasheets for specific thermal and handling requirements.
Conclusion
BGA rework doesn’t have to be intimidating. By mastering BGA rework hot air temperature, selecting the right BGA rework nozzle size, perfecting BGA rework flux application, conducting thorough BGA rework failure analysis, and optimizing your BGA rework equipment setup, you can achieve professional-grade results. This practical guide has walked you through the essentials, from equipment to troubleshooting, equipping you with the knowledge to tackle BGA rework with confidence.
With practice and attention to detail, you’ll refine your hot air techniques and handle even the most complex PCB repairs. Keep learning, stay patient, and let every rework project be a step toward mastery in electronics repair.


