ALLPCB


Struggling with slow PCB troubleshooting? Silkscreen annotations are your secret weapon. These markings on a printed circuit board (PCB) help identify components, test points, and critical information quickly, slashing debugging time. In this guide, we’ll uncover the hidden power of silkscreen for PCB troubleshooting, from reading markings to leveraging them for faster repairs. Whether you're decoding silkscreen for component identification or using test point annotations, this post will show you how to boost efficiency.
Let’s dive into the world of silkscreen annotations and explore practical tips, detailed techniques, and best practices to streamline your workflow.
What Is PCB Silkscreen and Why Does It Matter for Troubleshooting?
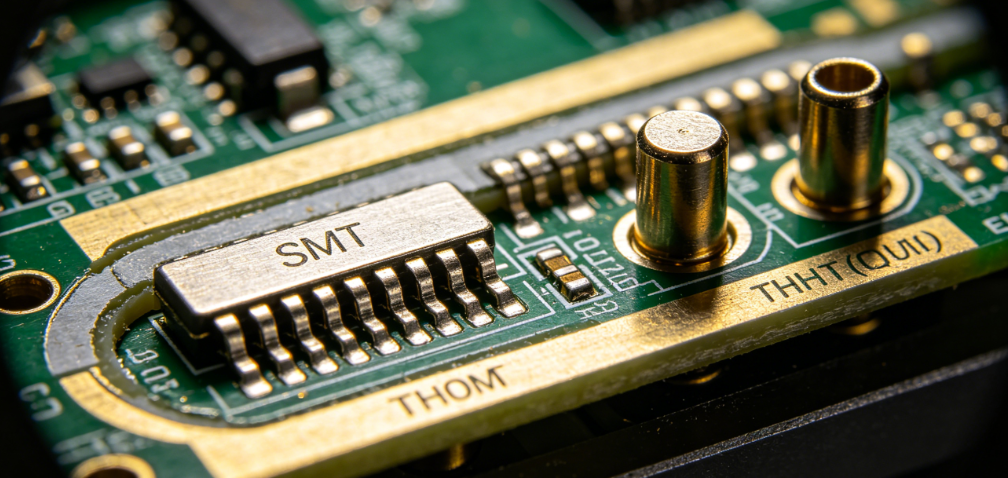
PCB silkscreen is a layer of ink applied to the surface of a printed circuit board, typically on the top or bottom side. This layer includes text, symbols, and markings that label components, test points, polarity indicators, and other vital information. While it doesn’t affect the electrical functionality of the board, silkscreen is crucial for assembly, debugging, and maintenance.
For troubleshooting, silkscreen acts as a roadmap. Imagine trying to locate a specific resistor or capacitor on a complex board without labels—it’s like finding a needle in a haystack. Silkscreen markings cut through the confusion, guiding you to the right spot in seconds. This is especially critical in high-density designs where components are packed tightly, and errors can cost hours of rework.

The Role of Silkscreen in PCB Troubleshooting Speed
When a PCB fails, time is of the essence. Whether it’s a short circuit, an open connection, or a faulty component, silkscreen markings help you pinpoint issues faster. Here’s how they contribute to speed:
- Component Identification: Silkscreen labels like “R1” for a resistor or “C3” for a capacitor tell you exactly what you’re looking at. No need to cross-reference schematics constantly.
- Test Point Annotation: Test points marked as “TP1” or “GND” let you probe specific circuit nodes without guessing where to place your multimeter leads.
- Polarity and Orientation: Markings for diodes, capacitors, and ICs prevent reverse polarity mistakes during repairs or replacements.
- Warning Symbols: Silkscreen often includes warnings for high-voltage areas or fragile components, keeping you safe during troubleshooting.
Without these annotations, troubleshooting speed drops significantly. A study by industry experts suggests that clear silkscreen markings can reduce debugging time by up to 30% in complex designs. That’s a game-changer for engineers under tight deadlines.
Decoding PCB Silkscreen: Tips for Reading Markings
Reading PCB silkscreen is a skill that saves time and frustration. While markings vary by design, most follow standard conventions. Here’s how to interpret them for faster troubleshooting with a focus on reading PCB silkscreen:
- Understand Reference Designators: These are alphanumeric codes like “R” for resistors, “C” for capacitors, “D” for diodes, and “U” for integrated circuits. The number next to the letter (e.g., R10) identifies the specific component on the board.
- Locate Test Points: Look for labels like “TP” followed by a number. These are spots where you can measure voltage, current, or signal integrity. For instance, probing TP5 might reveal a 3.3V output when you expect 5V, pointing to a power issue.
- Check Polarity Markings: A “+” sign or a small arrow near a capacitor or diode indicates the correct orientation. Misreading this can lead to incorrect replacements.
- Identify Pin 1 on ICs: Many chips have a dot or line on the silkscreen marking the first pin. This helps you align probes or replacements correctly.
- Note Ground and Power Symbols: Silkscreen often marks ground (GND) or voltage rails (e.g., VCC, 5V) near pads or test points, guiding you to key circuit areas.
Practice reading silkscreen on simpler boards before tackling complex ones. Over time, you’ll spot patterns and decode markings in seconds.

Silkscreen Component Identification: Streamlining Debugging
One of the biggest hurdles in PCB troubleshooting is identifying components quickly, especially on densely populated boards. This is where silkscreen component identification shines. Here are actionable tips to use silkscreen for this purpose:
- Match Labels to Schematics: If a board shows erratic behavior, use silkscreen labels to find suspect components on the schematic. For example, if R7 is near a failing circuit node, you can test its resistance (should be, say, 1kΩ) to confirm if it’s the culprit.
- Group Similar Components: Silkscreen often clusters related parts, like resistors in a voltage divider. Spotting these groupings helps you trace signal paths faster.
- Use Color Coding (If Present): Some boards use colored silkscreen ink to differentiate component types or critical areas. White ink might mark standard components, while yellow highlights high-voltage zones.
Accurate component identification via silkscreen can cut troubleshooting time by half, especially when dealing with boards lacking detailed documentation.
Leveraging Test Point Annotation for Faster Diagnostics
Test points are critical for diagnosing PCB issues, and silkscreen annotations make them accessible. Focusing on test point annotation, here’s how to use these markings effectively:
- Identify Key Nodes: Test points labeled as “TP-VIN” or “TP-OUT” often correspond to input and output voltages. Measuring a test point marked “TP-3V3” should show close to 3.3V; a reading of 2.1V signals a problem upstream.
- Trace Signal Flow: Test points along a signal path (e.g., TP1 to TP5) let you check signal integrity at each stage. If a 1MHz clock signal drops to 500kHz at TP3, you’ve narrowed down the fault area.
- Use for Continuity Tests: Silkscreen-marked test points near connectors or ICs help verify continuity without desoldering components. A quick multimeter check can reveal an open circuit.
Always keep a multimeter or oscilloscope handy when using test points. These tools, combined with clear silkscreen annotations, make diagnostics precise and swift.

PCB Repair Silkscreen Markings: A Guide to Efficient Fixes
Repairs are inevitable when troubleshooting uncovers a fault. Silkscreen markings play a vital role in ensuring repairs are done right the first time. Here’s how to use PCB repair silkscreen markings:
- Locate Faulty Components: If a capacitor labeled “C12” is bulging, silkscreen helps you find and replace it without disturbing nearby parts.
- Verify Replacement Specs: Silkscreen might include value markings like “10uF” for capacitors or “1k” for resistors, ensuring you install the correct part.
- Avoid Damage to Nearby Circuits: Markings often outline sensitive areas or no-touch zones, preventing accidental shorts during soldering.
For instance, replacing a blown fuse marked “F1 - 2A” ensures you use a 2-amp fuse, not a 5-amp one that could cause further damage. Silkscreen markings eliminate guesswork, making repairs faster and safer.
Best Practices for Designing Silkscreen to Aid Troubleshooting
While this blog focuses on using existing silkscreen, it’s worth noting how proper design enhances troubleshooting. If you’re involved in PCB layout, consider these tips for future boards:
- Use Clear, Readable Fonts: Fonts should be at least 6 mils in height for legibility. Tiny text is useless under a magnifying glass during repairs.
- Place Markings Strategically: Keep labels near components, not overlapping solder pads or vias, to avoid confusion during assembly or debugging.
- Include Essential Information: Label all test points, polarity indicators, and critical components. Don’t skimp on details to save space.
- Avoid Clutter: Overcrowded silkscreen can be as bad as no markings. Prioritize key information and use consistent spacing.
Well-designed silkscreen can reduce troubleshooting errors by up to 25%, according to industry feedback, saving countless hours in the long run.
Common Silkscreen Pitfalls and How to Overcome Them
Even with silkscreen, troubleshooting isn’t always straightforward. Here are common issues and solutions:
- Faded or Damaged Markings: Harsh environments or poor-quality ink can erase silkscreen. Keep a schematic handy as a backup, and consider protective coatings for future boards.
- Inconsistent Labeling: Some boards use non-standard designators. If “RX1” isn’t clear, trace nearby traces or consult design files to confirm its role.
- Missing Test Points: Not all boards label every test point. Use a continuity tester to identify unlabeled pads connected to key nodes like ground or power.
Being prepared for these pitfalls ensures silkscreen remains a helpful tool, even when imperfect.
Advanced Tools to Complement Silkscreen Troubleshooting
While silkscreen is invaluable, pairing it with the right tools amplifies your efficiency. Here are a few to consider:
- Digital Multimeters: Essential for measuring voltage, resistance, and continuity at silkscreen-marked test points. A reading of 0V at a 5V test point instantly flags a power issue.
- Oscilloscopes: For signal integrity checks, use silkscreen to locate test points and measure waveforms. A distorted 2MHz signal could indicate a capacitor failure.
- Magnifying Tools: Small silkscreen text or dense boards require magnification for accurate reading. A 10x loupe or digital microscope works wonders.
Combining these tools with silkscreen annotations turns complex troubleshooting into a manageable task.
Conclusion: Master Silkscreen for Lightning-Fast PCB Troubleshooting
Silkscreen annotations are more than just ink on a board—they’re a lifeline for fast, accurate PCB troubleshooting. By mastering PCB troubleshooting silkscreen, silkscreen component identification, test point annotation, and PCB repair silkscreen markings, you can slash debugging time and improve repair accuracy. From reading markings to using them with advanced tools, these secrets empower engineers to tackle even the toughest faults with confidence.
Start applying these tips on your next project. With practice, you’ll navigate silkscreen like a pro, turning hours of frustration into minutes of focused problem-solving. Keep this guide handy as your go-to resource for boosting troubleshooting speed.