ALLPCB


Audio and video functions are core applications in modern embedded systems. On the Allwinner T113-i development board, the available audio and video interfaces provide developers with flexible testing and debugging options. This guide summarizes practical test methods for quickly validating a device's audio and video performance, useful for video output verification and audio issue troubleshooting.
1. Video playback test
Use gst-launch-1.0 to play a video file (video only, no audio):
$ gst-launch-1.0 filesrc location=/talowe_test/jj.mp4 ! decodebin ! videoconvert ! autovideosink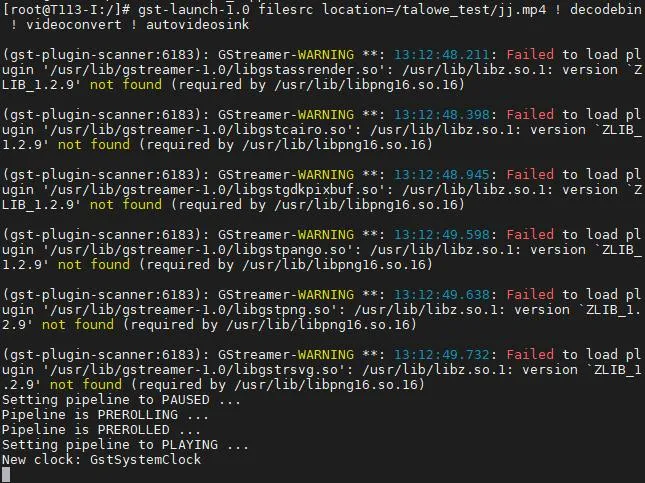
2. Audio tests
2.1 Record audio
The board has on-board microphones (silk-marked MIC). Configure the input interface to the on-board microphone:
$ tinymix -D 0 set "MIC1 Input Select" 0
$ tinymix -D 0 set "MIC2 Input Select" 0
$ tinymix -D 0 set "MIC3 Input Select" 1
$ tinymix -D 0 set "ADC1 Input MIC1 Boost Switch" 0
$ tinymix -D 0 set "ADC2 Input MIC2 Boost Switch" 0
$ tinymix -D 0 set "ADC3 Input MIC3 Boost Switch" 1
Record for 10 seconds (file saved in the current directory):
$ arecord -Dhw:0,0 -d 10 -f dat -r 44100 -c 1 -t wav record.wavPlay back the recorded audio:
$ aplay -Dhw:0,0 -r 44100 -f S16_LE -c 1 record.wav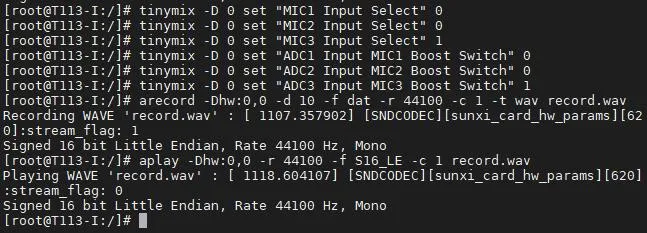
2.2 Headset microphone recording (silk-marked AUDIOOUT)
Configure the input interface to the headset microphone:
$ tinymix -D 0 set "MIC1 Input Select" 0
$ tinymix -D 0 set "MIC2 Input Select" 1
$ tinymix -D 0 set "MIC3 Input Select" 0
$ tinymix -D 0 set "ADC2 Input MIC2 Boost Switch" 1
$ tinymix -D 0 set "ADC3 Input MIC3 Boost Switch" 0
Record for 10 seconds (file saved in the current directory):
$ arecord -Dhw:0,0 -d 10 -f dat -r 44100 -c 1 -t wav record.wavPlay back the recorded audio:
$ aplay -Dhw:0,0 -r 44100 -f S16_LE -c 1 record.wav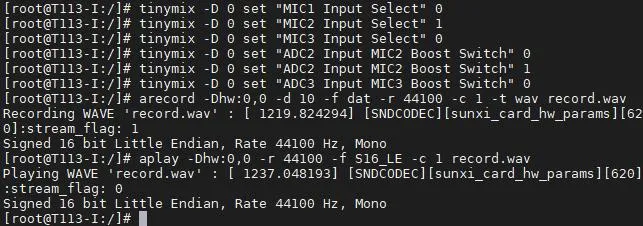
2.3 Play test audio
Play the audio test script included in the board filesystem:
$ /talowe_test/test_audio.sh
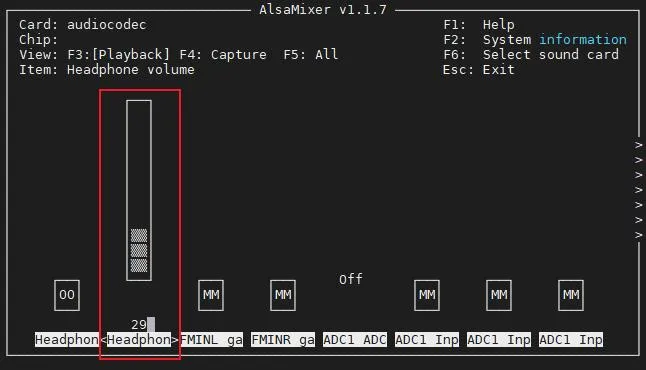
2.4 Volume control
Use the audio device console:
$ alsamixerUse the keyboard arrow keys to adjust levels.
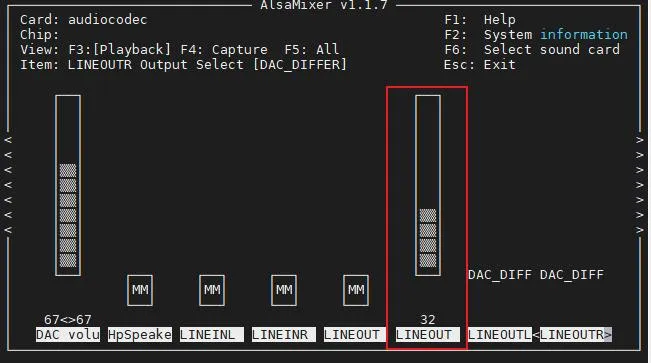
2.5 Speaker control (default on, volume 5)
Turn off speaker output:
$ amixer -D hw:audiocodec cset name='LINEOUT Switch' off
Turn on speaker output:
$ amixer -D hw:audiocodec cset name='LINEOUT Switch' on
Set speaker volume
$ amixer -D hw:audiocodec cset name='LINEOUT volume' VALUEExample: set the volume to 10
$ amixer -D hw:audiocodec cset name='LINEOUT volume' 10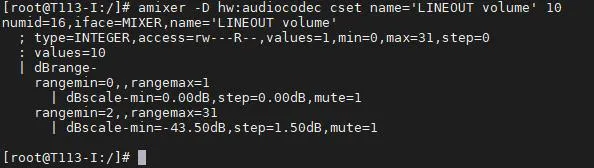
2.6 Headphone control (default on, volume 2)
Turn off headphone output:
$ amixer -D hw:audiocodec cset name='Headphone Switch' off
Turn on headphone output:
$ amixer -D hw:audiocodec cset name='Headphone Switch' on
Set headphone volume:
$ amixer -D hw:audiocodec cset name='Headphone volume' VALUEExample: set the headphone volume to 5
$ amixer -D hw:audiocodec cset name='Headphone volume' 5