 ALLPCB


If you're looking for effective ways to solder aluminum PCBs, you've come to the right place. Aluminum PCBs, known for their excellent heat dissipation, are widely used in high-power applications like LED lighting and power electronics. However, soldering aluminum PCB components requires specific techniques due to their unique thermal properties. In this guide, we'll cover everything you need to know about soldering aluminum PCBs, including optimal temperatures, suitable solder paste, reflow soldering methods, and hand soldering tips. Let's dive into the details to help you achieve reliable and strong solder joints.
What Are Aluminum PCBs and Why Are They Different?
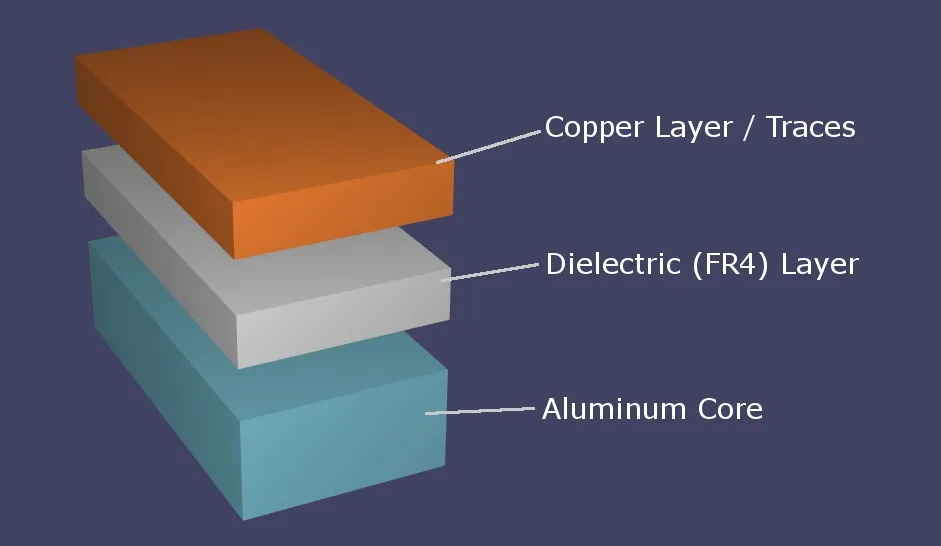
Aluminum PCBs, also known as metal core PCBs, have a base layer made of aluminum instead of the traditional FR4 material. This metal core provides superior thermal conductivity, often ranging from 1 to 2 W/mK, compared to FR4's 0.3 W/mK. This makes them ideal for applications that generate significant heat, such as high-power LEDs or automotive electronics. However, the high thermal conductivity also means that heat dissipates quickly during soldering, making it challenging to maintain the right temperature for forming strong joints.
Understanding these properties is key to mastering soldering aluminum PCB components. The rapid heat dissipation can lead to cold solder joints if not managed properly. This guide will walk you through practical techniques to overcome these challenges and ensure reliable connections.
Key Challenges in Soldering Aluminum PCBs
Before we explore specific techniques, let's look at the main challenges involved in soldering aluminum PCBs:
- High Thermal Conductivity: Aluminum conducts heat much faster than standard PCB materials, requiring higher soldering temperatures or specialized equipment to maintain heat at the joint.
- Risk of Thermal Damage: Excessive heat can damage sensitive components or the dielectric layer between the aluminum core and the circuit layer.
- Solder Compatibility: Not all solder pastes or fluxes are suitable for aluminum PCBs, as the material demands specific formulations to ensure proper adhesion and reliability.
With these challenges in mind, let’s move on to the practical soldering techniques tailored for aluminum PCBs, focusing on both reflow and hand soldering methods.
Choosing the Right Solder Paste for Aluminum PCBs
Selecting the appropriate solder paste for aluminum PCB is crucial for achieving strong and reliable joints. Standard solder pastes may not work well due to the unique thermal properties of aluminum. Here are some key considerations:
- Lead-Free Solder Paste: Opt for lead-free solder pastes with a melting point between 217°C and 221°C. These are often based on SAC (Tin-Silver-Copper) alloys, such as SAC305, which offer good wetting properties on aluminum PCB surfaces.
- Flux Compatibility: Use a no-clean or water-soluble flux designed for high thermal conductivity materials. The flux helps remove oxidation and ensures better adhesion during soldering.
- Particle Size: Choose a solder paste with a finer particle size (Type 4 or Type 5) for precise application, especially for small components or tight pad spacing.
Using the right solder paste minimizes issues like voiding or poor wetting, which are common when soldering aluminum PCB components. Always check the manufacturer’s recommendations for compatibility with metal core boards to avoid potential issues.
Aluminum PCB Soldering Temperature: Finding the Sweet Spot
One of the most critical factors in soldering aluminum PCBs is maintaining the correct temperature. Due to aluminum’s high thermal conductivity, the heat spreads quickly, often requiring higher temperatures or longer preheat times compared to standard PCBs. Here are some guidelines for aluminum PCB soldering temperature:
- Preheat Stage: Start with a preheat temperature of 150°C to 180°C for about 60-90 seconds. This helps reduce thermal shock to components and ensures even heat distribution across the board.
- Soak Stage: Maintain a soak temperature of 180°C to 200°C for 30-60 seconds to activate the flux and prepare the solder paste for reflow.
- Reflow Stage: Increase the temperature to 235°C to 250°C for 20-40 seconds. This range is suitable for most lead-free solder pastes and ensures proper melting and wetting on aluminum surfaces.
- Cooling Stage: Allow the board to cool gradually at a rate of 2-4°C per second to prevent thermal stress or cracking in the solder joints.
Keep in mind that these temperature profiles are general recommendations. Always refer to the specific thermal profile provided by your solder paste manufacturer and adjust based on the size and thickness of your aluminum PCB. Using a reflow oven with precise temperature control or a hot plate designed for metal core PCBs can help maintain these temperatures effectively.
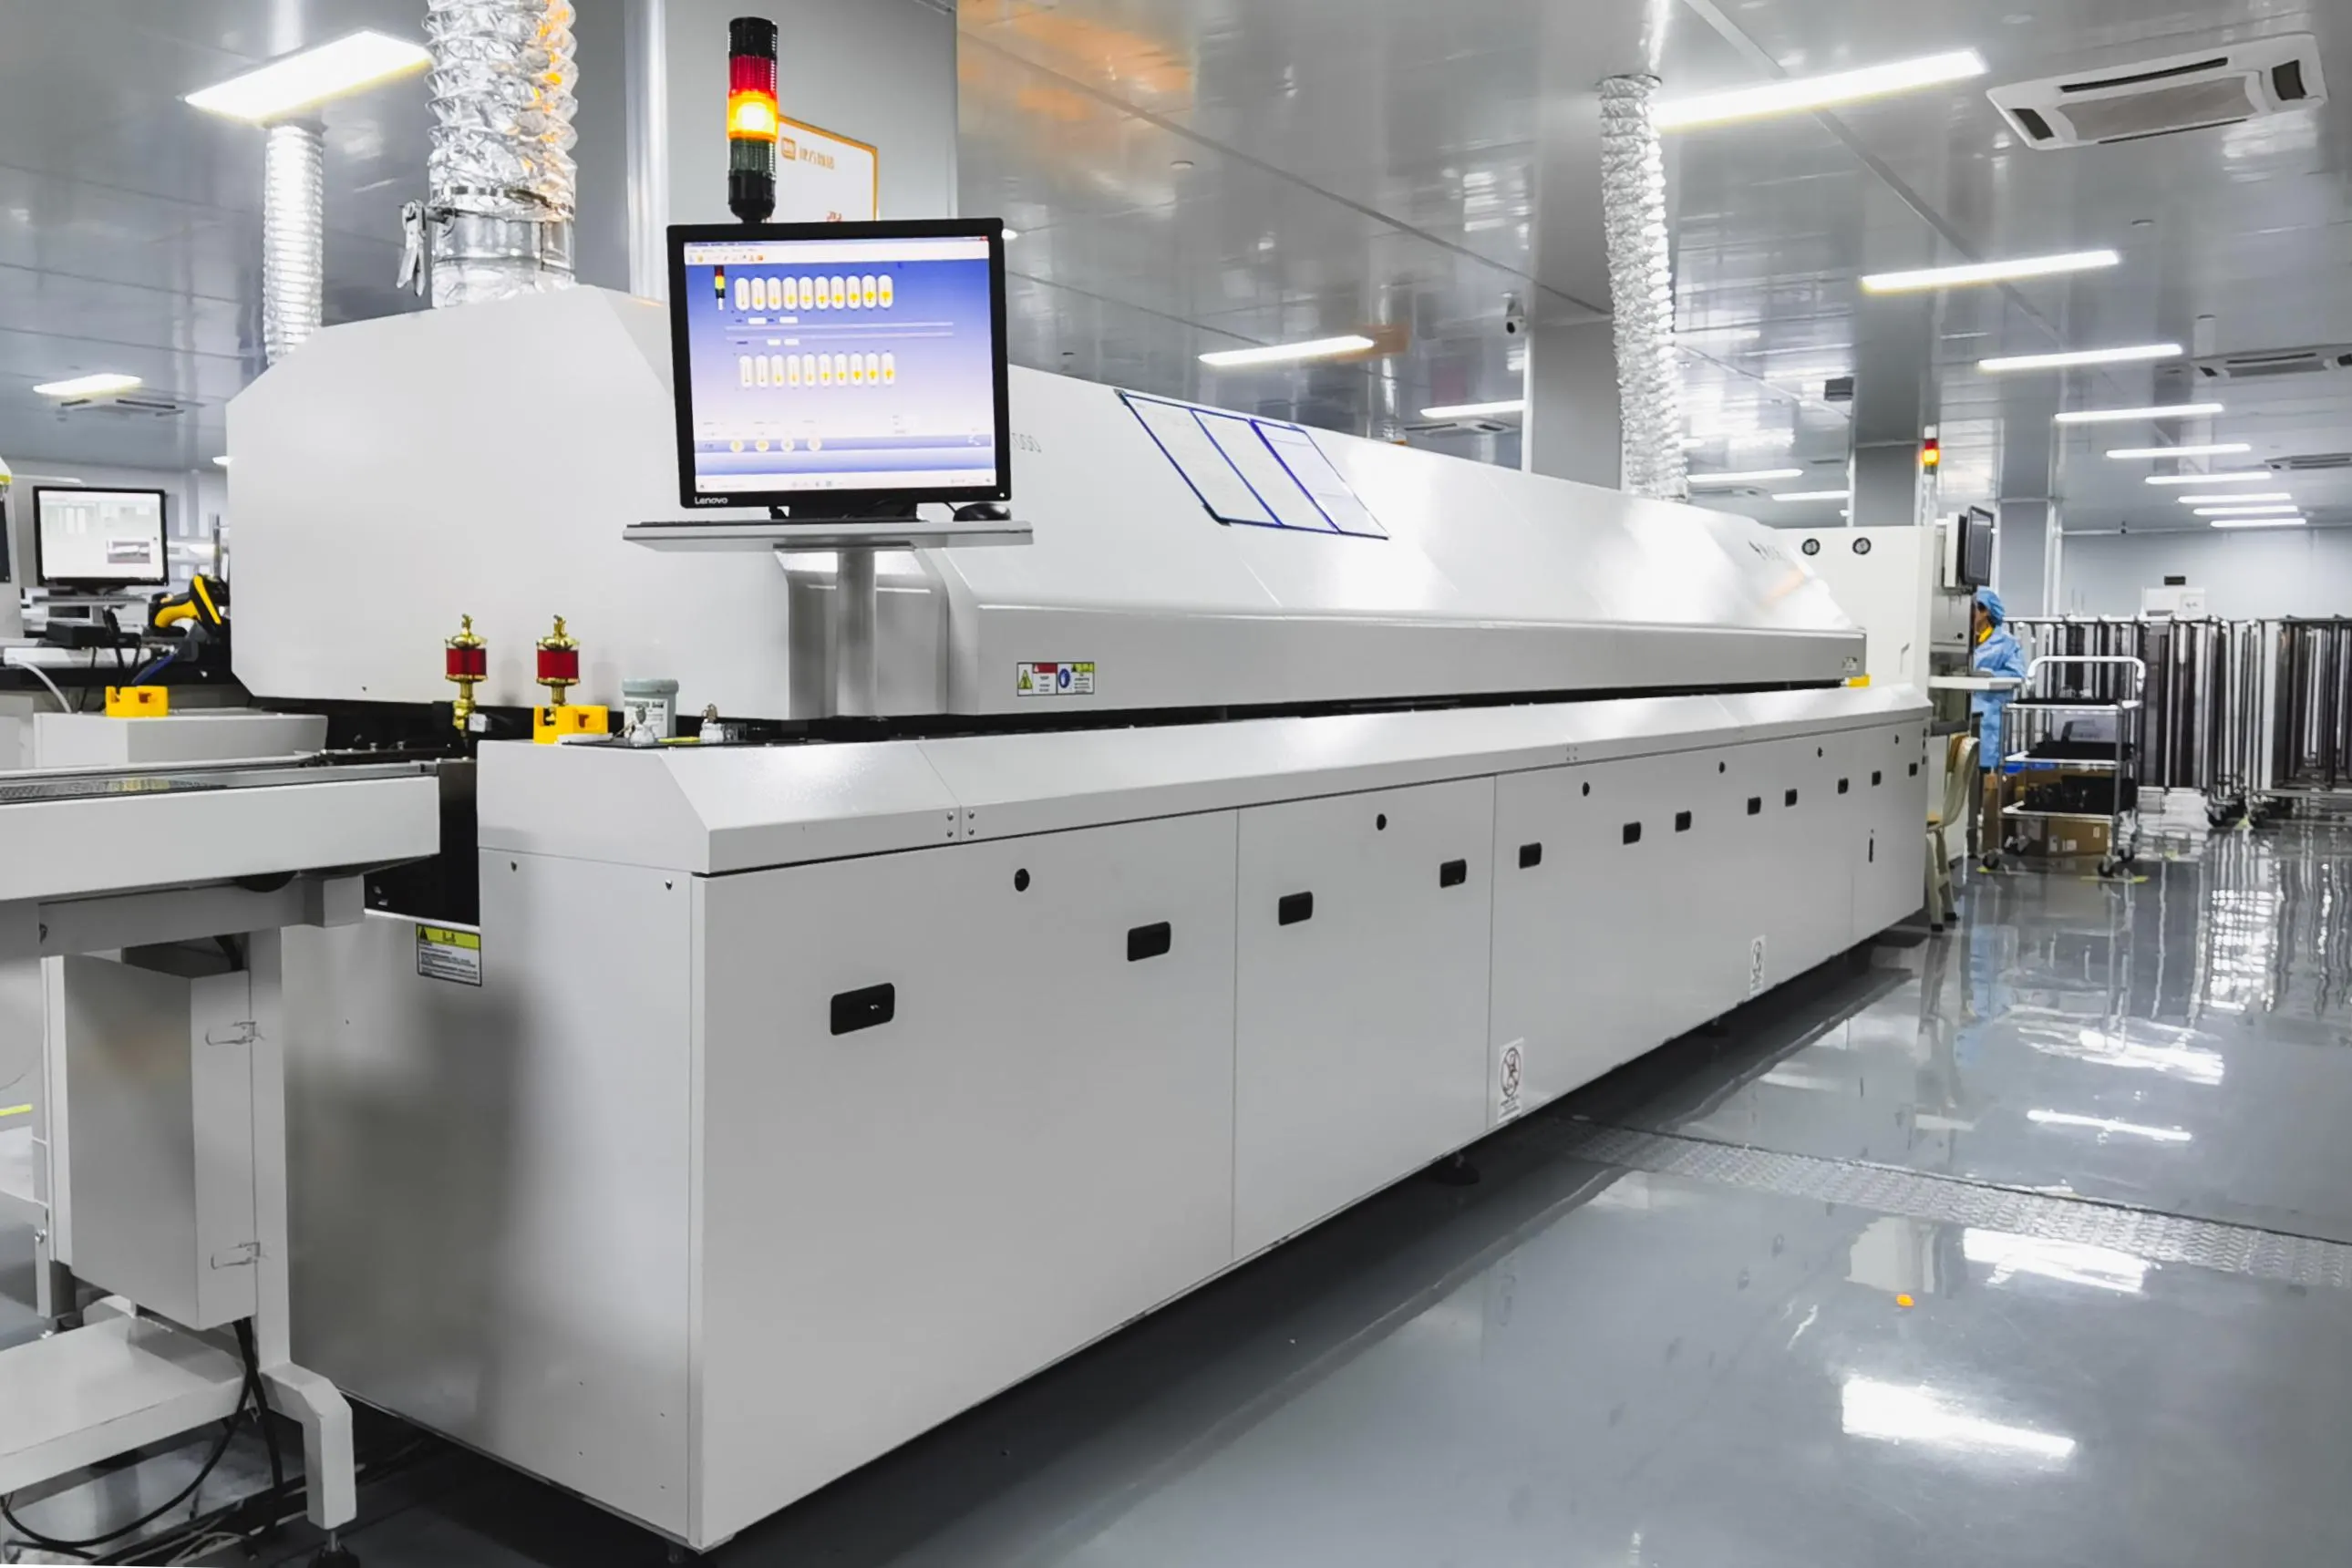
Reflow Soldering Aluminum PCB: Step-by-Step Process
Reflow soldering is the preferred method for assembling aluminum PCBs in mass production due to its efficiency and consistency. It involves applying solder paste, placing components, and heating the board in a controlled environment to create strong solder joints. Here’s a detailed guide to reflow soldering aluminum PCB:
- Prepare the PCB: Clean the aluminum PCB surface to remove any dirt, grease, or oxidation. Use isopropyl alcohol and a lint-free cloth for best results.
- Apply Solder Paste: Use a stencil to apply solder paste evenly to the pads. Ensure the paste is applied only to the areas where components will be placed to avoid excess solder.
- Place Components: Carefully place the components onto the solder paste using a pick-and-place machine or tweezers for manual assembly. Double-check alignment to prevent misalignment during reflow.
- Preheat the Board: Place the PCB in a reflow oven or on a hot plate. Follow the preheat temperature guidelines (150°C to 180°C) to warm up the board evenly.
- Reflow Soldering: Increase the temperature to the reflow stage (235°C to 250°C) as per the solder paste requirements. Monitor the process to ensure the solder melts and forms proper joints.
- Cool Down: Allow the board to cool gradually in the oven or on the hot plate. Avoid rapid cooling, as it can cause thermal stress and weaken the joints.
- Inspect the Joints: After cooling, inspect the solder joints for defects like cold soldering, voids, or insufficient wetting. Use a magnifying glass or automated optical inspection (AOI) for precision.
Reflow soldering aluminum PCB requires careful attention to temperature control due to the board’s heat dissipation properties. Investing in a reflow oven with a customized profile for metal core PCBs can significantly improve results, especially for larger batches.
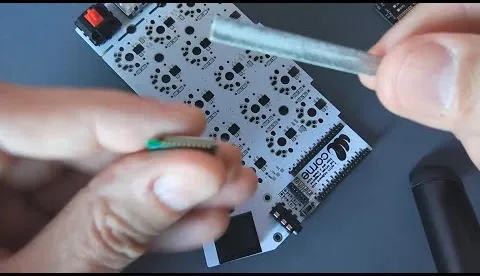
Hand Soldering Aluminum PCB: Tips for Small-Scale Projects
For prototypes or small-scale projects, hand soldering aluminum PCB is often more practical than reflow soldering. However, it comes with its own set of challenges due to the rapid heat dissipation of aluminum. Follow these tips to achieve successful hand soldering results:
- Use a High-Power Soldering Iron: Choose a soldering iron with at least 60-80 watts of power to compensate for the heat loss through the aluminum core. Adjustable temperature control is essential.
- Set the Right Temperature: Set the soldering iron temperature to 300°C to 350°C for lead-free solder. This higher range ensures the tip can maintain heat despite the aluminum’s thermal conductivity.
- Preheat the Board: Use a hot plate or heat gun to preheat the PCB to around 100°C to 150°C before soldering. This reduces the thermal gradient and helps the solder flow better.
- Work Quickly: Apply solder and position components swiftly to minimize heat loss. Use a fine tip for precision and avoid prolonged contact to prevent overheating components.
- Use Flux Generously: Apply flux to the pads before soldering to improve wetting and reduce oxidation on the aluminum surface. Choose a flux compatible with high-temperature soldering.
- Inspect and Rework: After soldering, check each joint for consistency. If a joint looks dull or uneven, reheat it briefly with additional flux to ensure a proper connection.
Hand soldering aluminum PCB can be tricky for beginners, but with practice and the right tools, it becomes manageable. Always prioritize safety by working in a well-ventilated area and using proper protective gear to avoid burns or exposure to fumes.
Common Mistakes to Avoid When Soldering Aluminum PCBs
Even with the best techniques, mistakes can happen during soldering. Here are some common pitfalls to watch out for when working with aluminum PCBs:
- Underheating: Failing to maintain sufficient heat can result in cold solder joints, leading to poor electrical conductivity and mechanical strength.
- Overheating: Excessive heat can damage components or burn the dielectric layer of the PCB. Always monitor temperature closely.
- Using Incompatible Solder Paste: Not all solder pastes are suitable for aluminum PCBs. Using the wrong type can cause poor adhesion or excessive voiding.
- Skipping Preheat: Without preheating, thermal shock can occur, potentially cracking components or weakening solder joints.
- Poor Cleaning: Residual flux or contaminants on the board can lead to corrosion over time. Clean the PCB thoroughly after soldering using appropriate solvents.
By being mindful of these issues, you can avoid costly rework and ensure the longevity of your aluminum PCB assemblies.
Tools and Equipment for Soldering Aluminum PCBs
Having the right tools can make a significant difference in the quality of your soldering work. Here’s a list of essential equipment for soldering aluminum PCBs:
- Reflow Oven or Hot Plate: For consistent heating during reflow soldering, especially for larger boards.
- High-Power Soldering Iron: A 60-80 watt iron with temperature control for hand soldering tasks.
- Solder Paste and Flux: Lead-free solder paste and compatible flux designed for high thermal conductivity materials.
- Stencil: For precise application of solder paste during reflow soldering.
- Tweezers and Magnifying Glass: For placing small components and inspecting solder joints.
- Heat Gun: Useful for preheating the board or rework tasks.
- Cleaning Supplies: Isopropyl alcohol and brushes to clean the PCB before and after soldering.
Investing in quality tools tailored for aluminum PCBs will save time and improve the reliability of your solder joints.
Final Thoughts on Soldering Aluminum PCBs
Soldering aluminum PCBs can be challenging due to their high thermal conductivity, but with the right techniques and tools, you can achieve excellent results. Whether you're using reflow soldering for mass production or hand soldering for prototypes, understanding the nuances of aluminum PCB soldering temperature, choosing the correct solder paste for aluminum PCB, and following best practices are essential steps to success.
By mastering these soldering techniques for aluminum PCB components, you’ll ensure strong, reliable connections that meet the demands of high-power applications. Keep practicing, pay attention to temperature control, and always prioritize cleanliness and precision in your work. With these skills, you’ll be well-equipped to handle any aluminum PCB project with confidence.


