 ALLPCB


Manual solder paste application is a critical skill for hobbyists and DIY enthusiasts working on PCB projects. Whether you're using a solder paste syringe or seeking a stencil alternative, knowing the right techniques can make or break your soldering results. In this comprehensive guide, we'll cover the essential dos and don'ts of manual solder paste application, offering practical tips for hobbyist soldering and DIY PCB assembly. From solder paste dispensing tips to common pitfalls, this post will help you achieve clean, reliable solder joints every time.
What Is Manual Solder Paste Application?
Manual solder paste application involves applying a mixture of tiny solder particles and flux to the pads of a printed circuit board (PCB) without automated equipment. This paste acts as the bonding agent for surface-mount components during soldering. Hobbyists often use a solder paste syringe or other tools to deposit the paste precisely where it's needed. Unlike professional setups with stencils and machines, manual application requires a steady hand and attention to detail, making it a popular choice for small-scale DIY PCB projects.
In the sections below, we'll dive into the best practices and mistakes to avoid, ensuring your soldering process is smooth and effective.
Why Choose Manual Solder Paste Application?
For hobbyist soldering, manual solder paste application offers several advantages. It's cost-effective, as it doesn't require expensive stencils or automated dispensers. It also provides flexibility for small batches or prototypes, where creating a custom stencil may not be practical. With just a solder paste syringe or a simple tool, you can work on intricate designs at home. However, the process demands precision to avoid issues like uneven paste distribution or solder bridges.
Understanding the dos and don'ts will help you maximize the benefits while minimizing errors in your DIY PCB projects.
The Dos of Manual Solder Paste Application
Following best practices is key to achieving professional-quality results with manual solder paste application. Here are the essential dos to keep in mind:
1. Do Choose the Right Solder Paste
Not all solder pastes are created equal. For hobbyist soldering, select a paste with a composition suited to your project, such as a lead-free option with a no-clean flux. Check the alloy type—common choices include Sn96.5/Ag3.0/Cu0.5 (SAC305), which melts at around 217-220°C. Also, ensure the particle size (often labeled as Type 3 or Type 4) matches your component pitch. Finer particles (Type 4) are ideal for smaller pads and tighter spaces, ensuring better precision during application.
2. Do Store Solder Paste Properly
Solder paste is sensitive to temperature and humidity. Store it in a refrigerator at 2-10°C to maintain its shelf life, which is typically 6-12 months when unopened. Before use, let the paste warm to room temperature for about 1-2 hours to avoid condensation, which can affect its consistency. Proper storage prevents the paste from drying out or separating, ensuring smooth dispensing during your DIY PCB work.
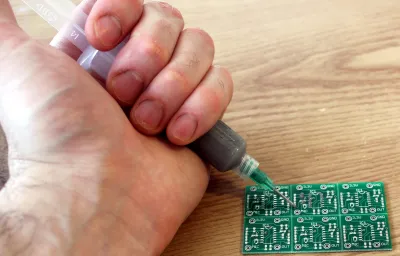
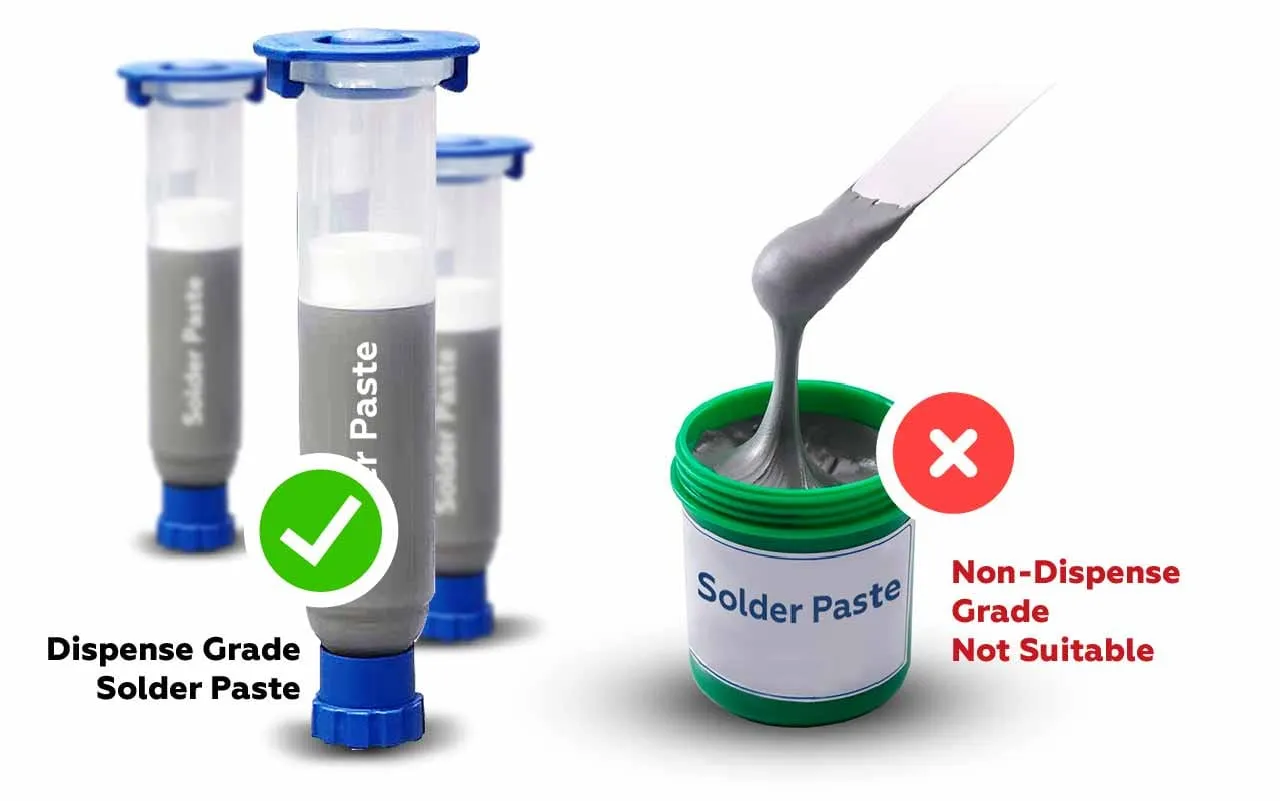
3. Do Use the Correct Dispensing Tool
For manual application, a solder paste syringe with a fine needle tip (e.g., 22-25 gauge) is ideal for precise control. Match the needle size to your pad dimensions—smaller needles for fine-pitch components and larger ones for bigger pads. Apply gentle, consistent pressure to avoid clogging or over-dispensing. If a syringe isn't available, a small toothpick or metal probe can work as a stencil alternative for very small projects, though it requires extra care.
4. Do Apply Paste in Small, Controlled Amounts
Less is often more when it comes to solder paste. Aim to cover about 50-70% of the pad surface with a thin, even layer. For a typical 0603 component pad (0.6mm x 0.3mm), a dot of paste roughly 0.3-0.4mm in diameter is sufficient. Too much paste can lead to solder bridges, while too little may result in weak joints. Practice on a scrap board to get a feel for the right amount before working on your actual project.
5. Do Work in a Clean, Well-Lit Environment
Dust, debris, or poor lighting can ruin your soldering efforts. Set up your workspace on a clean, flat surface, and use a magnifying glass or desk lamp to see small pads clearly. Wear gloves to avoid contaminating the paste or PCB with skin oils. A clean environment reduces the risk of defects and makes hobbyist soldering more efficient.
6. Do Place Components Immediately After Application
Solder paste begins to dry out or lose its tackiness after 30-60 minutes, depending on the formula and room conditions. Place your components as soon as possible after applying the paste to ensure proper adhesion. Use tweezers for precise placement, aligning the component leads with the paste-covered pads. If delays occur, check if the paste still feels sticky; if not, clean it off and reapply.
7. Do Use a Hot Air Station or Reflow Method
After applying paste and placing components, use a hot air station or reflow oven to melt the paste and form solder joints. For hobbyists, a hot air tool set to 250-300°C works well for most lead-free pastes. Heat the board evenly, focusing on the paste areas for about 30-60 seconds until it melts into a shiny joint. Follow the paste manufacturer's recommended reflow profile for best results, as overheating can damage components.
The Don'ts of Manual Solder Paste Application
Avoiding common mistakes is just as important as following best practices. Here are the key don'ts to steer clear of during manual solder paste application:
1. Don't Use Expired or Improperly Stored Paste
Expired solder paste or paste that has been stored at room temperature for too long can become grainy or separated, leading to uneven application. Check the expiration date (usually printed on the container) and discard any paste older than 12 months. Using substandard paste can result in poor solder joints or failed connections in your DIY PCB projects.
2. Don't Apply Too Much Pressure on the Syringe
When using a solder paste syringe, excessive pressure can cause the paste to squirt out uncontrollably, creating a mess on the PCB. This often leads to solder bridges or shorts between pads. Apply light, steady pressure, and stop immediately if the needle clogs. Clean the tip with a small brush or compressed air if needed, and resume with caution.
3. Don't Skip Cleaning the PCB Before Application
Dirt, flux residue, or fingerprints on the PCB can prevent solder paste from adhering properly. Always clean the board with isopropyl alcohol (90% or higher) and a lint-free cloth before starting. For stubborn residues, use a soft brush. A clean surface ensures the paste sticks to the pads and forms reliable joints during soldering.
4. Don't Ignore Component Placement Accuracy
Placing components off-center or misaligned with the paste can lead to tombstoning (where one end of a component lifts off the pad) or weak connections. Double-check alignment before reflow, and use a magnifying tool if needed. For fine-pitch components, even a 0.1mm misalignment can cause issues, so take your time during this step.
5. Don't Reuse Old or Dried-Out Paste
If solder paste has dried out on the board or in the syringe, don't attempt to reuse it by adding flux or other liquids. This alters the paste's properties and can result in unreliable joints. Instead, clean off any dried paste with alcohol and apply fresh paste. Always seal the syringe tightly after use to prevent drying.
6. Don't Overheat During Reflow
Excessive heat can damage components or cause the solder paste to burn, leaving behind residue that weakens joints. Avoid setting your hot air tool above 350°C, and keep the nozzle at least 2-3 cm away from the board to prevent localized overheating. Monitor the process closely, and stop heating once the solder appears shiny and fully melted.
Solder Paste Dispensing Tips for Hobbyists
For hobbyist soldering, mastering solder paste dispensing is essential for clean and consistent results. Here are some actionable tips to improve your technique:
- Practice on Scrap Boards: Before tackling your main project, test your syringe technique on a spare PCB or piece of cardboard. This helps you gauge the pressure needed for even dispensing.
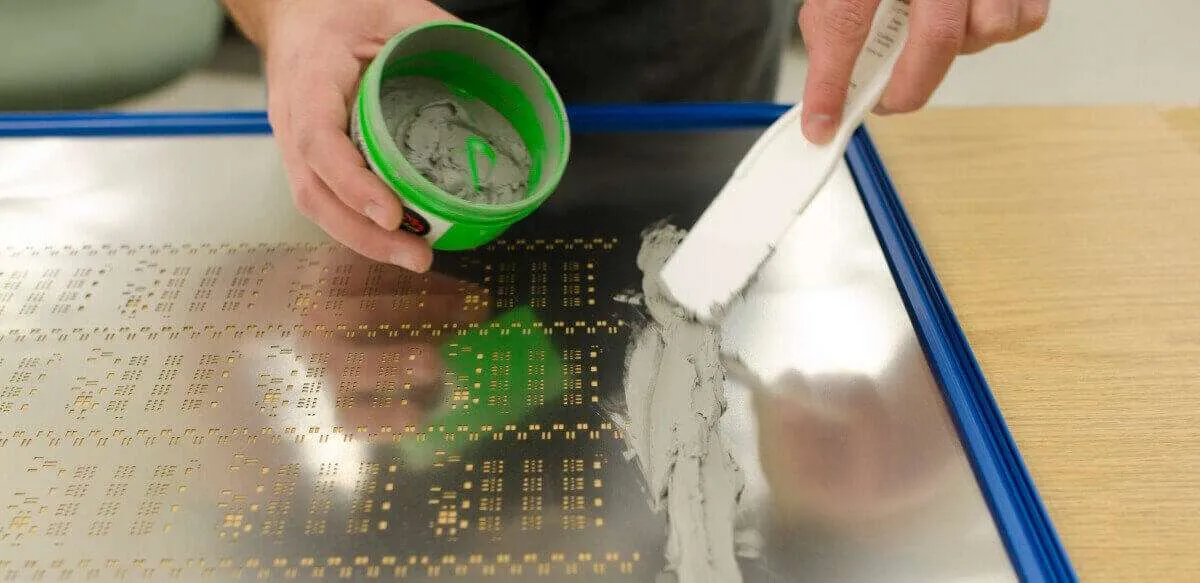
- Use a Stencil Alternative for Larger Projects: If you're working on multiple pads, consider making a DIY stencil from thin plastic or cardstock using a craft knife. Align it over the PCB and spread paste with a small spatula for quicker, uniform application.
- Keep Needles Clean: After each session, remove the needle from the solder paste syringe and clean it with a thin wire or compressed air to prevent blockages.
- Work in Small Batches: Apply paste to only a few pads at a time (e.g., 5-10) to avoid drying before component placement.
- Adjust for Temperature: If your workspace is cold (below 20°C), the paste may be stiffer and harder to dispense. Warm the syringe slightly in your hands before use, but avoid overheating.
Common Challenges and How to Overcome Them
Manual solder paste application can come with hurdles, especially for beginners in DIY PCB assembly. Below are some frequent issues and solutions:
Challenge 1: Uneven Paste Application
Solution: If the paste looks lumpy or uneven, your syringe needle might be too large or clogged. Switch to a finer needle and ensure it's clean. Also, maintain a consistent angle (about 45 degrees) while dispensing to control the flow.
Challenge 2: Solder Bridges After Reflow
Solution: Solder bridges occur when too much paste connects adjacent pads. Use a solder wick and a soldering iron set to 300°C to remove excess solder. Next time, reduce the amount of paste by 20-30% per pad.
Challenge 3: Paste Drying Out Too Quickly
Solution: Work in a humidity-controlled environment (40-60% relative humidity) if possible. If the paste dries out, clean it off with alcohol and reapply. Limit exposure time by covering unused paste or working faster during placement.
Conclusion: Mastering Manual Solder Paste Application
Manual solder paste application is a valuable skill for hobbyist soldering and DIY PCB projects. By following the dos—like using the right tools, applying controlled amounts, and working in a clean space—and avoiding the don'ts—such as using expired paste or overheating—you can achieve reliable, high-quality solder joints. With practice and the solder paste dispensing tips provided, you'll gain confidence in handling even the smallest components.
Whether you're using a solder paste syringe or experimenting with a stencil alternative, patience and precision are your best allies. Keep refining your technique, and soon, your DIY PCB creations will rival professional results. Remember to store your materials properly and maintain a tidy workspace for consistent success in every project.


