 ALLPCB


Stencil printing is a critical step in PCB assembly, and the right squeegee selection can make or break the quality of your solder paste application. Whether you're working on a small prototype or a large-scale production run, choosing the appropriate squeegee type and optimizing your stencil printing process ensures consistent results and minimizes defects like bridging or insufficient paste. In this comprehensive guide, we'll dive into the nuances of squeegee selection, explore different squeegee types, and share actionable tips for PCB assembly optimization. Let's get started with mastering the art of stencil printing for flawless solder paste application.
Why Squeegee Selection Matters in Stencil Printing
The squeegee is the tool that spreads solder paste across the stencil and into the apertures, directly impacting how evenly and accurately the paste is applied to the PCB. A poor choice in squeegee type or improper setup can lead to uneven deposits, skipped pads, or excess paste, all of which cause soldering defects during reflow. By focusing on squeegee selection, you can achieve consistent paste volume, reduce waste, and improve the overall quality of your PCB assembly process.
In the following sections, we'll break down the key factors in selecting a squeegee, the different types available, and best practices for optimizing stencil printing. Our goal is to equip you with the knowledge to make informed decisions for your specific assembly needs.
Understanding the Basics of Stencil Printing and Solder Paste Application
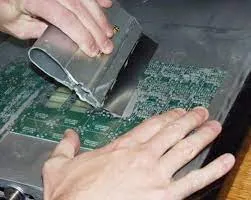
Before diving into squeegee selection, let's cover the basics of stencil printing. This process involves using a metal stencil with laser-cut apertures that match the pads on your PCB. Solder paste, a mixture of tiny solder particles and flux, is applied over the stencil. When the squeegee moves across the stencil, it forces the paste through the apertures onto the PCB below. After printing, components are placed on the paste, and the board undergoes reflow soldering to create permanent connections.
The success of this process hinges on several variables: stencil design, solder paste properties, printer settings, and, of course, the squeegee. A mismatch in any of these areas can result in issues like solder bridging (where paste connects adjacent pads) or insufficient paste (leading to weak joints). The squeegee plays a pivotal role by controlling the pressure, angle, and speed of paste application, directly affecting the volume and uniformity of the deposit.
Key Factors in Squeegee Selection for Optimal Results
Choosing the right squeegee isn't a one-size-fits-all decision. Several factors influence which squeegee will work best for your stencil printing setup. Let's explore these considerations in detail to guide your selection process.
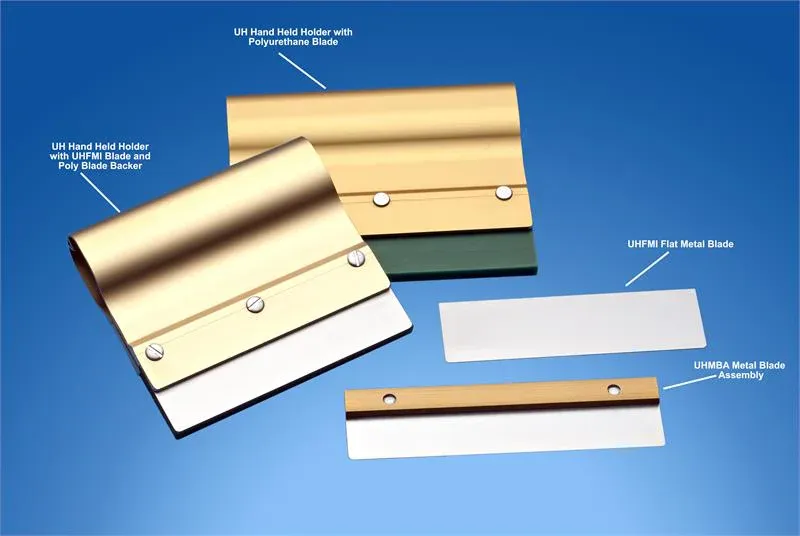
1. Squeegee Material: Metal vs. Polyurethane
Squeegees are typically made from either metal (stainless steel) or polyurethane, and each material has its strengths depending on your application.
- Metal Squeegees: These are highly durable and provide a consistent, sharp edge for precise solder paste application. They are ideal for high-volume production runs where wear resistance is crucial. Metal squeegees also work well with fine-pitch components (e.g., 0.4mm pitch or smaller) because they maintain a uniform pressure across the stencil, ensuring accurate paste transfer. However, they can be more expensive and may require careful handling to avoid damaging the stencil.
- Polyurethane Squeegees: Made from a flexible plastic material, polyurethane squeegees are softer and less likely to damage stencils, making them a popular choice for prototypes or low-volume runs. They come in various hardness levels (measured in durometer, typically 60-90), allowing customization based on paste viscosity and stencil type. Softer blades (lower durometer) are better for thicker pastes, while harder blades suit thinner pastes.
Tip: For most standard SMT applications with mid-range pitch components (0.5mm to 1.0mm), a polyurethane squeegee with a durometer of 70-80 offers a good balance of flexibility and control.
2. Squeegee Angle and Pressure
The angle at which the squeegee contacts the stencil significantly affects paste deposition. A common angle is 45 to 60 degrees, as it allows for effective paste rolling and filling of apertures without excessive pressure. Too steep an angle (e.g., closer to 90 degrees) can cause the paste to smear or skip apertures, while too shallow an angle may not push enough paste through.
Pressure is equally important. Excessive pressure can damage the stencil or cause paste to bleed under the edges, leading to defects. Insufficient pressure might result in incomplete aperture filling. Modern stencil printers often allow precise control over pressure settings, typically in the range of 0.5 to 2.0 kg per centimeter of squeegee length, depending on the paste and stencil thickness.
3. Squeegee Size and Length
The squeegee should be slightly longer than the stencil's width to ensure full coverage in a single pass. For example, if your stencil is 300mm wide, a squeegee length of 320mm to 350mm is ideal. A squeegee that's too short can leave unprinted areas, while one that's too long may cause uneven pressure distribution.
Different Squeegee Types for Stencil Printing
Beyond material, squeegees come in various designs tailored to specific applications in PCB assembly. Understanding these types helps in optimizing your stencil printing process for consistent solder paste application.
1. Flat Squeegees
Flat squeegees are the most common type, featuring a straight, uniform edge. They are versatile and work well for standard SMT applications with consistent stencil thickness (typically 0.1mm to 0.15mm). Flat squeegees provide even pressure and are easy to set up, making them a go-to choice for many assemblers.
2. Diamond or Angled Squeegees
These squeegees have a diamond-shaped or angled edge, which can improve paste rolling and reduce the amount of paste left on the stencil after each pass. They are particularly useful for high-density boards with fine-pitch components, as the unique edge design helps fill smaller apertures more effectively.
3. Trailing Edge Squeegees
Trailing edge squeegees are designed with a slight curve or secondary edge that follows the primary contact point. This design minimizes paste residue on the stencil, reducing the need for frequent cleaning and improving print consistency over long runs.
Tip: For fine-pitch applications (below 0.5mm), consider experimenting with diamond or trailing edge squeegees to achieve better aperture filling and reduce defects like bridging.
Optimizing Stencil Printing for PCB Assembly Success
Squeegee selection is just one piece of the puzzle. To achieve consistent results in solder paste application, you need to optimize the entire stencil printing process. Here are actionable strategies to enhance your PCB assembly workflow.
1. Match Squeegee to Stencil Thickness
Stencil thickness, typically ranging from 0.08mm to 0.2mm, dictates the volume of solder paste deposited. Thinner stencils (e.g., 0.08mm) are used for fine-pitch components to limit paste volume, while thicker stencils (e.g., 0.15mm to 0.2mm) suit larger components requiring more paste. Pair a harder squeegee (higher durometer or metal) with thinner stencils to maintain control over small apertures, and use a softer squeegee for thicker stencils to accommodate higher paste volumes without excessive pressure.
2. Control Print Speed
The speed at which the squeegee moves across the stencil affects paste consistency. A speed of 20 to 70 mm per second is typical for most applications. Slower speeds (closer to 20 mm/s) allow better aperture filling for fine-pitch designs, while faster speeds (up to 70 mm/s) are suitable for larger components and quicker production cycles. Test different speeds on your printer to find the sweet spot for your specific setup.
3. Regular Maintenance and Cleaning
Squeegees wear out over time, especially polyurethane ones, which can develop nicks or uneven edges after repeated use. Inspect your squeegee regularly for signs of wear and replace it if the edge is no longer uniform. Additionally, clean the squeegee after each print cycle to remove residual paste, as buildup can cause inconsistent application. Use a lint-free cloth and an appropriate solvent to keep the blade in top condition.
4. Monitor Solder Paste Properties
The viscosity and particle size of your solder paste also influence squeegee performance. Pastes with smaller particle sizes (e.g., Type 4 or Type 5, with particle diameters of 20-38 microns or 15-25 microns, respectively) are used for fine-pitch applications and require a firmer squeegee to ensure proper transfer. Thicker pastes for larger components may work better with a softer blade to avoid clogging apertures. Always check the paste manufacturer's recommendations and adjust your squeegee choice accordingly.
Common Challenges in Stencil Printing and How Squeegee Selection Helps
Even with the best setup, stencil printing can present challenges. Here's how the right squeegee can address common issues in PCB assembly.
- Insufficient Paste Deposition: If apertures aren't filling properly, consider switching to a softer polyurethane squeegee or adjusting the angle to 45 degrees for better paste rolling. Increasing pressure slightly (e.g., by 0.2 kg/cm) may also help.
- Solder Bridging: Excess paste causing bridges between pads often results from too much pressure or a worn squeegee edge. Use a harder squeegee or reduce pressure to control paste volume.
- Stencil Damage: Harsh metal squeegees or excessive pressure can scratch or dent stencils, especially thinner ones. Opt for a polyurethane squeegee with a mid-range durometer (70-80) to minimize wear on delicate stencils.
Advanced Tips for PCB Assembly Optimization
For those looking to take their stencil printing to the next level, consider these advanced strategies to refine your process further.
Experiment with Dual Squeegee Systems: Some modern stencil printers support dual squeegee setups, where two blades (often of different materials or angles) work in tandem to improve paste application and reduce residue. This can be particularly effective for complex boards with mixed component sizes.
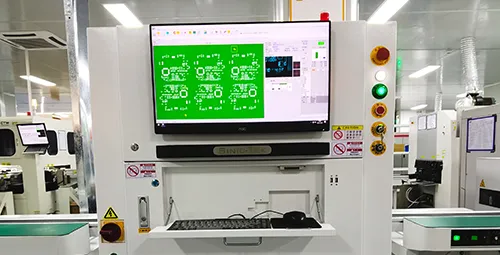
Use Automated Inspection: Invest in automated optical inspection (AOI) systems to check paste deposits after printing. AOI can detect issues like insufficient paste or misalignment, allowing you to adjust squeegee settings in real-time. Typical paste height targets are 80-120% of stencil thickness for optimal soldering results.
Document and Standardize Settings: Once you've found the ideal squeegee type, angle, pressure, and speed for a specific board design, document these parameters. Standardizing your setup ensures repeatability across production runs, saving time and reducing errors.
Conclusion: Mastering Squeegee Selection for Stencil Printing Success
Optimizing stencil printing for consistent solder paste application starts with understanding the art of squeegee selection. By considering factors like material (metal vs. polyurethane), angle, pressure, and squeegee type (flat, diamond, or trailing edge), you can tailor your setup to match your PCB assembly needs. Combine this with best practices like matching squeegee to stencil thickness, controlling print speed, and regular maintenance, and you'll be well on your way to minimizing defects and achieving reliable results.
Whether you're assembling prototypes or scaling up for production, the right squeegee can transform your stencil printing process. Take the time to experiment with different types and settings, and don't hesitate to leverage advanced tools like AOI for precision. With these strategies, you're equipped to optimize every aspect of PCB assembly, ensuring high-quality outcomes every time.


