 ALLPCB


If you're new to electronics manufacturing and wondering how to attach tiny components to a circuit board, reflow soldering is the answer. This process is the cornerstone of Surface Mount Technology (SMT) assembly, allowing you to create reliable connections between components and printed circuit boards (PCBs). In this guide, we'll walk you through the reflow soldering process, from solder paste application to setting up a reflow oven, making it easy for beginners to understand and apply.
Whether you're a hobbyist or starting in professional PCB assembly, this SMT assembly tutorial will cover every step of reflow soldering for beginners. Let's dive into the details of the reflow soldering process explained, including practical tips on component placement, solder paste application, and reflow oven settings.
What is Reflow Soldering and Why is it Important?
Reflow soldering is a widely used technique in electronics manufacturing to attach surface mount components to PCBs. Unlike traditional through-hole soldering, where components are inserted into holes and soldered manually, reflow soldering uses a sticky mixture called solder paste to hold components in place before melting it in a controlled heating process. This creates strong, permanent connections, ideal for the tiny, densely packed components found in modern electronics.
The importance of reflow soldering lies in its efficiency and precision. It allows for the simultaneous soldering of thousands of components, making it perfect for high-volume production. For beginners, mastering this technique opens the door to creating compact, professional-grade circuit boards at home or in a small workshop.
Understanding Surface Mount Technology (SMT) Basics
Before diving into the reflow soldering process, it's helpful to understand Surface Mount Technology (SMT). SMT refers to the method of mounting electronic components directly onto the surface of a PCB, rather than inserting them into drilled holes. This technology allows for smaller, lighter, and more efficient designs, which is why it's used in nearly all modern electronics, from smartphones to laptops.
SMT components are typically much smaller than their through-hole counterparts, with sizes often measured in millimeters. For example, a common SMT resistor might be just 1.6 mm long and 0.8 mm wide (known as a 0603 package). These tiny parts require precise placement and soldering techniques, which is where reflow soldering comes in as the preferred method.
The Reflow Soldering Process Explained: Step by Step
The reflow soldering process consists of several key stages, each critical to achieving a successful assembly. Below, we'll break down the process into manageable steps for beginners to follow.
Step 1: Solder Paste Application
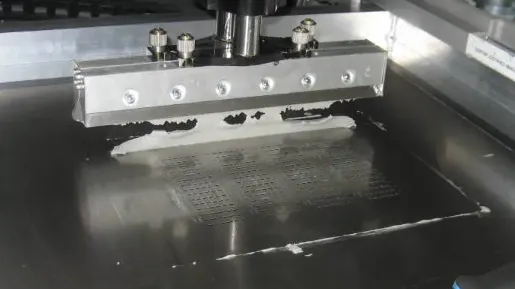
The first step in reflow soldering is applying solder paste to the PCB. Solder paste is a mixture of tiny solder particles and flux, a chemical agent that helps clean the surfaces and improve solder flow. The paste is applied only to the pads where components will be placed, ensuring precise soldering.
For small-scale or prototype work, you can apply solder paste manually using a syringe or small spatula. However, in professional settings, a stencil is used. A stencil is a thin metal sheet with cutouts matching the PCB's pads. You spread the paste over the stencil with a squeegee, ensuring an even layer—typically around 0.1 to 0.15 mm thick—on each pad.
Tip: Use a fresh batch of solder paste and store it in a cool environment (around 4-10°C or 39-50°F) to maintain its viscosity and effectiveness. Applying too much or too little paste can lead to poor connections or solder bridges.
Step 2: Component Placement
Once the solder paste is applied, the next step is placing the components onto the PCB. The sticky nature of the paste holds the components in place temporarily. For beginners working on small projects, tweezers can be used to manually position components. Ensure that each component aligns correctly with its corresponding pads—misalignment can cause soldering defects.
In larger-scale production, automated pick-and-place machines are used to position components with incredible precision, often at speeds of thousands of placements per hour. For hobbyists, though, patience and a steady hand are key. Start with larger components before moving to smaller ones to avoid knocking parts out of place.
Tip: Double-check the orientation of polarized components like diodes and capacitors. Incorrect placement can lead to circuit failure after soldering.
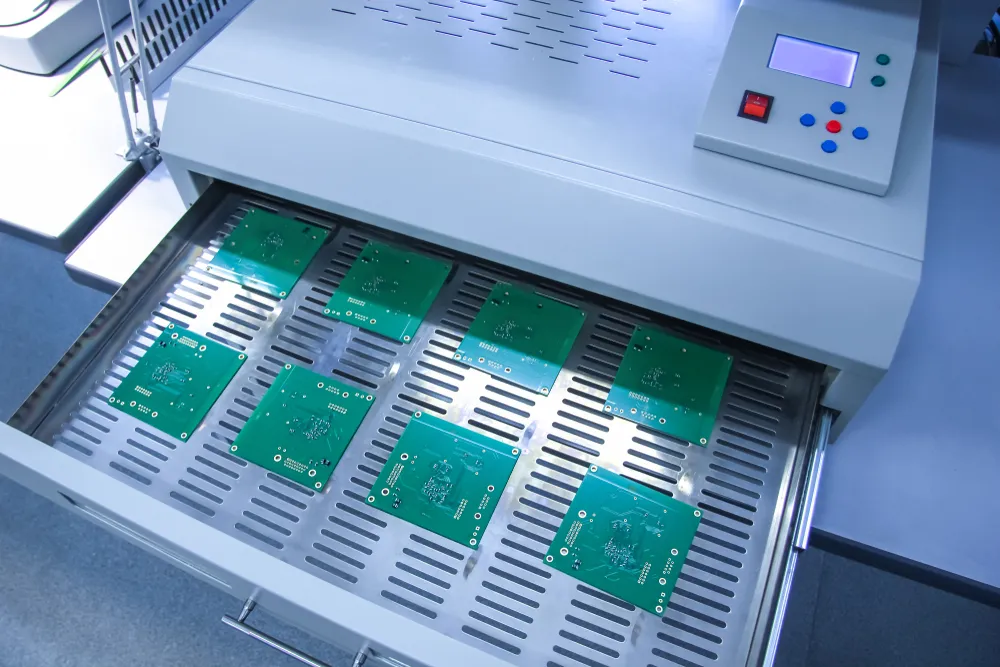
Step 3: Heating in a Reflow Oven
After placing the components, the PCB is heated in a reflow oven to melt the solder paste and form permanent connections. A reflow oven provides controlled heat through multiple temperature zones, following a specific profile to ensure proper soldering without damaging components.
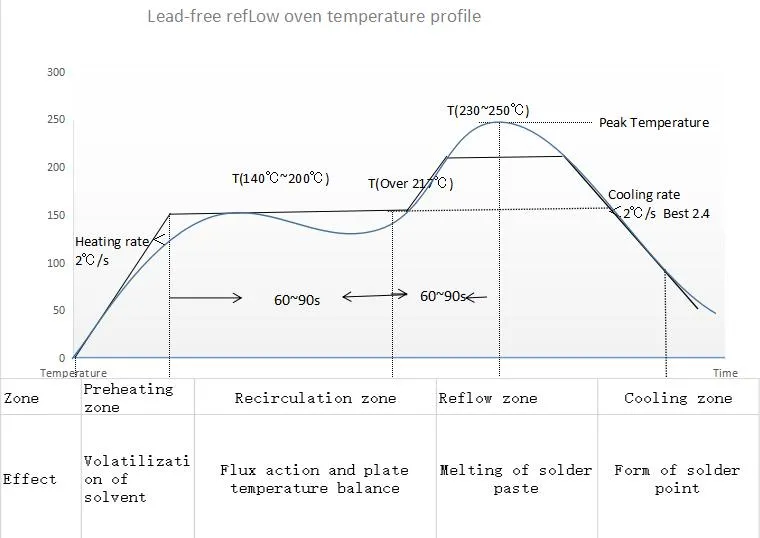
The reflow process typically includes four phases:
- Preheat: The temperature rises slowly (1-3°C per second) to around 150-180°C (302-356°F). This activates the flux in the solder paste, removing oxides and preparing the surfaces for soldering.
- Soak: The temperature holds steady for 60-120 seconds to ensure even heating across the board, minimizing thermal shock to components.
- Reflow: The temperature peaks at 220-250°C (428-482°F), depending on the solder type, for about 20-40 seconds. This melts the solder, forming strong joints.
- Cooling: The temperature decreases gradually (2-4°C per second) to solidify the solder without causing stress or cracks in the joints.
For beginners without access to a professional reflow oven, alternatives like toaster ovens or hot plates can be modified for reflow soldering. However, these require careful monitoring to mimic the temperature profile.
Step 4: Inspection and Quality Control
After cooling, inspect the PCB for soldering defects. Common issues include solder bridges (where solder connects two pads that shouldn’t be joined), cold joints (weak connections due to insufficient heat), or tombstoning (where a component stands upright due to uneven heating). Use a magnifying glass or microscope for a close look, especially on small components.
If defects are found, they can often be fixed with a soldering iron or hot air rework station. For larger issues, the board may need to go through the reflow process again after corrections.
Reflow Oven Settings: Getting the Temperature Profile Right
One of the most critical aspects of reflow soldering for beginners is understanding and setting the correct reflow oven temperature profile. Each type of solder paste and PCB assembly has specific thermal requirements, often provided by the solder paste manufacturer in a datasheet.
For lead-free solder paste, which is common due to environmental regulations, the peak temperature during reflow is typically around 240-250°C (464-482°F). For leaded solder paste, the peak is lower, around 210-220°C (410-428°F). The time above liquidus (the temperature at which solder melts) should be kept between 30-60 seconds to avoid overheating components.
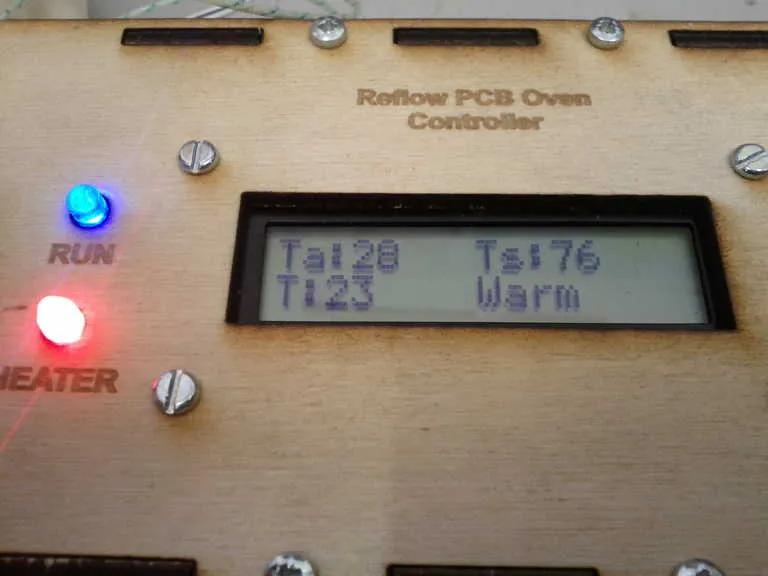
If you're using a DIY setup like a toaster oven, invest in a thermocouple or temperature probe to monitor the heat. Manually adjust the settings to approximate the preheat, soak, reflow, and cooling phases. Some modern reflow ovens for hobbyists come with pre-programmed profiles, making this step easier.
Tip: Always test your reflow oven settings with a scrap PCB before soldering a critical project. This helps you fine-tune the profile and avoid costly mistakes.
Common Challenges in Reflow Soldering and How to Avoid Them
Even with careful preparation, reflow soldering can present challenges, especially for beginners. Here are some common issues and solutions:
- Solder Bridges: Caused by excess solder paste or misaligned components. Prevent this by using the right amount of paste and ensuring precise placement. Fix bridges with a soldering iron and wick to remove excess solder.
- Cold Joints: Result from insufficient heat or poor contact between components and pads. Ensure your reflow oven reaches the correct peak temperature and check for proper paste application.
- Tombstoning: Happens when one end of a component lifts during reflow due to uneven heating. Use a balanced temperature profile and ensure even paste distribution on both pads of a component.
- Component Damage: Overheating can damage sensitive components like ICs. Stick to the recommended temperature profile and avoid prolonged exposure to peak heat.
Tips for Successful SMT Assembly as a Beginner
Starting with reflow soldering and SMT assembly can feel daunting, but these tips will help you succeed:
- Start Small: Practice with simple designs and larger components (like 1206 package resistors) before tackling complex boards with tiny parts.
- Invest in Tools: A good pair of tweezers, a magnifying glass, and a basic reflow setup (even a modified toaster oven) can make a big difference.
- Follow Datasheets: Always refer to the solder paste and component datasheets for specific temperature and handling guidelines.
- Keep it Clean: Work in a clean environment to avoid dust or debris contaminating the solder paste or PCB.
- Document Your Process: Take notes on your reflow oven settings and results to refine your technique over time.
Why Choose Professional SMT Assembly Services?
While reflow soldering can be done at home, professional SMT assembly services offer advantages, especially for larger projects or when precision is critical. At ALLPCB, we provide end-to-end solutions for PCB manufacturing and assembly, ensuring high-quality results with state-of-the-art equipment. Our team handles everything from solder paste application to final inspection, saving you time and reducing the risk of errors.
For beginners, partnering with a professional service can also be a learning opportunity. You can start by assembling small projects yourself and scale up to professional services as your needs grow.
Conclusion: Mastering Reflow Soldering for SMT Assembly
Reflow soldering is an essential skill for anyone interested in electronics assembly, especially with the rise of compact, surface mount designs. By understanding the reflow soldering process explained in this guide, from solder paste application to component placement and reflow oven settings, beginners can achieve professional-quality results.
Start with the basics, practice your technique, and don't hesitate to leverage professional services for complex projects. With time and experience, you'll gain confidence in SMT assembly and be able to tackle even the most intricate PCB designs. Keep learning, experimenting, and refining your process to stay ahead in the world of electronics manufacturing.


