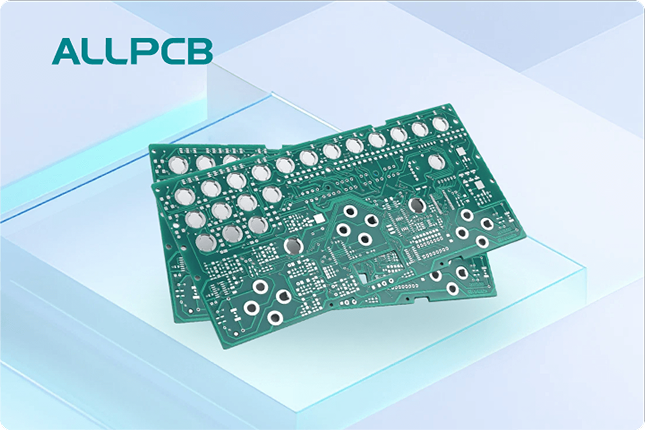
Are you looking to improve your manual PCB assembly process with effective Design for Assembly (DFA) guidelines? Whether you're a hobbyist or a professional engineer, mastering DFA for hand assembly can save time, reduce errors, and ensure high-quality results. In this comprehensive guide, we’ll explore DFA guidelines for manual assembly, PCB assembly best practices, manual PCB assembly tips, DFA for hand assembly, and hand soldering techniques to help you achieve success in your projects.
Manual PCB assembly requires precision, patience, and a well-thought-out design to minimize errors during the assembly process. By following the best practices outlined in this blog, you’ll learn how to optimize your PCB designs for hand assembly and improve the efficiency of your workflow. Let’s dive into the details of creating designs that make manual assembly smoother and more reliable.
What is Design for Assembly (DFA) in PCB Manufacturing?
Design for Assembly (DFA) is a set of principles aimed at simplifying the assembly process of a product, including printed circuit boards (PCBs). When applied to manual PCB assembly, DFA focuses on creating designs that reduce the complexity of hand placement and soldering of components. The goal is to minimize assembly time, lower the risk of errors, and ensure the final product is both functional and durable.
In the context of manual assembly, DFA becomes even more critical. Unlike automated assembly lines with precision machines, hand assembly relies on human skill and attention to detail. A well-designed PCB for manual assembly considers factors like component spacing, accessibility, and ease of soldering. By adhering to DFA guidelines, you can significantly improve the outcome of your projects.
Why DFA Matters for Manual PCB Assembly
Manual PCB assembly is often used for prototypes, small-batch production, or repairs where automated equipment isn’t feasible. While it offers flexibility, it also comes with challenges like inconsistent soldering quality, component misalignment, and longer assembly times. DFA helps address these issues by ensuring the design supports the assembler’s capabilities.
For instance, a poorly designed PCB with tightly packed components can lead to soldering errors, such as bridges between pads or insufficient solder joints. On the other hand, a design optimized with DFA principles—such as adequate spacing and clear markings—can reduce these risks. Studies have shown that implementing DFA can cut assembly errors by up to 30%, saving both time and resources in the long run.
Key DFA Guidelines for Manual PCB Assembly
Let’s break down the essential DFA guidelines for manual assembly. These tips will help you create PCB designs that are easier to assemble by hand while maintaining functionality and reliability.
1. Optimize Component Spacing
One of the most important PCB assembly best practices for manual work is ensuring adequate spacing between components. Tight spacing can make it difficult to place components or apply solder without affecting nearby parts. As a general rule, maintain a minimum spacing of 0.1 inches (2.54 mm) between components to allow for easy access with a soldering iron.
For surface-mount devices (SMDs), ensure that pads are large enough to accommodate hand soldering. Smaller components, like 0402 or 0201 packages, can be challenging to solder manually due to their size. If possible, opt for larger packages like 0805 or 1206 for easier handling.
2. Use Clear Markings and Labels
Clear silkscreen markings are a lifesaver during manual assembly. Label each component with its reference designator (e.g., R1 for a resistor) and ensure polarity indicators are visible for diodes, capacitors, and ICs. This reduces the chance of placing components incorrectly, which is a common issue in hand assembly.
Additionally, include fiducial marks or alignment indicators on the PCB to help with component orientation. These small visual cues can make a big difference when assembling by hand.
3. Minimize Component Variety
Another key aspect of DFA for hand assembly is reducing the number of unique components in your design. Using fewer types of resistors, capacitors, or ICs simplifies the assembly process by minimizing the need to switch between different parts. This not only speeds up assembly but also reduces the likelihood of errors.
For example, if your design requires multiple resistor values, try to standardize on common values like 1kΩ or 10kΩ where possible. This approach streamlines the process of picking and placing components manually.
4. Design for Accessibility
When designing your PCB, consider how easy it will be to access each component with a soldering iron. Avoid placing tall components, like large capacitors or connectors, in areas that block access to smaller parts. Arrange components in a logical order, grouping similar parts together to streamline the assembly process.
For through-hole components, ensure that leads are spaced adequately (at least 0.05 inches or 1.27 mm apart) to prevent solder bridges. Accessibility is a cornerstone of effective manual PCB assembly tips.
5. Choose Components Suitable for Hand Assembly
Not all components are ideal for manual assembly. Fine-pitch ICs with lead spacings below 0.5 mm, for instance, are extremely difficult to solder by hand without specialized tools. Whenever possible, select components with larger leads or pads that are easier to work with.
Through-hole components are generally more suitable for hand assembly compared to SMDs due to their larger size and easier soldering process. However, if SMDs are necessary, use larger packages and ensure your design includes solder mask between pads to prevent accidental shorts.
Hand Soldering Techniques for Manual PCB Assembly
Even with a well-designed PCB, the quality of your assembly depends heavily on your soldering skills. Let’s explore some proven hand soldering techniques to ensure strong, reliable connections.
1. Use the Right Tools
Invest in a good-quality soldering iron with adjustable temperature control. For most PCB work, a temperature range of 300°C to 350°C (572°F to 662°F) is suitable for soldering components without damaging them. Use a fine tip (1 mm or smaller) for precision work on small pads.
Other essential tools include flux, solder wire (preferably 0.5 mm to 1 mm diameter with a rosin core), and a desoldering braid for removing excess solder. Flux helps improve solder flow and prevents oxidation, ensuring clean joints.
2. Prepare the Components and Board
Before soldering, clean the PCB with isopropyl alcohol to remove any dirt or residue. Trim the leads of through-hole components to the appropriate length (about 1-2 mm above the board) after insertion to avoid excess protrusion. For SMDs, apply a small amount of flux to the pads to aid in soldering.
3. Master the Soldering Process
For through-hole components, insert the component, apply the soldering iron to both the pad and lead simultaneously, and feed solder into the joint. The solder should flow evenly around the lead within 2-3 seconds. Remove the iron and let the joint cool naturally without blowing on it, as this can cause cracks.
For SMDs, apply a small amount of solder to one pad first, then place the component and reflow the solder to secure it. Solder the remaining pads afterward. Avoid excessive heat, as it can damage sensitive components or lift pads from the PCB.
4. Inspect and Clean After Soldering
After soldering, inspect each joint under magnification if possible. Look for shiny, concave joints that fully cover the pad and lead. Dull or cracked joints indicate a cold solder connection, which can lead to electrical failures. Use a desoldering braid or pump to correct any issues.
Finally, clean the board again with isopropyl alcohol and a brush to remove flux residue. This prevents corrosion and improves the board’s appearance.
Common Mistakes to Avoid in Manual PCB Assembly
Even with the best DFA guidelines for manual assembly, mistakes can happen. Here are some common pitfalls and how to avoid them.
- Overheating Components: Prolonged exposure to heat can damage sensitive parts like ICs or capacitors. Limit soldering time to 3-5 seconds per joint and use a heat sink if necessary.
- Solder Bridges: These occur when solder connects adjacent pads, causing a short circuit. Use a solder mask in your design and apply solder sparingly to prevent this issue.
- Component Misplacement: Double-check polarity and orientation before soldering. Once soldered, removing components can damage the board or part.
Advanced Tips for Streamlining Manual PCB Assembly
For those looking to take their manual assembly skills to the next level, consider these advanced manual PCB assembly tips.
- Batch Assembly: Assemble similar components in batches to reduce the time spent switching between tools or parts. For example, place and solder all resistors first before moving to capacitors.
- Use Assembly Jigs: Simple jigs or holders can help stabilize the PCB during soldering, especially for larger boards. This improves precision and reduces hand fatigue.
- Practice on Scrap Boards: If you’re new to hand soldering, practice on old or scrap PCBs to build confidence before working on critical projects.
How DFA and Hand Soldering Improve Project Outcomes
Combining effective DFA principles with strong hand soldering techniques can transform your manual PCB assembly process. A well-designed PCB reduces assembly time by up to 25%, while proper soldering ensures reliable connections that pass electrical tests on the first attempt. Together, these practices lead to fewer revisions, lower costs, and higher-quality results.
For instance, a hobbyist creating a custom microcontroller board can save hours of debugging by spacing components properly and using clear labels. Similarly, a small business producing limited-run prototypes can avoid costly rework by selecting hand-assembly-friendly components from the start.
Conclusion: Elevate Your Manual PCB Assembly with DFA
Mastering Design for Assembly is a game-changer for anyone involved in manual PCB assembly. By following the DFA guidelines for manual assembly and adopting the PCB assembly best practices outlined in this guide, you can simplify the assembly process, reduce errors, and achieve professional-grade results. From optimizing component spacing to refining your hand soldering techniques, every step counts toward a successful project.
Whether you’re assembling a single prototype or a small batch of boards, these manual PCB assembly tips and DFA for hand assembly strategies will help you work more efficiently. Start implementing these practices in your next project and experience the difference a well-designed PCB can make.
 ALLPCB


