ALLPCB


If you're diving into DIY ECU (Engine Control Unit) projects, learning how to etch your own printed circuit boards (PCBs) at home can save time and money while giving you full control over your designs. PCB etching is a key skill for creating custom circuits tailored to automotive applications. In this guide, we’ll walk you through the essentials of PCB etching, from the process itself to tips for success in homemade PCB fabrication.
Whether you're a hobbyist or an engineer building a custom ECU, this blog will cover everything you need to know about etching PCBs at home. We'll break down the steps, tools, and techniques to help you master the PCB process and create reliable boards for your projects.
What Is PCB Etching and Why Is It Important for DIY ECU Projects?
PCB etching is the process of removing unwanted copper from a copper-clad board to create conductive traces that connect components in a circuit. For DIY ECU projects, etching allows you to design and build custom circuits that control engine functions like fuel injection, ignition timing, and sensor data processing.
Etching your own PCBs at home offers several benefits. It reduces costs compared to ordering professionally made boards, especially for prototypes. It also speeds up the development process since you don’t have to wait for shipping. Most importantly, it gives you the flexibility to tweak designs on the fly, which is crucial when fine-tuning an ECU for specific vehicle needs.
The Basics of the PCB Etching Process
Before diving into the step-by-step guide, let’s understand the core concept of PCB etching. A typical copper-clad board has a thin layer of copper covering one or both sides. The goal is to remove copper from areas where you don’t want conductive paths, leaving behind the traces and pads that form your circuit.
The process involves protecting the desired copper areas with a resist material (like a printed design or photoresist) and then using a chemical solution to dissolve the unprotected copper. The result is a custom PCB ready for drilling and component assembly.
Tools and Materials for Etching PCBs at Home
To get started with DIY PCB fabrication, you’ll need a few basic tools and materials. Here’s a comprehensive list to ensure you’re prepared:
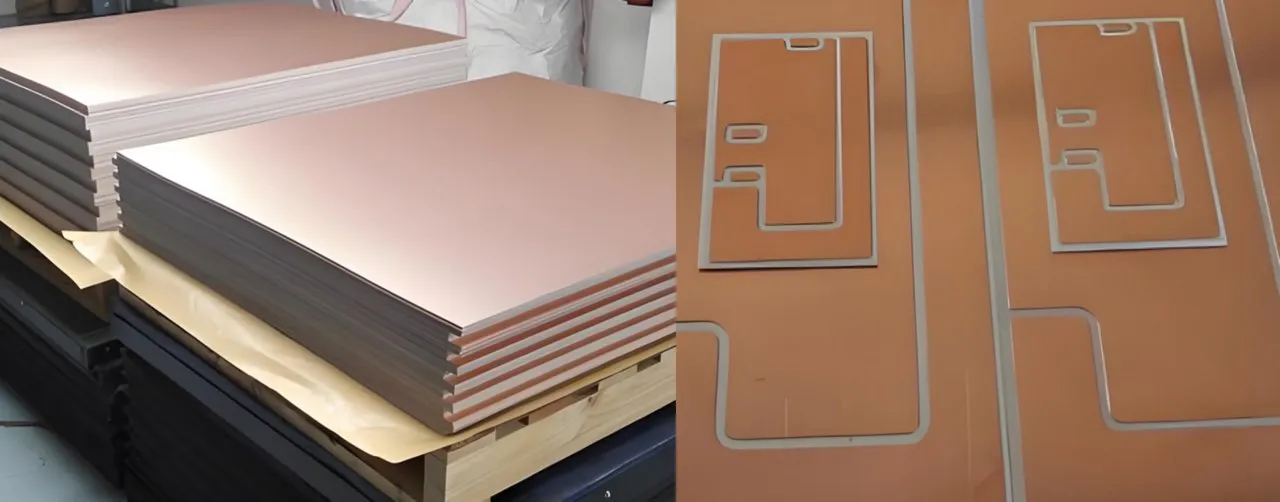
- Copper-clad board: Choose single-sided or double-sided boards based on your ECU design complexity. Common thicknesses range from 1.6mm to 2.0mm.
- Etchant solution: Ferric chloride or a mixture of hydrogen peroxide and hydrochloric acid are popular choices for dissolving copper.
- Resist material: This can be a permanent marker, toner transfer paper, or photoresist film to protect desired copper areas.
- Design software: Use free or paid tools to create your PCB layout. Export the design as a printable file.
- Printer: A laser printer works best for toner transfer methods.
- Protective gear: Gloves, safety goggles, and a well-ventilated workspace to handle chemicals safely.
- Containers: Plastic trays or containers for holding the etchant solution (avoid metal containers as they react with chemicals).
- Drill or drill bits: For creating holes for through-hole components after etching.
- Acetone or alcohol: To clean the board after etching and remove resist material.
Step-by-Step Guide to Etching PCBs at Home
Now that you have your tools ready, let’s walk through the detailed process of making homemade PCBs for your ECU project. Follow these steps carefully to achieve clean and functional results.
Step 1: Design Your PCB Layout
Start by creating a schematic for your ECU circuit using design software. Ensure the layout accounts for critical factors like trace width (typically 0.25mm to 1mm for low-current signals in ECUs) and spacing to prevent interference. For automotive applications, consider impedance matching for high-speed signals, which might require traces with specific widths to maintain signal integrity (e.g., 50 ohms for common RF signals).
Once your design is ready, print it on toner transfer paper or transparency film if using the photoresist method. Make sure to mirror the design if printing for the toner transfer method, as it will be flipped during transfer.
Step 2: Prepare the Copper-Clad Board
Clean the copper-clad board with a fine abrasive pad or steel wool to remove oxidation and ensure a smooth surface. Wipe it down with isopropyl alcohol to remove dust and grease. A clean surface helps the resist material adhere better.
Step 3: Apply the Resist Material
There are a few methods to transfer your design onto the board:
- Toner Transfer Method: Place the printed design (toner side down) on the copper board. Use a hot iron to transfer the toner by applying heat and pressure for 2-5 minutes. Let it cool, then peel off the paper carefully. Soak in water if needed to remove paper residue.
- Photoresist Method: Coat the board with photoresist film or liquid. Expose it to UV light through a transparency of your design for about 5-10 minutes (depending on the photoresist). Develop the board in a developer solution to reveal the protected areas.
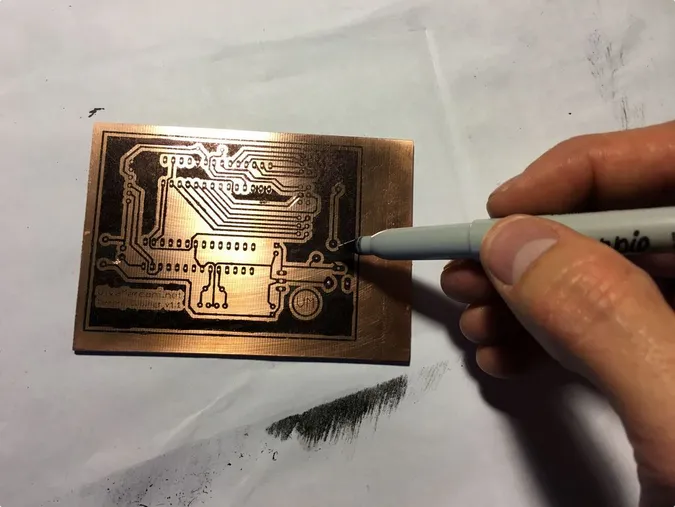
- Manual Method: For simple designs, draw directly on the board with a permanent marker. This method is less precise but works for basic circuits.
Step 4: Etch the Board
Place the prepared board in a plastic container with the etchant solution. If using ferric chloride, a common concentration is around 30-40% in water. Agitate the container gently to speed up the process and ensure even etching. This step typically takes 10-30 minutes, depending on the etchant strength and copper thickness (usually 1oz or 2oz per square foot).
Check the board periodically. Once the unprotected copper is completely dissolved, remove the board and rinse it thoroughly with water to stop the etching process. Dispose of the used etchant safely according to local regulations.
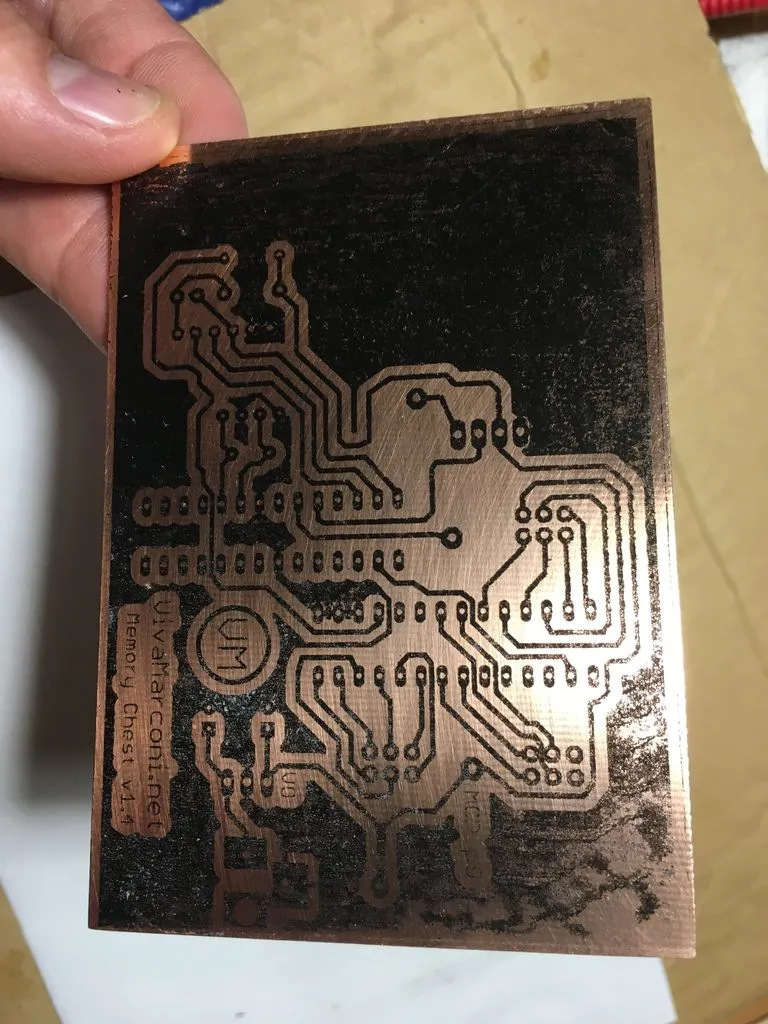
Step 5: Clean and Inspect the Board
Use acetone or alcohol to remove the resist material, revealing the copper traces. Inspect the board for defects like over-etching (where traces are too thin) or under-etching (where copper remains in unwanted areas). If needed, touch up with a marker and re-etch small areas.
Step 6: Drill Holes and Finalize
Drill holes for through-hole components using a small drill bit (e.g., 0.8mm for standard component leads). Sand the board lightly if there are rough edges. Your homemade PCB is now ready for soldering components.
Tips for Successful PCB Etching in DIY ECU Projects
Creating reliable PCBs for ECU projects requires attention to detail, especially since automotive circuits must withstand harsh conditions like vibration and temperature swings. Here are some tips to improve your results:
- Test Small Designs First: Before etching a complex ECU board, practice with a simple design to perfect your technique.
- Use High-Quality Materials: Cheap copper-clad boards or weak etchant solutions can lead to inconsistent results.
- Maintain Safety: Always work in a ventilated area and wear protective gear when handling chemicals. Etchant solutions are corrosive and can cause skin or eye irritation.
- Optimize Trace Widths: For ECU power lines, use wider traces (e.g., 2mm or more) to handle higher currents (up to 5A in some cases). Signal lines can be narrower but should avoid sharp corners to prevent signal reflection.
- Double-Check Designs: Errors in the layout can lead to short circuits or signal noise in an ECU, affecting engine performance. Simulate your design if possible to verify functionality.
Common Challenges in PCB Etching and How to Overcome Them
Even with careful planning, you might encounter issues during the PCB process. Here’s how to address common problems:
- Uneven Etching: This happens if the etchant isn’t agitated enough or the board isn’t fully submerged. Stir the solution regularly or use a small pump for circulation.
- Over-Etching: If traces become too thin, reduce etching time or dilute the etchant slightly. Monitor the process closely.
- Resist Failure: If the resist peels off during etching, ensure the board is clean before applying the resist and avoid excessive heat during transfer.
- Poor Trace Definition: Blurry or broken traces often result from low-resolution printing. Use a high-quality printer and check the design file for clarity.
Why DIY PCB Fabrication Matters for ECU Projects
In automotive electronics, ECUs are the brain of the vehicle, managing critical systems. Building a custom ECU often requires unique PCB layouts that aren’t available off-the-shelf. By mastering PCB etching at home, you gain the ability to prototype and iterate designs quickly. For instance, if you’re tuning an engine for better fuel efficiency, you can etch multiple versions of a control board to test different sensor configurations without waiting weeks for manufactured boards.
Additionally, homemade PCBs allow you to experiment with signal integrity. High-speed signals in ECUs, like those from crankshaft position sensors, can operate at frequencies up to 10 kHz or more. Proper trace design during etching ensures minimal noise and reliable data transmission.
Scaling Up: From Homemade PCBs to Professional Boards
While DIY PCB etching is ideal for prototyping, complex ECU projects with multilayer boards or tight tolerances may require professional fabrication. Once your design is finalized through homemade testing, partnering with a trusted manufacturer can ensure durability and precision for production runs. Professional services often offer advanced materials and finishes (like ENIG or HASL) that enhance board performance in automotive environments.
Conclusion: Start Etching Your Way to Custom ECU Solutions
PCB etching is a rewarding skill for anyone working on DIY ECU projects. By following the steps outlined in this guide, you can create custom circuit boards at home with minimal investment. From designing your layout to etching and assembling components, the PCB process empowers you to bring innovative automotive solutions to life.
With practice, you’ll refine your technique and tackle more complex designs. Whether you’re optimizing an engine control system or experimenting with new sensor integrations, mastering DIY PCB fabrication opens up endless possibilities. Grab your tools, set up a safe workspace, and start etching your first board today!