ALLPCB


Creating a DIY parking sensor with Arduino and a custom PCB is an exciting project for hobbyists and engineers looking to enhance their skills in electronics and programming. This guide will walk you through building an ultrasonic sensor Arduino project that acts as a parking assistant, complete with a custom PCB design. Whether you're searching for an "Arduino parking sensor DIY" tutorial or a "parking sensor schematic Arduino," this step-by-step post will provide all the details you need to succeed.
Introduction to Arduino Parking Sensor DIY Projects
Parking sensors are incredibly useful for drivers, helping to avoid collisions while parking in tight spaces. With an Arduino microcontroller and an ultrasonic sensor, you can build a low-cost parking assistant that alerts you to nearby obstacles. By adding a custom PCB design to your Arduino parking sensor DIY project, you can create a compact, professional-looking device tailored to your needs. In this blog, we'll cover everything from the basic components to designing a custom PCB for your ultrasonic sensor Arduino project.

Why Build a Parking Sensor with Arduino?
Building your own parking sensor using Arduino offers several advantages. First, it's cost-effective compared to commercial systems, often costing less than $20 in parts. Second, it allows for customization—you can adjust the detection range, alert methods, and even integrate it with other systems. Finally, designing a custom PCB for your Arduino parking assistant tutorial project elevates it from a breadboard prototype to a polished, reliable device. This is especially beneficial for those interested in "custom PCB design Arduino" projects, as it teaches valuable skills in circuit design and fabrication.
Components Needed for Your Ultrasonic Sensor Arduino Project
Before diving into the build, let's gather the necessary components for this Arduino parking sensor DIY project. Here's a detailed list:
- Arduino Board: An Arduino Uno or Nano works well for this project due to its simplicity and ample GPIO pins.
- Ultrasonic Sensor (HC-SR04): This sensor measures distance by emitting ultrasonic waves and calculating the time it takes for the echo to return. It operates at a frequency of 40 kHz.
- Buzzer or LED: For alerts. A piezo buzzer can emit different tones based on proximity, while LEDs can provide visual feedback.
- Resistors and Wires: Use 220-ohm resistors if using LEDs, and jumper wires for connections.
- Breadboard (Optional): Useful for prototyping before moving to a custom PCB.
- Power Source: A 9V battery or USB power bank to power the Arduino.
For the custom PCB design, you'll need access to PCB design software and a manufacturing service to produce your board. We'll discuss this in detail later in the "custom PCB design Arduino" section.

Understanding How the Parking Sensor Works
The core of this ultrasonic sensor Arduino project is the HC-SR04 sensor. It has two main parts: a transmitter that sends out ultrasonic waves and a receiver that detects the echo. The time difference between sending the wave and receiving the echo is used to calculate the distance to an object using the speed of sound (approximately 343 meters per second in air). The Arduino processes this data and triggers alerts via a buzzer or LED when an object is within a set range, such as 30 cm.
For example, if the echo returns in 1.75 milliseconds, the distance can be calculated as follows: Distance = (Time x Speed of Sound) / 2 = (0.00175 s x 343 m/s) / 2 = 0.3 meters or 30 cm. This precision makes it ideal for a parking sensor schematic Arduino setup.
Step-by-Step Arduino Parking Assistant Tutorial
Let's break down the process of building your DIY parking sensor with Arduino. Follow these steps carefully to ensure success.
Step 1: Set Up the Hardware
Start by connecting the HC-SR04 ultrasonic sensor to your Arduino board. Here's the wiring setup:
- Connect the VCC pin of the sensor to the 5V pin on the Arduino.
- Connect the GND pin to the GND pin on the Arduino.
- Connect the TRIG pin to digital pin 9 on the Arduino.
- Connect the ECHO pin to digital pin 10 on the Arduino.
- Attach a buzzer to digital pin 8 and GND (use a resistor if needed to protect the buzzer).
Test the connections on a breadboard first to ensure everything works before moving to a custom PCB.

Step 2: Write the Arduino Code
Next, you'll need to program the Arduino to read data from the ultrasonic sensor and trigger alerts. Below is a simple code snippet to get you started. Upload this to your Arduino using the IDE software.
#define TRIG_PIN 9
#define ECHO_PIN 10
#define BUZZER_PIN 8

void setup() {
  pinMode(TRIG_PIN, OUTPUT);
  pinMode(ECHO_PIN, INPUT);
  pinMode(BUZZER_PIN, OUTPUT);
  Serial.begin(9600);
}

void loop() {
  long duration;
  int distance;

  digitalWrite(TRIG_PIN, LOW);
  delayMicroseconds(2);
  digitalWrite(TRIG_PIN, HIGH);
  delayMicroseconds(10);
  digitalWrite(TRIG_PIN, LOW);

  duration = pulseIn(ECHO_PIN, HIGH);
  distance = duration * 0.034 / 2;

  Serial.print("Distance: ");
  Serial.println(distance);

  if (distance < 30) {
    digitalWrite(BUZZER_PIN, HIGH);
    delay(200);
    digitalWrite(BUZZER_PIN, LOW);
    delay(200);
  } else {
    digitalWrite(BUZZER_PIN, LOW);
  }
  delay(100);
}
This code sets the buzzer to beep when an object is closer than 30 cm. You can adjust the threshold distance or add varying beep frequencies based on proximity for a more advanced setup.
Step 3: Test the Parking Sensor
Power up your Arduino and place an object in front of the sensor at different distances. Check the Serial Monitor in the Arduino IDE to see the measured distances. If the buzzer activates at the set threshold (30 cm in this case), your basic parking sensor is working. Mount the sensor on a car bumper or a test rig to simulate real-world parking conditions.
Designing a Custom PCB for Your Arduino Parking Sensor
Once your prototype is functional, the next step in this "custom PCB design Arduino" journey is to create a permanent, compact solution. A custom PCB reduces wiring clutter and makes your project more durable for real-world use. Here's how to design one for your parking sensor schematic Arduino setup.
Step 1: Create the Schematic
Use free PCB design software to draw the schematic for your circuit. Include the Arduino (or its microcontroller chip for a standalone design), the HC-SR04 sensor pins, the buzzer or LED, and any necessary resistors or capacitors. Ensure proper connections for power (5V and GND) and signal lines (TRIG and ECHO pins). Label all components clearly to avoid errors during layout.
Step 2: Design the PCB Layout
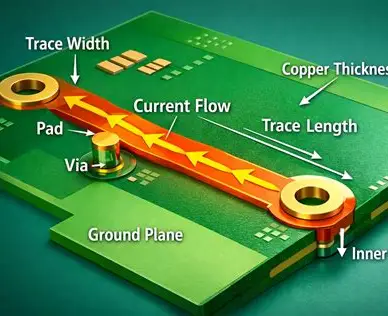
After finalizing the schematic, move to the PCB layout editor in your design software. Place the components on the board, keeping the sensor separate for easy mounting. Route the traces to connect all components, ensuring minimal crossing to avoid interference. Keep power traces wider (e.g., 20-30 mils) for better current handling, and signal traces narrower (e.g., 10 mils). Add mounting holes for securing the PCB in an enclosure.
Step 3: Manufacture the PCB
Export your design files (usually Gerber files) and send them to a PCB manufacturing service. At ALLPCB, we offer high-quality, affordable PCB production with quick turnaround times, perfect for hobbyists and professionals working on ultrasonic sensor Arduino projects. Once you receive the PCB, solder the components in place and test the circuit again to ensure functionality.
Tips for Optimizing Your Arduino Parking Sensor DIY Project
To make your parking assistant more effective, consider these additional tips:
- Adjust Detection Range: Modify the code to change the alert threshold based on your parking needs. For tighter spaces, reduce it to 20 cm; for larger areas, increase it to 50 cm.
- Add Visual Feedback: Incorporate LEDs alongside the buzzer for a dual alert system. Use different colors (e.g., green for safe, red for danger) to indicate proximity.
- Waterproofing: If mounting the sensor outdoors, use a waterproof enclosure or sealant to protect the electronics from rain and dust.
- Power Efficiency: Use a low-power mode in the Arduino code to save battery life when the sensor isn't in use.
Common Challenges and Solutions
While building your Arduino parking sensor DIY project, you might encounter a few hurdles. Here are some common issues and how to solve them:
- Inaccurate Distance Readings: This could be due to interference or incorrect sensor placement. Ensure the sensor faces directly forward without obstructions, and avoid mounting it near reflective surfaces that could bounce signals unpredictably.
- Buzzer Not Working: Check the wiring and ensure the buzzer is compatible with the Arduino's output voltage (usually 5V). Add a current-limiting resistor if needed.
- PCB Design Errors: Double-check your schematic before manufacturing. Use the design rule check (DRC) feature in your PCB software to catch mistakes like unconnected traces or incorrect component footprints.
Conclusion: Take Your Skills to the Next Level
Building a DIY parking sensor with Arduino and a custom PCB is a rewarding project that combines programming, electronics, and design skills. By following this Arduino parking assistant tutorial, you've learned how to create a functional ultrasonic sensor Arduino project and elevate it with a professional custom PCB design. Whether you're a beginner or an experienced maker, this project offers a practical way to explore "Arduino parking sensor DIY" concepts and apply them to real-world problems.
At ALLPCB, we're committed to supporting your creative projects with top-notch PCB manufacturing services. Ready to turn your prototype into a polished product? Start designing your custom PCB today and bring your parking sensor schematic Arduino vision to life.