 ALLPCB


If you're looking to lower the expenses of single-sided PCB manufacturing without sacrificing quality, you're in the right place. Single-sided printed circuit boards (PCBs) are a popular choice for simple, cost-sensitive projects due to their straightforward design and lower production costs compared to multilayer boards. However, even with their inherent affordability, there are still ways to achieve significant single-sided PCB manufacturing cost reduction. In this comprehensive guide, we'll explore practical strategies to help you save on cheap single-sided PCB production, optimize the single-sided PCB manufacturing process, reduce single-sided PCB material cost, and take advantage of single-sided PCB volume discount opportunities.
Why Choose Single-Sided PCBs for Cost Efficiency?
Single-sided PCBs are the simplest type of circuit boards, featuring conductive traces on only one side of the substrate. This design reduces manufacturing complexity, making them inherently less expensive than double-sided or multilayer boards. They are ideal for basic electronic devices like calculators, LED lighting, and power supplies. By starting with a single-sided design, you already take a big step toward cost savings. But how can you push those savings even further? Let’s dive into actionable tips and strategies.
Tip 1: Optimize Your PCB Design for Cost Reduction
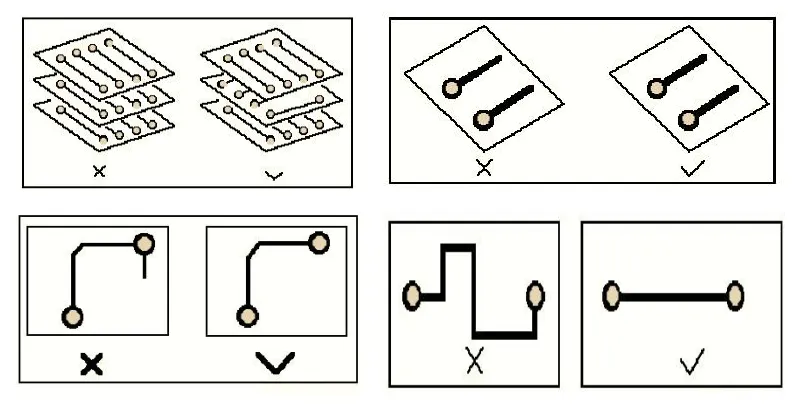
One of the most effective ways to achieve single-sided PCB manufacturing cost reduction is through smart design choices. The way you layout your board directly impacts material usage, production time, and overall expenses. Here are some design tips to keep costs low:
- Minimize Board Size: A smaller board uses less raw material, such as the substrate and copper. For instance, reducing a board from 100 mm x 100 mm to 80 mm x 80 mm can cut material costs by up to 20%. Ensure the layout is compact but avoid overcrowding, which can lead to manufacturing errors.
- Stick to Standard Shapes: Complex shapes or custom cutouts increase production time and waste material. Opt for rectangular or square boards to keep costs down. Non-standard shapes can add 10-15% to your manufacturing expenses due to additional processing steps.
- Simplify Trace Layouts: Use wider traces and larger spacing when possible. For single-sided PCBs, a minimum trace width of 0.2 mm and spacing of 0.25 mm are often sufficient for low-frequency applications, reducing the risk of defects and lowering production costs.
By focusing on these design elements, you can significantly lower the cost of producing a cheap single-sided PCB while maintaining functionality.
Tip 2: Choose the Right Materials to Lower Single-Sided PCB Material Cost
Material selection plays a crucial role in controlling single-sided PCB material cost. While high-performance materials may be necessary for specific applications, many single-sided PCB projects can use more affordable options without compromising quality. Consider the following:
- Use Standard FR-4 Substrate: FR-4, a common fiberglass-epoxy laminate, is widely used for single-sided PCBs due to its low cost and reliable performance. It typically costs 30-40% less than exotic materials like polyimide, which are unnecessary for most basic designs.
- Opt for Thinner Boards: Thinner substrates, such as 0.8 mm or 1.0 mm instead of 1.6 mm, reduce material usage. A thinner board can save up to 15% on substrate costs, though ensure it meets your mechanical strength requirements.
- Minimize Copper Thickness: For low-power applications, a 1 oz/ft2 copper layer (approximately 35 μm thick) is often sufficient. Thicker copper, like 2 oz/ft2, increases costs by 10-20% due to higher material usage and processing time.
By carefully selecting materials suited to your project’s needs, you can keep expenses down while still producing a reliable board.
Tip 3: Streamline the Single-Sided PCB Manufacturing Process
Optimizing the single-sided PCB manufacturing process can lead to substantial savings. The manufacturing process for single-sided PCBs is simpler than for multilayer boards, but inefficiencies can still drive up costs. Here’s how to streamline production:
- Standardize Specifications: Use industry-standard design rules, such as minimum hole sizes of 0.3 mm and standard drill bit sizes. Custom specifications often require special tools or additional setup time, increasing costs by 5-10% per order.
- Avoid Unnecessary Surface Finishes: For single-sided PCBs used in non-corrosive environments, a basic Hot Air Solder Leveling (HASL) finish is often sufficient. More expensive finishes like ENIG (Electroless Nickel Immersion Gold) can add 20-30% to your costs without providing significant benefits for simple applications.
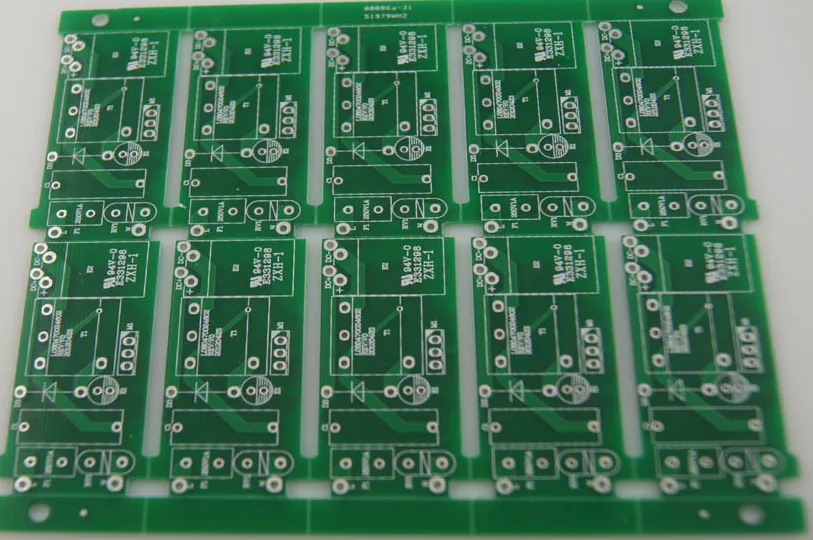
- Panelize Your Design: If you’re producing multiple small boards, arrange them on a single panel to maximize material usage. Panelization can reduce waste by up to 25%, lowering overall production costs.
These steps help ensure the manufacturing process is as efficient as possible, directly contributing to a cheap single-sided PCB outcome.
Tip 4: Take Advantage of Single-Sided PCB Volume Discounts
One of the easiest ways to achieve single-sided PCB volume discount savings is by ordering in larger quantities. Manufacturers often offer significant price reductions for bulk orders due to economies of scale. Here’s how to make the most of volume discounts:
- Plan for Bulk Orders: If your project timeline allows, order a larger quantity upfront. For example, ordering 1,000 units instead of 100 can reduce the per-unit cost by 30-50%, depending on the manufacturer’s pricing structure.
- Consolidate Designs: If you have multiple small projects, consider combining them into a single order to reach a higher volume tier. This approach minimizes setup costs for the manufacturer, which translates to lower prices for you.
- Negotiate Long-Term Contracts: For recurring orders, discuss long-term agreements with your supplier. Committing to regular purchases can lock in discounted rates, saving 10-20% over time.
Volume discounts are a powerful tool for cost reduction, especially for businesses scaling up production or managing multiple projects.
Tip 5: Work with a Reliable Manufacturer for Cost Savings
Partnering with the right manufacturing service can make a big difference in achieving single-sided PCB manufacturing cost reduction. A reliable manufacturer will offer transparent pricing, efficient processes, and value-added services to help keep costs low. Here’s what to look for:
- Transparent Pricing Models: Choose a manufacturer that provides clear cost breakdowns for materials, labor, and additional services. This transparency helps you identify areas to save.
- Design for Manufacturability (DFM) Support: Some manufacturers offer free DFM checks to identify potential issues in your design before production. Fixing errors at the design stage can save up to 15% on rework costs.
- Flexible Order Quantities: Look for a manufacturer that supports both small prototype runs and large-scale production with competitive pricing, allowing you to scale as needed without overpaying.
Building a strong relationship with a trusted manufacturing partner can lead to consistent savings and higher-quality boards.
Tip 6: Reduce Testing and Assembly Costs
For single-sided PCBs, testing and assembly often contribute to the overall expense. While ensuring quality is critical, there are ways to manage these costs effectively:
- Limit Extensive Testing: For non-critical applications, basic electrical testing (like continuity checks) may be sufficient instead of full functional testing. This can reduce testing costs by 10-20%.
- Simplify Assembly Requirements: Use through-hole components instead of surface-mount devices (SMDs) for manual assembly, as they are easier and cheaper to solder on single-sided boards. This can save 5-10% on labor costs.
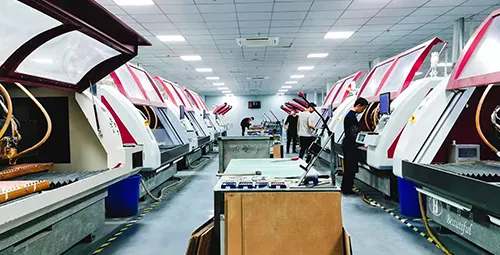
- Automate Where Possible: If your budget allows, invest in automated pick-and-place machines for larger runs. Automation can reduce assembly costs by up to 30% compared to manual labor.
Balancing quality assurance with cost efficiency ensures you get reliable boards without overspending.
Tip 7: Plan for Prototyping to Avoid Costly Revisions
Prototyping is a crucial step in the PCB design process, especially for single-sided boards where errors can be costly to fix in mass production. Here’s how to use prototyping to save money:
- Start with Small Runs: Order a small batch of prototypes (e.g., 5-10 units) to test your design before committing to a larger order. This can prevent expensive mistakes, potentially saving thousands of dollars on rework.
- Use Simulation Tools: Before physical prototyping, use software to simulate electrical performance. Identifying issues like signal integrity problems (e.g., impedance mismatches above 50 ohms for high-speed signals) in simulation can cut down on physical prototype iterations.
- Iterate Quickly: Work with a manufacturer that offers fast turnaround times for prototypes. Quick feedback loops allow you to refine your design without delaying your project timeline, keeping costs under control.
Investing time and resources in prototyping upfront can prevent costly errors down the line.
Conclusion: Achieving Cost-Effective Single-Sided PCB Manufacturing
Reducing production costs for single-sided PCBs doesn’t mean cutting corners on quality. By focusing on smart design choices, material selection, process optimization, and leveraging single-sided PCB volume discount opportunities, you can achieve significant single-sided PCB manufacturing cost reduction. Whether it’s minimizing single-sided PCB material cost with standard substrates like FR-4 or streamlining the single-sided PCB manufacturing process through panelization, every step counts toward creating a cheap single-sided PCB that meets your needs.
Implementing these strategies ensures that your project stays within budget while delivering reliable performance. Start with a well-thought-out design, choose cost-effective materials, and partner with a trusted manufacturer to bring your vision to life affordably. With these tips, you’re well on your way to mastering cost-effective single-sided PCB production.


