 ALLPCB


Choosing the right microprocessor for your PCB design is a critical step that can make or break the performance of your electronic project. Whether you're designing a simple embedded system or a complex IoT device, understanding microprocessor selection criteria and PCB design considerations is essential. In this guide, we’ll walk you through the key factors to consider when selecting a microprocessor, how to compare microprocessor specs, and tips for integrating it into your printed circuit board layout. Let’s dive into the details to help you make an informed decision for your next project.
Why Microprocessor Selection Matters in PCB Design
The microprocessor is often referred to as the "brain" of your electronic system. It handles processing tasks, manages data, and interacts with other components on the PCB. A poor choice can lead to performance bottlenecks, power inefficiency, or even project failure. By focusing on the right microprocessor selection criteria, you ensure your design meets functional, cost, and performance goals. This guide will cover everything from understanding microprocessor datasheets to practical PCB design considerations, helping you avoid common pitfalls.
Key Microprocessor Selection Criteria for PCB Design
When choosing a microprocessor for your PCB, you need to evaluate several technical and practical factors. Below are the most important criteria to guide your decision.
1. Processing Power and Performance Needs
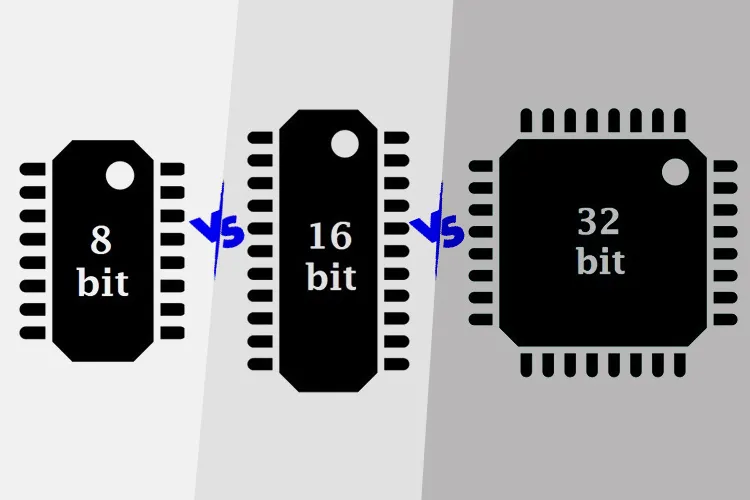
The processing power of a microprocessor determines how well it can handle your application’s workload. Consider the clock speed (measured in MHz or GHz) and the architecture (e.g., 8-bit, 16-bit, or 32-bit). For example, a simple control system for a home appliance may only require an 8-bit processor with a clock speed of 16 MHz, while a real-time video processing application might need a 32-bit processor running at 1 GHz or higher. Always match the processor’s capability to your project’s computational demands to avoid overpaying for unnecessary power or underperforming with a weak chip.
2. Power Consumption and Efficiency
Power efficiency is a critical factor, especially for battery-powered or portable devices. Look at the microprocessor’s power consumption specs in active and sleep modes, often listed in milliwatts (mW) or microamps (μA). For instance, a low-power microprocessor might consume only 50 μA in sleep mode, extending battery life significantly in IoT devices. If your design operates in harsh environments or requires long-term operation, prioritize chips with low-power modes and efficient energy management features.
3. Peripheral Integration and I/O Capabilities
Your microprocessor must support the peripherals and input/output (I/O) interfaces required by your design. Check for built-in features like UART, SPI, I2C, ADC (Analog-to-Digital Converter), and GPIO (General Purpose Input/Output) pins. For example, if your PCB design includes sensors that communicate via I2C, ensure the microprocessor has enough I2C channels. Insufficient I/O pins or missing peripherals can force you to add external components, increasing cost and board complexity.
4. Memory Requirements
Evaluate the microprocessor’s on-chip memory, including RAM (for temporary data storage) and Flash or ROM (for program storage). A basic embedded application might work with 2 KB of RAM and 16 KB of Flash, while a more complex system with an operating system could require 256 KB of RAM and 1 MB of Flash. If your application needs external memory, ensure the processor supports interfaces like SDRAM or external Flash.
5. Cost and Availability
Budget constraints play a big role in microprocessor selection. High-performance chips often come with a higher price tag, so balance cost with performance needs. Additionally, check the availability of the microprocessor to avoid supply chain delays. Opt for widely available chips with long-term manufacturer support to prevent obsolescence issues during production.
PCB Design Considerations When Choosing a Microprocessor
Once you’ve narrowed down your microprocessor options, it’s time to consider how it integrates into your PCB design. The following PCB design considerations will ensure compatibility and optimal performance.
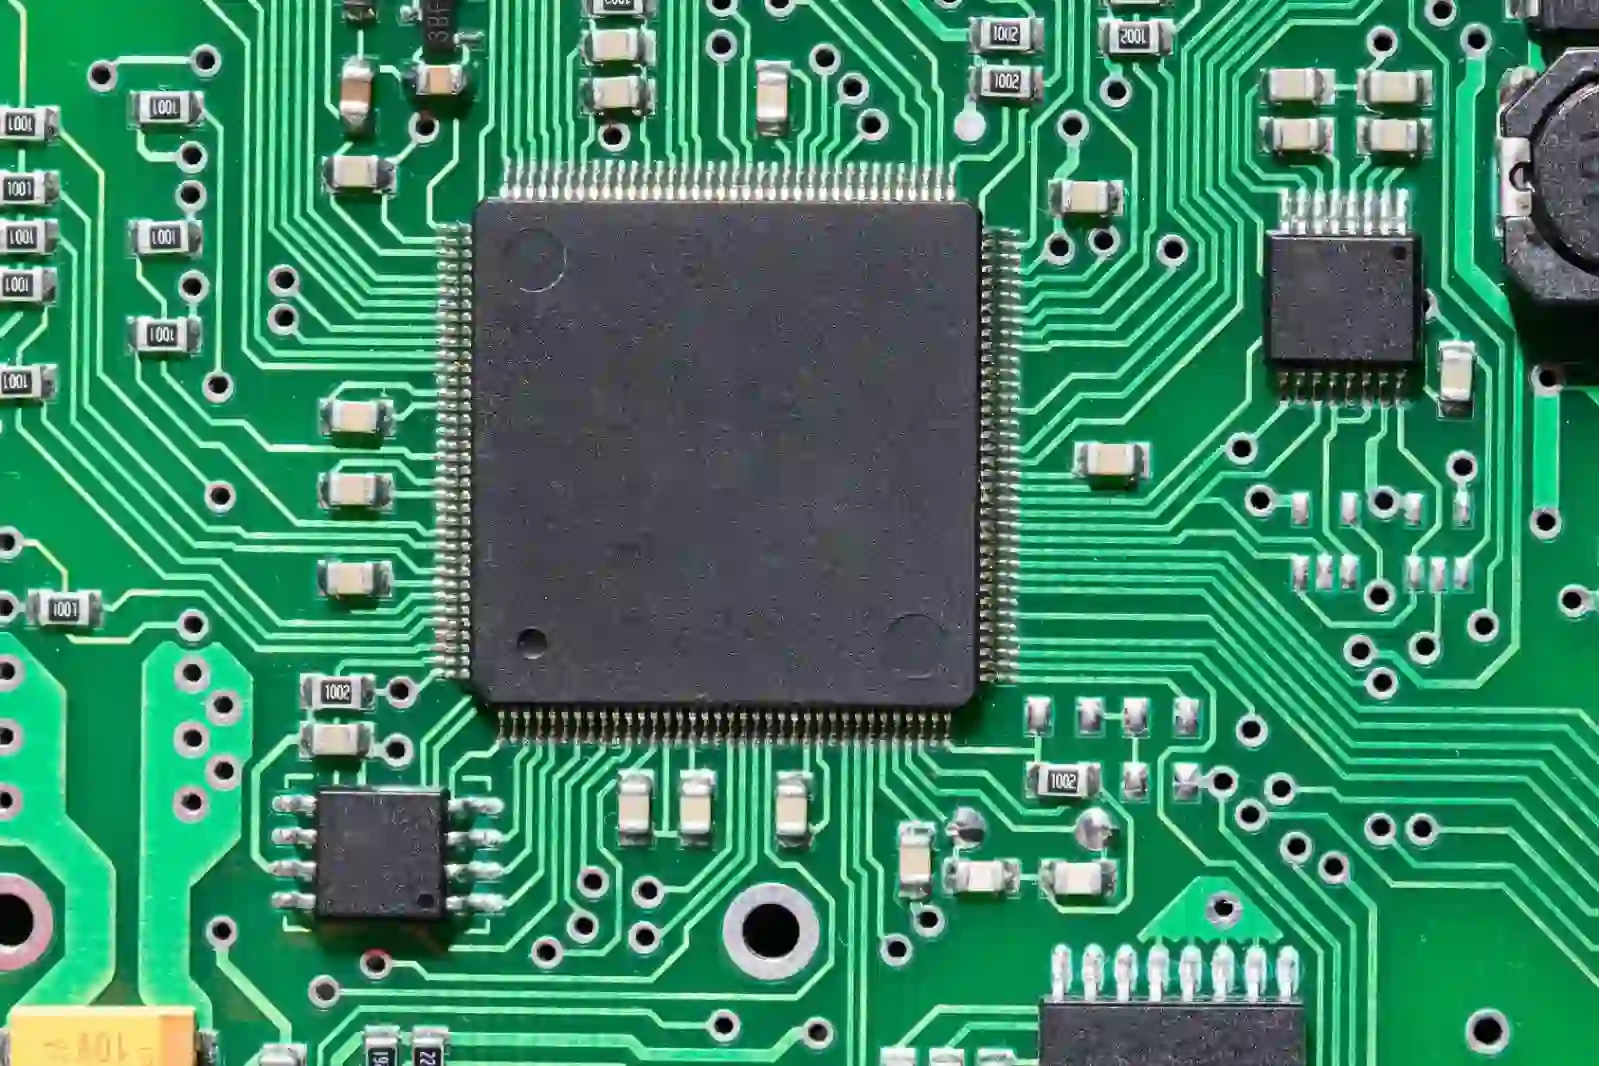
1. Package Type and Footprint
Microprocessors come in various package types, such as QFP (Quad Flat Package), BGA (Ball Grid Array), or DIP (Dual Inline Package). The package affects how the chip is mounted on the PCB and the space it occupies. For instance, a BGA package with hundreds of pins might be compact but requires advanced soldering techniques and multilayer boards, while a DIP package is easier to handle for prototyping but takes up more space. Verify that your PCB layout can accommodate the chosen package and that your manufacturing process supports it.
2. Power Supply and Voltage Levels
Check the operating voltage of the microprocessor, typically ranging from 1.8V to 5V, and ensure your PCB’s power supply design matches it. Some chips require multiple voltage levels for different internal components (e.g., 3.3V for I/O and 1.2V for the core). Use voltage regulators or level shifters if needed, and design the power traces to handle the current draw without significant voltage drops. For example, a microprocessor drawing 500 mA at 3.3V requires careful trace width calculations to avoid overheating.
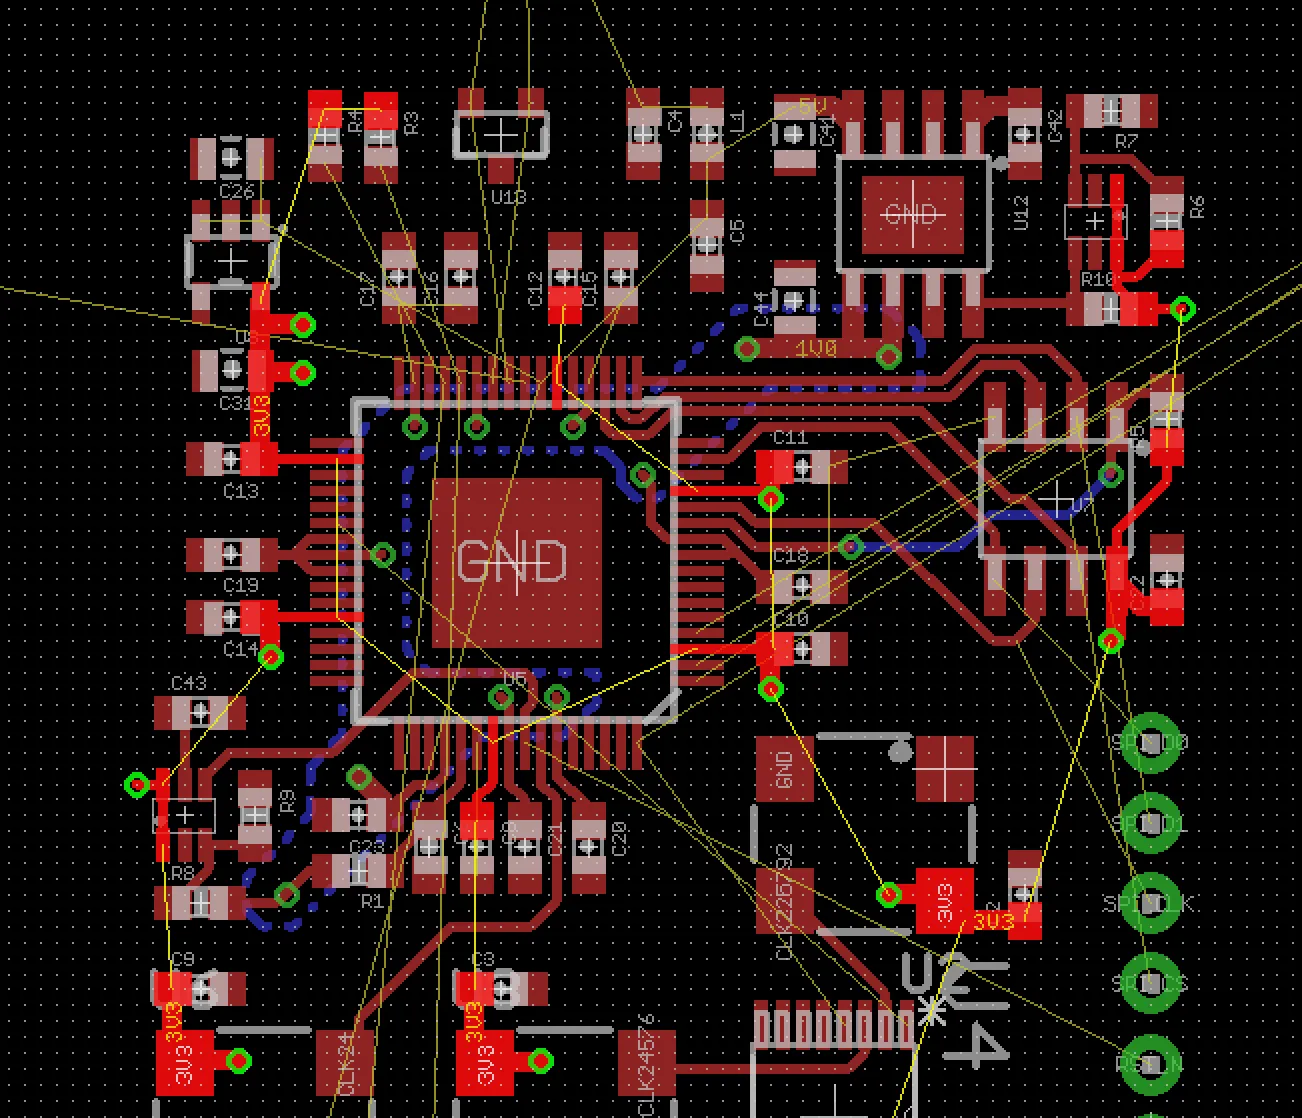
3. Signal Integrity and Noise Management
High-speed microprocessors can introduce signal integrity issues like crosstalk or electromagnetic interference (EMI) on the PCB. Place decoupling capacitors (e.g., 0.1 μF) close to the power pins to reduce noise. Keep high-speed signal traces short and avoid routing them near noisy components. For a microprocessor running at 100 MHz, ensure trace lengths are minimized to prevent signal delays, ideally keeping them under 1 inch for critical paths.
4. Thermal Management
Microprocessors generate heat, especially during high-performance tasks. Review the chip’s thermal characteristics in the datasheet, often listed as a maximum junction temperature (e.g., 85°C). Design your PCB with proper heat dissipation in mind, such as adding thermal vias, heat sinks, or copper pours under the chip. Inadequate thermal management can lead to performance throttling or component failure.
How to Read and Compare Microprocessor Datasheets
Understanding microprocessor datasheets is a vital skill for comparing specs and making an informed choice. These documents provide detailed technical information about the chip’s capabilities and limitations. Here’s how to navigate them effectively.
1. Key Sections to Focus On
Start with the overview section for a summary of the microprocessor’s features, such as architecture, clock speed, and supported interfaces. Then, dive into specific sections like electrical characteristics (voltage, current, power consumption), timing diagrams (for signal speeds), and pin configurations. Pay attention to absolute maximum ratings to avoid exceeding safe operating limits.
2. Comparing Critical Specs
When comparing microprocessor specs, create a side-by-side table of key parameters like processing speed, power consumption, memory size, and peripheral support. For instance, if one chip offers a 200 MHz clock speed with 64 KB of RAM and another provides 150 MHz with 128 KB of RAM, weigh which feature is more critical for your application. Use numerical data from the datasheets to make objective comparisons rather than relying on marketing claims.
3. Understanding Application Notes
Many datasheets include application notes or reference designs showing how to integrate the microprocessor into a PCB. These can provide valuable insights into recommended layouts, bypass capacitor values (e.g., 10 μF for bulk capacitance), and grounding techniques. Use these guidelines to reduce design errors and ensure compatibility.
Steps for Choosing a Microprocessor for PCB Design
Now that you understand the criteria and considerations, follow these practical steps to select the best microprocessor for your PCB project.
Step 1: Define Project Requirements
List your project’s functional needs, such as processing tasks, connectivity options, and power constraints. For a wearable device, you might prioritize low power consumption (under 100 μA in sleep mode) and small package size over raw processing power.
Step 2: Shortlist Potential Microprocessors
Based on your requirements, research and shortlist microprocessors that meet your criteria. Use online databases, manufacturer websites, or distributor catalogs to find chips with matching specs.
Step 3: Compare Specs and Features
Use datasheets to compare the shortlisted options. Focus on performance, power, cost, and PCB compatibility. Eliminate options that don’t fully meet your needs or pose integration challenges.
Step 4: Prototype and Test
Before finalizing your choice, build a prototype PCB with the selected microprocessor. Test its performance under real-world conditions to confirm it meets expectations. For example, measure power consumption with a multimeter to verify it aligns with datasheet values (e.g., 200 mA at full load).
Common Mistakes to Avoid in Microprocessor Selection
Even experienced engineers can make errors when choosing a microprocessor. Here are some pitfalls to watch out for:
- Overlooking Future Scalability: Choosing a chip with no room for firmware updates or additional features can limit your design’s lifespan. Opt for a microprocessor with extra memory or processing headroom if upgrades are likely.
- Ignoring PCB Space Constraints: Selecting a microprocessor with a large footprint or complex package can complicate your PCB layout. Always check dimensions and pin counts early in the design process.
- Neglecting Software Support: Ensure the microprocessor has a robust development ecosystem, including compilers, libraries, and community support. Lack of software tools can slow down programming and debugging.
Conclusion: Making an Informed Choice for Your PCB Design
Selecting the right microprocessor for your PCB design is a balancing act between performance, power, cost, and compatibility. By focusing on key microprocessor selection criteria like processing power, peripherals, and memory, and considering PCB design factors such as signal integrity and thermal management, you can create a reliable and efficient system. Take the time to thoroughly review microprocessor datasheets, compare specs, and test your choice in a prototype to ensure success. With these steps, you’ll be well-equipped to build high-quality PCB designs tailored to your project’s needs.
At ALLPCB, we’re committed to supporting your electronic projects with top-notch manufacturing and assembly services. Whether you’re in the early stages of choosing a microprocessor or ready to produce your final design, our expertise can help bring your ideas to life. Start your next project with confidence and precision.


