 ALLPCB


If you're involved in PCB assembly, you know that stencils are critical tools for applying solder paste with precision. But how do you ensure they last long and perform consistently? The key lies in proper stencil storage, handling, and maintenance. In this comprehensive guide, we'll dive into the best practices for stencil care to prevent damage and maximize their lifespan, helping you save costs and maintain high-quality production.
Why Stencil Care Matters in PCB Assembly
Stencils play a vital role in PCB assembly by ensuring accurate solder paste application for surface-mount technology (SMT) processes. A damaged or poorly maintained stencil can lead to uneven paste deposits, component misalignment, or even production delays. According to industry studies, improper stencil handling and storage can reduce a stencil's lifespan by up to 50%, leading to frequent replacements and increased costs. By following best practices for stencil storage and handling, you can avoid these issues and maintain consistent assembly quality.
Understanding the Vulnerabilities of Stencils
Before diving into care practices, it's important to understand what makes stencils vulnerable. Most stencils are made from thin stainless steel or polymer materials, with laser-cut or chemically etched apertures. These delicate structures can easily warp, bend, or get scratched if mishandled. Exposure to moisture can cause rust, while dust and debris can clog apertures, affecting paste transfer efficiency. Knowing these risks helps in creating effective strategies for stencil maintenance.
Common Causes of Stencil Damage
- Physical Damage: Dropping or stacking heavy items on stencils can cause bending or warping.
- Environmental Factors: High humidity or temperature fluctuations can lead to corrosion or material degradation.
- Improper Cleaning: Harsh chemicals or abrasive tools can scratch or wear down stencil surfaces.
- Poor Storage: Storing stencils without protection can expose them to dust, debris, or mechanical stress.
Best Practices for Stencil Handling
Handling stencils with care during PCB assembly processes is the first step to preventing damage. Here are actionable tips to ensure safe handling:
1. Use Proper Tools and Gloves
Always handle stencils with clean, lint-free gloves to avoid transferring oils or dirt from your hands onto the stencil surface. Skin oils can attract dust and interfere with solder paste application. Use dedicated stencil holders or frames when moving them to avoid direct contact with sharp edges or surfaces.
2. Avoid Excessive Force
Stencils are thin and delicate, so never apply excessive pressure when placing them on the printer or removing them after use. Gentle, controlled movements prevent bending or warping of the stencil frame or foil.
3. Train Staff on Handling Protocols
Ensure that all team members involved in PCB assembly are trained on proper stencil handling techniques. Regular training sessions can reinforce the importance of careful handling and reduce the risk of accidental damage. A well-trained team can extend stencil life by minimizing human error.

Effective Stencil Storage Solutions
Proper stencil storage is just as important as careful handling. Storing stencils correctly prevents physical damage and protects them from environmental factors. Follow these guidelines for optimal storage:
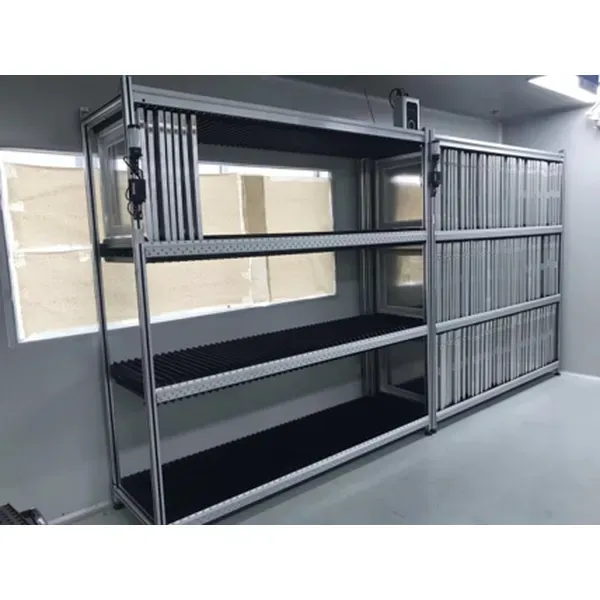
1. Use Dedicated Storage Racks or Cabinets
Invest in vertical storage racks or cabinets designed specifically for stencils. These systems hold stencils upright, preventing them from leaning or bending under their own weight. Avoid stacking stencils horizontally, as this can cause warping or scratching of the delicate apertures.
2. Maintain a Controlled Environment
Store stencils in a clean, dry, and temperature-controlled environment. Ideal conditions include a temperature range of 20-25°C (68-77°F) and relative humidity below 50%. High humidity can lead to rust on metal stencils, while extreme temperatures can cause material expansion or contraction, affecting precision.
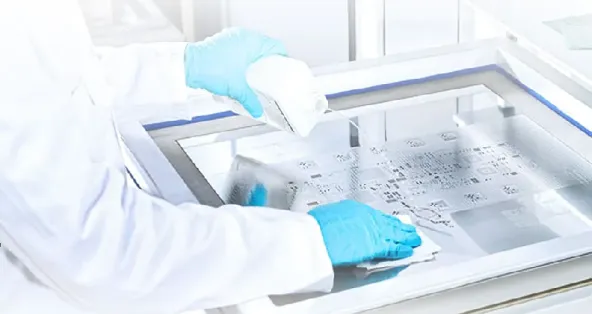
3. Protect with Covers or Sleeves
Use protective covers or sleeves made from anti-static, lint-free materials to shield stencils from dust and debris during storage. These covers also prevent accidental scratches when stencils are moved or stored alongside other equipment.
4. Label and Organize
Clearly label each stencil with details like project name or part number to avoid mix-ups. Organize storage racks by frequency of use or project type to minimize unnecessary handling, which reduces the risk of damage.
Stencil Maintenance: Cleaning and Inspection
Regular maintenance is crucial for ensuring stencil longevity and consistent performance in PCB assembly. Cleaning and inspecting stencils after each use prevents solder paste buildup and detects early signs of damage.
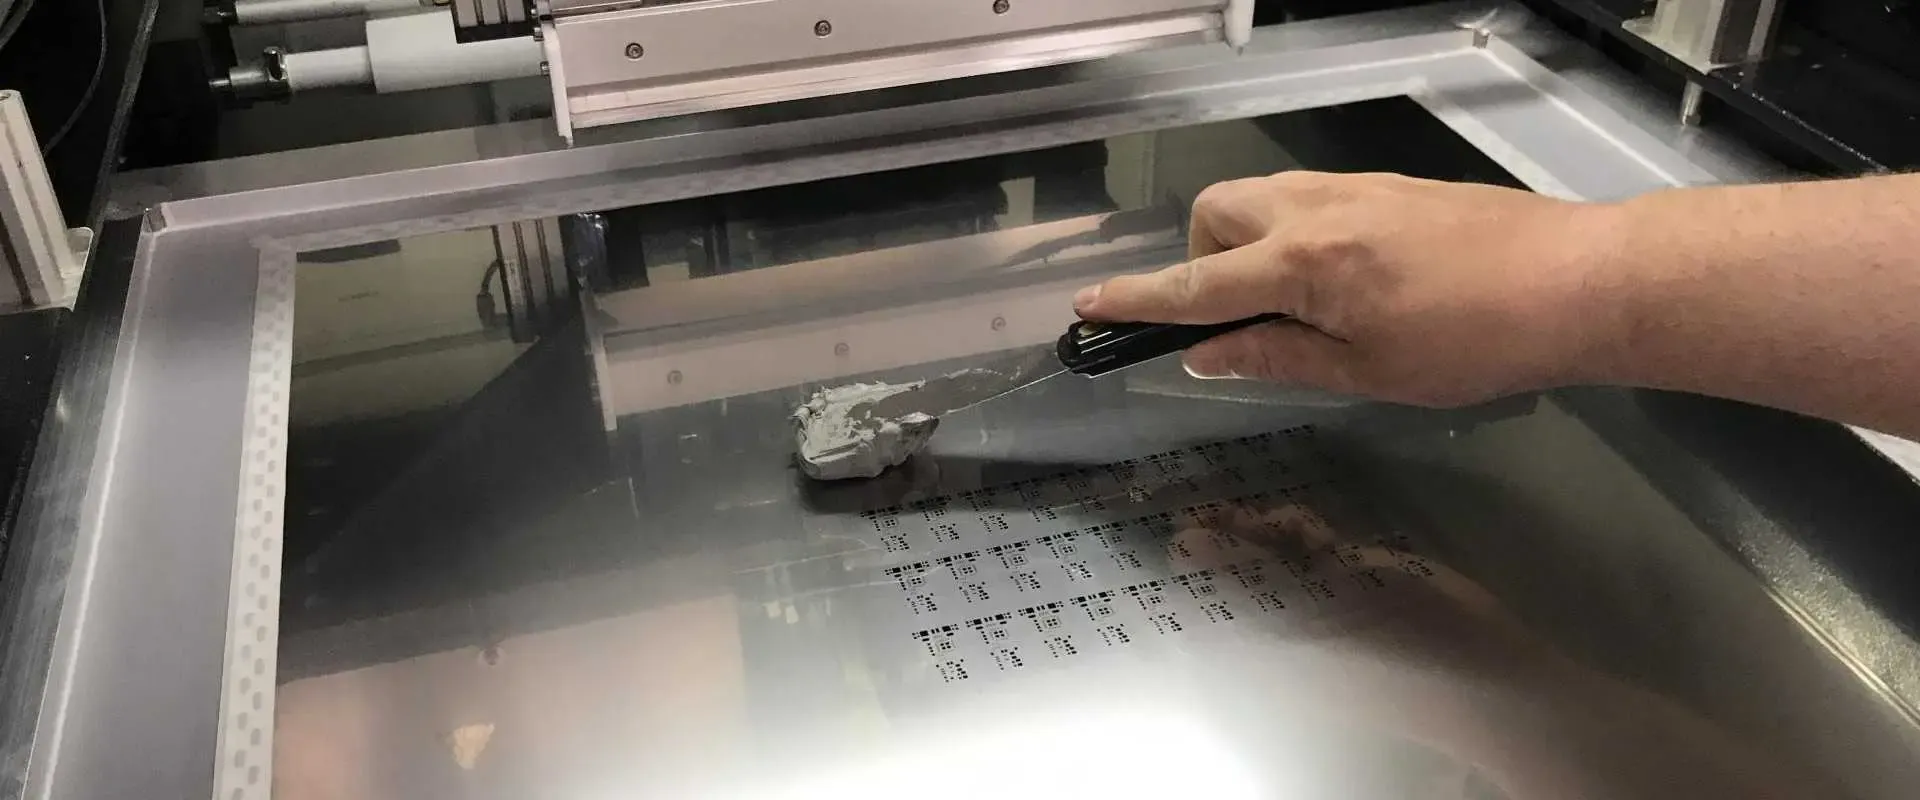
1. Clean After Every Use
Remove residual solder paste from the stencil immediately after use to prevent it from hardening. Use a dedicated stencil cleaning solution or isopropyl alcohol (IPA) with a lint-free wipe or soft brush. Avoid abrasive materials like steel wool, as they can scratch the stencil surface. For automated cleaning, ultrasonic cleaners with appropriate solutions can be effective for thorough results.
2. Inspect for Damage
After cleaning, inspect the stencil under magnification for signs of wear, scratches, or clogged apertures. Even small defects can affect solder paste transfer, leading to defects like insufficient paste or bridging. If damage is detected, consider repairing minor issues or replacing the stencil if the damage is extensive.
3. Schedule Regular Deep Cleaning
In addition to daily cleaning, schedule a deep cleaning session every 1-2 weeks, depending on usage frequency. This involves a more thorough process to remove any stubborn residues that daily cleaning might miss. Deep cleaning helps maintain aperture accuracy, ensuring consistent paste application over time.
Preventing Stencil Damage During PCB Assembly
Damage prevention doesn't stop at storage and handling; it extends to how stencils are used during the PCB assembly process. Here are some tips to minimize wear and tear during operation:
1. Use Correct Printer Settings
Ensure that the stencil printer is set up with the right pressure and speed settings. Excessive pressure during printing can cause the stencil to flex or warp, while incorrect alignment can lead to uneven wear. Regularly calibrate the printer to maintain optimal performance.
2. Avoid Overloading Solder Paste
Applying too much solder paste can lead to excess residue, which increases cleaning frequency and the risk of damage during cleaning. Use the recommended amount of paste and monitor the process to ensure even distribution.
3. Minimize Stencil Movement
Limit unnecessary movement of the stencil during assembly. Frequent repositioning or removal increases the chance of accidental drops or mishandling. Secure the stencil properly in the printer frame to avoid shifts during operation.
Long-Term Strategies for Stencil Longevity
Beyond daily care, adopting long-term strategies can significantly extend the life of your stencils and reduce replacement costs. Consider these approaches for sustained stencil maintenance:
1. Invest in High-Quality Stencils
Choosing high-quality stencils made from durable materials like stainless steel with precise laser-cut apertures can improve longevity. While the initial cost may be higher, these stencils withstand wear better and require less frequent replacement.
2. Track Usage and Performance
Maintain a log of stencil usage, including the number of prints and cleaning cycles. Tracking performance helps identify when a stencil is nearing the end of its useful life, allowing for timely replacement before quality issues arise. Industry data suggests that a well-maintained stencil can handle 50,000 to 100,000 prints before significant wear impacts performance.
3. Implement a Maintenance Schedule
Create a detailed maintenance schedule that includes daily cleaning, weekly inspections, and monthly deep cleaning. Consistency in maintenance prevents small issues from escalating into major damage, ensuring reliable performance over time.
Benefits of Proper Stencil Care
Adopting these best practices for stencil storage, handling, and maintenance offers several benefits for PCB assembly operations:
- Cost Savings: Extending stencil life reduces the need for frequent replacements, saving on material costs.
- Improved Quality: Well-maintained stencils ensure precise solder paste application, reducing defects and rework.
- Increased Efficiency: Proper care minimizes downtime caused by damaged stencils, keeping production on schedule.
- Environmental Impact: Longer-lasting stencils mean less waste, contributing to more sustainable manufacturing practices.
Conclusion
Stencils are indispensable tools in PCB assembly, and their care directly impacts production quality and cost-efficiency. By following best practices for stencil storage, handling, and maintenance, you can prevent damage and ensure longevity. From using proper tools and storage solutions to maintaining a clean, controlled environment and adhering to a regular maintenance schedule, every step counts in protecting these delicate components. Implement these strategies in your workflow to achieve consistent results, reduce expenses, and enhance the overall efficiency of your assembly process.
With the right approach to stencil care, you're not just protecting a tool—you're safeguarding the quality of every PCB you produce. Start applying these tips today and see the difference in your production outcomes.


