ALLPCB


Designing an analog PCB layout can be a challenging task, especially when it comes to ensuring signal clarity. Proper component placement is the foundation of a successful analog PCB design, as it directly impacts noise levels, signal integrity, and overall performance. In this comprehensive guide, we'll dive into the essential strategies for analog PCB component placement, focusing on minimizing noise coupling, separating analog and digital components, and optimizing high-frequency analog layouts. Whether you're an experienced engineer or just starting out, these guidelines will help you achieve a cleaner, more reliable design.
Why Component Placement Matters in Analog PCB Design
In analog PCB design, component placement is not just about fitting parts on a board—it's about ensuring that signals remain clear and free from interference. Analog circuits are particularly sensitive to noise, which can come from nearby components, power supplies, or even the board's own traces. Poor placement can lead to issues like crosstalk, electromagnetic interference (EMI), and degraded signal quality. By following proven analog PCB component placement guidelines, you can reduce these risks and create a board that performs as intended.
Key Principles of Analog PCB Component Placement
Before diving into specific techniques, let’s cover the core principles that guide component placement in analog PCB design. These principles focus on maintaining signal integrity and minimizing noise coupling, which are critical for any analog or mixed-signal system.
1. Group Components by Function
Start by grouping components based on their function. For instance, keep all analog components together and separate from digital components. This reduces the chance of noise from high-speed digital signals interfering with sensitive analog signals. For example, place operational amplifiers, resistors, and capacitors used in an analog filter circuit close to each other to minimize trace lengths and potential interference.
2. Minimize Trace Lengths for Sensitive Signals
Long traces in analog circuits act like antennas, picking up noise and introducing parasitic capacitance or inductance. Keep traces as short as possible, especially for high-frequency signals. For instance, in a design operating at 100 MHz, even a 1-inch trace can introduce significant signal delay and noise. Place components like feedback resistors and capacitors directly next to the pins of an amplifier to keep loops tight and reduce noise pickup.
3. Prioritize Critical Components
Place the most critical components first, such as precision amplifiers or sensors that handle low-level signals. These components are often the most sensitive to noise, so positioning them away from noisy areas (like power supplies or digital switching circuits) is essential. Once these are placed, arrange supporting components around them to maintain short connections.
Minimizing Noise Coupling in Analog PCB Layouts
Noise coupling is one of the biggest challenges in analog PCB design. It occurs when unwanted signals interfere with your circuit through shared ground planes, nearby traces, or electromagnetic fields. Here are actionable tips to minimize noise coupling during component placement.
1. Use Physical Separation
Physically separate noisy components from sensitive ones. For example, keep power supply circuits, which often generate switching noise, far from analog signal paths. If you're working with a voltage regulator that switches at 500 kHz, ensure it’s placed at least 1-2 inches away from sensitive analog components to reduce EMI.
2. Orient Components to Avoid Crosstalk
Pay attention to the orientation of components and traces. Running traces parallel to each other over long distances can lead to crosstalk, especially at high frequencies. If possible, orient traces perpendicularly when they must cross. For components like inductors or transformers, which can radiate magnetic fields, position them so their fields don’t interfere with nearby signal paths.
3. Shield Sensitive Areas
For extremely noise-sensitive components, consider using shielding techniques during placement. Place guard rings or grounded copper pours around sensitive analog sections to block interference. This is especially useful in high-frequency analog layouts where signals above 10 MHz are common, as these are more prone to picking up external noise.
Separating Analog and Digital Components
In mixed-signal designs, separating analog and digital components is critical to prevent digital noise from corrupting analog signals. Digital circuits, with their fast-switching signals, generate significant noise that can couple into analog sections if not managed properly.
1. Create Distinct Analog and Digital Zones
Divide your PCB into clear analog and digital zones. Place all analog components in one area and digital components in another. For example, if your design includes a microcontroller and an analog-to-digital converter (ADC), position the ADC at the boundary between the zones, with its analog pins facing the analog section and digital pins facing the digital section.
2. Use Separate Ground Planes
Implement separate ground planes for analog and digital sections to prevent noise from traveling through a shared ground. Connect these planes at a single point, often near the power supply or ADC, to avoid ground loops. This technique, known as a star ground, ensures that digital switching currents don’t flow through the analog ground, which could introduce noise into sensitive signals.
3. Route Signals Carefully Between Zones
When signals must cross between analog and digital zones, route them over a split in the ground plane only at the connection point. Avoid running analog traces over digital ground planes (or vice versa), as this can couple noise into the signal. For instance, a 3.3V digital signal switching at 10 MHz can easily induce noise in an analog trace if they overlap without proper isolation.
High-Frequency Analog Layout Techniques
High-frequency analog layouts, where signals often exceed 10 MHz, require extra care in component placement to maintain signal integrity and prevent issues like ringing or signal loss. Here are key techniques tailored for high-frequency designs.
1. Optimize for Impedance Matching
At high frequencies, traces behave like transmission lines, and mismatches in impedance can cause reflections that degrade signals. Place components to keep trace lengths consistent with the required impedance. For example, in a 50-ohm system, ensure that critical traces are designed with the correct width and length, and place termination resistors as close as possible to the load to minimize reflections.
2. Reduce Parasitic Effects
Parasitic capacitance and inductance become significant at high frequencies. Place bypass capacitors directly next to the power pins of high-frequency components, such as RF amplifiers, to filter out noise. Use small capacitor values (like 0.1 μF) for high-frequency noise and position them within 0.1 inches of the pin to minimize inductance from long traces.
3. Maintain Signal Path Integrity
For high-frequency signals, keep the signal path as straight and uninterrupted as possible. Avoid vias in critical signal paths, as they introduce inductance and can cause signal degradation. If a via is unavoidable, ensure it’s placed strategically and compensated with proper grounding nearby. For signals at 100 MHz or higher, even a single via can introduce a noticeable delay or loss.
Additional Tips for Analog PCB Component Placement
Beyond the core strategies, here are some additional tips to refine your analog PCB layout and ensure optimal performance.
- Decoupling Capacitors: Place decoupling capacitors close to every IC’s power pin to stabilize voltage and reduce noise. A common practice is to use a 0.1 μF ceramic capacitor for each pin, positioned within 0.05 inches of the pin.
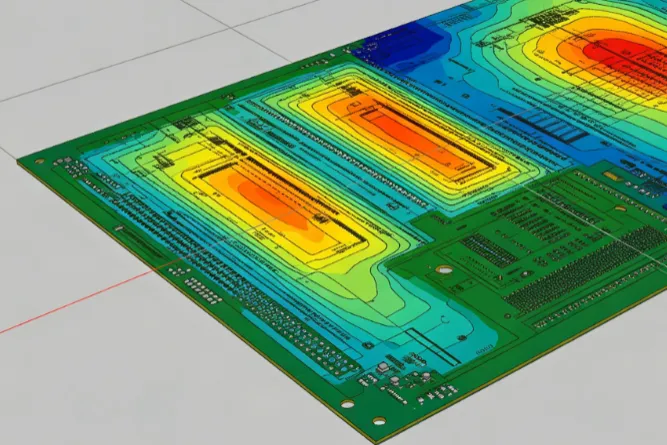
- Thermal Management: Consider heat dissipation when placing components. High-power analog components, like voltage regulators, should be placed near board edges or heat sinks to avoid heating sensitive nearby components.
- Component Orientation: Align components in the same direction where possible to simplify assembly and reduce errors during manufacturing. For polarized components like capacitors, ensure consistent orientation to avoid confusion.
Common Mistakes to Avoid in Analog PCB Layout
Even experienced designers can make mistakes in analog PCB layout. Here are some pitfalls to watch out for during component placement.
- Mixing Analog and Digital Grounds Without Care: Failing to separate ground planes or connecting them improperly can introduce noise into analog signals. Always use a single-point connection for mixed-signal designs.
- Ignoring Trace Routing: Placing components without considering trace paths can lead to long, noisy traces. Plan your placement with routing in mind to keep connections short and clean.
- Overcrowding the Board: Squeezing components too close together can increase noise coupling and make routing difficult. Leave adequate spacing, especially around sensitive analog components.
Conclusion: Achieving Signal Clarity Through Smart Placement
Mastering analog PCB layout starts with thoughtful component placement. By following analog PCB component placement guidelines, minimizing noise coupling, separating analog and digital components, and applying high-frequency analog layout techniques, you can create designs that deliver clear, reliable signals. Remember to group components by function, keep traces short, separate noisy and sensitive areas, and pay special attention to grounding and high-frequency needs. With these strategies, your analog PCB designs will perform at their best, meeting both functional and performance goals.
Implementing these practices may take extra time during the design phase, but the payoff in signal clarity and reduced debugging is well worth the effort. Use the tips and techniques shared in this guide to elevate your next analog PCB project to new levels of precision and reliability.