 ALLPCB


Selecting the right solder paste for your stencil printer projects is crucial for achieving high-quality results in PCB assembly. Whether you're working on surface mount technology (SMT) or prototyping, the type of solder paste, its compatibility with your stencil printer, and proper storage practices can make or break your project. In this comprehensive guide, we'll dive into solder paste types, stencil printer compatibility, and solder paste storage tips to help you optimize your workflow and ensure reliable outcomes.
Why Choosing the Right Solder Paste Matters
Solder paste is the backbone of modern PCB assembly, acting as the adhesive and conductive material that bonds components to the board during reflow soldering. A mismatch between your solder paste and stencil printer can lead to defects like insufficient solder, bridging, or poor adhesion, costing time and resources. By understanding the key factors—such as alloy composition, particle size, and viscosity—you can avoid common pitfalls and streamline your production process.
In the sections below, we'll break down everything you need to know to make an informed decision for your stencil printer projects, ensuring precision and efficiency every step of the way.
Understanding Solder Paste Types for PCB Assembly
Solder paste is a mixture of metal alloy powder, flux, and other additives that facilitate soldering. Different types are designed for specific applications, and choosing the right one depends on your project requirements. Let's explore the main categories and their characteristics.
1. Leaded vs. Lead-Free Solder Paste
One of the first decisions you'll face is whether to use leaded or lead-free solder paste. Leaded solder paste, typically made of a tin-lead (Sn-Pb) alloy, offers excellent wetting properties and a lower melting point (around 183°C). This makes it easier to work with, especially for beginners or projects not bound by environmental regulations.
Lead-free solder paste, often composed of tin-silver-copper (Sn-Ag-Cu) alloys, is the industry standard due to RoHS compliance requirements. It has a higher melting point (approximately 217-220°C), which may require adjustments to your reflow profile. While lead-free options are more environmentally friendly, they can be more challenging to work with due to reduced wettability and potential for defects like tombstoning.
2. Particle Size and Type Classification
Solder paste is classified by particle size, ranging from Type 1 to Type 6, with smaller numbers indicating larger particles. For stencil printer projects, Type 3 (25-45 micrometers) and Type 4 (20-38 micrometers) are most commonly used due to their balance of printability and suitability for standard SMT components. Type 5 and Type 6 pastes, with finer particles, are ideal for ultra-fine pitch components but may require specialized stencils and printers to avoid clogging.
Choosing the right particle size ensures smooth application through your stencil and prevents issues like insufficient solder volume or bridging. For most general-purpose PCB projects, Type 3 or Type 4 will suffice unless you're working with extremely small components.
3. Flux Types in Solder Paste
Flux is a critical component of solder paste, as it cleans the surfaces being soldered and prevents oxidation during the reflow process. There are three main flux types:
- Rosin-Based Flux: Offers good activity and is easy to clean, making it suitable for many applications. Residues may require cleaning to prevent corrosion.
- Water-Soluble Flux: Highly active and ideal for challenging surfaces, but it requires thorough cleaning to avoid residue-related issues.
- No-Clean Flux: Leaves minimal residue that doesn't need cleaning, saving time in production. It's a popular choice for high-volume manufacturing.
Your choice of flux depends on your cleaning capabilities and the reliability requirements of your project. For stencil printer setups, no-clean flux is often preferred for its convenience.

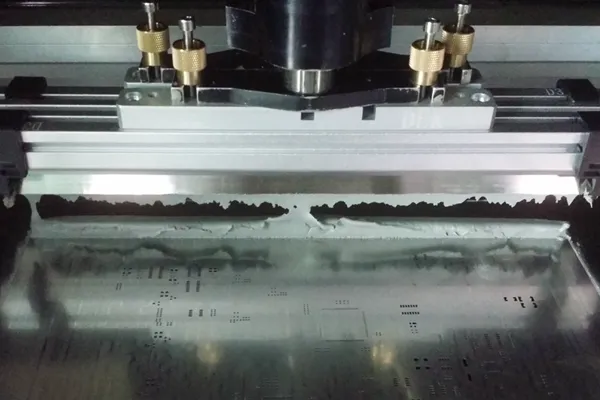
Stencil Printer Compatibility: Matching Solder Paste to Your Equipment
Compatibility between your solder paste and stencil printer is essential for achieving consistent, defect-free results. A mismatch can lead to poor paste release, uneven deposits, or clogged apertures. Here are the key factors to consider when aligning your solder paste with your stencil printer.
1. Viscosity and Printability
Solder paste viscosity determines how easily it flows through the stencil apertures during printing. Viscosity is typically measured in Pascal-seconds (Pa·s), and most stencil printers work best with pastes in the range of 600-1200 Pa·s. If the paste is too thick, it may not release properly from the stencil, leading to incomplete deposits. If it's too thin, it can cause slumping or bridging between pads.
Check the specifications of your stencil printer to ensure the solder paste viscosity falls within the recommended range. Many manufacturers provide guidelines for optimal paste characteristics, so consult your equipment manual or supplier for precise recommendations.
2. Stencil Design and Aperture Size
The design of your stencil, including its thickness and aperture size, must match the solder paste type. For example, a stencil thickness of 0.1-0.15 mm is common for standard SMT components and works well with Type 3 or Type 4 solder paste. Thinner stencils (around 0.08 mm) may be needed for finer pitch components and Type 5 paste to control solder volume accurately.
Aperture size should also align with the particle size of the solder paste. A general rule is that the aperture width should be at least five times larger than the largest particle size in the paste to prevent clogging. For Type 3 paste with particles up to 45 micrometers, ensure apertures are at least 225 micrometers wide.
3. Printer Settings and Squeegee Pressure
Your stencil printer's settings, such as squeegee pressure and speed, must be adjusted based on the solder paste properties. High-viscosity pastes may require higher pressure (around 8-12 kg) to ensure proper transfer, while low-viscosity pastes might need lower pressure (around 5-8 kg) to avoid over-deposition. Experiment with small test runs to fine-tune these parameters for your specific paste and printer combination.
Additionally, ensure your printer supports the paste's shelf life and working time. Some pastes have a limited "open time" (the duration they can remain on the stencil before degrading), so automated printers with controlled environments may be necessary for large-scale projects.
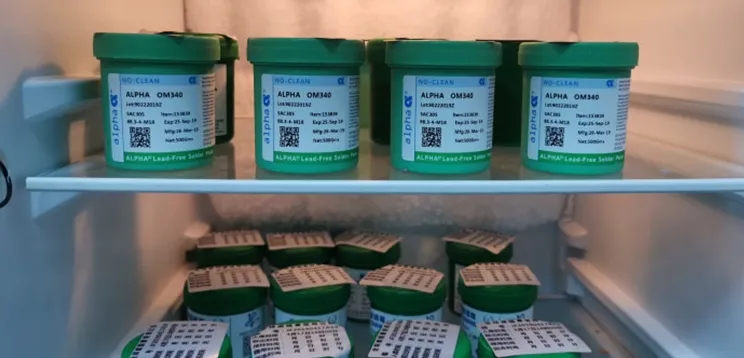
Solder Paste Storage Tips for Optimal Performance
Proper storage of solder paste is often overlooked but is vital for maintaining its quality and performance. Improper handling can lead to issues like drying out, oxidation, or flux separation, resulting in poor soldering results. Follow these solder paste storage tips to keep your materials in top condition for your stencil printer projects.
1. Temperature Control
Solder paste should be stored in a refrigerator at a temperature between 2°C and 10°C (36°F to 50°F). This slows down the chemical reactions between the flux and metal particles, extending shelf life. Avoid freezing the paste, as temperatures below 0°C can cause separation or crystallization of components.
Before using refrigerated solder paste, allow it to reach room temperature (around 20-25°C) for 4-8 hours. Rapid heating or microwaving can damage the paste's consistency, so patience is key. Many professionals recommend taking the paste out of storage the night before a project to ensure it's ready for use.
2. Sealing and Contamination Prevention
Always store solder paste in its original airtight container to prevent exposure to air and moisture, which can cause oxidation or drying. If you transfer paste to a different container (such as for use in a stencil printer cartridge), ensure it's sealed tightly after each use. Avoid introducing contaminants like dust or debris, as these can affect printability and soldering quality.
3. Shelf Life and Batch Tracking
Most solder pastes have a shelf life of 6-12 months when stored properly, though this varies by manufacturer. Check the expiration date on the packaging and prioritize using older batches first. Keep a log of purchase dates and storage conditions to track inventory and avoid using expired paste, which may lead to poor performance or defects like insufficient wetting.
For large-scale operations, consider investing in a dedicated storage unit with temperature and humidity controls to maintain consistency across batches. Humidity should ideally be kept below 50% to prevent moisture absorption.
Practical Tips for Using Solder Paste with Stencil Printers
Beyond selecting the right solder paste and ensuring compatibility, there are practical steps you can take to maximize success in your stencil printer projects. These tips are based on common challenges faced during SMT assembly and can help you achieve consistent, high-quality results.
1. Perform Test Prints
Before starting a full production run, conduct test prints with your chosen solder paste and stencil setup. Inspect the deposits for uniformity, volume, and alignment with the PCB pads. Use a solder paste inspection (SPI) system if available to measure deposit height and area, ensuring they meet design specifications (typically within ±10% of target volume).
2. Clean Stencils Regularly
Residue buildup on stencils can cause uneven paste application or clogging. Clean your stencil after every 5-10 prints using a lint-free wipe and an appropriate solvent (like isopropyl alcohol). For automated stencil printers, use the built-in cleaning mechanisms if available to maintain consistency.
3. Monitor Environmental Conditions
The working environment can affect solder paste performance. Aim for a workspace temperature of 20-25°C and relative humidity of 40-60%. High humidity can cause the paste to absorb moisture, leading to slumping, while low humidity may cause it to dry out prematurely.
Common Mistakes to Avoid When Choosing Solder Paste
Even with the best intentions, mistakes in solder paste selection and handling can derail your project. Here are some pitfalls to watch out for:
- Using Expired Paste: Always check the expiration date, as old paste can lose its effectiveness, leading to poor soldering results.
- Ignoring Stencil Specifications: Choosing a paste with particles too large for your stencil apertures can cause clogging and uneven deposits.
- Improper Storage: Storing paste at room temperature or in unsealed containers can degrade its quality over time.
- Skipping Warm-Up Time: Using refrigerated paste without allowing it to reach room temperature can result in inconsistent viscosity and poor printability.
Conclusion: Making an Informed Choice for Your Stencil Printer Projects
Choosing the right solder paste for your stencil printer projects is a multi-faceted decision that involves understanding solder paste types, ensuring stencil printer compatibility, and following solder paste storage tips. By selecting the appropriate alloy (leaded or lead-free), particle size (Type 3 or 4 for most applications), and flux type (no-clean for convenience), you lay the foundation for successful PCB assembly.
Equally important is matching the paste's viscosity and printability to your stencil design and printer settings, as well as storing it under controlled conditions (2-10°C, sealed containers) to maintain its performance. With the practical advice and insights shared in this guide, you're well-equipped to tackle your next project with confidence, achieving reliable solder joints and minimizing defects.
Whether you're a hobbyist or a professional engineer, taking the time to align your materials and equipment will pay off in the form of smoother workflows and superior results. Keep experimenting, refining your process, and leveraging the right tools to elevate your PCB assembly game.


