 ALLPCB


Are you new to electronics and wondering how to start with manual assembly for your DIY projects? This guide is your one-stop resource for learning the basics of manual assembly, hand soldering for beginners, component placement techniques, and basic electronics assembly. Whether you're building a simple circuit or diving into more complex DIY electronics projects, we'll walk you through every step with clear instructions and practical tips to help you succeed.
In this comprehensive beginner's guide, we'll break down the essentials of assembling electronics by hand. From gathering the right tools to mastering soldering techniques and placing components accurately, you'll gain the confidence to tackle your first projects. Let's dive into the world of manual assembly and turn your ideas into working circuits!
Why Manual Assembly Matters for Beginners
Manual assembly is the foundation of many electronics projects, especially for hobbyists and beginners. It involves physically placing and soldering components onto a circuit board by hand, allowing you to understand how circuits work at a fundamental level. Unlike automated assembly, which is used in mass production, manual assembly gives you full control over every detail, making it ideal for learning and prototyping.
By mastering manual assembly, you can create custom designs, troubleshoot issues, and experiment with different components. It's a hands-on skill that builds patience and precision, and it's the starting point for countless DIY electronics projects. Whether you're making a simple LED circuit or a more advanced microcontroller setup, the techniques you'll learn here are essential.
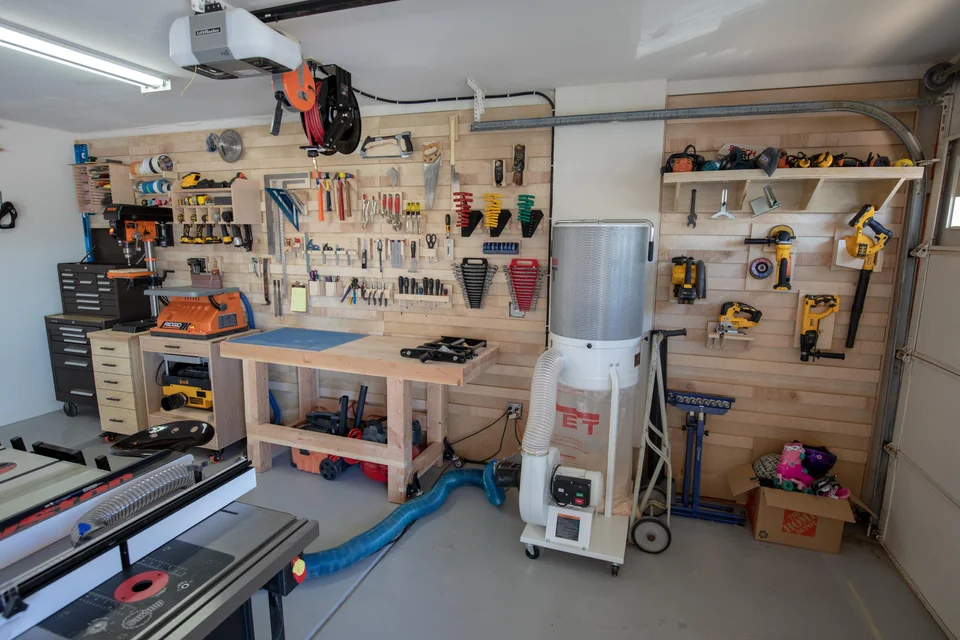
Essential Tools for Manual Assembly
Before you start any electronics project, you need the right tools. Having a well-equipped workspace makes manual assembly easier and safer. Here’s a list of must-have tools for beginners:
- Soldering Iron: A 25-40 watt soldering iron with a fine tip is perfect for most beginner projects. It heats up to around 300°C (572°F), which is suitable for melting solder without damaging components.
- Solder Wire: Use a rosin-core solder with a 60/40 tin-lead mix for general electronics work. A diameter of 0.8-1.0 mm works well for small components.
- Soldering Station (Optional): For more control, a soldering station with adjustable temperature (typically 200-400°C) is a great investment.
- Desoldering Tools: A solder sucker or desoldering wick helps remove mistakes by absorbing excess solder.
- Wire Cutters and Strippers: These are used to trim component leads and prepare wires for connections.
- Tweezers: Precision tweezers help place small components accurately on the board.
- Multimeter: A basic multimeter measures voltage, current, and resistance, helping you test your circuits. For example, you can check if a resistor has the correct value (e.g., 1kΩ) before soldering.
- Workbench and Safety Gear: Work on a non-conductive surface and wear safety glasses to protect your eyes from solder splashes.
With these tools, you're ready to start assembling. Keep them organized and within reach to streamline your workflow.
Understanding Components and Circuit Boards
Before diving into assembly, familiarize yourself with common electronic components and the circuit board itself. Here are the basics:
- Resistors: These limit current flow and have color-coded bands to indicate resistance values (e.g., a 220Ω resistor might have red, red, brown bands).
- Capacitors: Store and release energy, often marked with values like 10μF. Pay attention to polarity for electrolytic capacitors.
- Diodes and LEDs: Diodes allow current to flow in one direction only, while LEDs emit light. Both have polarity, so note the anode (positive) and cathode (negative) sides.
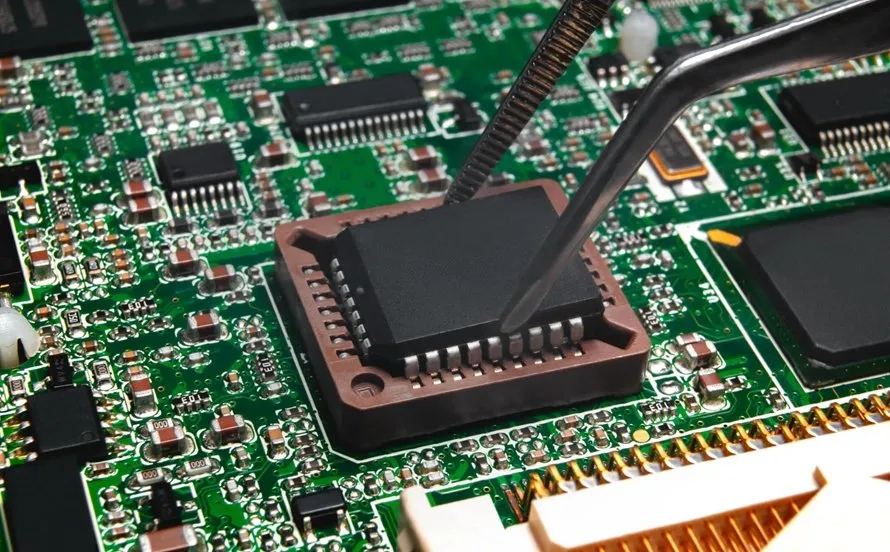
- Integrated Circuits (ICs): These are small chips with multiple functions. Look for a notch or dot to identify pin 1 for correct placement.
- Circuit Boards: Printed circuit boards (PCBs) have copper traces that connect components. They may be single-sided or double-sided, with holes for through-hole components or pads for surface-mount parts.
Understanding how these components work and interact on a board is key to successful assembly. Always refer to a schematic or layout diagram to know where each part goes.
Step-by-Step Manual Assembly Tutorial
Now that you have your tools and components, let’s walk through a basic electronics assembly process. Follow these steps to build a simple circuit, such as an LED blinker.
Step 1: Prepare Your Workspace
Set up a clean, well-lit area with all tools and components within reach. Ensure proper ventilation if you're soldering, as fumes from solder can be harmful. Lay out your circuit board and schematic for reference.
Step 2: Identify and Organize Components
Sort your components based on the schematic. For instance, if your project includes a 1kΩ resistor, two 10μF capacitors, and an LED, group them together. Double-check values using a multimeter if needed to avoid mistakes.
Step 3: Component Placement Techniques
Place components on the board according to the schematic. Start with low-profile parts like resistors and diodes, then move to taller components like capacitors and ICs. Here are some tips for accurate placement:
- Align components with the correct holes or pads. For through-hole parts, insert leads through the holes and bend them slightly on the other side to hold them in place.
- Check polarity for components like LEDs and capacitors. For an LED, the longer lead is usually the anode (positive).
- For ICs, align the notch or dot with the marking on the board to ensure correct orientation.
- Space components evenly to avoid overcrowding, which can lead to short circuits.
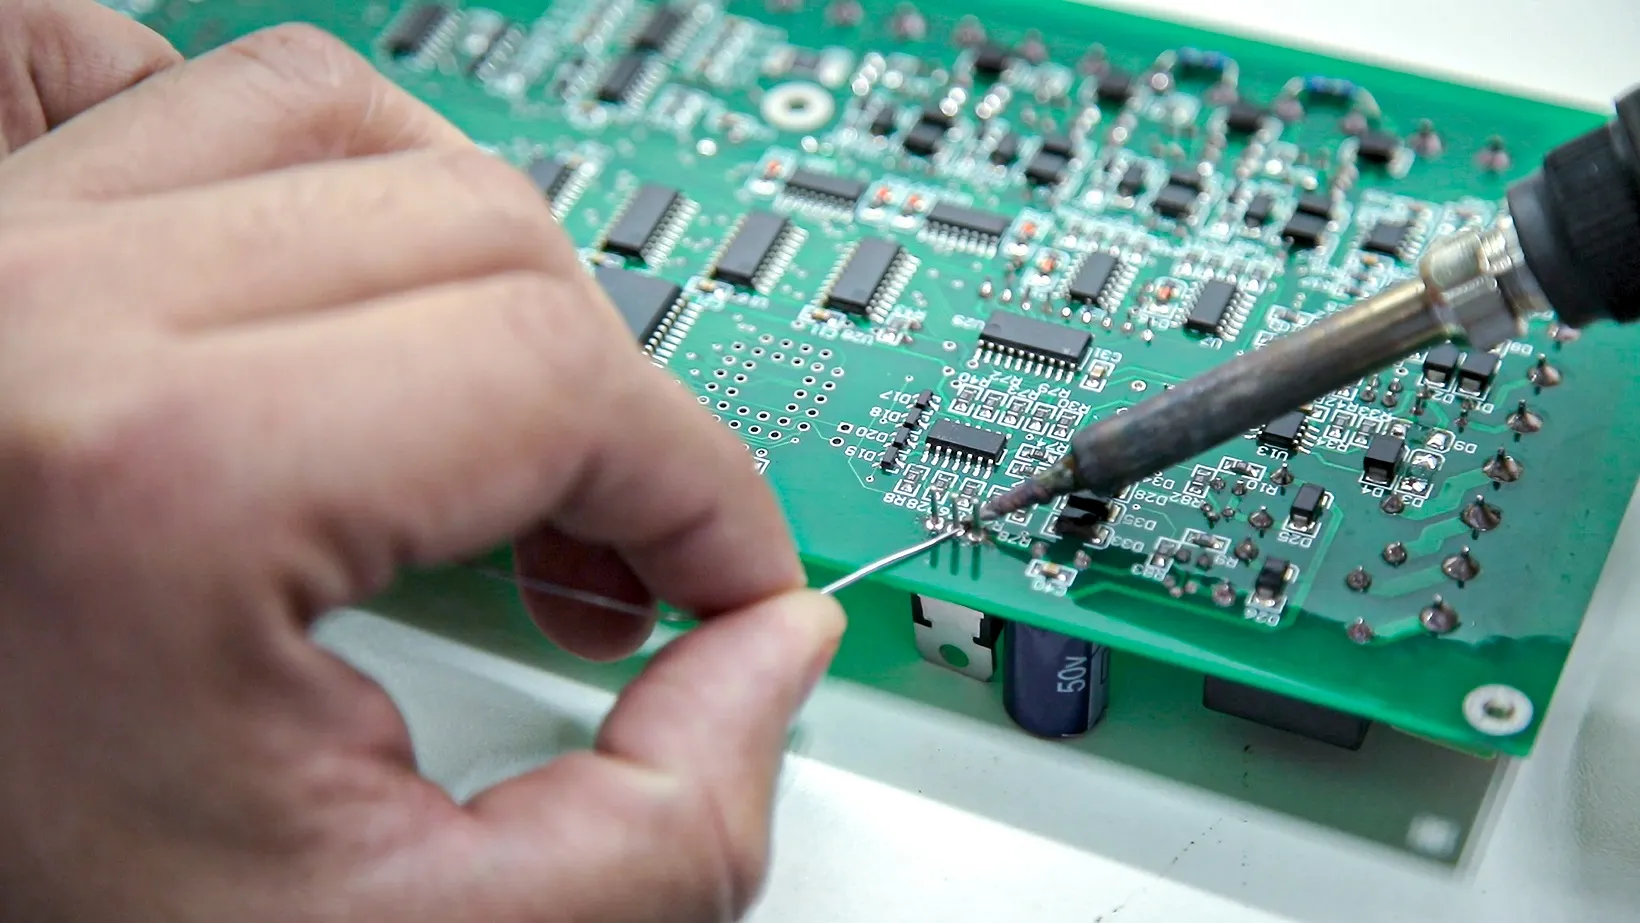
Step 4: Hand Soldering for Beginners
Soldering joins components to the board by melting a metal alloy (solder) to create a strong electrical connection. Follow these beginner-friendly steps:
- Heat the Soldering Iron: Set your iron to around 300°C (572°F) for most electronics work. Wait until it’s fully heated (usually 2-3 minutes).
- Tin the Tip: Apply a thin layer of solder to the iron’s tip to improve heat transfer. Wipe excess on a damp sponge or brass wire cleaner.
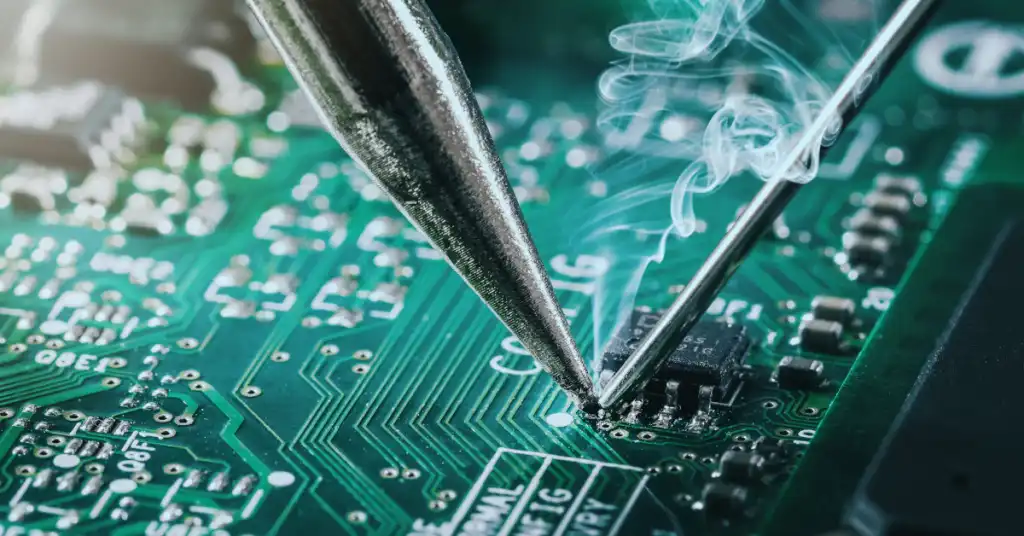
- Solder the Joint: Place the iron tip on the component lead and pad simultaneously for 1-2 seconds to heat them. Then, touch the solder wire to the joint (not the iron) and let it melt and flow around the lead. Remove the solder wire first, then the iron. The process should take no more than 3-5 seconds per joint.
- Inspect the Joint: A good solder joint looks shiny and forms a small cone shape. If it’s dull or uneven, reheat and add more solder or use a desoldering tool to fix it.
Practice on a scrap board first to get comfortable with the technique. Avoid overheating components, as excessive heat (above 350°C for more than 5 seconds) can damage sensitive parts like ICs.
Step 5: Trim Excess Leads
After soldering, use wire cutters to trim the excess leads of through-hole components. Cut close to the solder joint, but be careful not to damage the connection. This keeps the board neat and prevents accidental shorts.
Step 6: Test Your Circuit
Power up your circuit and use a multimeter to check for correct operation. For an LED blinker, measure the voltage across the LED (typically 1.8-2.2V for a standard red LED) to ensure it’s working. If something’s wrong, inspect your solder joints and component placement for errors.
Common Mistakes in Basic Electronics Assembly
As a beginner, it’s normal to make mistakes during manual assembly. Here are some common issues and how to avoid them:
- Cold Solder Joints: These occur when the joint isn’t heated enough, resulting in a weak, dull connection. Reheat the joint and add fresh solder to fix it.
- Incorrect Component Placement: Placing a component in the wrong spot or with wrong polarity can cause the circuit to fail. Always double-check the schematic before soldering.
- Overheating Components: Applying heat for too long can damage parts. Limit soldering time to 3-5 seconds per joint and let components cool between soldering nearby connections.
- Short Circuits: Excess solder or untrimmed leads can create unintended connections. Inspect your board carefully after soldering and use a multimeter to test for shorts.
Learning from these mistakes will improve your skills over time. Start with simple projects and gradually tackle more complex designs as you gain confidence.
DIY Electronics Projects to Practice Manual Assembly
Hands-on practice is the best way to master manual assembly. Here are three beginner-friendly DIY electronics projects to help you apply what you've learned:
1. LED Circuit
Build a basic circuit with an LED, a 220Ω resistor, and a 9V battery. This project teaches component placement and soldering while showing you how current flows through a simple setup.
2. Tone Generator
Create a small tone generator using a 555 timer IC, a speaker, and a few resistors and capacitors. This introduces you to IC placement and timing circuits, with the 555 timer oscillating at a frequency determined by component values (e.g., 1kHz with specific resistor-capacitor combinations).
3. Light Sensor
Assemble a light sensor circuit using a photoresistor and a transistor to control an LED. This project helps you understand variable resistance (photoresistors change resistance from 100Ω in light to over 1MΩ in darkness) and transistor switching.
These projects are low-cost and widely documented online with schematics, making them perfect for beginners to practice basic electronics assembly.
Tips for Success in Manual Assembly
To make your journey into electronics assembly smoother, keep these tips in mind:
- Start Small: Begin with simple circuits and fewer components to build your skills before moving to complex designs.
- Practice Soldering: Use a practice board or old electronics to refine your soldering technique. Aim for consistent, shiny joints every time.
- Stay Organized: Label components and keep your workspace tidy to avoid mix-ups or lost parts.
- Use Quality Materials: Invest in good solder and a reliable soldering iron to make the process easier and safer.
- Learn from Resources: Watch online tutorials or read guides to see different approaches to manual assembly and soldering.
Conclusion: Build Your Skills with Manual Assembly
Mastering manual assembly is a rewarding skill that opens the door to endless DIY electronics projects. By following this beginner’s guide, you’ve learned the basics of hand soldering for beginners, component placement techniques, and basic electronics assembly. With the right tools, a step-by-step approach, and plenty of practice, you’ll be able to create functional circuits and bring your ideas to life.
Start with small projects, refine your techniques, and don’t be afraid to make mistakes—they’re part of the learning process. As you grow more comfortable with manual assembly tutorials, you’ll find yourself taking on bigger challenges and creating more intricate designs. Dive into the world of electronics today, and let your creativity shine through every soldered joint and placed component!


