 ALLPCB


Are you an electronics hobbyist looking to replace surface mount PCB components at home? Whether you're tackling a repair or upgrading a device, this guide will walk you through the process of DIY SMD component replacement step by step. You don’t need fancy equipment like hot air stations to get the job done. With a basic soldering iron and some patience, you can master soldering SMD components without hot air, removing SMD components with a soldering iron, hand soldering SMD resistors, and even replacing SMD capacitors at home. Let’s dive into the details and get your project back on track!
Why Replace SMD Components at Home?
Surface Mount Devices (SMDs) are tiny components soldered directly onto the surface of printed circuit boards (PCBs). They’re found in almost every modern electronic device, from smartphones to laptops. Over time, these components can fail due to heat, physical damage, or wear, requiring replacement. Taking on a DIY SMD component replacement project at home saves money compared to professional repairs and helps you build valuable skills as a hobbyist.
Many hobbyists shy away from working with SMDs because of their small size—some resistors and capacitors are as tiny as 1mm x 0.5mm (0402 package size)! But with the right tools and techniques, even beginners can succeed. In this guide, I’ll share practical tips based on my own experience repairing a broken game controller by replacing a faulty SMD capacitor. Let’s get started with what you’ll need.

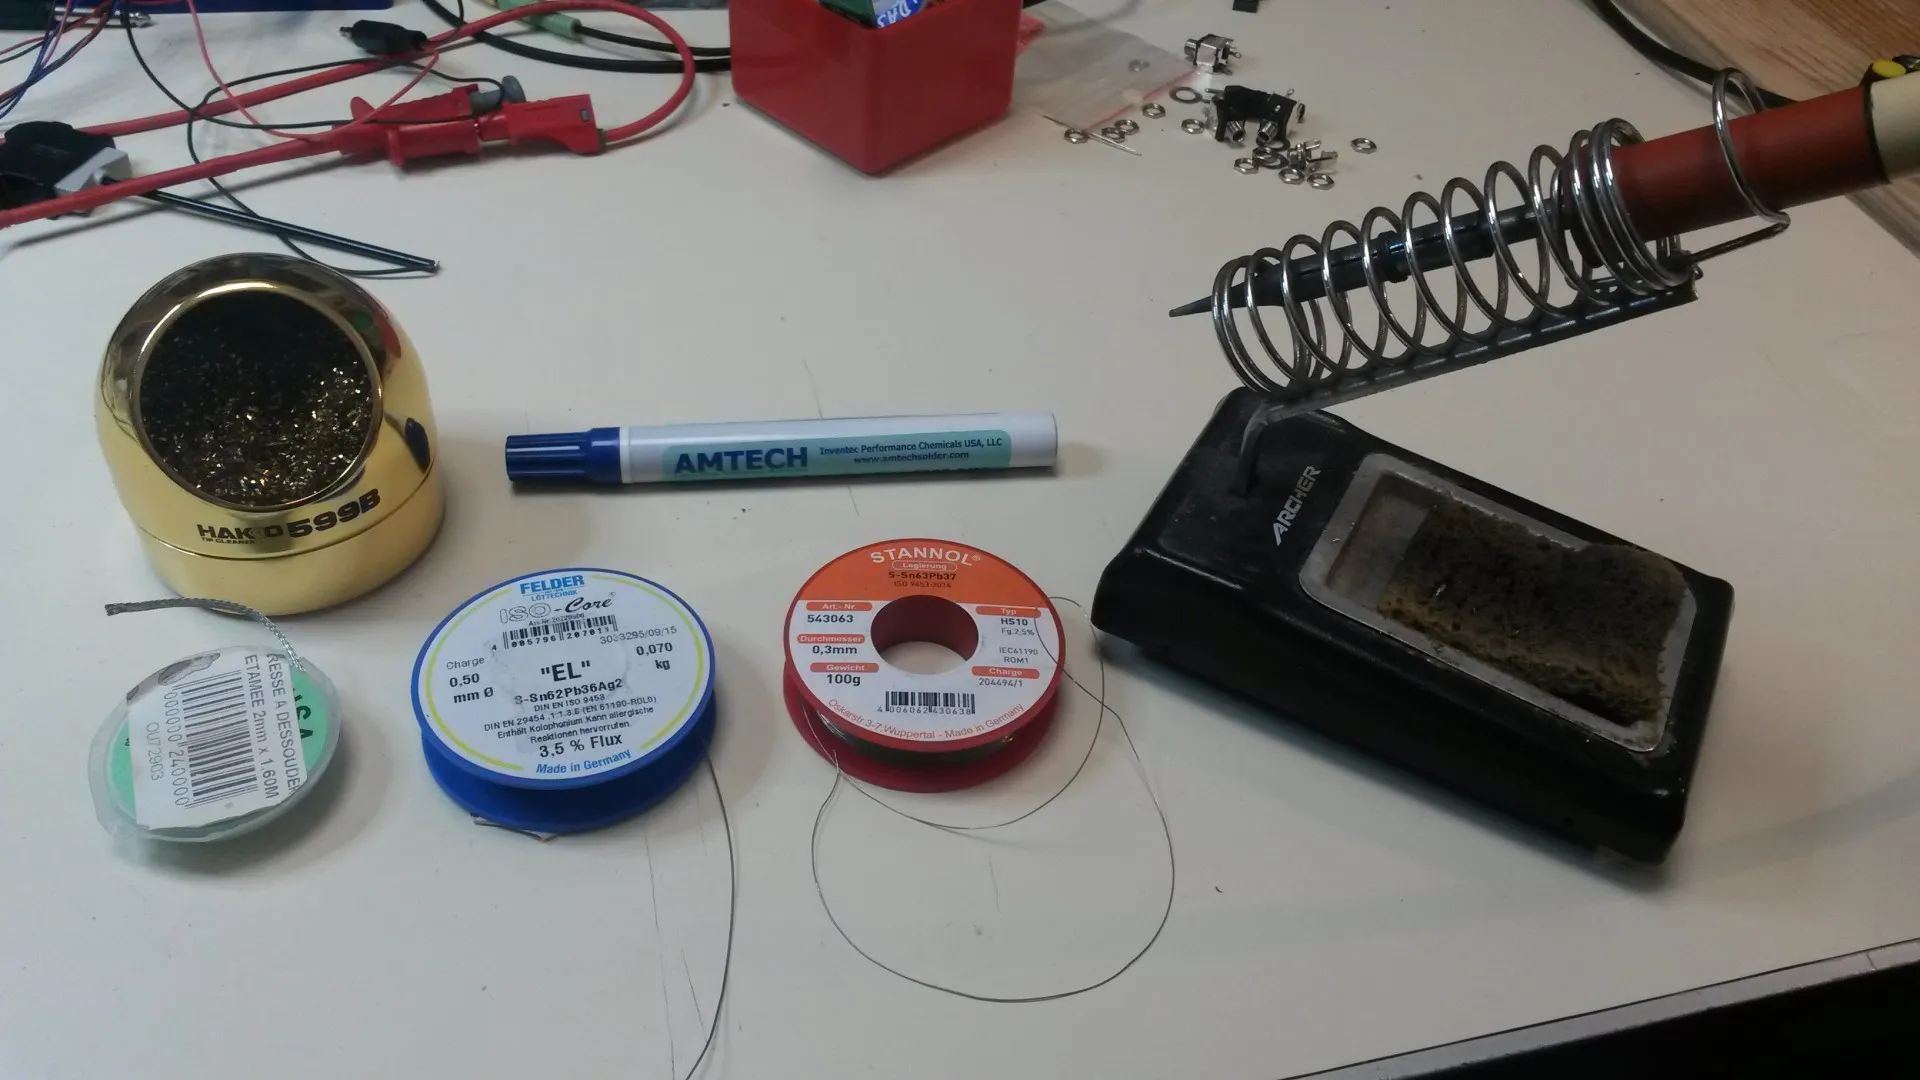
Tools and Materials for DIY SMD Replacement
Before you begin, gather the following tools and materials. Most of these are likely already in your electronics toolkit, keeping costs low for replacing SMD capacitors at home or other components.
- Soldering Iron: A fine-tip soldering iron (15-30 watts) works best for precision. Adjustable temperature models are ideal—set it to around 300°C (572°F) for most SMD work.
- Solder: Use thin lead-free or leaded solder (0.5mm to 0.8mm diameter) for clean joints.
- Desoldering Braid or Solder Wick: Essential for removing SMD components with a soldering iron by soaking up excess solder.
- Flux: Helps solder flow smoothly and prevents oxidation. Liquid or paste flux works well.
- Tweezers: Precision tweezers are a must for handling tiny SMD parts.
- Replacement Components: Ensure you have the correct SMD resistors, capacitors, or other parts. Check markings or datasheets for values (e.g., a 10μF capacitor with 0603 package size).
- Magnifying Glass or Microscope: Optional but helpful for inspecting small components.
- Isopropyl Alcohol and Brush: For cleaning the PCB after soldering.
- Multimeter: To test continuity and verify component values or functionality.
With these tools ready, you’re set to tackle hand soldering SMD resistors and other components. Let’s move on to safety and preparation.
Safety First: Preparing for SMD Work
Working with electronics involves risks like burns or damage to components. Follow these safety tips before starting your DIY SMD component replacement project:
- Work in a well-ventilated area to avoid inhaling solder fumes.
- Wear safety glasses to protect your eyes from solder splashes.
- Keep your soldering iron on a stand when not in use to prevent burns or fires.
- Handle components carefully to avoid static discharge, which can damage sensitive parts like ICs. Use an anti-static wrist strap if possible.
Also, prepare your workspace by clearing clutter and ensuring good lighting. A stable, flat surface helps when handling tiny parts during soldering SMD components without hot air.
Step 1: Identifying Faulty SMD Components
The first step in replacing SMD capacitors at home or other components is identifying what’s broken. Here’s how to spot issues:
- Visual Inspection: Look for burnt marks, cracks, or bulging capacitors on the PCB. A failed SMD capacitor often looks swollen or leaky.
- Testing with a Multimeter: Test resistors for correct resistance (e.g., a 1kΩ resistor should read close to 1000 ohms). For capacitors, check for shorts or open circuits. If a 10μF capacitor reads 0μF, it’s likely dead.
- Circuit Behavior: If a device isn’t powering on or a specific function fails, trace the circuit to suspect components. For example, a failed SMD resistor in a power line might cause a voltage drop.
Once you’ve identified the faulty part, note its package size (like 0805 or 1206) and value to order an exact replacement. In my game controller repair, a bulging 4.7μF capacitor near the power input was the culprit, confirmed by a multimeter reading of 0μF.
Step 2: Removing SMD Components with a Soldering Iron
Now comes the tricky part: removing SMD components with a soldering iron. Hot air rework stations are ideal for this, but a basic soldering iron can work with the right technique. Here’s how to do it for resistors, capacitors, and small ICs:
For Two-Lead Components (Resistors and Capacitors)
- Apply Flux: Dab flux on the component’s solder joints to help the solder melt evenly.
- Heat One Side: Place your soldering iron tip on one solder joint for 2-3 seconds until the solder melts.
- Lift with Tweezers: While the solder is molten, use tweezers to gently lift that side of the component off the pad.
- Heat the Other Side: Move to the other joint, heat it, and fully remove the component with tweezers.
- Clean the Pads: Use desoldering braid and your iron to remove excess solder from the PCB pads. Wipe with isopropyl alcohol for a clean surface.
For Multi-Lead Components (ICs)
- Add Solder: If the pins are hard to desolder, add fresh solder to all pins to make melting easier.
- Use Two-Iron Method (if possible): If you have a second iron or can alternate quickly, heat multiple pins at once to lift the IC. Otherwise, work pin by pin with flux.
- Clean Up: Remove leftover solder with braid and clean the area.
Be patient—rushing can damage PCB traces. When I removed the faulty capacitor from my controller, I accidentally lifted a pad by overheating it for too long. Keep heat exposure under 5 seconds per joint to avoid this.
Suggested Image Placement: Insert an image here showing a soldering iron and tweezers removing an SMD resistor from a PCB. ALT Text: "Removing SMD resistor with a soldering iron for DIY replacement."
Step 3: Preparing for Replacement
With the old component removed, prepare the PCB and the new part for soldering. Double-check the replacement component’s value and package size. For instance, if you’re replacing SMD capacitors at home, ensure the voltage rating (e.g., 16V) and capacitance (e.g., 10μF) match the original.
- Clean the Pads: Ensure no old solder or debris remains on the PCB pads.
- Tin One Pad: Apply a small amount of solder to one of the pads. This makes placing the new component easier.
- Position the Component: Use tweezers to align the new SMD part over the pads, ensuring correct orientation for polarized components like capacitors or diodes.
Step 4: Hand Soldering SMD Resistors and Other Components
Now it’s time for hand soldering SMD resistors or capacitors. This technique works for soldering SMD components without hot air using just a soldering iron:
- Place the Component: Set the new component on the tinned pad using tweezers.
- Solder the First Joint: Touch your iron to the tinned pad and component lead for 1-2 seconds, allowing the solder to reflow and secure the part.
- Solder the Other Side: Apply flux to the unsoldered side, then add a small amount of fresh solder to bond the component to the pad.
- Inspect the Joints: Ensure the solder joints are shiny and concave, not dull or blobby. A good joint on an 0805 resistor should cover the pad without excess solder spilling over.
I found that using too much solder created bridges between pads when replacing a 1kΩ resistor. If this happens, use desoldering braid to clean it up. Practice on a scrap PCB if you’re new to hand soldering SMD resistors.
Suggested Image Placement: Insert an image here showing a soldering iron attaching an SMD capacitor to a PCB. ALT Text: "Hand soldering SMD capacitor onto PCB at home."
Step 5: Testing and Troubleshooting
After completing your DIY SMD component replacement, test the repair to ensure everything works:
- Visual Check: Look for cold solder joints (dull or cracked) or misplaced components.
- Multimeter Test: Verify continuity across the soldered joints. For a resistor, confirm the resistance value; for a capacitor, ensure it’s not shorted.
- Power On: Reassemble the device and power it up. Watch for normal operation. My game controller powered on perfectly after replacing the capacitor!
If the device still doesn’t work, recheck your soldering or test adjacent components for faults. A nearby SMD resistor with a value of 0Ω (a short) might indicate another issue in the circuit.
Common Challenges and Solutions
Even with careful work, soldering SMD components without hot air can present challenges. Here are some common issues and fixes:
- Lifted Pads: If a PCB pad comes off, use a small wire to bridge the connection or apply conductive epoxy as a last resort.
- Solder Bridges: Remove excess solder with desoldering braid and reapply flux for a clean joint.
- Component Misalignment: Reheat the solder and reposition with tweezers before it cools.
- Overheating: Limit soldering time to 3-5 seconds per joint to avoid damaging components or the PCB.
Tips for Success in DIY SMD Work
Based on my experiences and insights from online resources, here are extra tips for replacing SMD capacitors at home or tackling other SMD repairs:
- Practice on old or scrap PCBs to build confidence with hand soldering SMD resistors.
- Keep your soldering iron tip clean using a wet sponge or brass wire cleaner for better heat transfer.
- Use the smallest tip possible (like a 1mm chisel tip) for precision on tiny components.
- Work slowly—SMD soldering rewards patience over speed.

Conclusion: Mastering SMD Replacement at Home
Replacing surface mount PCB components at home is a rewarding skill for any electronics hobbyist. With this guide, you’ve learned how to handle DIY SMD component replacement, from identifying faulty parts to removing SMD components with a soldering iron and soldering SMD components without hot air. Whether you’re hand soldering SMD resistors or replacing SMD capacitors at home, the key is preparation, patience, and practice.


