 ALLPCB


If you're a hobbyist stepping into the world of electronics assembly, you might be wondering where to start with machine assembly techniques like Through-Hole Technology (THT) and Surface Mount Technology (SMT). This guide is designed to help beginners understand the basics of electronics assembly for hobbyists, covering soldering techniques, DIY PCB assembly, and more. Whether you're tackling basic electronics projects or diving into through-hole and surface mount assembly tutorials, we've got you covered with practical tips and step-by-step instructions.
In this comprehensive blog, we'll break down the essentials of THT and SMT, explore the tools you need, and guide you through the processes with clear explanations. By the end, you'll have the confidence to start assembling your own circuits and bring your DIY projects to life. Let's dive into the exciting world of electronics assembly!
Why Electronics Assembly Matters for Hobbyists
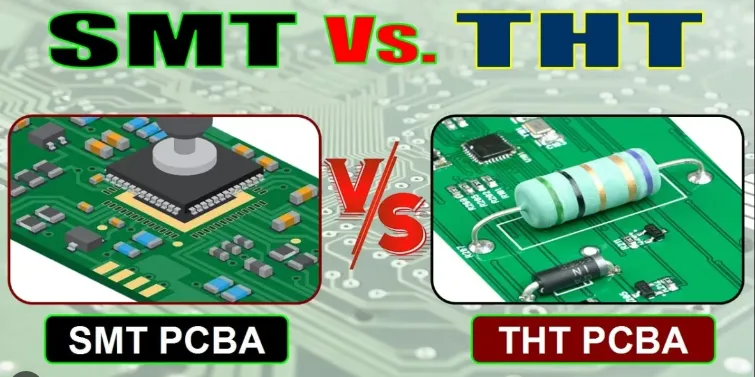
Electronics assembly is the backbone of any DIY project involving circuits. As a hobbyist, learning how to assemble components onto a printed circuit board (PCB) opens up endless possibilities for creating gadgets, repairing devices, or even designing custom electronics. The two primary methods of assembly—Through-Hole Technology (THT) and Surface Mount Technology (SMT)—each have unique advantages, and understanding them is key to mastering basic electronics projects.
THT is often the starting point for beginners due to its simplicity and forgiving nature, while SMT is more compact and widely used in modern devices. Both techniques are essential for hobbyists looking to expand their skills in DIY PCB assembly. In the following sections, we'll explore these methods in detail and provide actionable tips for soldering techniques for beginners.
Getting Started with Electronics Assembly: Tools and Materials
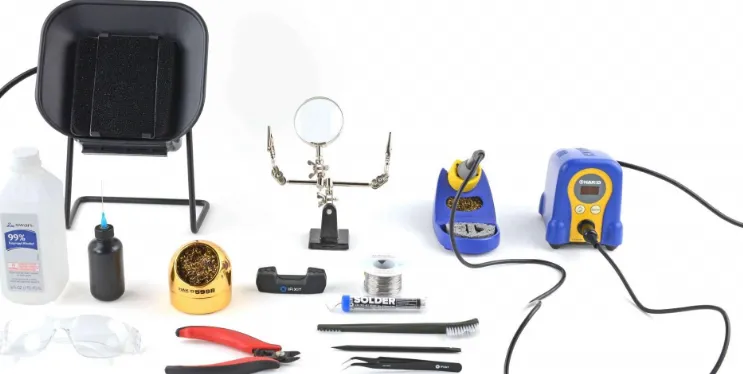
Before diving into a through-hole assembly tutorial or surface mount assembly tutorial, it's crucial to gather the right tools and materials. Having the proper equipment not only makes the process smoother but also ensures safety and precision in your work. Here's a list of essentials for electronics assembly for hobbyists:
- Soldering Iron: A 25-40 watt soldering iron with a fine tip is ideal for beginners. Adjustable temperature models (ranging from 300°C to 400°C) offer more control for both THT and SMT soldering.
- Solder Wire: Use a rosin-core solder with a diameter of 0.5mm to 1mm for most hobbyist projects. A 60/40 tin-lead alloy is common and melts at around 183°C.
- Desoldering Tools: A solder sucker or desoldering braid (wick) helps remove excess solder or correct mistakes.
- Helping Hands: These are adjustable clips that hold components in place, making soldering easier, especially for small SMT parts.
- Tweezers: Precision tweezers are essential for handling tiny SMT components.
- Multimeter: Useful for testing connections and ensuring your circuit works as intended. Look for one with continuity testing capabilities.
- PCB and Components: Start with a simple PCB design and basic components like resistors (e.g., 220 ohms for LEDs), capacitors, and LEDs for practice.
- Safety Gear: Safety glasses and a well-ventilated workspace protect you from solder fumes and accidental burns.
With these tools in hand, you're ready to tackle both THT and SMT projects. Let's move on to the specifics of each method and how they apply to DIY PCB assembly.
Through-Hole Technology (THT): A Beginner's Guide
Through-Hole Technology, or THT, is one of the oldest and most beginner-friendly methods of electronics assembly. In this technique, components have long leads that are inserted into pre-drilled holes on a PCB and soldered on the opposite side. This method is ideal for hobbyists starting with basic electronics projects due to its simplicity and durability.
Steps for Through-Hole Assembly Tutorial
Follow these steps to master THT soldering techniques for beginners:
- Prepare Your PCB: Place the PCB on a flat surface and identify the holes where components will go based on your circuit diagram or silkscreen markings.
- Insert Components: Start with the smallest components like resistors and diodes. Insert their leads through the holes, ensuring correct orientation (e.g., check the polarity of diodes or LEDs).
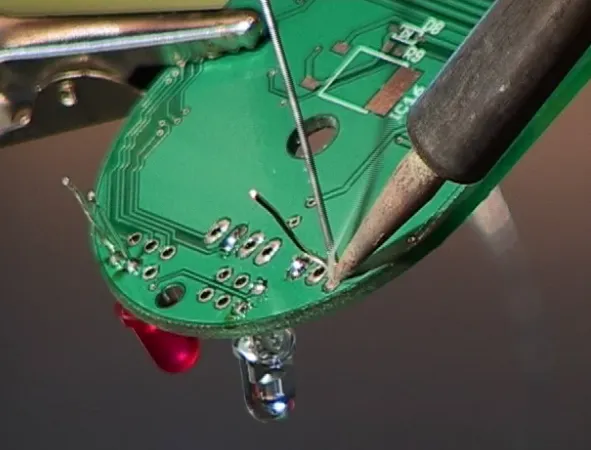
- Bend Leads: On the underside of the PCB, bend the leads slightly to hold the component in place. Don't cut the leads yet.
- Heat and Solder: Set your soldering iron to around 300°C. Touch the tip to the lead and pad (the copper ring around the hole) for 1-2 seconds, then apply solder wire until it flows evenly around the lead. The joint should look shiny and cone-shaped.
- Trim Excess Leads: Use wire cutters to trim the leads close to the solder joint, leaving about 1-2mm for safety.
- Inspect Joints: Check for cold solder joints (dull or cracked appearance) and rework them if necessary by reheating and adding fresh solder.
THT is forgiving because the larger components and holes make it easier to position parts and correct errors. A typical beginner project, like assembling a simple LED circuit with a 220-ohm resistor and a 5V power source, can be completed in under an hour using THT.
Advantages of THT for Hobbyists
- Components are larger and easier to handle, making it ideal for soldering techniques for beginners.
- Strong mechanical connections due to leads passing through the board, perfect for projects subject to physical stress.
- Easy to prototype and modify, as components can be desoldered and replaced without specialized tools.
Surface Mount Technology (SMT): Taking the Next Step
Surface Mount Technology, or SMT, is a more advanced method where components are mounted directly onto the surface of the PCB without leads passing through holes. SMT components are much smaller, allowing for compact designs commonly seen in modern electronics like smartphones and laptops. While it can be challenging for beginners, with practice, hobbyists can master SMT for DIY PCB assembly.
Steps for Surface Mount Assembly Tutorial
Here's how to get started with SMT soldering:
- Prepare Your Workspace: Ensure good lighting and use a magnifying glass if needed, as SMT components can be as small as 1mm x 0.5mm (e.g., 0402 size resistors).
- Apply Solder Paste: If working with a stencil, apply solder paste to the pads on the PCB. For manual assembly, you can skip this and apply solder directly later.
- Place Components: Use tweezers to carefully place SMT components on their designated pads. Check polarity for components like capacitors and LEDs (look for markings like a stripe for negative).
- Solder Components: Set your soldering iron to 300-350°C. For each pad, apply a small amount of solder to the tip, touch it to the pad and component terminal for 1-2 seconds, and let the solder flow. Alternatively, use a hot air rework station for multiple pins (e.g., IC chips) at around 350°C with low airflow.
- Check Alignment: Inspect the board for misaligned components or bridges (solder connecting adjacent pads). Use desoldering braid to clean up excess solder if needed.
SMT requires a steady hand and patience, but it’s worth learning for compact and professional-looking projects. For instance, assembling a small microcontroller board with SMT components can reduce the board size by up to 50% compared to THT.
Advantages of SMT for Hobbyists
- Allows for smaller, more efficient designs, ideal for advanced basic electronics projects.
- Supports high-density circuits, fitting more components in less space.
- Reduces signal delays in high-speed circuits due to shorter connections (e.g., signal propagation can be improved by 10-20% in some designs).
Common Challenges in Electronics Assembly and How to Overcome Them
As a beginner, you'll likely face some hurdles in electronics assembly for hobbyists. Here are a few common issues and solutions:
- Cold Solder Joints: These occur when the solder doesn't fully melt, leading to weak connections. Fix them by reheating the joint with a clean iron tip and adding fresh solder.
- Component Damage: Overheating can damage sensitive components (e.g., ICs can fail if exposed to 400°C for over 10 seconds). Use a lower temperature and work quickly, or invest in a temperature-controlled iron.
- SMT Misalignment: Tiny components can shift during soldering. Use flux to help solder flow and hold components in place with tweezers until the solder cools.
Practice is key to overcoming these challenges. Start with simple projects and gradually move to more complex ones as your skills improve.
Basic Electronics Projects to Practice THT and SMT
Now that you understand the basics of THT and SMT, try these beginner-friendly projects to build your confidence in DIY PCB assembly:
- LED Blinker Circuit (THT): Assemble a circuit with a 555 timer IC, a 1k ohm resistor, a 10uF capacitor, and an LED. This project teaches basic soldering and timing circuits, with a typical frequency of 1-2 Hz for blinking.
- USB-Powered Fan (SMT): Use SMT components to build a small fan circuit powered by a USB port (5V). Include a small motor and a 100-ohm resistor to limit current. This project introduces SMT soldering and compact design.
- Temperature Sensor Module (Mixed THT and SMT): Combine both techniques by assembling a sensor circuit with a thermistor and a small microcontroller. Use THT for larger parts and SMT for tiny resistors and capacitors.
These projects not only reinforce soldering techniques for beginners but also give you tangible results to showcase your skills.
Tips for Safe and Effective Soldering
Soldering is a critical skill in electronics assembly, and safety should always come first. Here are some tips to ensure safe and effective soldering:
- Work in a well-ventilated area to avoid inhaling solder fumes, which can contain harmful substances.
- Keep your soldering iron on a stand when not in use to prevent burns or fires.
- Clean your iron tip regularly with a damp sponge or brass wire cleaner to maintain good heat transfer.
- Allow solder joints to cool naturally (about 5-10 seconds) before handling the PCB to avoid disrupting the connection.
Conclusion: Start Your Electronics Assembly Journey Today
Electronics assembly for hobbyists is an exciting and rewarding skill to learn, and mastering both Through-Hole Technology (THT) and Surface Mount Technology (SMT) opens up a world of creative possibilities. From following a through-hole assembly tutorial to experimenting with a surface mount assembly tutorial, each step builds your confidence in DIY PCB assembly. Start with basic electronics projects, gather the right tools, and practice your soldering techniques for beginners to create impressive circuits.
At ALLPCB, we're passionate about supporting hobbyists and engineers in bringing their ideas to life. With the knowledge from this guide, you're ready to tackle your first project and beyond. Keep experimenting, stay safe, and enjoy the process of building something amazing with your own hands!


