 ALLPCB


If you're new to electronics assembly and wondering what RoHS compliance means or how to start with lead-free soldering, you're in the right place. RoHS, or Restriction of Hazardous Substances, is a set of regulations that limits the use of harmful materials in electronics to protect the environment and human health. For hobbyists and beginners, this means using lead-free solder and components that meet these standards. In this guide, we'll break down RoHS compliance for hobbyists, explain lead-free soldering for beginners, and provide a clear path with a DIY RoHS compliance checklist, tips on RoHS component sourcing, and the right RoHS soldering equipment for hobbyists.
Whether you're building a small DIY project or learning the ropes of electronics assembly, understanding RoHS is essential in today's eco-conscious world. Let's dive into the details with practical advice and actionable steps to help you get started.
What Is RoHS Compliance and Why Does It Matter?
RoHS stands for Restriction of Hazardous Substances, a directive first introduced in the European Union in 2003. It restricts the use of specific hazardous materials in electrical and electronic equipment, including lead, mercury, cadmium, and several other toxic substances. The goal is to reduce environmental pollution and health risks caused by improperly disposed electronic waste (e-waste).
For hobbyists, RoHS compliance means ensuring that the components, solder, and tools you use meet these safety standards. While hobby projects may not always fall under strict legal requirements, adopting RoHS practices shows responsibility and prepares you for potential commercial or collaborative projects where compliance is mandatory. Plus, lead-free assembly is safer for you and the planet.
According to data from environmental studies, e-waste is one of the fastest-growing waste streams globally, with over 50 million metric tons generated annually. By following RoHS guidelines, you contribute to reducing this burden and promote sustainable electronics practices.

RoHS Compliance for Hobbyists: Getting Started
As a hobbyist, navigating RoHS compliance might seem daunting at first, but it’s simpler than you think. The key is to focus on using materials and components that are labeled as RoHS-compliant. This means avoiding traditional lead-based solders and opting for alternatives that meet the directive’s standards, which limit lead content to less than 0.1% by weight in homogeneous materials.
Start by understanding that RoHS compliance for hobbyists isn’t just about following rules—it’s about building safer projects. Lead, for instance, can be harmful if inhaled or ingested during soldering, especially without proper ventilation. Switching to lead-free options reduces these risks. Additionally, many component suppliers now prioritize RoHS-compliant products, making it easier than ever to find suitable materials.
Here’s a quick starting point: always check product datasheets or labels for the RoHS symbol (a green checkmark or similar indicator) when buying components or solder. This small step ensures you're on the right track from the beginning.
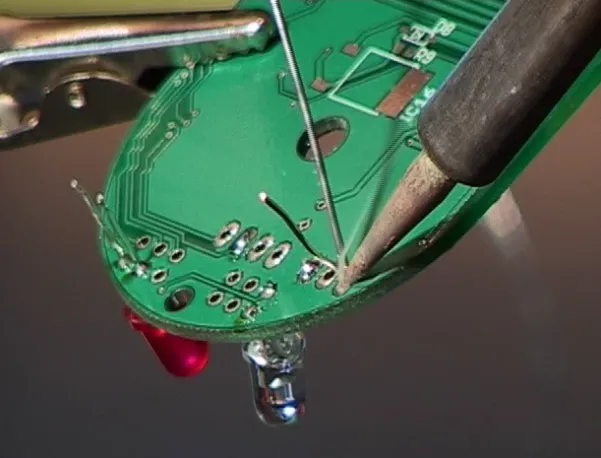
Lead-Free Soldering for Beginners: Basics and Tips
Lead-free soldering is a core part of RoHS compliance, but it can feel tricky if you’re used to traditional lead-based solder. Lead-free solder, often made from tin, silver, and copper alloys (like SAC305, which is 96.5% tin, 3% silver, and 0.5% copper), has a higher melting point, typically around 217-220°C compared to 183°C for lead-based solder. This means you’ll need to adjust your technique and equipment.
Here are some beginner-friendly tips for lead-free soldering:
- Use the Right Temperature: Set your soldering iron to about 300-350°C for lead-free solder. Too low, and the solder won’t flow properly; too high, and you risk damaging components.
- Work Quickly: Lead-free solder cools faster, so apply heat and solder efficiently to avoid cold joints, which can cause unreliable connections.
- Keep Tips Clean: Lead-free solder can oxidize faster, leading to buildup on your iron’s tip. Use a tip cleaner regularly to maintain good heat transfer.
- Practice Patience: The learning curve is real. Start with scrap boards to get a feel for the flow and wetting properties of lead-free solder, which can appear less shiny than lead-based options.
One common challenge is that lead-free solder joints might look dull or grainy, but this doesn’t mean they’re bad. As long as the joint is mechanically sound and electrically conductive (test with a multimeter for continuity), it’s likely fine.
RoHS Component Sourcing Guide: Where to Find Compliant Parts
Finding RoHS-compliant components is a crucial step for hobbyists. Luckily, most major distributors and manufacturers now offer detailed information about compliance. When sourcing components, prioritize suppliers that clearly label their products as RoHS-compliant and provide documentation or certificates if needed.
Here are some practical steps for RoHS component sourcing as a beginner:
- Check Online Distributors: Look for filters or categories labeled “RoHS Compliant” on websites of popular electronics suppliers. This makes it easy to narrow down your search for resistors, capacitors, ICs, and more.
- Read Datasheets: Manufacturers often include RoHS status in product datasheets. Look for statements like “RoHS Compliant” or “Lead-Free” in the specifications.
- Buy from Reputable Sources: Avoid unverified sellers or surplus stock that might not meet modern standards. Stick to trusted platforms to ensure quality and compliance.
- Ask for Certificates: For critical projects, request a Certificate of Compliance (CoC) from the supplier to confirm the parts meet RoHS standards.
A handy tip is to build a small inventory of commonly used RoHS-compliant components, like resistors in standard values (e.g., 1kΩ, 10kΩ) or popular microcontrollers. This saves time for future projects and ensures you’re always prepared.
Related Reading: The Ultimate Guide to Lead Free Assembly Certification: Standards, Compliance, and Best Practices
DIY RoHS Compliance Checklist: Stay on Track
To make RoHS compliance straightforward, use this DIY RoHS compliance checklist. It’s designed for hobbyists to ensure every aspect of your project aligns with the directive’s goals.
- Solder Selection: Confirm that your solder is lead-free and labeled as RoHS-compliant. Common alloys like SAC305 are a safe bet.
- Component Verification: Double-check that all components (resistors, capacitors, LEDs, etc.) are RoHS-compliant by reviewing datasheets or supplier information.
- Tools and Equipment: Ensure your soldering iron, flux, and other tools are suitable for lead-free soldering. Avoid cross-contamination by not using tools previously used with lead-based solder unless thoroughly cleaned.
- Safe Practices: Use proper ventilation or a fume extractor when soldering to avoid inhaling harmful fumes from flux or solder.
- Waste Disposal: Dispose of any electronic waste responsibly. Check local recycling programs for e-waste drop-off points to prevent environmental harm.
Keep this checklist handy as a quick reference for every project. It’s a simple way to build good habits and ensure your work aligns with RoHS principles.
Related Reading: Mastering Lead Free Assembly: A Comprehensive Guide for PCB Design
RoHS Soldering Equipment for Hobbyists: What You Need
Having the right tools makes lead-free soldering and RoHS compliance much easier. As a hobbyist, you don’t need industrial-grade equipment, but investing in quality gear suited for lead-free work is important. Here’s a breakdown of essential RoHS soldering equipment for hobbyists:
- Soldering Iron or Station: Choose a temperature-controlled soldering iron with at least 30-50 watts of power to handle the higher melting points of lead-free solder (around 217-220°C). Adjustable stations with digital displays are ideal for precision, costing between $30-100 for beginner-friendly models.
- Lead-Free Solder: Opt for a tin-silver-copper alloy like SAC305 with a diameter of 0.6-1.0mm for general hobby work. A 100g spool typically costs $10-20 and lasts for multiple projects.
- Flux: Use rosin-based or no-clean flux designed for lead-free soldering to improve solder flow and reduce oxidation. Avoid acidic fluxes that can damage components.
- Fume Extractor or Ventilation: Soldering produces fumes that can be harmful if inhaled. A small desktop fume extractor (around $40-70) or a well-ventilated workspace is a must for safety.
- Tip Cleaner and Solder Wick: Keep your iron tip clean with a brass wire cleaner, and use solder wick for desoldering or fixing mistakes. These are inexpensive but essential tools.
Start with a basic kit and upgrade as you gain experience. Proper equipment not only ensures compliance but also makes soldering more enjoyable and effective.
Common Challenges with Lead-Free Soldering and How to Overcome Them
Transitioning to lead-free soldering for RoHS compliance can come with a few hurdles, especially for beginners. Here are some common issues and solutions:
- Higher Melting Point: Lead-free solder requires more heat, which can stress components. Solution: Use a temperature-controlled iron and limit heat exposure to 2-3 seconds per joint.
- Poor Wetting: Lead-free solder doesn’t spread as easily as lead-based options. Solution: Apply flux generously to improve flow and ensure clean surfaces before soldering.
- Brittle Joints: Lead-free joints can be more prone to cracking under stress. Solution: Avoid excessive force on soldered connections and consider reinforcing critical joints with adhesive if needed.
- Oxidation Issues: Lead-free solder oxidizes faster at high temperatures. Solution: Keep your soldering iron tip tinned (coated with a thin layer of solder) and clean it frequently.
With practice, these challenges become manageable. Don’t get discouraged—every hobbyist faces a learning curve when switching to lead-free methods.
Benefits of RoHS Compliance for Hobbyists
Adopting RoHS compliance and lead-free soldering offers several advantages beyond just following regulations. First, it’s safer for your health by reducing exposure to toxic substances like lead. Second, it aligns your projects with global standards, making them more marketable if you ever decide to sell or share your work. Finally, it contributes to a cleaner environment by minimizing hazardous waste.
For instance, using lead-free solder reduces the risk of contaminating soil and water if your project ends up in a landfill. Small actions like these add up, especially when millions of hobbyists and professionals adopt similar practices.
Final Thoughts on RoHS Compliance and Lead-Free Assembly
RoHS compliance for hobbyists doesn’t have to be complicated. By understanding the basics of the directive, using lead-free soldering techniques, sourcing RoHS-compliant components, and equipping yourself with the right tools, you can build projects that are safe, sustainable, and future-proof. Follow the DIY RoHS compliance checklist shared in this guide to stay organized, and remember that practice makes perfect when it comes to lead-free soldering for beginners.
As you grow in your electronics journey, embracing RoHS standards will become second nature. Not only will you create better projects, but you’ll also play a part in protecting the environment. Start small, stay consistent, and enjoy the process of learning and building with safer materials.


