ALLPCB


Most integrated development environments (IDEs) for microcontrollers, such as Keil and IAR, support multi-target projects. For developer convenience, some IDEs create "Release" and "Debug" target builds by default. This article will discuss the differences between Release and Debug modes in the Renesas e² studio IDE.
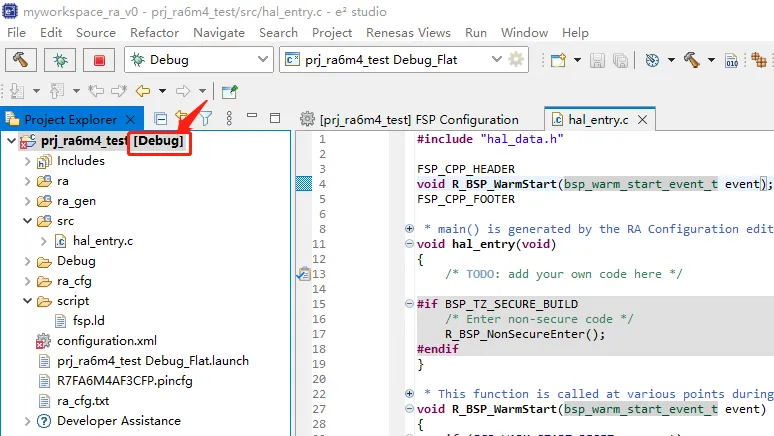
Example Using the RA6M4 Series MCU
In the e² studio IDE, a new project defaults to the Debug configuration.
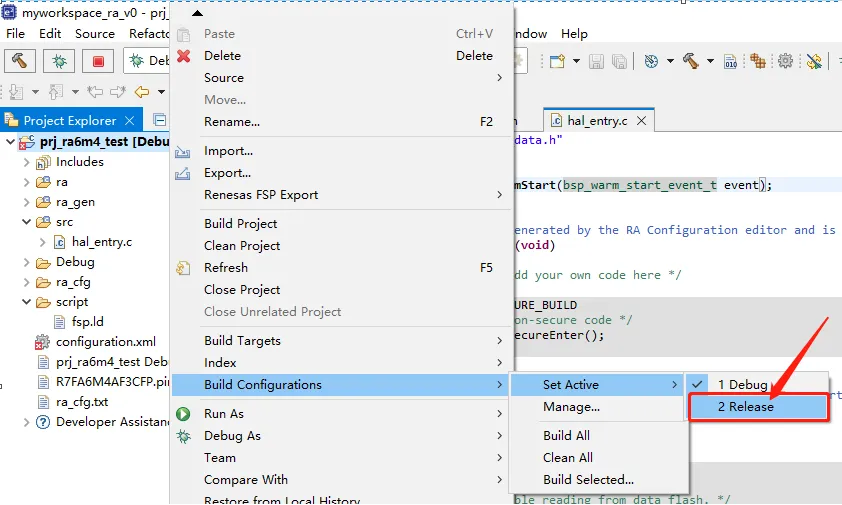
You can also switch to the Release configuration by right-clicking on the project.
So, what is the difference between Debug and Release builds? This detail is often overlooked. During field technical support, it's common to find that a lack of understanding of these differences can lead to errors.
For example, submitting a binary file generated from a Debug build for testing can cause issues. The code might contain many ASSERT() functions for debugging convenience. During compilation, these functions can embed absolute file paths, causing different binary files to be generated when compiled on different computers. This can lead to confusion in testing and production code management.
Debug vs. Release Configurations
Debug: Often called the debugging version, a Debug build is compiled with a set of options that includes debugging information and typically disables optimizations, making it easier for programmers to debug the code.
Release: This is the distribution version, prepared for mass production. Debugging is generally not performed on the Release version, so it does not contain debugging information. Instead, it is highly optimized for the smallest possible code size and fastest execution speed.
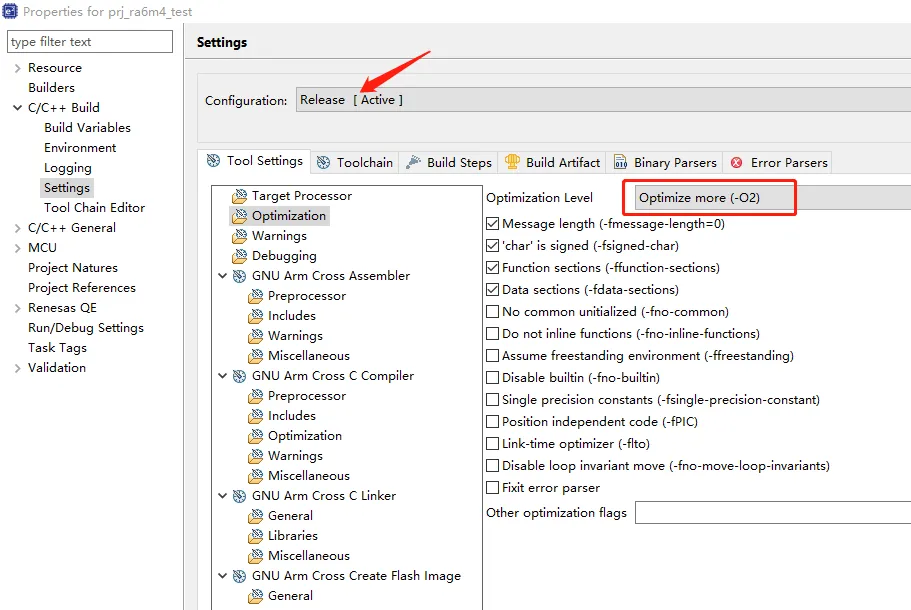
For example, the Release build might use an optimization level like 'Optimize more (-O2)'.
In contrast, the Debug build might use 'Optimize for debug (-Og)'.
In reality, there is no strict boundary between Debug and Release. They are simply collections of compiler options, and the compiler acts according to these predefined settings. It's possible to modify these options to create an optimized debug build or a release build that includes trace statements.
Preprocessing Directives
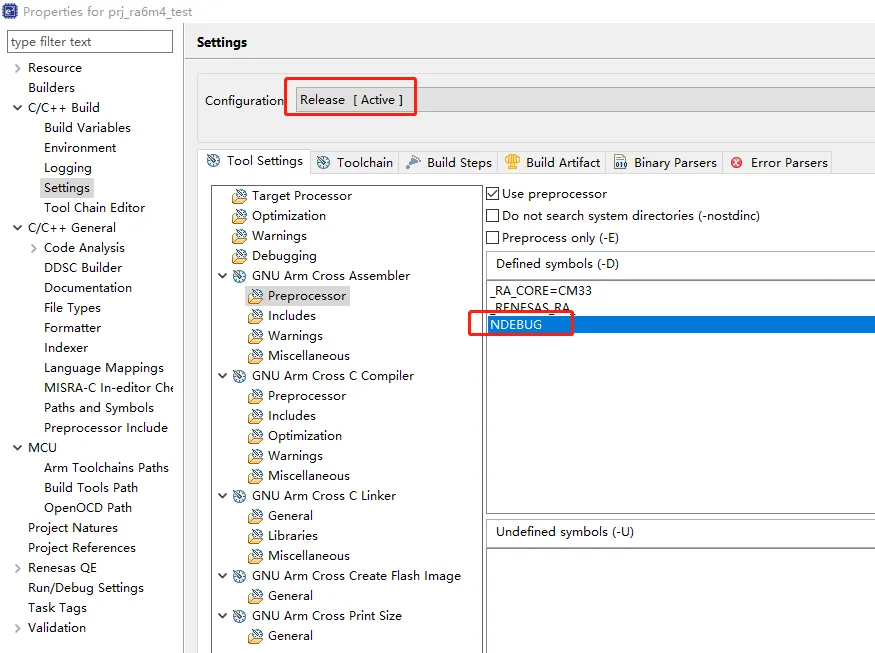
Debug builds typically include preprocessor directives (macros) related to "DEBUG" .
_DEBUG and NDEBUG
Debug macros are frequently used, as shown below:
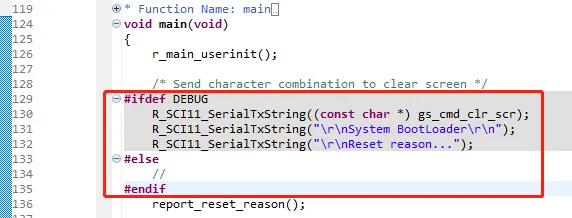
For instance, common functions like printf can be enabled or disabled for logging output using a "DEBUG" macro. Similarly, assertions like ASSERT() are also enabled or disabled via macros.
When _DEBUG is defined, the assert() function is compiled. When NDEBUG is defined, it is not.
Most assertions are only compiled in Debug builds and are ignored in Release builds. One common exception is VERIFY(). These macros typically call the assert() function while adding some library-specific debugging code. If you include any program logic (like assignments or function calls that modify variables) within these macros instead of just a Boolean expression, that logic will not execute in the Release build, potentially causing errors.
After debugging, assertion calls can be disabled by inserting #define NDEBUG before the #include statement.
How to Debug a Release Build
Encountering a program that works in Debug mode but fails in Release mode can be frustrating and difficult to diagnose. If the analysis above helps you quickly identify the error based on its specific behavior, that's great. However, if the cause isn't immediately obvious, here are some strategies:
As mentioned, the only difference between Debug and Release is a set of compiler options. You can narrow down the source of the error by modifying the Release build's settings. Try changing the Release options one by one to match their Debug counterparts, or switch from time optimization to size optimization, to see if it affects the bug.