ALLPCB


Many electronic products use breathing LEDs for visual effect. There are many relatively simple methods to create a breathing LED. This article demonstrates how to configure one in a few steps using a Renesas microcontroller.
Overview
This article demonstrates how to implement a breathing LED effect using the CPK-RA2L1 evaluation board and the e2 studio development environment by configuring a timer for PWM output. This project covers creating a new project, configuring peripherals, accessing peripheral drivers, and developing applications based on the FSP (Flexible Software Package).
Hardware Preparation
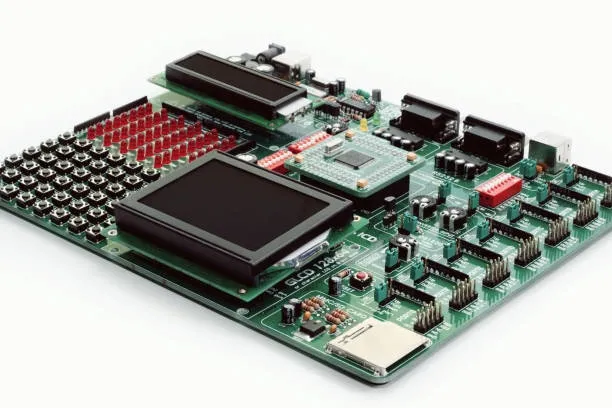
This guide uses the Renesas CPK-RA2L1 evaluation board, which features the R7FA2L1AB2DFM microcontroller. This MCU has a Cortex-M23 core, runs at a maximum frequency of 48 MHz, and comes in a PLQFP64 package. The board is shown below.
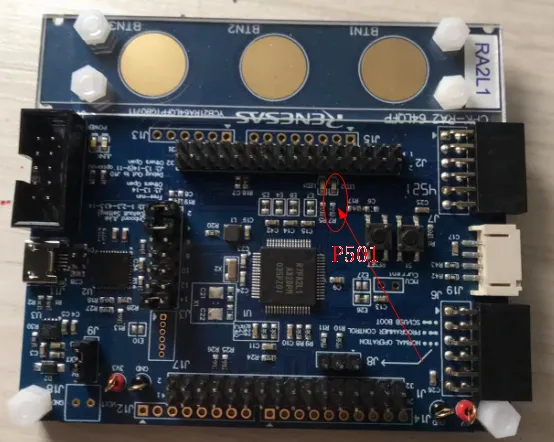
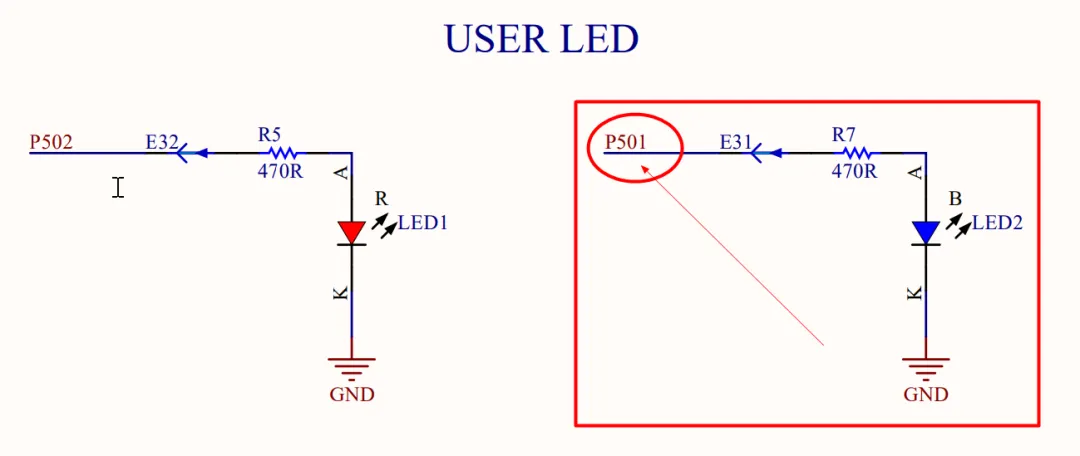
The evaluation board supports power and debugging via USB. A blue LED is driven by pin P501, as shown in the schematic below.
Creating the Project
- From the menu, select File > New > C/C++ Project.
- Enter a project name and select a save location. Ensure the path does not contain non-ASCII characters, then click Next.
- Select the FSP version, target device, and debugger. Then, click Next. You can click Next on the following screen as well.
- Choose the project template and click Finish.
- After the project is created, a summary screen will appear where you can verify the configuration.
Project Configuration
Project configuration is a key step, involving the setup of peripherals, BSP, clocks, pins, interrupts, and stacks.
- Click the Stacks tab and add a new timer for this project.
- Click on the newly added stack to open its Properties window.
- You can double-click the Properties tab to toggle full-screen view. Configure the properties as required.
- Assign the timer output to pin P501. Once configuration is complete, click the "Generate Project Content" button.
Software Development
Navigate to the src folder and open hal_entry.c to begin coding.
Before writing code, it's helpful to understand a few features of e2 studio that can streamline development.
The first tip is to use the Developer Assistance view. It shows all available driver functions for the configured peripherals. For detailed information on function usage, refer to the FSP user manual.
Open hal_entry.c and add the application code in the designated user code section.
You can drag and drop functions from the Developer Assistance view directly into the editor.
Conclusion
This article has outlined the process of creating a breathing LED effect using the CPK-RA2L1 evaluation board and the e2 studio development environment. The CPK-RA2L1 is an entry-level kit from Renesas. All I/O pins are brought out to headers, allowing for easy expansion. A single USB cable connected to a PC provides power, programming, and debugging for the board. e2 studio is Renesas's integrated development environment. Its FSP-based graphical user interface simplifies peripheral selection, configuration, code generation, and application development. Like many other MCU development environments, e2 studio is based on Eclipse, providing a familiar interface for developers new to Renesas MCUs.