 ALLPCB


If you're an electronic hobbyist eager to dive into the world of Surface Mount Technology (SMT) assembly, you might be wondering where to start. SMT assembly is a method used to mount electronic components directly onto the surface of a printed circuit board (PCB), allowing for smaller, more efficient designs. This guide will walk you through the basics of SMT assembly, from essential tools and techniques to hands-on DIY projects, ensuring you have everything you need to succeed as a beginner.
In this comprehensive blog, we'll break down SMT assembly basics, explore SMT assembly tools for hobbyists, teach you hand soldering SMT components, share SMT assembly techniques for beginners, and inspire you with DIY SMT assembly projects. Whether you're building a small gadget or experimenting with circuit designs, this step-by-step guide will help you master the art of SMT assembly at home.
What Is SMT Assembly and Why Should Hobbyists Learn It?
Surface Mount Technology (SMT) is a technique used to place electronic components directly onto the surface of a PCB, unlike traditional through-hole technology where components are inserted through holes and soldered on the opposite side. SMT allows for smaller components, tighter layouts, and more compact designs, making it the standard in modern electronics.
For hobbyists, learning SMT assembly opens up a world of possibilities. Many modern components are only available in surface-mount packages, and mastering this skill lets you work on cutting-edge projects. Plus, SMT designs are often more efficient, with reduced parasitic capacitance and inductance, leading to better performance at high frequencies—sometimes up to 50% lower impedance compared to through-hole designs in high-speed circuits.
By learning SMT assembly, you can create smaller, lighter, and more professional-looking projects while keeping up with the latest trends in electronics.

SMT Assembly Basics: Understanding the Fundamentals
Before diving into the hands-on process, let’s cover the core concepts of SMT assembly. At its heart, SMT involves placing and soldering tiny components, like resistors, capacitors, and integrated circuits (ICs), onto the surface of a PCB. These components are often just a few millimeters in size, such as 0402 resistors measuring 1.0 mm x 0.5 mm, requiring precision and patience.
The main steps in SMT assembly include:
- Preparing the PCB: Ensuring the board is clean and ready for component placement.
- Applying Solder Paste: A mixture of tiny solder particles and flux, applied to the PCB pads where components will be placed.
- Placing Components: Positioning SMT parts onto the solder paste using tweezers or automated tools.
- Reflow Soldering: Heating the board to melt the solder paste and secure the components.
- Inspection and Testing: Checking for soldering defects and verifying functionality.
For hobbyists, hand soldering is often the go-to method since professional equipment like pick-and-place machines and reflow ovens can be expensive. We’ll focus on hand soldering techniques later in this guide.
Essential SMT Assembly Tools for Hobbyists
Having the right tools is crucial for successful SMT assembly. While industrial setups use advanced machinery, hobbyists can achieve great results with affordable, accessible equipment. Here’s a list of must-have SMT assembly tools for hobbyists:
- Soldering Iron with Fine Tip: A temperature-controlled soldering iron with a fine tip (0.5 mm or smaller) is ideal for working with tiny SMT components. Look for one with adjustable temperature settings between 250°C and 350°C.
- Tweezers: Precision tweezers with fine, non-magnetic tips are essential for placing and adjusting small components like 0603 resistors (1.6 mm x 0.8 mm).
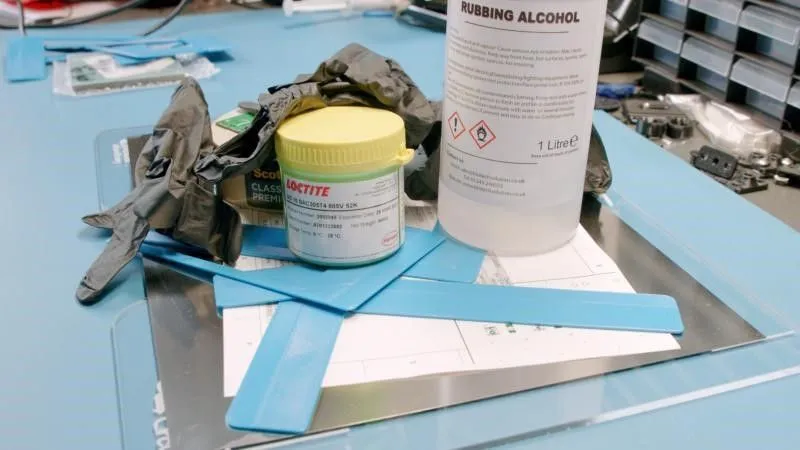
- Solder Paste: A small syringe of lead-free solder paste is perfect for applying precise amounts to PCB pads.
- Flux Pen or Liquid Flux: Flux helps solder flow smoothly and prevents oxidation during soldering.
- Hot Air Rework Station (Optional): Useful for reflow soldering multiple components at once or removing parts. Entry-level models start at around $50.
- Magnifying Glass or Microscope: A magnifying tool with at least 5x magnification helps you see tiny pads and components clearly.
- Desoldering Braid: For cleaning up excess solder or correcting mistakes.
- Multimeter: Essential for testing connections and troubleshooting after assembly.
Investing in quality tools will save you time and frustration. Start with the basics and upgrade as you gain confidence in your skills.
Hand Soldering SMT Components: A Step-by-Step Guide
One of the most accessible ways for beginners to get started with SMT assembly is by hand soldering SMT components. While it requires practice, you can achieve professional results with patience and the right approach. Follow these steps to master hand soldering:
Step 1: Prepare Your Workspace
Set up a clean, well-lit workspace with all your tools within reach. Ensure good ventilation, as soldering produces fumes. Use an anti-static mat or wrist strap to prevent damage to sensitive components from electrostatic discharge (ESD).
Step 2: Clean the PCB
Use isopropyl alcohol (at least 90% concentration) and a brush to clean the PCB surface. This removes dust, grease, and oxidation from the pads, ensuring better solder adhesion.
Step 3: Apply Solder Paste or Tin the Pads
For very small components, apply a thin layer of solder paste to the pads using a syringe or stencil. Alternatively, for hand soldering, you can tin one pad of each component’s footprint by applying a small amount of solder with your iron. This creates a base for placing the component.
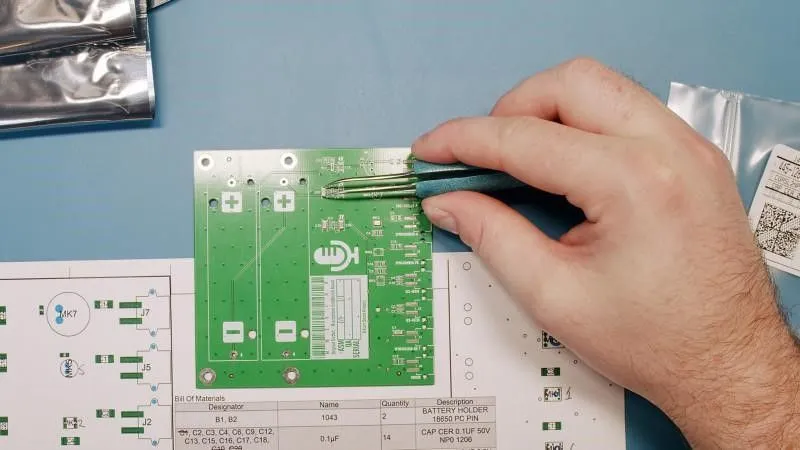
Step 4: Place the Component
Using tweezers, carefully place the SMT component onto the pads, aligning it with the tinned pad or solder paste. For example, when placing a 1206 capacitor (3.2 mm x 1.6 mm), ensure both ends sit evenly on the pads.
Step 5: Solder the First Pad
Heat the tinned pad with your soldering iron (set to about 300°C for lead-free solder) and press the component into the molten solder. Hold it in place for 2-3 seconds until the solder cools and secures one side of the component.
Step 6: Solder the Remaining Pads
Apply solder to the other pads by touching the iron tip to the pad and feeding a small amount of solder wire (0.5 mm diameter works well). The solder should flow smoothly around the component’s leads, forming a shiny, concave fillet.
Step 7: Inspect and Clean
Use a magnifying glass to check for cold solder joints (dull, grainy appearance) or bridges (solder connecting adjacent pads). Clean excess flux residue with isopropyl alcohol and a brush for a professional finish.
Practice on a scrap PCB or kit before working on your main project. Start with larger components like 1206 or 0805 packages before moving to smaller 0402 or fine-pitch ICs.
SMT Assembly Techniques for Beginners: Tips for Success
Beyond the basic steps, mastering SMT assembly techniques for beginners involves learning a few tricks to improve precision and avoid common pitfalls. Here are some practical tips:
- Work in Small Batches: Solder a few components at a time to avoid fatigue. For instance, place and solder 5-10 resistors before moving to capacitors or ICs.
- Use the Right Temperature: Set your soldering iron to 280-320°C for lead-free solder. Too high (above 350°C) can damage components or lift pads, while too low (below 250°C) leads to poor joints.
- Avoid Excess Solder: Use just enough solder to form a small fillet. Excess solder can cause bridges, especially on fine-pitch components with lead spacing as small as 0.5 mm.
- Practice Drag Soldering for ICs: For multi-pin ICs, apply solder to all pins, then use the iron tip to drag across them, distributing solder evenly. Remove excess with desoldering braid if needed.
- Double-Check Polarity: Components like LEDs, diodes, and capacitors have polarity. Misplacing them can damage your circuit. Always refer to the PCB silkscreen or datasheet.
Patience and steady hands are key. Over time, you’ll develop a feel for the right amount of solder and heat needed for different components.
DIY SMT Assembly Projects to Build Your Skills
Now that you’ve learned the basics, it’s time to put your skills to the test with some DIY SMT assembly projects. These beginner-friendly projects will help you gain confidence while creating functional gadgets.
Project 1: LED Blinker Circuit
Build a simple LED blinker using an SMT 555 timer IC, a few resistors (0805 package), capacitors (0805 package), and surface-mount LEDs. This project teaches component placement and soldering while creating a fun, flashing light effect. The 555 timer can operate at frequencies up to 2 MHz, allowing you to experiment with blink rates by adjusting resistor values (e.g., 1 kΩ to 10 kΩ).
Project 2: USB-Powered Mini Amplifier
Create a small audio amplifier using an SMT op-amp chip and supporting components like resistors and capacitors in 0603 packages. This project introduces soldering finer components and working with audio signals, often in the 20 Hz to 20 kHz range, for clear sound output.
Project 3: Temperature Sensor Module
Assemble a temperature sensor circuit using an SMT microcontroller and a surface-mount temperature sensor. This project combines digital and analog components, giving you practice with mixed-signal designs. Typical sensors output voltages proportional to temperature, like 10 mV per °C, which you can measure and display.
Start with kits or pre-designed PCBs for these projects to focus on assembly rather than design. As you grow more comfortable, you can create custom layouts for unique ideas.
Common Challenges in SMT Assembly and How to Overcome Them
As a beginner, you might face a few hurdles in SMT assembly. Here’s how to tackle common issues:
- Tombstoning: This happens when one end of a component lifts during soldering, resembling a tombstone. Prevent it by applying equal solder paste to both pads and ensuring even heating.
- Solder Bridges: Excess solder can connect adjacent pads, causing shorts. Use desoldering braid to remove extra solder and apply flux for cleaner joints.
- Component Misalignment: Tiny parts can shift during placement. Use tweezers to adjust before soldering, and reflow with a hot air tool if needed.
- Damaged Pads: Overheating can lift PCB pads. Limit soldering time to 2-3 seconds per pad and use the correct temperature.
Don’t get discouraged by mistakes. Each error is a learning opportunity that brings you closer to mastering SMT assembly.
Scaling Up: Moving Beyond Hand Soldering
Once you’re comfortable with hand soldering, consider exploring tools and methods to streamline your workflow. A small reflow oven or toaster oven modified for PCB use can handle multiple components at once, melting solder paste evenly at controlled temperatures (typically peaking at 220-250°C for lead-free solder). Additionally, a stencil for applying solder paste can save time on larger projects.
These upgrades require an initial investment but can significantly improve efficiency and quality for hobbyists working on more complex designs.
Conclusion: Start Your SMT Assembly Journey Today
SMT assembly might seem intimidating at first, but with the right tools, techniques, and practice, any electronic hobbyist can master it. By understanding SMT assembly basics, gathering essential SMT assembly tools for hobbyists, learning hand soldering SMT components, applying SMT assembly techniques for beginners, and experimenting with DIY SMT assembly projects, you’ll be well on your way to creating compact, professional-grade electronics.
Start small, be patient, and celebrate each successful solder joint. Your journey into SMT assembly is just beginning, and the possibilities for innovation are endless. Dive in today and bring your electronic projects to the next level!


